Table des Matières
Publicité
Les langues disponibles
Les langues disponibles
Liens rapides
Publicité
Chapitres
Table des Matières
Dépannage

Manuels Connexes pour Cafe C7CEBBS3RD3

Sommaire des Matières pour Cafe C7CEBBS3RD3
- Page 1 It’s time appliances had a personality. Yours. AFFETTO-Cafe Automatic Espresso Machine + Frother OWNER’S MANUAL ENGLISH/FRANÇAIS ESPAÑOL - Para consultar una version en español de este manual de instrucciones, visite nuestro sitio de internet cafeappliances.com.
- Page 2 THANK YOU FOR MAKING CAFÉ A PART OF YOUR HOME. We take pride in the craftsmanship, innovation and design that goes into every Café product, and we think you will too. Among other things, registration of your appliance ensures that we can deliver important product information and warranty details when you need them.
-
Page 3: Table Des Matières
Table of Contents Models: C7CEBBS3RD3, C7CEBBS4RW3, C7CEBBS2RS3, C7CEBAS3RD3, C7CEBAS4RW3, C7CEBAS2RS3 SAFETY INFORMATION ..........4 GETTING STARTED . -
Page 4: Important Safety Information
IMPORTANT SAFETY INFORMATION READ ALL INSTRUCTIONS BEFORE USING THE APPLIANCE WARNING Read the instructions carefully before using the appliance for the first time. Save these instructions for reference. The appliance is designed for domestic use and may only be operated in accordance with these instructions for use. - Page 5 IMPORTANT SAFETY INFORMATION READ ALL INSTRUCTIONS BEFORE USING THE APPLIANCE WARNING Read the instructions carefully before using the appliance for the first time. Save these instructions for reference. The appliance is designed for domestic use and may only be operated in accordance with these instructions for use.
-
Page 6: Getting Started
Getting Started Drip Tray ■ Remove the drip tray from the packaging and attach it to the front of the espresso machine, under the coffee spout. NOTE: There are magnets that will allow the drip tray to attach to the machine. Water Tank ■... -
Page 7: Components
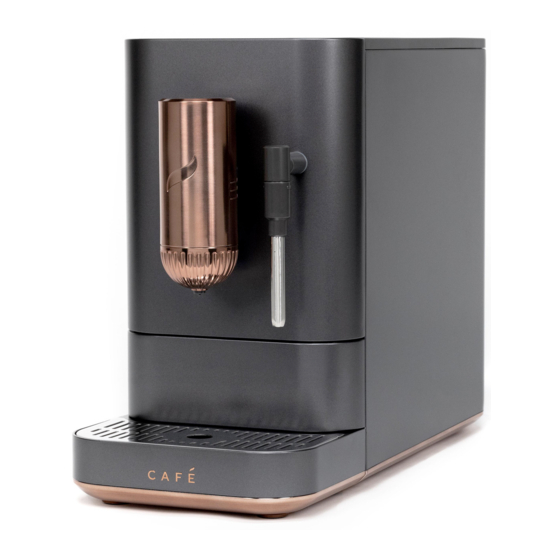
Coffee Bean Container Lid Coffee Bean Container Coffee Grinder Control Knob Coffee Spout Steam Wand Disposal Box Disposal Tray Coffee Spout Light Coffee Brewer Service Drip Tray Door Drip Tray Grate Steam wand only available with models C7CEBBS3RD3, C7CEBBS4RW3, and C7CEBBS2RS3... -
Page 8: Accessories
Warnings Warnings Warnings Warnings Warnings Warnings Warning Warnings Warnings Warnings Warnings Warnings Warnings Warning Warnings Warnings Warnings Warnings Microfiber Cleaning Cloth Cleaning Solution (3) Water Hardness Strips Milk Pitcher NOTE: Milk Pitcher is only included with model C7CEBBS3RD3, C7CEBBS4RW3, C7CEBBS2RS3... -
Page 9: Control Panel
Control Panel C7CEBAS3RD3, C7CEBAS4RW3, C7CEBAS2RS3 C7CEBBS3RD3, C7CEBBS4RW3, C7CEBBS2RS3... -
Page 10: Functions
Hot Water The Hot Water function dispenses hot water NOTE: All settings have a default and can be from the spout or steam wand (C7CEBBS3RD3, changed through the SmartHQ App. C7CEBBS4RW3, C7CEBBS2RS3). Use this function NOTE: Coffee ground amounts and espresso when hot water is desired. -
Page 11: Using Your Espresso Machine
Using your Espresso Machine NOTE: Appearance may vary slightly by model. Coffee Grinder Knob Add coffee beans to the coffee bean container. While grinding is occurring, adjust the coffee grinder knob to desired grind size. Align the desired grind circle to the arrow on the grinder top. - Page 12 Using your Espresso Machine How to Turn on the Machine Press the Power button to turn on the machine. The other buttons will appear after the Power button is pressed. Espresso, Lungo, Americano, and My Cup Functions NOTE: Make sure you have a coffee cup or container placed under the dis- penser before using any function.
-
Page 13: Steam And Hot Water
Do not remove pitcher until steaming is complete. Hold milk pitcher by the handle. NOTE: The Steam function is only available with model C7CEBBS3RD3, C7CEBBS4RW3, C7CEBBS2RS3. NOTE: Make sure you have a coffee cup or container placed under the steam wand before using either function. -
Page 14: Care And Cleaning
Care and Cleaning WARNING Allow heating element to completely cool to avoid risk of fire or injury and disconnect power prior to cleaning or service. CAUTION To avoid possible burns to body parts and/or other injury from hot steam, do not touch liquids or steam wand during or after steaming. Do not remove pitcher until steaming is complete. - Page 15 Care and Cleaning Descaling Process DO NOT use any cleaning agents not provided with the product or recommended in this manual. ■ It is recommended to descale once a month or more depending on the water hardness. Water hardness strip can be used to measure your water hardness and adjust the frequency of the descale alert accordingly under SmartHQ app.
-
Page 16: Tips
This drink uses espresso and steamed milk with a smaller head of foam. How to steam milk: ■ NOTE: Steam function is only included with model C7CEBBS3RD3, C7CEBBS4RW3, C7CEBBS2RS3. 1. After steam is preheated and ready, place the tip of the steam wand right under the surface of the milk at the edge of the milk pitcher at approximately a 45°... -
Page 17: Troubleshooting
Troubleshooting Problem Cause Solution Appliance does not No power is connected to the appliance. ■ Check cable and plug are connected work/does not turn on. to power and press the "on" button. ■ Check GSI plug. No or delayed Panel may be dirty or wet. Unplug the unit and clean the panel with response from cloth provided and ensure panel is dry. - Page 18 Troubleshooting Problem Cause Solution "Add/Stir Coffee Internal coffee outlet is blocked. Clean the coffee grinder shoot. Refer Beans" indicator to the "Cleaning the Coffee Brewer and on but hopper still Service Area" on page 14. contains lots of coffee Beans are too oily and do not slide freely Stir the beans in the container to allow beans.
-
Page 19: Wifi Connect Smart Hq App
WiFi Connect – SmartHQ WiFi Connect Press and hold the Espresso and Americano buttons simultaneously for 3 seconds to turn on the WiFi function. The espresso maker will beep to confirm the action and the WiFi icon will appear on the screen. Follow the directions in the SmartHQ app to continue WiFi setup. -
Page 20: Fcc Statement
FCC/IC COMPLIANCE STATEMENT FCC/IC COMPLIANCE STATEMENT: This device complies with Part 15 of the FCC Rules. Operation is subject to the following two conditions: 1. This device may not cause harmful interference, and 2. This device must accept any interference received, including interference that may cause undesired operation. - Page 21 Notes...
-
Page 22: Limited Warranty
Limited Warranty If your appliance fails to operate properly while in use under normal household conditions within the warranty period, visit cafeappliances.com/support for product care/maintenance self-help. In Canada, visit service.geappliances.ca/servicio/en_CA/. To initiate a warranty claim, please visit cafeappliances.com/support/returns/, or call 1-800-430- 1757. -
Page 23: Consumer Support
Consumer Support CAFÉ WEBSITE Have a question or need assistance with your appliance? Try the Café Appliances Website 24 hours a day, any day of the year! You can also shop for more great Café Appliances products and take advantage of all our on-line support services designed for your convenience. cafeappliances. In Canada: cafeappliances.ca REGISTER YOUR APPLIANCE Register your new appliance on-line at your convenience! Timely product registration will allow... - Page 25 Il est temps que les électroménagers se dotent d’une personnalité. La vôtre. Machine à expresso automatique AFFECT-Cafe + mousseur MANUEL D’UTILISATION FRANÇAIS.
- Page 26 Nous sommes fiers du savoir-faire, de l’innovation et de l’esthétique qui composent chaque appareil Cafe, et nous pensons que vous le serez aussi. Dans cette optique, nous vous rappelons que l’enregistrement de votre électroménager vous assure la communication de renseignements...
- Page 27 Table des matières Models: C7CEBBS3RD3, C7CEBBS4RW3, C7CEBBS2RS3, C7CEBAS3RD3, C7CEBAS4RW3, C7CEBAS2RS3 CONSIGNES DE SÉCURITÉ IMPORTANTES ......4 POUR COMMENCER .
-
Page 28: Consignes De Sécurité Importantes
CONSIGNES DE SÉCURITÉ IMPORTANTES LISEZ TOUTES LES INSTRUCTIONS AVANT D'UTILISER L'APPAREIL AVERTISSEMENT Lisez les instructions attentivement avant d’utiliser cet appareil pour la première fois. Conservez ces instructions pour référence. Cet appareil est destiné à un usage domestique et il doit être utilisé conformément aux présentes instructions seulement. Manipulez-le avec soin et avertissez les autres utilisateurs des risques potentiels. -
Page 29: Risque D'incendie Ou De Choc Électrique
CONSIGNES DE SÉCURITÉ IMPORTANTES LISEZ TOUTES LES INSTRUCTIONS AVANT D'UTILISER L'APPAREIL AVERTISSEMENT Lisez les instructions attentivement avant d’utiliser cet appareil pour la première fois. Conservez ces instructions pour référence. Cet appareil est destiné à un usage domestique et il doit être utilisé conformément aux présentes instructions seulement. Manipulez-le avec soin et avertissez les autres utilisateurs des risques potentiels. -
Page 30: Pour Commencer
Pour commencer Plateau d’égouttage ■ Retirez le plateau d’égouttage de l’emballage et fixez-le sur le devant de la machine à expresso, en dessous de la buse de distribution du café. REMARQUE : Des aimants vont permettre au plateau d’égouttage de se fixer sur la machine. Réservoir d'eau ■... -
Page 31: Composants
Tiroir des rési- dus de café Voyant de la buse de Infuseur à café distribution du café Panneau Plateau d’égouttage de service Grille du plateau d’égouttage REMARQUE : La buse de vapeur est disponible sur les modèles C7CEBBS3RD3, C7CEBBS4RW3, and C7CEBBS2RS3... -
Page 32: Accessoires
Microfiber Cleaning Cloth Cleaning Solution (3) Solution de nettoyage (3) Solution de nettoyage (3) Band de mesure de la dureté de l'eau Carafe à lait REMARQUE : La carafe à lait est incluse avec le modèle C7CEBBS3RD3, C7CEBBS4RW3, C7CEBBS2RS3 seulement. -
Page 33: Panneau De Commande
Panneau de commande C7CEBAS3RD3, C7CEBAS4RW3, C7CEBAS2RS3 C7CEBBS3RD3, C7CEBBS4RW3, C7CEBBS2RS3... -
Page 34: Fonctions
Fonctions Boutons Hot Water (eau chaude) REMARQUE : Tous les réglages ont une valeur par La fonction Hot Water distribue de l'eau chaude par la défaut que l’on peut modifier avec l’application buse de distribution de café ou par la buse de vapeur SmartHQ. -
Page 35: Utilisation De Votre Machine À Expresso
Utilisation de votre machine à expresso Bouton de mouture des grains de café Ajoutez des grains dans le compartiment des grains de café. Pendant que la mouture se déroule, réglez le bouton de mouture à la taille désirée. Alignez la taille (cercle) de mouture désirée sur la flèche du dessus du moulin. - Page 36 Utilisation de votre machine à expresso Mise en marche de la machine à expresso Pressez le bouton marche-arrêt pour mettre la machine en marche. Les autres boutons vont alors apparaître. Fonctions Espresso, Lungo, Americano et My Cup REMARQUE : Assurez-vous de placer une tasse ou un récipient sous la buse de distri- bution avant d’utiliser une fonction quelconque.
-
Page 37: Quantité De Distribution Personnalisée
Utilisation de votre machine à expresso Fonction Steam/Hot Water (vapeur/eau chaude) ATTENTION Pour éviter de vous brûler, ne touchez pas aux liquides ni à la buse de vapeur pendant ou après le moussage du lait. Attendez que la projection de vapeur soit terminée avant de retirer la carafe. -
Page 38: Entretien Et Nettoyage
Entretien et Nettoyage AVERTISSEMENT Pour éviter de vous brûler, ne touchez pas aux liquides ni à la buse de vapeur pendant ou après le moussage du lait. Attendez que l’injection de vapeur soit terminée avant de retirer la carafe. Tenez la carafe de lait par la poignée. ATTENTION Pour éviter de vous brûler, ne touchez pas aux liquides ni à... -
Page 39: Procédure De Détartrage
Entretien et Nettoyage Procédure de détartrage N'utilisez PAS d'agents de nettoyage non fournis avec le produit ou recommandés dans ce manuel. ■ Nous recommandons de détartrer une fois par mois ou plus selon la dureté de l’eau. Vous pouvez utiliser une bande de mesure de la dureté de l'eau pour évaluer la dureté de votre eau afin d’ajuster la fréquence des alertes de détartrage au moyen de l’application SmartHQ. -
Page 40: Conseils
Ce café utilise de l’expresso et du lait vapeur dont la couche de mousse est plus petite. ■ Comment préparer le lait vapeur : ■ Comment préparer le lait vapeur : C7CEBBS3RD3, REMARQUE : La fonction Steam (vapeur) est incluse avec le modèle C7CEBBS4RW3, C7CEBBS2RS3. -
Page 41: Dépannage
Dépannage Problème Cause Solution L’appareil ne fonctionne L’appareil n’est pas branché. ■ Vérifiez que le cordon électrique et sa pas ou ne s’allume pas fiche sont bien branchés et pressez le bouton marche-arrêt. ■ Vérifiez le disjoncteur de la fiche (si GFCI). Réponse absente ou Le panneau est peut-être sale ou mouillé. - Page 42 Dépannage Problem Cause Solution L’indicateur « Add/ La sortie interne du café est bloquée. Nettoyez la goulotte du moulin à café. Stir Coffee Beans » Reportez-vous à la section « Nettoyage de est illuminé mais la l’infuseur et de la zone de service » à la trémie ne contient pas page 15.
-
Page 43: Connexion Wi-Fi - Smarthq
Connexion Wi-Fi – SmartHQ Connexion Wi-Fi Maintenez une pression simultanément sur les boutons Espresso et Americano durant 3 secondes pour activer la fonction Wi-Fi. La machine à expresso fera entendre un bip pour confirmer l’action et l’icône Wi-Fi apparaîtra sur l’écran. Suivez les instructions de l’application SmartHQ pour poursuivre la configuration Wi-Fi. -
Page 44: Renseignements Réglementaires
Renseignements réglementaires DÉCLARATION DE CONFORMITÉ DE LA FCC/IC : Cet appareil est conforme aux prescriptions de la partie 15 des règles de la FCC. Le fonctionnement de cet équipement est assujetti aux deux conditions suivantes : 1. Cet appareil ne doit pas causer de brouillage préjudiciable, et 2. - Page 45 Notes...
-
Page 46: Garantie Limitée
Garantie limitée Si votre appareil ne fonctionne pas correctement pendant son utilisation dans des conditions domestiques normales pendant la période de garantie, visitez cafeappliances.com/support pour une assistance / entretien du produit. Au Canada, visitez service.geappliances.ca/servicio/fr_CA/. Pour lancer une réclamation au titre de la garantie, veuillez visiter cafeappliances.com/support/returns/ ou appeler le 1-800-430-1757. -
Page 47: Soutien Au Consommateur
Soutien au consommateur SITE WEB CAFÉ Vous avez une question ou avez besoin d’aide pour votre appareil électroménager? Visitez le site Web de Café Appliances 24 heures par jour, tous les jours de l’année! Vous pouvez aussi y trouver d’autres formidables produits Café Appliances et tirer avantage de tous nos services d’assistance en ligne.