Table des Matières
Publicité
Les langues disponibles
Les langues disponibles
Liens rapides
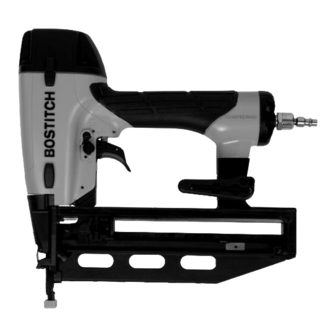
FN1664
OIL-FREE FINISH NAILER
CLAVADORA SIN ACEITE PARATERMINACIONES
CLOUEUR DE FINITION SANS HUILE DE QUALITÉ
OPERATION and MAINTENANCE MANUAL
MANUAL DE OPERACIÓN Y DE MANTENIMIENTO
MANUEL D'INSTRUCTIONS ET D'ENTRETIEN
BEFORE OPERATING THIS TOOL, ALL OPERATORS SHOULD STUDY THIS MANUAL TO
UNDERSTAND AND FOLLOW THE SAFETY WARNINGS AND INSTRUCTIONS. KEEP THESE
INSTRUCTIONS WITH THE TOOL FOR FUTURE REFERENCE. IF YOU HAVE ANY QUESTIONS,
CONTACT YOUR BOSTITCH REPRESENTATIVE OR DISTRIBUTOR.
ANTES DE OPERAR ESTA HERRAMIENTA, TODOS LOS OPERADORES DEBERÁN ESTUDIAR
ESTE MANUAL PARA PODER COMPRENDER Y SEGUIR LAS ADVERTENCIAS SOBRE SEGURIDAD
Y LAS INSTRUCCIONES. MANTENGA ESTAS INSTRUCCIONES CON LA HERRAMIENTA PARA
FUTURA REFERENCIA, SI TIENE ALGUNA DUDA, COMUNÍQUESE CON SU REPRESENTANTE DE
BOSTITCH O CON SU DISTRIBUIDOR.
LIRE ATTENTIVEMENT LE PRÉSENT MANUEL AVANT D'UTILISER L'APPAREIL. PRÉTER UNE
ATTENTION TOUTE PARTICULIÈRE AUX CONSIGNES DE SÉCURITÉ ET AUX AVERTISSEMENTS.
GARDER CE MANUEL AVEC L'OUTIL POUR FUTUR RÉFÉRENCE. SI VOUS AVEZ DES QUESTIONS,
CONTACTEZ VOTRE REPRÉSENTANT OU VOTRE CONCESSIONNAIRE BOSTITCH.
STANLEY FASTENING SYSTEMS L.P.
180586REVB 09/08
Publicité
Chapitres
Table des Matières
Dépannage

Manuels Connexes pour Bostitch FN1664


Sommaire des Matières pour Bostitch FN1664
- Page 1 LIRE ATTENTIVEMENT LE PRÉSENT MANUEL AVANT D’UTILISER L’APPAREIL. PRÉTER UNE ATTENTION TOUTE PARTICULIÈRE AUX CONSIGNES DE SÉCURITÉ ET AUX AVERTISSEMENTS. GARDER CE MANUEL AVEC L’OUTIL POUR FUTUR RÉFÉRENCE. SI VOUS AVEZ DES QUESTIONS, CONTACTEZ VOTRE REPRÉSENTANT OU VOTRE CONCESSIONNAIRE BOSTITCH. STANLEY FASTENING SYSTEMS L.P. 180586REVB 09/08...
-
Page 2: Table Des Matières
Bostitch Finish & Trim Products........17... -
Page 3: Safety Instructions
SAFETY INSTRUCTIONS EYE PROTECTION which conforms to ANSI specifications and provides protection against flying particles both from the FRONT and SIDE should ALWAYS be worn by the operator and others in the work area when connecting to air supply, loading, operating or servicing this tool. -
Page 4: Tool Components
TOOL COMPONENTS Frame Cap Over-Molded Rear Exhaust Comfort Grip Frame Protector Swivel Air Fitting Frame Trigger Lockout Trigger Actuation Mode Selector Switch Pencil Sharpener Dial-A-Depth™ Control 3mm Hex Wrench Trip Belt Hook No-Mar Tip Trigger Lockout 4mm Hex Wrench Spare No Mar Tip Storage... -
Page 5: Operating Pressure
DO NOT EXCEED THIS RECOMMENDED OPERATING PRESSURE. Air Consumption: The FN1664 requires 3.9 cubic feet per minute or C.F.M. (110.4 liters per minute or LT/MIN) of free air at 80PSI (5.6 kg/cm ) to operate at a rate of 60 fasteners per minute. To determine the appropriately sized air compressor, take the actual rate at which the tool will be run and compare the required C.F.M. -
Page 6: Air Supply & Connections
AIR SUPPLY AND CONNECTIONS Do not use oxygen, combustible gases, or bottled gases as a power source for this tool as tool may explode, possibly causing injury. FITTINGS: Install a male plug on the tool which is free flowing and which will release air pressure from the tool when disconnected from the supply source. - Page 7 LOADING THE FN1664 EYE PROTECTION which conforms to ANSI specifications and provides protection against flying particles both from the FRONT and SIDE should ALWAYS be worn by the operator and others in the work area when connecting to air supply, loading, operating or servicing this tool.
- Page 8 TRIP OPERATION MODE Warning: Always disconnect air supply before making adjustments as accidental actuation may occur, possibly causing injury. The FN1664 features a selectable trigger system that allows the user to choose between the following modes of operation: 1. Contact Trip Operation 2.
-
Page 9: Dial-A-Depth
MANUAL OBSERVE THE FOLLOWING FOR SAFE OPERATION • Use the BOSTITCH pneumatic tool only for the purpose for which it was designed. • Never use this tool in a manner that could cause a fastener to be directed toward the user or others in the work area. -
Page 10: Installing The Belt Hook
INSTALLING THE BELT HOOK Always disconnect tool from air supply before making adjustments or before attempting any part assembly or disassembly. Always remove the belt hook from the tool when selecting Contact Trip Mode. 1. Assure that the sequential trip mode is selected. 2. -
Page 11: Contact Trip Operation
TOOL OPERATION EYE PROTECTION which conforms to ANSI specifications and provides protection against flying particles both from the FRONT and SIDE should ALWAYS be worn by the operator and others in the work area when connecting to air supply, loading, operating or servicing this tool. -
Page 12: Jam Clearing Procedure
On occasion nails can jam in the nose of a pneumatic nailer. This can be caused by striking a metal plate in the wall, drywall screw, or some other hard object. The FN1664 feature open drive channel architecture for jam clearing. To clear a jam follow this procedure: 1. -
Page 13: Tool Operation Check
REPLACEMENT PARTS: Use only genuine BOSTITCH replacement parts. Do not use modified parts. ASSEMBLY PROCEDURE FOR SEALS: When repairing a tool, make sure the internal parts are clean and lubricated. Use Parker “O”-LUBE, Magnalube, or equivalent on all “O”-rings. -
Page 14: Maintenance Checklist
MAINTENANCE CHECKLIST Maintenance Benefit Procedure Service Interval Inspect trigger performance Ensure trigger system is in Refer to Tool Operation Daily proper working order Check section in this manual Drain condensation from air Prevents accumlation of Open drain cock on tanks Daily compressor tanks and air moisture that can impede tool... -
Page 15: Trouble Shooting
Broken/chipped driver ....Replace driver (check piston ring) Dry/dirty magazine ..... .Clean/lubricate use BOSTITCH Air Tool Lubricant Worn magazine . -
Page 16: Available Accessories
AVAILABLE ACCESSORIES FN1664-RK TIPPAK3 FN1664 TIP PACK (INCLUDES 4 FN1664 REBUILD KIT PROFILE TIPS & 2 NO-MAR TIPS SB16 SERIES TVA-15 16 GAUGE STRAIGHT FINISH NAILS FN1664 TRIGGER VALVE KIT -16-... -
Page 17: Bostitch Finish & Trim Products
BOSTITCH FINISH & TRIM PRODUCTS N62FNK-2 HP118K 15 GAUGE OIL-FREE 23 GAUGE MICRO FINISH NAILER KIT PINNER KIT SX1838K BT1855K 18 GAUGE OIL-FREE STAPLER KIT 18 GAUGE OIL-FREE BRAD NAILER KIT PRO-3850 PRO-1450 9.5 MM X 15 MM (3/8” X 50’) PREMIUM 6.4 MM X 15 MM (1/4”... - Page 18 Productos Bostitch para remate y detalle........
-
Page 19: Instrucciones De Seguridad
INSTRUCCIONES DE SEGURIDAD El operador y otros en el área SIEMPRE deben llevar PROTECCIÓN OCULAR en conformidad con las especificaciones ANSI y que proteja contra partículas que vuelen por DELANTE y por el LADO, cuando se haga la conexión al suministro de aire, así como al cargar, operar o dar servicio a esta herramienta. Se exige protegerse la vista para resguardarse contra fijaciones o residuos que vuelen, lo cual puede causar lesiones graves a los ojos. -
Page 20: Componentes De La Herramienta
COMPONENTES DE LA HERRAMIENTA Tapa del armazón Escape posterior Agarre cómodo sobremoldeado Conector de Protector del aire giratorio armazón Armazón Bloqueo del gatillo Gatillo Modo de activación Interruptor selector Sacapuntas Control Dial-A-Depth™ Disparador 3mm Llave hexagonal Punta que no marca Gancho para el cinturón Bloqueo del gatillo Llave hexagonal... -
Page 21: Especificaciones De La Herramienta
NO SUPERE ESTA PRESIÓN OPERATIVA RECOMENDADA. Consumo de aire: Los modelo FN1664 requieren 110.4 litros por minuto o LT/MIN (3.9 pies cúbicos por minuto o C.F.M.) de aire libre a 5.6 kg/cm (80 PSI) para operar a razón de 60 fijaciones por minuto. Para determinar el compresor de aire del tamaño adecuado, tome la velocidad real con la cual se operará... -
Page 22: Suministro De Aire Y Conexiones
SUMINISTRO DE AIRE Y CONEXIONES No use oxígeno, gases combustibles ni gases envasados en cilindros para operar esta herramienta porque puede explotar, causando posibles lesiones. CONECTORES: Instale un enchufe macho en la herramienta que está fluyendo libremente y que liberará presión de aire de la herramienta al desconectarse de la fuente de alimentación. - Page 23 CARGA DE LA FN1664 El operador y otros en el área SIEMPRE deben llevar PROTECCIÓN OCULAR en conformidad con las especificaciones ANSI y que proteja contra partículas que vuelen por DELANTE y por el LADO, cuando se haga la conexión al suministro de aire, así como al cargar, operar o dar servicio a esta herramienta.
-
Page 24: Control De Bloqueo Del Gatillo
Advertencia: Siempre desconecte el suministro de aire antes de hacer ajustes porque puede activarse la unidad casualmente, causando posibles lesiones. Los modelos FN1664 tienen un sistema de gatillo seleccionable que permite al usuario elegir entre los siguientes modos de funcionamiento: 1. -
Page 25: Dial-A-Depth
• Siempre lleve la herramienta tomándola por la empuñadura. Nunca lleve la herramienta tomándola por la manguera de aire. • No altere ni modifique el diseño o función original de esta herramienta sin la aprobación de BOSTITCH, INC. • Siempre tenga presente que el uso indebido o la manipulación incorrecta de esta herramienta puede causarle lesiones a usted y a los demás. -
Page 26: Instalación Del Gancho Para El Cinturón
INSTALACIÓN DEL GANCHO PARA EL CINTURÓN Desconecte siempre la herramienta del suministro de aire antes de hacer ajustes o de intentar armar o desarmar piezas. Siempre quite el gancho para el cinturón de la herramienta al seleccionar el Modo de disparo de contacto. -
Page 27: Funcionamiento De La Herramienta
FUNCIONAMIENTO DE LA HERRAMIENTA El operador y otros en el área SIEMPRE deben llevar PROTECCIÓN OCULAR en conformidad con las especificaciones ANSI y que proteja contra partículas que vuelen por DELANTE y por el LADO, cuando se haga la conexión al suministro de aire, así como al cargar, operar o dar servicio a esta herramienta. -
Page 28: Procedimiento Para Despejar Atascos
4. Retire el pasador atascado. En ciertas circunstancias, pueden necesitarse pinzas para retirar la fijación. 5. Cierre el pestillo en la boquilla de desatasco. 6. Retraiga el empujador de modo que quede detrás de las barras de clavos. DESPEJE DE ATASCOS EN LA FN1664 -28-... -
Page 29: Revisión Funcional De La Herramienta
PIEZAS DE REPUESTO: Al cambiar piezas, solamente use repuestos genuinos BOSTITCH. No use piezas modificadas. PROCEDIMIENTO DE ENSAMBLAJE PARA LOS SELLOS: Al reparar una herramienta, fíjese en que las piezas internas estén limpias y lubricadas. Use Parker “O”-LUBE, Magnalube u otro lubricante equivalente en todas las juntas tóricas. -
Page 30: Lista De Verificación De Mantenimiento
LISTA DE VERIFICACIÓN DE MANTENIMIENTO Mantenimiento Beneficio Procedimiento Intervalo de servicio Inspeccione el Confirme que el sistema de Consulte la sección Revisión Diariamente funcionamiento del gatillo o disparo funcione bien funcional de la herramienta disparador en este manual Drene la condensación de los Previenelaacumulacióndehumedad Abra la llave de drenaje en Diariamente... -
Page 31: Solución De Problemas
El impulsor está roto o picado ....Cambie el impulsor (revise el anillo del pistón) El depósito está seco o sucio ....Limpie/lubrique con Lubricante para herramientas neumáticas BOSTITCH El depósito está... -
Page 32: Accesorios Disponibles
ACCESORIOS DISPONIBLES FN1664-RK TIPPAK3 PAQUETE DE 7.5MM REVEAL PAQUETE DE PUNTAS RECONSTRUCCIÓN QUE NO MARCAN FN1664K TVA-15 CALIBRE 16 CLAVOS DE ACABADO FN1664 PAQUETE DE VÁLVULA DEL GATILLO -32-... -
Page 33: Productos Bostitch Para Remate Y Detalle
PRODUCTOS BOSTITCH PARA REMATE Y DETALLE N62FNK-2 HP118K PAQUETE DE CLAVADORA INDUSTRIAL PAQUETE DE MICROCLAVETEADORA DE REMATE CALIBRE 15 SIN ACEITE INDUSTRIAL CALIBRE 23 BT1855K SX1838K PAQUETE DE CLAVADORA PARA PAQUETE DE ENGRAPADORA DE CLAVILLOS CALIBRE 18 ACABADO CALIBRE 18... - Page 34 Accessoires disponibles ..........48 Produits de finition et d’habillage Bostitch....... . 49 REMARQUE : Les outils Bostitch ont été...
-
Page 35: Consignes De Sécurité
CONSIGNES DE SÉCURITÉ DES LUNETTES DE SÉCURITÉ se conformant aux normes ANSI et qui protègent des particules projetées du côté FRONTAL ainsi que du côté LATÉRAL doivent TOUJOURS être portées par l’opérateur et toute autre personnes se trouvant dans la zone de travail lors d’une connexion à l’alimentation d'air, du chargement, de fonctionnement ou de l’entretien de cet outil. -
Page 36: Composants De L'outil
COMPOSANTS DE L'OUTIL Chapeau de couple Poignée moulée Échappement arrière confortable Protecteur Raccord d'air de bâti à rotule Bâti Blocage de Gâchette gâchette Mode de fonctionnement Sélecteur Taille-crayon Commande Dial-A-Depth Déclencheur Clé hex 3mm Embout anti-marques Crochet de ceinture Blocage de gâchette Clé... -
Page 37: Pression De Fonctionnement
NE DÉPASSEZ PAS LA PRESSION DE FONCTIONNEMENT RECOMMANDÉE. Consommation d’air : La FN1664 requièrentes 80,1 litres par minute ou l/min (2,83 pieds cubes par minute ou pi3/min) d'air libre à 5,6 kg/cm (80 psi) afin de fonctionner à un débit de 60 attaches par minute. Afin de déterminer la dimension correcte de compresseur d’air, utilisez le débit réel auquel l’outil fonctionnera et comparez-le au volume de l/min (pi... -
Page 38: Alimentation D'air Et Connexions
ALIMENTATION D'AIR ET CONNEXIONS N’utilisez pas d’oxygène, de gaz combustibles ou de gaz en bouteille comme source d'alimentation pour cet outil puisque cela peut causer l’explosion de l’outil et causer des blessures. RACCORDS : Installez une prise mâle sur l’outil laquelle est mobile et libérera la pression d’air de l’outil lorsque déconnecté de la source d’alimentation. - Page 39 CHARGEMENT DE LA FN1664 DES LUNETTES DE SÉCURITÉ se conformant aux normes ANSI et qui protègent des particules projetées du côté FRONTAL ainsi que du côté LATÉRAL doivent TOUJOURS être portées par l’opérateur et toute autre personnes se trouvant dans la zone de travail lors d’une connexion à...
- Page 40 Advertencia: Siempre desconecte el suministro de aire antes de hacer ajustes porque puede activarse la unidad casualmente, causando posibles lesiones. Los modelos FN1664 tienen un sistema de gatillo seleccionable que permite al usuario elegir entre los siguientes modos de funcionamiento: 1.
-
Page 41: Ajustement De La Commande D'attache Dial-A-Depth
MANUEL, VEILLEZ À OBSERVER LES PRÉCAUTIONS SUIVANTES : • N'utilisez jamais l’outil pneumatique BOSTITCH dans un but autre que celui pour lequel il a été conçu. • N’orientez jamais l’outil de façon à ce qu’il puisse éjecter une attache en direction de l’utilisateur ou d’autres personnes dans la zone de travail. -
Page 42: Installation Du Crochet De Ceinture
INSTALLATION DU CROCHET DE CEINTURE Déconnectez toujours l’outil de l'alimentation d'air avant de faire des ajustements ou de tenter d’assembler ou de désassembler une pièce. Retirez toujours le crochet de ceinture lorsque vous sélectionnez le mode déclenchement sur contact. 1. Assurez-vous que le mode de déclenchement séquentiel est sélectionné 2. -
Page 43: Fonctionnement De L'outil
FONCTIONNEMENT DE L ’OUTIL DES LUNETTES DE SÉCURITÉ se conformant aux normes ANSI et qui protègent des particules projetées du côté FRONTAL ainsi que du côté LATÉRAL doivent TOUJOURS être portées par l’opérateur et toute autre personnes se trouvant dans la zone de travail lors d’une connexion à l’alimentation d'air, du chargement, de fonctionnement ou de l’entretien de cet outil. -
Page 44: Procédure Pour Le Dégagement Des Blocages
Il peut arriver que des clous restent bloqués dans le nez poseur de la cloueuse pneumatique. Cela peut se produire lorsque l’attache frappe une plaque de métal, une vis de cloison sèche ou tout autre objet dur. La FN1664 comportent une architecture à rainure de mandrin ouverte permettant le dégagement des blocages. Suivez la procédure suivante pour dégager un blocage. -
Page 45: Vérification Du Fonctionnement De L 'Outil
PIÈCES DE RECHANGE : N'utilisez que de pièces de rechange d’origine Bostitch. N’utilisez pas de pièces modifiées. PROCÉDURE D’ASSEMBLAGE DES JOINTS : Lorsque vous réparez un outil, assurez-vous que les pièces internes sont propres et lubrifiées. Utilisez du Parker “O”- LUBE, Magnalube ou l’équivalent sur tous les joints toriques. -
Page 46: Liste De Vérification Pour L 'Entretien
LISTE DE VÉRIFICATION POUR L ’ENTRETIEN Entretien Bienfait Procédure Intervalle de service Inspectez la performance de Assurez-vous que le système Reportez-vous à la section Chaque jour la gâchette de gâchette est en bon état Vérification du fonctionnement de de marche l'outil du présent manuel Drainez le condensat des Prévient l'accumulation de... -
Page 47: Dépannage
Le mandrin est cassé ou détérioré ... . .Remplacez le mandrin (vérifiez le segment de piston) Le magasin est sale ou trop peu lubrifié ..Nettoyez et lubrifiez et utilisez le lubrifiant pour outil pneumatique BOSTITCH Le magasin est trop usé... -
Page 48: Accessoires Disponibles
ACCESSOIRES DISPONIBLES FN1664-RK TIPPAK3 ENSEMBLE DE ÈBRASEMENT DE 0.79CM RÉASSEMBLAGE EMBOUTS ANTI-MARQUES FN1664K TVA-15 CLOUS A FINIR CALIBRE 16 FN1664 ENSEMBLE DE SOUPAPE DE GÂCHETTE -48-... -
Page 49: Produits De Finition Et D'habillage Bostitch
PRODUITS DE FINITION ET D’HABILLAGE BOSTITCH HP118K N62FNK-2 ENSEMBLE DE CLOUEUSE MICRO, ENSEMBLE DE CLOUEUSE DE FINITION CALIBRE 23 SANS HUILE, CALIBRE 15 BT1855K SX1838K ENSEMBLE AGRAFEUSE DE ENSEMBLE CLOUEUSE À TÊTE PERDUE DE CALIBRE 18 FINITION DE CALIBRE 18... - Page 50 NOTES AND RECORDS NOTAS Y REGISTROS REMARQUES ET RAPPORTS...