Table des Matières
Publicité
Les langues disponibles
Les langues disponibles
Liens rapides
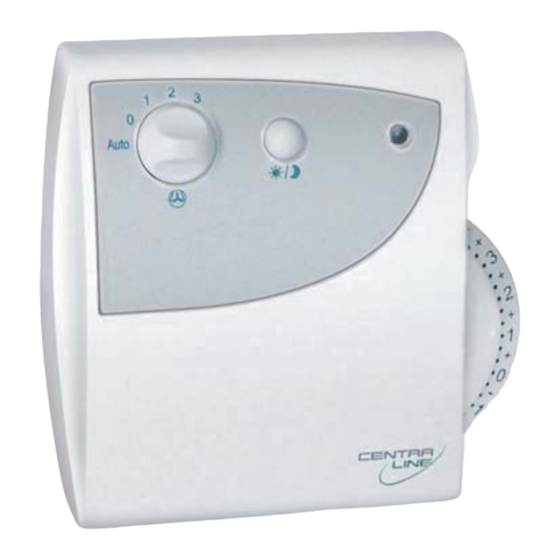
CLCM1T,2T,4T,5T,6T
Wall Modules
BEFORE INSTALLATION
All wiring must comply with local electrical codes and
ordinances or as specified on installation wiring diagrams.
Wall module wiring can be sized from 1.5 to 0.34 mm
depending on the application. The maximum length of wire
from a device to a wall module is 305 m. Twisted-pair wire is
recommended for wire runs longer than 30.5 m.
CAUTION
EMI Noise Introduction.
Risk of erratic system operation.
Keep wiring at least 300 mm away from large induc-
tive loads such as motors, line starters, lighting
ballasts and large power distribution panels. During
installations, try to avoid areas of high EMI noise.
Run wall module wiring separately from 50 Vac or
greater power wiring.
COVER DISASSEMBLY
The CLCM1T,2T,4T,5T,6T come packed with a sub-base that
mounts separately for ease of installation; to disassemble the
cover and the sub-base, see Fig. 1.
LIFT
2
1
PRESS
Fig. 1. Cover disassembly / assembly
Table 1. Overview of features
model
sensor setpoint bypass/ LED
CLCM1T
CLCM2T
CLCM4T
CLCM5T
CLCM6T
Copyright © 2016 Honeywell GmbH ● All Rights Reserved
fan speed
-
-
-
3-position
5-position
Installation Instructions
INSTALLATION
The CLCM2T,4T,5T,6T packages include two setpoint dials.
By default, the "Celsius Relative" type is mounted, but can be
easily replaced with the "Celsius Absolute" type by pulling the
2
,
one dial off and inserting the other one.
Mount the wall modules on an inside wall approx. 1.3 m from
the floor (or in the specified location) to allow exposure to the
average zone temperature.
NOTE: Maintain a mounting clearance of approx. 10 cm on
both sides of the module in order to allow a free
airflow for the temperature sensor and accessibility
of the setpoint dial.
Do not mount the wall modules on an outside wall,
on a wall containing water pipes, or near air ducts.
Avoid locations that are exposed to discharge air
from registers or radiation from lights, appliances, or
the sun.
The wall modules can be mounted on a 60-mm wall outlet
box using 3.5-mm screws or on a wall (see Fig. 2). When
mounting directly on a wall, use the type of screws
appropriate for the wall material. See Fig. 2 for bore-holes
and mounting dimensions (the CLCM5T,6T are shown but
the dimensions are the same for all models).
1 2 3 4 5 6 7
-
-
-
Fig. 2. Bore-holes and dimensions (mm)
68
97
104
MU1Z-0901GE51 R0416B
28
33
Publicité
Table des Matières

Sommaire des Matières pour Honeywell CentraLine CLCM1T
- Page 1 LED fan speed CLCM1T CLCM2T CLCM4T CLCM5T 3-position CLCM6T 5-position Fig. 2. Bore-holes and dimensions (mm) Copyright © 2016 Honeywell GmbH ● All Rights Reserved MU1Z-0901GE51 R0416B...
-
Page 2: Mounting Procedure
CLCM1T,2T,4T,5T,6T WALL MODULES – INSTALLATION INSTRUCTIONS Mounting Procedure Wiring with PANTHER NOTE: You should always first connect the wall module and 1. Disassemble the cover as shown in Fig. 1. only then install the PANTHER's software. 2. CLCM2T,4T,5T,6T, only: Pull off the setpoint dial. Wire the terminal blocks as follows: 3. - Page 3 Fig. 1 and make sure that the tab on the underside engages. Manufactured for and on behalf of the Environmental & Energy Solutions Division of Honeywell Technologies Sàrl, Rolle, Z.A. La Pièce 16, Switzerland by its Authorized Representative: CentraLine Honeywell GmbH Böblinger Strasse 17...
-
Page 4: Vor Der Installation
Sollwert Überst./ LED Schalter CLCM1T CLCM2T CLCM4T CLCM5T 3-stellig CLCM6T 5-stellig Abb. 2. Befestigungslöcher und Abmessungen (mm) Copyright © 2016 Honeywell GmbH ● Alle Rechte vorbehalten MU1Z-0901GE51 R0416B... - Page 5 CLCM1T,2T,4T,5T,6T RAUMBEDIENGERÄTE – MONTAGEANLEITUNG Montageschritte Verdrahtung (mit PANTHER) 1. Öffnen Sie das Gehäuse, wie in Abb. 1 gezeigt. HINWEIS: Immer zuerst das Wandmodul anschließen und 2. Nur CLCM2T,4T,5T,6T: Ziehen Sie die Sollwertscheibe erst dann die PANTHER-Software installieren. Nehmen Sie die Anschlüsse wie folgt vor: 3.
- Page 6 4…20 Vdc, 3.5 mA Eingang) Übersteuerung / rtn LED / rtn Hergestellt für und im Auftrag des Geschäftsbereichs Environmental & Energy Solutions der Honeywell Technologies Sàrl, Rolle, Z.A. La Pièce 16, Schweiz in Vertretung durch: CentraLine Honeywell GmbH Böblinger Strasse 17 71101 Schönaich, Germany...
-
Page 7: Combinés D'ambiance
CLCM1T CLCM2T CLCM4T CLCM5T 3-positions CLCM6T 5-positions Fig. 2. Trous de perçage et dimensions (mm) Copyright © 2016 Honeywell ● Tous droits réservés MU1Z-0901GE51 R0416B... -
Page 8: Procédure D'installation
CLCM1T,2T,4T,5T,6T COMBINES D’AMBIANCE – NOTICE D’INSTALLATION Procédure d’installation Câblage (PANTHER) 1. Démontez le couvercle comme le montre la Fig. 1. NOTE: Vous devez toujours connecter le module mural en 2. CLCM2T,4T,5T,6T seulement: Retirez la molette de premier puis ensuite installer la programmation du réglage du point de consigne en tirant. -
Page 9: Limiteurs
Fig. 1 et assurez-vous que l’onglet sur la face arrière soit engagé. Fabriqué pour et au nom de la division Environmental & Energy Solutions de Honeywell Technologies Sàrl, Rolle, Z.A. La Pièce 16, Suisse par son représentant autorisé: CentraLine Honeywell GmbH Böblinger Strasse 17... -
Page 10: Voor De Installatie
LED punt snelheid CLCM1T CLCM2T CLCM4T CLCM5T 3-standen Fig. 2. Boorgaten en afmetingen (mm) CLCM6T 5-standen Copyright © 2016 Honeywell GmbH ● All Rights Reserved MU1Z-0901GE51 R0416B... -
Page 11: Montageprocedure
CLCM1T,2T,4T,5T,6T WANDMODULEN – INSTALLATIE-INSTRUCTIES Montageprocedure Verbinden met een PANTHER 1. Verwijder de afdekkap, zoals afgebeeld in Fig. 1. OPM: Het wandmodule moet altijd eerst worden 2. Alleen voor de CLCM2T, 4T, 5T, 6T: Verwijder de aangesloten op de PANTHER voordat het instelschaal door deze er af te trekken. - Page 12 Fig. 1. Gefabriceerd voor en in opdracht van de Environmental and Combustion Controls Division van Honeywell Technologies Sàrl, Ecublens, Route du Bois 37, Zwitserland door zijn daartoe gemachtigde vertegenwoordiging CentraLine Honeywell GmbH Böblinger Strasse 17...


