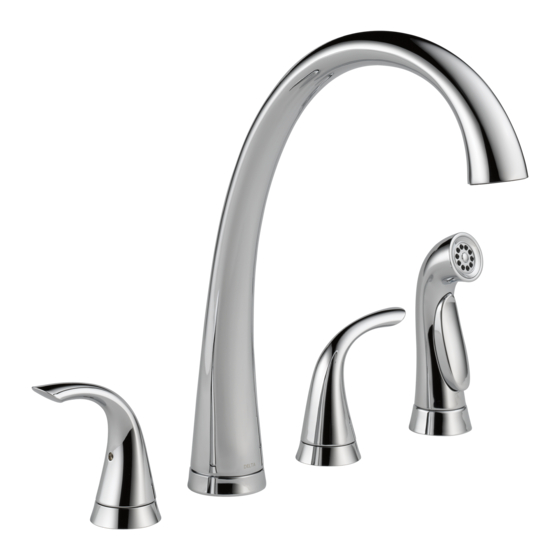
Delta 2256-DST Mode D'emploi
Masquer les pouces
Voir aussi pour 2256-DST:
- Mode d'emploi (12 pages) ,
- Manuel d'installation (12 pages) ,
- Mode d'emploi (12 pages)
Publicité
Liens rapides
Models/Modelos/Modéles
2256-DST & 2480-DST
Series/Series/Seria
Write purchased model number here.
Escriba aquí el número del modelo comprado.
Inscrivez le numéro de modèle ici.
You may need/Usted puede necesitar/Articles dont vous pouvez avoir besoin:
For easy installation of your Delta
faucet you will need:
• To READ ALL the instructions completely
before beginning.
• To READ ALL warnings, care, and maintenance
information.
Para instalación fácil de su llave Delta
usted necesitará:
• LEER TODAS las instrucciones completamente
antes de empezar.
• LEER TODOS los avisos, cuidados, e
información de mantenimiento.
Pour installer votre robinet Delta
facilement, vous devez:
• LIRE TOUTES les instructions avant de débuter;
• LIRE TOUS les avertissements ainsi que toutes
les instructions de nettoyage et d'entretien;
www.deltafaucet.com
TWO HANDLE WIDESPREAD
77539
KITCHEN FAUCETS
DOS GRIFOS EXTENSOS DE LA
COCINA DE LA MANIJA
ROBINETS À GRAND ENTRAXE À DEUX
MANETTES POUR ÉVIERS DE CUISINE
1
T E FLO N
10/1/15
Rev. B
Publicité

Sommaire des Matières pour Delta 2256-DST
- Page 1 • To READ ALL the instructions completely before beginning. • To READ ALL warnings, care, and maintenance information. Para instalación fácil de su llave Delta usted necesitará: • LEER TODAS las instrucciones completamente antes de empezar. • LEER TODOS los avisos, cuidados, e información de mantenimiento.
-
Page 2: Instructions De Nettoyage
Delta Faucet Company no será responsable por cualquier daño a la llave de agua que resulte del Esta es la garantía exclusiva por escrito de Delta Faucet Company y la garantía no es transferible. - Page 3 Spout Installation If you are installing the faucet on a Stainless Steel or a thin sink use RP37490 Stablization Plate SUPPLIED WITH FAUCET. SHUT OFF WATER SUPPLIES. Assemble base (1) and gasket (2). Place base and gasket over mounting hole for the spout. Slide spout tube and shank (3) through base and position spout assembly onto base (Note the “F”...
- Page 4 Correct End Valve Orientation La Orientación de la Válvula Extrema Bonne configuration de la soupape Hot/Caliente/Chaude Cold/Fría/Froide Open/Abrir/Ouvert Valves shown in closed position. Las válvulas en la posición cerrada. Soupapes montrées en position fermée. Hot Label Etiqueta Caliente Étiquette eau chaude Slide end valves (1) with gaskets (2) and bushings (3) through sink.
- Page 5 Line Delta is not responsible for tubing that is cut too short or cut in a way that Slide Y-shaped connector (1) into adapter (2) and secure with clip (3). Pull will not allow for a leak-free joint. moderately on Y-shaped connector to ensure connection has been made.
- Page 6 For Models With A Side Spray Mount spray support assembly (1) in far right hole in sink. HAND TIGHTEN pulled out, insert spray hose nipple (4) into diverter (3). Make sure the hose ONLY. Insert spray hose (2) down through spray support. nipple is completely inserted and then push diverter clip (1) in until it locks the hose nipple into place.
- Page 7 Loop tubing (2) if it created. Delta is not responsible for tubing that is cut l Tubing is cut too short: buy a coupling union and a is too long.
- Page 8 Correct method Incorrect Installation Método Correcto Instalación Incorrecta Installation Incorrecte Bonne méthode Do not install sleeve Ensure cut is straight. upside down. No instale la manga Asegúrese que el corte Custom Fit Connections - Plastic Sleeve Installation Instructions boca abajo. esté...
-
Page 9: Entretien
To Change the Position of Handle Stop (5). Para cambiar la posición de el tope (5). Pour changer la position de la butée (5). Cold Fría Caliente Froide Chaude La flecha va hacia el surtidor en lados Arrow faces calientes y fríos. spout on both hot &... - Page 10 2256-DST Models/Modelos/Modèles RP64476▲ Handle Assembly Ensamble de las Manijas Manette RP41896 Glide Ring Argolla deslizable Anneau de RP70746 glissement Aerator Aereador Aérateur RP60352 Bonnet Nuts RP52217 Bonetes/Capuchones Wrench Chapeaux Filetés Llave Clé RP60400 Valve Assembly Ensamble de la Válvula Soupape RP63976▲...
- Page 11 2480-DST Models/Modelos/Modèles RP63973▲ Handle Assembly Ensamble de las Manijas Manette RP41896 Glide Ring Argolla deslizable Anneau de RP70746 glissement Aerator Aereador Aérateur RP60352 RP52217 Bonnet Nuts Wrench Bonetes/Capuchones Llave Chapeaux Filetés Clé RP60400 Valve Assembly Ensamble de la Válvula Soupape RP63974▲...
- Page 12 77539 Rev. B...

