Table des Matières
Publicité
Les langues disponibles
Les langues disponibles
Liens rapides
12pc Multi-Hook Accessory Kit
Warning: Excessive weight hazard!
Use two or more people to move, assemble or install overhead rack to avoid back or other injury.
Do not leave children unattended near overhead rack. High risk of injury if installed incorrectly: Follow
instructions carefully and routinely inspect your system to ensure all components are fastened securely.
For assistance, call 1.877.306.8930; for UK 0800.031.4069; e-mail at info@newageproducts.com
Publicité
Table des Matières

Sommaire des Matières pour Newage VersaRac
- Page 1 12pc Multi-Hook Accessory Kit Warning: Excessive weight hazard! Use two or more people to move, assemble or install overhead rack to avoid back or other injury. Do not leave children unattended near overhead rack. High risk of injury if installed incorrectly: Follow instructions carefully and routinely inspect your system to ensure all components are fastened securely.
-
Page 2: Parts Supplied
Items Required Part Description Quantity Hanging S-Hooks 8in Hanging S-Hooks 4in Hanging S-Hooks Post Mount J-Hooks 4in J-Hooks VersaRac 2in J-Hooks Hanging Bar Assemblies Clothes Bar C Chanel Drop Bar C Chanel Grid Clip Bottom Adjustable Wrench Grid Clip Top... -
Page 3: Safety Warning
600lbs for the overhead rack. lbs. 3. Do not load more than 600lbs on to a VersaRac. Live lbs. loads (people, pets, etc) may weigh less than the rated weight capacity, however will exert force on the rack beyond its rated capacity. - Page 4 When this product is installed, operated and maintained according to the instructions attached to or furnished with the product, NewAge Products Inc. will replace the defective product or parts if the part fails as a result of defective materials or workmanship for the Lifetime of the product.
- Page 5 WARNING: Hanging S-Hook Installation Only install Accessory Hooks onto initial securely mounted Overhead Racks Center Installation: Edge Installation: From the bottom of the overhead rack, From the top of the overhead rack, determine location for utility hook to be determine location for utility hook to be installed;...
- Page 6 Post Mount J-Hook Installation Locate the desired installation location Slide the J-Hook down to align the rivet and align the rivet nubs on the back of nubs with the bottom of the keyhole slots. the J-Hook with the large hole of the keyhole slots on the vertical angle posts.
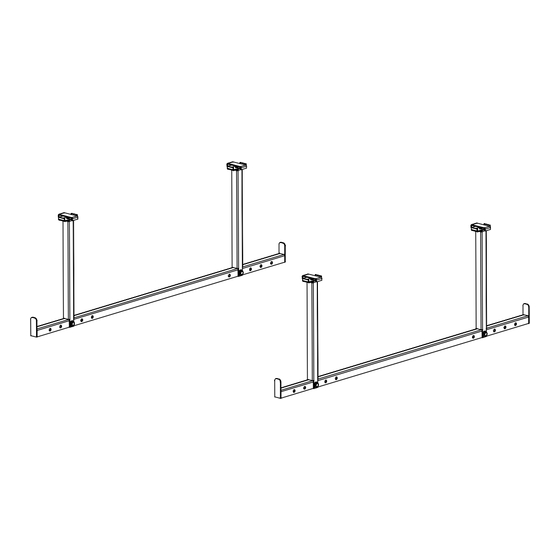
- Page 7 Hanging Bar Assembly Installation Place the top grid clips on top of the wire grid with the threaded rod facing down through the wire grid sections. These should be placed where you will be installing the vertical drop bars of the drop bar assembly.
-
Page 8: Pack D'accessoires -12 Pièces
Pack d’accessoires -12 Pièces Avertissement:Risque de poids excessif! Déplacer, assembler ou installer les armoires et armoires-vestiaires avec l'aide de deux personnes ou plus. Dans le cas contraire, il pourrait en découler des blessures au dos ou autre. Ne pas laisser les enfants sans surveillance près des armoires. -
Page 9: Déballage
Articles requis DESCRIPTION DES PIÈCES Quantity Crochets-S Crochets-S 8 po. Crochets-S 4 po. Crochets-J Crochets-J 4 po. VersaRac Crochets-J 2 po. Bar de vêtements Bar Horizontale Bar Vertical Clé Réglable Clips de grille supérieur Clips de grille inférieur Piecès de xation Échelle... -
Page 10: Alerte De Sécurité
être inclus dans la charge maximale de 600lbs pour les étageres. lbs. 3. Ne pas charger plus de 600 lb sur un VersaRac. Il est possible que les charges vivantes (personnes, animaux de compagnie, etc.) soient moins lourdes que la capacité... -
Page 11: Garantie À Vie Limitée Du Fabricant
NEWAGE PRODUCTS INC. N’ASSUMERA PAS LES COÛTS SUIVANTS : Les appels de service pour corriger l’installation de tout produit NewAge ou pour vous montrer comment les utiliser ou les installer. Les dommages causés par une manutention ou une expédition inadéquate du produit, ou des produits endommagés par un accident, une mauvaise utilisation, un abus, un incendie, une inondation, une installation inadéquate, un cas fortuit, une négli-... -
Page 12: Installation De S-Crochet
ATTENTION: Installation de S-Crochet Les unités VersaRac doivent être installées à des solives suspendues ou des supports adéquats du point de vue structurel en avant de fixer les crochet de suspension. Installation au Centre: Installation au Bord: Du fond des plateformes en treillis métallique Du haut des plateformes en treillis métallique... -
Page 13: Installation Du J-Crochet Sur Le Poteau Vertical
Installation du J-crochet sur le poteau vertical Déterminer l’emplacement du J-crochet Faites glisser le J - crochet vers le bas pour sur le poteau vertical. Aligne avec les aligner les bossages de rivet avec le fond trous. des trous . Remarque: Lors de l’installation de plus d’un J - crochet sur le même côté... -
Page 14: Installation De Bar De Vêtements
Installation de bar de vêtements Placez en haut, les clips de la grille au-dessus de la grille de fil avec la tige filetée vers le bas à tra- vers les sections de la grille métallique. Ceux-ci devraient être placés là où vous allez installer les barres de chute verticale de l’ensemble.
