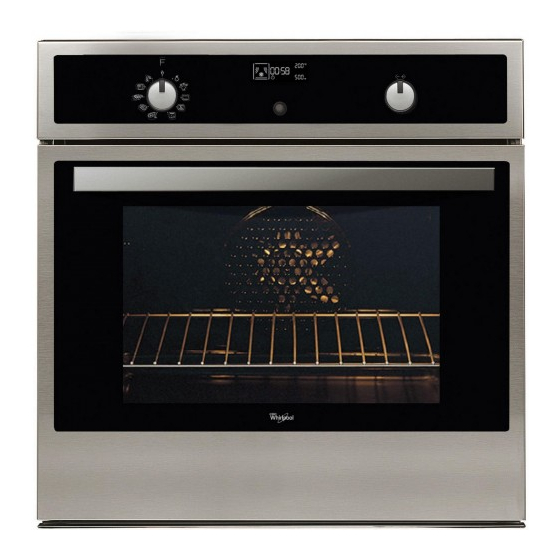
Table des Matières
Publicité
Les langues disponibles
Les langues disponibles
Liens rapides
Publicité
Table des Matières

Sommaire des Matières pour Whirlpool AKZ 232
- Page 1 AKZ 232 AKZ 233 User and maintenance manual Manuel d’utilisation et d’entretien...
-
Page 19: Instructions Importantes Sur La Sécurité
INSTRUCTIONS IMPORTANTES SUR LA SÉCURITÉ VOTRE SÉCURITÉ AINSI QUE CELLE D’AUTRUI EST PARTICULIÈREMENT IMPORTANTE Le présent manuel contient d’importants messages relatifs à la sécurité, qui figurent également sur l’appareil. Nous vous invitons à les lire soigneusement et à les respecter en toute circonstance. Ceci est le symbole de danger relatif à... -
Page 20: Préparation Du Meuble Pour L'encastrement
Mise au rebut des appareils ménagers usagés Cet appareil est fabriqué à partir de matériaux recyclables ou pouvant être réutilisés. Mettez-le au rebut en vous conformant aux prescriptions locales en matière d’élimination des déchets. Avant de mettre votre appareil au rebut, rendez-le inutilisable en sectionnant le câble d’alimentation. -
Page 21: Déclaration De Conformité
• votre numéro de téléphone. Nous vous invitons à enregistrer votre four sur le site : www.whirlpool.fr, rubrique « enregistrez votre produit » afin d’être rapidement reconnu et renseigné par l service consommateur en cas de conseil ou de panne. -
Page 22: Enceinte Du Four
Enceinte du four REMARQUE IMPORTANTE : évitez l’emploi d’éponges abrasives et/ou de pailles de fer. À la longue, celles-ci risquent d’abîmer les surfaces émaillées et la vitre de la porte. • Après chaque utilisation, laissez refroidir le four et nettoyez-le, de préférence lorsqu’il est tiède, pour éviter que les résidus d’aliments ne s’incrustent (aliments à... -
Page 23: Pour Remonter La Porte
Pour remonter la porte : Introduisez les charnières dans leur logement respectif. Ouvrez complètement la porte. Abaissez les deux manettes d’arrêt. Fermez la porte du four. Fig. 1 Fig. 2 DÉPLACEMENT DE LA RÉSISTANCE SUPÉRIEURE (UNIQUEMENT SUR CERTAINS MODÈLES) Déposez les grilles porte-accessoires latérales (Fig. 3). Dégagez légèrement la résistance (Fig. -
Page 24: Instructions Pour L'utilisation Du Four
INSTRUCTIONS POUR L’UTILISATION DU FOUR POUR LE BRANCHEMENT ÉLECTRIQUE, CONSULTEZ LA PARTIE RELATIVE À L’INSTALLATION Bandeau de commandes Résistance supérieure/gril Ventilateur (non visible) Plaque signalétique (à ne pas enlever) Éclairage Résistance circulaire (non visible) Ventilateur Tournebroche (si présent) Résistance inférieure (non visible) 10. -
Page 25: Description Du Bandeau De Commande
INTRODUCTION DE GRILLES ET AUTRES ACCESSOIRES À L’INTÉRIEUR DU FOUR La grille et les autres accessoires sont équipés d’un système de blocage qui en évite l’extraction involontaire. Fig. 1 Insérez la grille horizontalement, avec la partie rehaussée « A » orientée vers le haut (Fig. 1). Inclinez la grille à... -
Page 26: Description De L'affichage
DESCRIPTION DE L’AFFICHAGE Visualisation des éléments chauffants actifs pour les différentes fonctions Symboles pour la gestion du temps : minuterie, durée de cuisson, heure de fin cuisson, heure courante Informations relatives aux fonctions choisies Fonction automatique PAIN/PIZZA sélectionnée Indication porte four fermée durant le cycle de nettoyage automatique (pyrolyse) Température intérieure four Fonction Pyrolyse Dorage... -
Page 27: Préchauffage Rapide
PRÉCHAUFFAGE RAPIDE Sélectionnez la fonction Préchauffage rapide en tournant le bouton « Fonctions » en face du symbole Confirmez avec la touche : les paramètres s’affichent. Si la température proposée correspond à celle qui est désirée, appuyez sur la touche . -
Page 28: Sélection Des Fonctions Spéciales
MINUTEUR Cette fonction ne peut être utilisée qu’à four éteint et elle est utile, par exemple, pour contrôler le temps de cuisson des pâtes. La durée maximum pouvant être introduite est de 23 heures et 59 minutes. Avec le bouton « Fonctions » sur le zéro, tournez le bouton « Navigation » jusqu’à l’affichage de la durée désirée. Appuyez sur la touche pour lancer le compte à... -
Page 29: Luminosité
Pizzas Tournez le bouton « Fonctions » sur le symbole : l’afficheur visualise « BREAD » (pain). Pour sélectionnez la fonction « PIZZA », procédez comme suit : Tournez le bouton « Navigation : « PIZZA » s’affiche à l’écran. Appuyez sur pour sélectionner la fonction. - Page 30 TABLEAU DESCRIPTIF DES FONCTIONS DU FOUR BOUTON FONCTIONS Pour interrompre la cuisson et éteindre le four. LAMPE Pour allumer/éteindre la lumière à l’intérieur du four. Pour accélérer la décongélation des aliments. Placez l’aliment sur le gradin central. Laissez-le dans son emballage pour empêcher que la surface ne se déshydrate. DÉCONGÉLATION Pour conserver les aliments cuits chauds et croustillants (ex.
- Page 31 TABLEAU DE CUISSON Recette Fonction Préchauffage Gradin (en Température Durée Accessoires partant du bas) (°C) (min) 160-180 30-90 Moule à gâteau sur grille Gâteaux levés Grad. 4 : moule à gâteau sur grille 160-180 30-90 Grad. 1: moule à gâteau sur grille DÉLICATE Lèchefrite / plaque à...
- Page 32 Recette Fonction Préchauffage Gradin (en Température Durée Accessoires partant du bas) (°C) (min) 190-200 20-30 Lèchefrite / plaque à pâtisserie Vol-au-vent/Feuilletés Grad. 4 : plaque sur grille 180-190 20-40 Grad. 1 : lèchefrite/plaque à DÉLICATE pâtisserie Lasagnes/Pâtes au four/ 190-200 45-55 Plaque sur grille Cannellonis/Flans...
- Page 33 RECETTES TESTÉES conformément à la norme IEC 60350:99+A1:05 +A2:08 et DIN 3360-12:07:07 Recette Fonction Préchauffage Gradin Temp. Durée Accessoires et remarques (en partant du bas) (°C) (min) IEC 60350:99+A1:05 +A2:08 § 8.4.1 15-25 Lèchefrite / plaque à pâtisserie Biscuits de pâte brisée Grad.
-
Page 34: Conseils Pour L'utilisation Et Suggestions
CONSEILS POUR L’UTILISATION ET SUGGESTIONS Comment lire le tableau de cuisson Le tableau indique la meilleure fonction à utiliser pour un aliment déterminé, à cuire sur un ou plusieurs gradins simultanément. Les temps de cuisson commencent au moment de l’introduction du plat dans le four et ne tiennent pas compte du préchauffage (lorsque demandé). - Page 36 Printed in Italy 07/2011 5019 310 01328...


