Table des Matières
Publicité
Les langues disponibles
Les langues disponibles
Liens rapides
Publicité
Table des Matières

Sommaire des Matières pour Build Worker BDP500-16LA
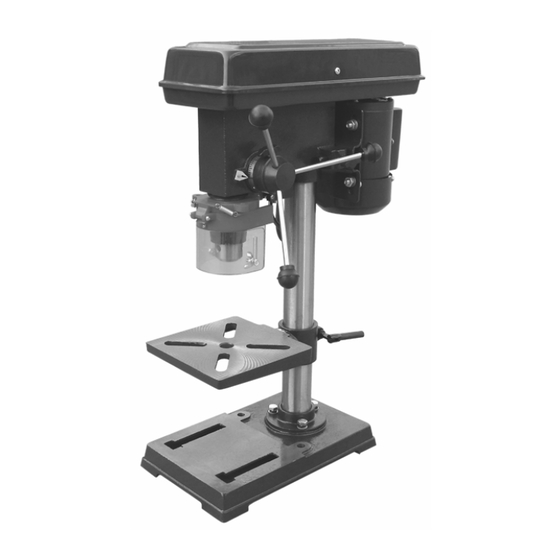
- Page 1 BDP500-16LA PERCEUSE A COLONNE KOLOMBOORMACHINE DRILL PRESS 2009...
-
Page 6: Consignes De Sécurité
FR –PERCEUSE A COLONNE pourraient toucher la perceuse si la pièce MISE EN GARDE Pour votre propre sécurité, lisez préalablement bougeait de manière inattendue. ce manuel d’utilisation avant d’utiliser la N’utilisez pas la machine avant qu’elle ait été machine. complètement montée et installée conformément aux instructions. -
Page 7: Sécurité Électrique
Si des pièces sont Ce laser est conforme à la classe 2 de la manquantes, n’assemblez norme EN 60825-1/A11, 1996. Cet appareil ne pas la machine, ne la branchez pas et ne contient pas de pièces nécessitant l’allumez pas avant que les une maintenance. - Page 8 Utilisez un morceau de bois servant d’appui Insertion et retrait d’un foret (fig. C) Ouvrez le dispositif de sécurité (7). pour réduire le risque d’éclatement de la pièce Ouvrez le mandrin (6). et pour protéger la pointe de la perceuse. Insérez le foret dans le mandrin.
-
Page 9: Nettoyage Et Entretien
NETTOYAGE ET ENTRETIEN La machine n’exige pas d’entretien particulier. Nettoyez régulièrement les orifices d’aération. Lubrification Mettez la perceuse sur la profondeur de perçage maximum une fois tous les 3 mois et graissez-la légèrement avec de l’huile. SPÉCIFICATIONS TECHNIQUES Tension du réseau V Fréquence du réseau Hz Puissance W Vitesse à... -
Page 10: Veiligheidsvoorschriften
NL - KOLOMBOORMACHINE plaats waar ze in aanraking kunnen komen met WAARSCHUWING Lees voor uw eigen veiligheid deze de boor als het werkstuk onverwachts gebruiksaanwijzing goed door alvorens de verschuift. machine te gebruiken. Gebruik de machine niet voordat deze volledig volgens de instructies is gemonteerd en geïnstalleerd. -
Page 11: Elektrische Veiligheid
Bouw de machine bij het Richt de laserstraal tijdens gebruik nooit op ontbreken van onderdelen mensen, hetzij direct, hetzij indirect via niet op, steek de stekker niet in het stopcontact en reflecterende oppervlakken. schakel de machine niet in Deze laser voldoet aan klasse 2 volgens EN tot de ontbrekende onderdelen volgens de 60825-1/A11, 1996. - Page 12 de voorzijde van de kolom en de tafel, in geval Monteren van de boorhouder (fig. B6) Open de beschermkap (7). u de tafel op een later tijdstip opnieuw in de Schuif de boorhouder (6) op de aandrijfas middenpositie wilt plaatsen. (23).
-
Page 13: Reiniging En Onderhoud
Controleer of het dradenkruis (34) op een lijn is met het centrum van het boorgat zoals GARANTIE gemarkeerd op het werkstuk. Voor de garantiebepalingen wordt verwezen Stel de laser indien noodzakelijk met de hand naar de bijgevoegde garantievoorwaarden. Volg de “Aanwijzingen voor gebruik” om een MILIEU Als uw machine na verloop van boorgat te maken. -
Page 14: Safety Instructions
GB - DRILL PRESS not switch on the machine until having checked WARNING Read this manual carefully before using the that head and table have been tightened firmly machine, for your own safety. to the pillar. Do not use the machine if a part is damaged ... - Page 15 DESCRIPTION (fig. A) Mounting the stand (fig. B1) Your drill press has been designed for drilling Install the foot (11) on a level and solid surface. holes in wood, Slide the foot over the pillar (12) in the metal and plastics. orientation as shown.
-
Page 16: Cleaning And Maintenance
Switch off the machine and The laser beam is used to indicate the centre wait until the machine location of the drill hole in case you have to drill has come to a complete standstill before changing several holes in workpieces of the same the speed. - Page 17 GUARANTEE Refer to the enclosed guarantee conditions for the terms and conditions of guarantee. ENVIRONMENT Should your machine need replacement after extended use, do not put it in the domestic waste but dispose of it in an environmentally safe way. Made in China 2009...
- Page 18 81, rue de Gozée 6110 Montigny-le-Tilleul Belgique Tél : 0032 71 29 70 70 Fax : 0032 71 29 70 86 Made in China S.A.V 32 / 71 / 29 . 70 . 88 32 / 71 / 29 . 70 . 99 Service Parts separated 32 / 71 / 29 .