Publicité
Les langues disponibles
Les langues disponibles
Liens rapides
Istuzioni per l'installazione Isotherm SP
Instructions pour l'installation Isotherm SP
Indel Marine S.r.l.
Zona Artigianale sn
IT-61019 S. Agata Feltria (PU) - Italy
Tel. +39 0541 848030
Fax +39 0541 848 563
Installation instruction Isotherm SP
Montageanleitung Isotherm SP
Monteringsanvisning Isotherm SP
E.mail: info@indelmarine.com
www.isotherm.com
Publicité

Sommaire des Matières pour Indel Marine Isotherm SP
- Page 1 Installation instruction Isotherm SP Istuzioni per l’installazione Isotherm SP Instructions pour l’installation Isotherm SP Montageanleitung Isotherm SP Monteringsanvisning Isotherm SP Indel Marine S.r.l. Zona Artigianale sn IT-61019 S. Agata Feltria (PU) - Italy Tel. +39 0541 848030 E.mail: info@indelmarine.com Fax +39 0541 848 563...
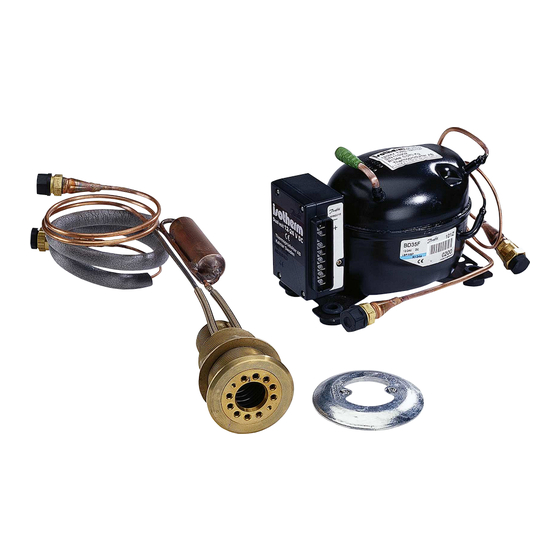
- Page 2 Isotherm SP Installation instructions General Isotherm SP is a sea water cooled refrigeration system for sailing yachts and power boats. This unique system means reduced power consumption and noise level. It has no fan or pump. The sea water cooled skin fi tting/heat exchanger replaces the air cooled condenser and cooling fan.
-
Page 3: Connection Diagram
Mounting First of all, plan the installation! The skin fi tting is to be mounted in the hull instead of existing fi tting for the galley sink waste water. The hole in the hull shall have a diameter of 60 mm (2½”). When an existing skin fi tting is to be replaced, it is taken away by the following method. - Page 4 è in acque calde ed “aggressive” dev’essere installato l’anodo di zinco. Si consiglia vivamente di montarlo quando l’Isotherm SP viene installato per la prima volta. Qualora l’anodo dopo una stagione presenti un notevole danneggiamento e perdita di materiale, si deve appurarne la ragione.
- Page 5 Montaggio Innanzitutto, programmare l’installazione ! La presa a mare dev’essere montata nello scafo al posto della presa esistente per l’acqua di scarico del lavello. Il tubo nello scafo deve avere un diametro di 60 mm. Quando dev’essere sostituita una presa a mare esistente, dev’essere rimossa nel modo seguente.
- Page 6 à bord ou si le bateaux est dans des eaux chaudes et aggresives, l’anode en zinc doit être installé. On suggère vivement de l’installer quand Isotherm SP est installé pour la première fois. Si, après une saison, l’anode est très endommagé et il présente une manque de matériel il faut en comprendre la cause. Il faut contrôler l’installation électrique à...
- Page 7 Montage Premièrement, programmez l’installation! La prise à mer doit être installée dans la coque à la place de la prise existante pour l’eau de vidage de l’évier. Le tuyau dans la coque doit avoir un diamètre de 60 mm. Quand il faut remplacer une prise à mer existante, enlevez-la en suivant ces instructions : mettez une prise en bois à...
- Page 8 Borddurchlass hat direkte Verbindung mit Wasser und die Zinkanode wird vor allem bei der Neuinstallation von Isotherm SP empfohlen. Nach der ersten Saison besteht Klarheit darüber, ob auch in Zukunft eine Zinkanode benötigt wird. Wenn diese nach der ersten Saison stark korrodiert ist, gilt das als Warnsignal! Fehler aufweist, die galvanische Ströme über den Borddurchlass verursachen.
-
Page 9: Montage
Borddurchlass an diesen angeschlossen wird. Verwenden Sie mindestens6 mm² Kupferkabel. (M 5 Schraub) Verwendung von eine Isolations-Transformator in der Landstromanlage ist zu empfehlen. Galvanische Trennung wird durch den Einbau eines Isolations-Transformators erreicht. Montage Beginnen Sie mit der Planung der Installation! Der Borddurchlass wird statt des vorhandenen Durchlasses für den Spül-ablauf der Pantry im Rumpf montiert. - Page 10 Bordgenomföringen är gjord i avzinkningshärdad och saltvattenbeständig mässing. Kondensorröret som är av Cu/Ni, liksom silvret i lödningarna offeranoden på Isotherm SP ska kontrolleras regelbundet och byts ut då mer än hälften av materialet är förbrukat. Om den angrips snabbt och inte räcker mer än en eller två säsonger, skall...
- Page 11 Montering Planera först installationen! Bordgenomföringen monteras i skrovet i stället för den befi ntliga genomföringen för avloppet från vasken i pentryt. Hålet i skrovet skall vara ø 60 mm. När den befi ntliga genomföringen skall ersättas tas den gamla bort genom att en träplugg trycks in i genomföringen från utsidan, så...
