
Sommaire des Matières pour Hyundai HY-TVS50UH-001
- Page 1 Guide d'utilisation HY-TVS50UH-001 Sous licence de HYUNDAI Corporation Holdings, Corée...
- Page 3 CONSIGNES DE SÉCURITÉ IMPORTANTES CONSIGNES DE SÉCURITÉ ATTENTION RISQUE D’ÉLECTROCUTION NE PAS OUVRIR ATTENTION : POUR RÉDUIRE Le symbole de l’éclair à Le symbole du point TOUT RISQUE D’ÉLECTROCUTION. l’intérieur d’un triangle est d’exclamation, à l’intérieur NE RETIREZ PAS LE PANNEAU d’un triangle, sert à...
- Page 4 électriques doivent être disposés de manière à ce qu'ils ne soient pas piétinés ou écrasés par les objets placés dessus ou contre eux, tout en faisant particulièrement attention aux fiches, prises et points de sortie de l'appareil. ● Toute prise secteur ou prise multiple utilisée comme dispositif de débranchement doit être facilement accessible.
- Page 5 ● Ne pas placer le téléviseur sur un tissu ou tout autre matériau placé au-dessus du meuble. ● Expliquer aux enfants les risques potentiels auxquels ils pourraient être exposés en escaladant des meubles pour atteindre les touches du téléviseur. ● Appliquer les mêmes consignes en cas de changement de place du téléviseur.
-
Page 6: Table Des Matières
Table des matières Accessoires ............................. 5 Introduction ............................6 Caractéristiques ..........................6 Fonctions de base ..........................6 Spécifications ..........................7-8 Instructions de montage sur support et de montage mural (en option) ........9-10 Description Générale ........................11 Vue d'ensemble du panneau avant ....................12 Vue d'ensemble de la télécommande .................... -
Page 7: Accessoires
Accessoires Assurez-vous les articles suivants sont inclus avec votre téléviseur LED. Contactez votre revendeur si un article est manquant. Poste de télévision Télécommande Support de base Guide d’utilisation 4 vis... -
Page 8: Introduction
Introduction Caractéristiques ● Téléviseur LED TFT 50" ● Un rayonnement X réduit à zéro respectueux de l'environnement ● Se connecte directement à un ordinateur pour avoir un combo téléviseur/moniteur. ● USB 2.0 ● Écran large 16:9 ● Réglage automatique et fin ●... -
Page 9: Spécifications
Spécifications Référence HY-TVS50UH-001 MUDV50A0Y-68860 N° de modèle Nom du modèle TÉLÉVISEUR LED INTELLIGENT 50" NETFLIX Résolution 3840x2160 Nombre de couleurs 1,07 Go Contraste 5000:1 Format d’ image 16:9 Tuner DVB-T/DVB-C/DVB-T2 1.5 A Alimentation du téléviseur 100-240V~ 50/60Hz, Consommation 120W Dimensions 1121x231x707.8mm... - Page 10 Fiche technique sur l’énergie Marque HYUNDAI HY-TVS50UH-001 Référence (Modèle : MUDV50A0Y-68860) Niveau d’efficacité énergétique Taille de l’écran 125 cm; 49 pouces sur la demande d’énergie de mode pour la gamme dynamique standard (DTS) 86kWh/1000h Consommation électrique en mode veille (W) <0,5 W...
-
Page 11: Instructions De Montage Sur Support Et De Montage Mural (Enoption)
Instructions de montage sur support et de montage mural (enoption) Comment assembler le support Lisez les instructions suivantes pour savoir comment assembler et désassembler le support. Éteignez le téléviseur avant de fixer/détacher le support. Avant toute intervention sur le téléviseur LED, étalez un tissu sous l'écran. Cela empêche tout dommage éventuel. - Page 12 Instructions de montage mural Ce téléviseur LED peut être accroché à un mur en utilisant un support mural (non fourni, mais que vous pouvez acheter auprès d’une quincaillerie) et les trous de montage situés à l'arrière de l'appareil. Il est recommandé d'enlever le support du téléviseur avant de l'accrocher à...
-
Page 13: Description Générale
Description Générale Vue d'ensemble du panneau arrière Vous pouvez connecter le téléviseur avec des appareils vidéo tels que lecteur DVD/VCD, magnétoscope et caméra vidéo pour bénéficier d’une image de haute qualité. RJ 45 OPTICAL HDMI4 HDMI3 HDMI2 AV IN Lecteur DVD Lecteur de disque Blu-ray Caméra vidéo PC (sortie HDMI) -
Page 14: Vue D'ensemble Du Panneau Avant
Vue d'ensemble du panneau avant Les touches du panneau inférieur gauche permettent de contrôler les fonctions de base du téléviseur, dont les menus à l'écran. Vous devez utiliser la télécommande pour utiliser des fonctions plus avancées. Schéma d’utilisation du téléviseur : Manette Panneau de commande du panneau arrière Centre... -
Page 15: Vue D'ensemble De La Télécommande
Vue d'ensemble de la télécommande Insertion des piles : 1) Ouvrez le couvercle du compartiment à piles. 2) Insérez 2 piles AAA en respectant les polarités comme indiqué à l'intérieur du compartiment. 3) Remettez le couvercle. Remarque : 1) Les piles neuves offrent une autonomie d’un an en utilisation normale. 2) Si vous n'allez pas utiliser la télécommande pendant une longue période, retirez les piles pour éviter tout dommage dû... - Page 16 Présentation de la télécommande Description générale 1. ALIMENTATION : Pour mettre le téléviseur en INPUT veille ou l’allumer 2. SOURCE : Pour afficher le menu des sources (TV, Subtitles HDMI1, HDMI2, etc) TEXT GUIDE ASPECT Pour ouvrir directement NETFLIX. Pour ouvrir directement YouTube. 5.
- Page 17 TÉLÉCOMMANDE Pour sélectionner le ratio d’affichage de ASPECT l’image. Pour naviguer dans les menus à l’écran. FLÈCHES INPUT Appuyez sur OK pour confirmer la sélection Subtitles 15. RETOUR : Pour revenir au menu précédent. : Pour afficher la page d’accueil. TEXT GUIDE ASPECT...
-
Page 18: Installation Des Piles De La Télécommande
Installation des piles de la télécommande Installation des piles Ouvrez le couvercle du compartiment à piles situé à l'arrière. Insérez deux piles AAA 1,5 V en respectant les polarités. Ne mélangez jamais des vieilles piles ou des piles usées avec des neuves. Pointez la télécommande vers le capteur de télécommande du téléviseur dans un rayon de moins de 8 mètres. -
Page 19: Connexion D'un Lecteur Dvd/Boîtier Décodeur Via Hdmi
Connexion d’un lecteur DVD/boîtier décodeur via HDMI Cette connexion ne peut être effectuée que si l’appareil externe comprend un connecteur de sortie HDMI. HDMI1(ARC) HEADPHONE HDMI Cable (Not supplied) Qu'est-ce que HDMI ? HDMI ou interface multimédia haute définition, est une interface de nouvelle génération qui permet la transmission sans compression de signaux audio et vidéo numériques via un seul câble. -
Page 20: Connexion D'un Système Audio Numérique
Connexion d’un système audio numérique Les prises du panneau arrière de ce téléviseur permettent de connecter facilement un système audio numérique. TV Rear Panel Digital Audio System (Black) OPTICAL RJ 45 OPTICAL HDMI4 HDMI3 HDMI2 AV IN L'audio 5.1 canaux est possible lorsque le téléviseur est connecté à un appareil externe prenant en charge 5.1 canaux. -
Page 21: Connexion Rj45 Et Usb
Connexion RJ45 et USB RJ 45 OPTICAL HDMI4 HDMI3 HDMI2 AV IN L’interface USB est utilisée avec des appareils USB (tels que disques durs mobiles, disques U, etc.), pour diffuser directement des fichiers audio et vidéo contenus dans ces appareils. Il a également une fonction de mémoire, comme sur une interface USB avec une caméra, une autre interface pour connecter un disque dur mobile, vous pouvez facilement déplacer les photos d’une caméra sur un disque dur. -
Page 22: Fonctionnement De Base
FONCTIONNEMENT DE BASE CONFIGURATION INITIALE Lors de la première prise en marche de votre téléviseur, l’assistant de configuration vous guide dans la configuration des paramètres de base. À effectuer en respectant les conseils de la première configuration. Cette fonction est utilisée pour le code de couplage de la télécommande. Une fois le couplage réussi, vous pouvez utiliser la télécommande Bluetooth pour commander le téléviseur. - Page 23 FONCTIONNEMENT DE BASE Choisissez «OUI» pour accepter et obtenir les informations sur la localisation de votre appareil afin d’avoir davantage de fonctions. Choisissez «OUI» pour accepter d’envoyer automatiquem ent des informations de diagnostic à Google afin d’améliorer le pouvoir discriminant. Votre appareil est compatible Android TV, appuyez sur la touche pour sélectionner la fonction d'exploration.
- Page 24 FONCTIONNEMENT DE BASE t es es le eille (C st) e l s il est e le et e le e tilisez ez s Utilisez i si itez e ti...
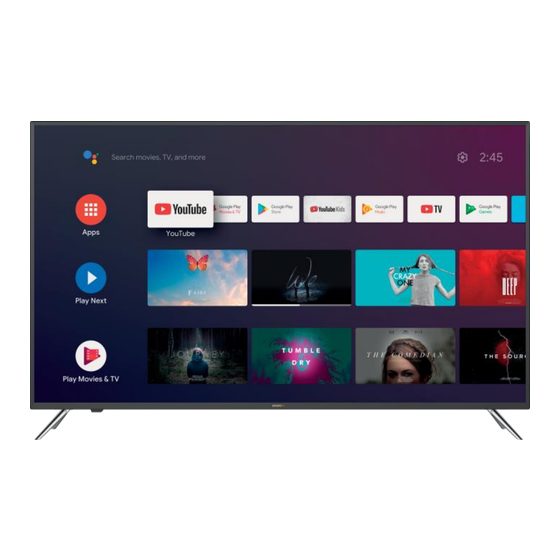
- Page 25 FONCTIONNEMENT DE BASE ÉCRAN D'ACCUEIL Appuyez sur la touche ACCUEIL pour aller à la page d’accueil ① Ouvrez Google assistant lancez une recherche vocale ou utilisez la recherche au clavier ② Parmi les applications installées sur le téléviseur, les icônes des applications favorites sont présentées ici.
- Page 26 Appuyez sur la touche SOURCE pour afficher la liste des sources. Vous pouvez sélectionner la source souhaitée. NAVIGATION DANS LES MENUS Il y a deux façons pour accéder. Première façon, appuyez sur la touche MENU pour afficher les options ètres, puis appuyez sur OK pour confirmer.
- Page 27 FONCTIONNEMENT DE BASE 3. Une fois le réglage terminé, appuyez sur la touche OK pour enregistrer et retourner au menu précédent. CHAÎNE Chaînes : Afficher le sous-menu de recherche en fonction des différents modes d’installation des chaînes. Mode d’installation des chaînes : Sélectionnez le menu sources de chaînes. Vous pouvez sélectionner le type de signal.
- Page 28 FONCTIONNEMENT DE BASE Antenne Menu -› Par amètres -› Chaînes -› Mode d’installation des chaînes, choisissez Antenne ou Câble. Accédez à Menu -› Paramètres -› Chaîne -› Chaînes. La recherche des chaînes accède directement dans l’interface de la plate-forme de recherche automatique TVA + TNT d’Antenne.
- Page 29 FONCTIONNEMENT DE BASE Simple recherche RF : Recherche manuelle TNT, à gauche et à droite après la sélection du canal RF, OK pour recherche directe. Câble Menu -› Paramètres -› Chaînes -› Mode d’installation des chaînes, choisissez Câble. Accédez à Menu-› Paramètres -› Chaîne -› Chaînes. 3.
- Page 30 FONCTIONNEMENT DE BASE Appuyez sur les touches HAUT/BAS pour sélectionner Connexion ou Ignorer. APPLICATIONS Dans ce menu, vous pouvez définir les autorisations de l’application et afficher les listes des applications. Appuyez sur la touche OK pour effectuer le réglage. Une fois le réglage terminé, appuyez sur la touche BACK pour retourner au menu précédent. Préférences de l’appareil À...
- Page 31 FONCTIONNEMENT DE BASE Date et heure automatiques- Utilis cc d sous- Régler la date : u sous-me Régler l'heure : u sous-me Régler le fuseau horaire : Utilise cc d sous-me Choisir le format 24 heures : choisi Acti d s ct MINUTEUR : Minuteur de mise en marche : choisi Acti...
- Page 32 FONCTIONNEMENT DE BASE Clavier Clavier actuel : u sous-me u. Paramètres du clavier : cc e u sous-me u. Gestion des claviers : cc e u sous-me u. ENTRÉES Entrées : sous-me u. Contrôle HDMI : Utilisez les Activ s ctiv . u ez s choisi Activ ctiv...
- Page 33 FONCTIONNEMENT DE BASE Minuterie de veille : Utilisez les touches pour sélectionner une option, puis appuyez sur OK pour accéder au sous-menu. (En option : Désactivé, 10 minutes, 20 minutes, 30 minutes, 40 minutes, 50 minutes, 60 minutes, 90 minutes, 120 minutes). Image désactivée : Utilisez les touche pour sélectionner une option, puis appuyez sur OK pour éteindre le téléviseur.
- Page 34 FONCTIONNEMENT DE BASE Style de son : Utilisez les touches pour sélectionner une option, puis appuyez sur OK pour accéder au sous-menu. (En option : Personnalisé, Standard, Vif, Sport, Film, Musique, Actualités) Balance/Graves/Aigus : Appuyez sur pour diminuer la valeur du paramètre. Appuyez sur pour augmenter la valeur du paramètre.
- Page 35 FONCTIONNEMENT DE BASE STOCKAGE Stockage interne partagé : cc d sous-me u. Stockage amovible : cc de u sous-me u. (Rem : Affiche les eils exte es si dis o ibles) ÉCRAN D'ACCUEIL s ce me vous ouvez d fi i ch î es lic tio s et lice ces o e so ce.
- Page 36 FONCTIONNEMENT DE BASE GOOGLE Dans ce menu, vous pouvez définir des applications consultables, filtres de recherche sécurisée, blocage des expressions offensantes et licences open source. Appuyez sur la touche OK pour effectuer le réglage. Une fois le réglage terminé, appuyez sur la touche BACK pour retourner au menu précédent. CHROMECAST INTÉGRÉ...
- Page 37 FONCTIONNEMENT DE BASE EMPLACEMENT État de l’emplacement : acc de au sous-menu. (En option : Utilis le Wi- Utilisation et diagnosti po choisi Acti d sact ACCESSIBILITÉ Description audio : choisi Acti d sacti Malvoyants : sous-menu. Sous-titre parlé : Acti d sacti .
- Page 38 FONCTIONNEMENT DE BASE RÉINITIALISER Appuyez sur OK pour accéder au sous-menu Réinitialiser-effacer tout. TÉLÉCOMMANDE ET ACCESSOIRES Dans ce menu, vous pouvez coupler des appareils Bluetooth. Maintenez appuyées les touches « MENU » et « Gauche » situées en bas de la télécommande pendant 5 secondes.
- Page 39 FONCTIONNEMENT DE BASE LECTEUR MULTIMÉDIA Dans l’interface ACCUEIL, sélectionnez l’application MMP pour afficher Vidéo, Photo, Audio et Texte. Dès que vous insérez une clé USB, vous pouvez afficher les fichiers qu’elle contient. REMARQUE : Le menu peut être différent selon la date d’achat du téléviseur.
-
Page 40: Conditions De Garantie
CONDITIONS DE GARANTIE MODE DE PRISE EN CHARGE : Votre produit est garanti pendant 2 ans. Pour obtenir de l’aide, contactez le Service à la clientèle au 0811 382 272 Il vous sera alors demandé la pièce défectueuse et la facture d’origine attestant du règlement du produit. Nous pourrons être amenés à... -
Page 41: Règle Des Pixels
Déclaration de conformité UE : Market Maker Brand Licensing, déclare par la présente que cet équipement conforme aux exigences essentielles et aux autres dispositions pertinentes de la directive 2014/53/UE. La déclaration de conformité peut être consultée à l’adresse suivante : http://www.mms-support.net/OTA/ECD_ MMBL_ HY-TVS50UH-001.pdf... - Page 42 Sous licence de HYUNDAI Corporation Holdings, Corée...
- Page 43 USER MANUAL HY-TVS50UH-001 Licensed by HYUNDAI Corporation Holdings, Korea...
- Page 45 IMPORTANT INSTRUCTIONS SAFETY INFORMATION CAUTION RISK OF ELECTRIC SHOCK DO NOT OPEN CAUTION: TO REDUCE THE RISK OF ELECTRIC SHOCK. DO NOT REMOVE The lightning flash and The exclamation point within COVER (OR BACK). NO USER arrow head within the triangle the triangle is a warning sign SERVICEABLE PARTS INSIDE.
- Page 46 • Do not operate this product under the following conditions. - When the power-supply cord or plug is damaged. - If liquid has been spilled into or abjects have fallen into the product. - If the product has been exposed to rain or water.
- Page 47 BATTERY HANDLING AND USAGE: • CAUTION: Danger of explosion if battery is incorrectly replaced or not replaced by the same type or equivalent. • The battery should not be exposed to excessive heat such as sunshine, fire or similar. • Different types of batteries, new and used batteries should not be mixed. •...
- Page 48 Table of Contents Accessories ........................5 Introduction Features......................... 6 Basic Functions......................6 Specifications......................... 7-8 Stand and wall-mounting instructions (optional) ............9-10 General Description Overview of back panel ....................11 Overview of front panel....................12 Overview of remote control ..................... 13-15 Installing Batteries in the Remote Control ...............
-
Page 49: Accessories
Accessories Please make sure the following items are included with your LED TV. If any items are missing, contact your dealer. TV Set Remote Control Base Stand User Manual 4 Screws... -
Page 50: Introduction Features
Introduction Features TV adopts 50" TFT LED display screen Zero X radiation complies to green environment protection requirement Connect to computer directly to realize TV/monitor combo. USB 2.0 16:9 wide screen Auto tuning and fine tuning HDMI input Programmable sleep timer Wide range voltage input No-signal automatic power off Basic Functions... -
Page 51: Specifications
Introduction Specifications Reference HY-TVS50UH-001 Model No. MUDV50A0Y-68860 Model title 50" SMART TV LED NETFLIX Resolution 3840X2160 Color number 1.07GB Contrast 5000 :1 Ratio 16 :9 Tuner DVB-T/DVB-C/DVB-T2 TV rated voltage 100-240V~ 50/60Hz, 1.5 A Consumption 120W Dimensions 1121x231x707.8mm Weight Approx. 9.1Kg... - Page 52 HY-TVS50UH-001 MUDV50A0Y-68860 on mode power demand for standard dynamic Range(SDR) 86 kWh/1000h The Adopted Trademarks HDMI, HDMI High-Definition Multimedia Interface, and the HDMI Logo are trademarks or registered trademarks of HDMI Licensing Administrator, Inc. in the United States and other countries.
-
Page 53: Stand And Wall-Mounting Instructions (Optional)
Stand and wall-mounting instructions (optional) How to assemble the stand If you need to remove or assemble the stand please read the following instructions. -Before attaching/detaching the stand, make sure to turn off the TV. -Before performing work, spread cushioning over the base area to lay the LED TV on. This will prevent it from being damaged. - Page 54 Stand and wall-mounting instructions (optional) Wall mounting instructions Your LED TV is able to accommodate wall mounting with the use of a wall mount bracket (not supplied with LED TV, please contact your local hardware store) and the mounting holes on the back of the unit. We recommend removing the TV stand prior to wall mounting the TV.
-
Page 55: General Description Overview Of Back Panel
General Description Overview of back panel Overview of back panel Overview of back panel You can connect the TV with video devices such as DVD/VCD player, VCR and video camera to enjoy the high quality picture. Tarjeta CI RJ 45 OPTICAL HDMI4 HDMI3... -
Page 56: Overview Of Front Panel
General Description Overview of front panel The buttons on the lower-left panel control your TV’s basic features, including the on-screen menu. To use the more advanced features, you must use the remote control. Joystick The control panel on the back shell in the standby mode,press the middle button to turn on the TV . -
Page 57: Overview Of Remote Control
General Description Overview of Remote Control IN PUT Subtitles TEXT GUIDE ASPECT INFO Loading batteries: 1) Remove the lid of the battery compartment. 2) Insert 2 size AAA batteries with polarities as indicated inside the compartment. 3) Replace the lid. Note: 1) A loading of batteries should be last one year under normal use. - Page 58 General Description Overview of Remote Control 1. POWER: To set the TV to Standby or Power On modes INPUT 2. INPUT Open Input menu (TV, HDMI1, HDMI2, etc) Subtitles Press to open NETFLIX. TEXT GUIDE ASPECT Press to open the You Tube. 5.
- Page 59 General Description Overview of Remote Control ASPECT: Press to change the picture aspect ratio. INPUT ARROWS: Navigate on-screen menu, Subtitles RETURN: Return to previous menu TEXT GUIDE ASPECT Press to open the Home Page. en menu. : search VOL+/- : CH+/CH- : INFO NUMBER KEY:...
-
Page 60: Installing Batteries In The Remote Control
General Description Installing Batteries in the Remote Control Installing Batteries Open the battery compartment cover on the back side. Insert two 1.5V AAA size batteries in correct polarity. Don´t mix old or used batteries with new ones. Point the remote towards the remote control sensor of the TV and use it within 8 meters. -
Page 61: Connecting Dvd Player/Set-Top Box Via Hdmi
External Connection Connecting DVD Player/Set-Top Box via HDMI HDMI1(ARC) HEADPHONE HDMI Cable (Not supplied) -
Page 62: Connecting Digital Audio System
External Connection Connecting Digital Audio System The rear panel jacks on your TV make it easy to connect a Digital Audio System to your TV. TV Rear Panel Digital Audio System (Black) OPTICAL RJ 45 OPTICAL HDMI4 HDMI3 HDMI2 AV IN 5.1 CH audio is possible when the TV is connected to an external device supporting 5.1 CH. -
Page 63: Connecting Rj45 And Usb
External Connection Connecting RJ45 and USB RJ 45 OPTICAL HDMI4 HDMI3 HDMI2 AV IN USB interface is used to and other USB devices (such as mobile hard disk, U disk, etc.), direct broadcast audio and video files in USB devices.Turn it also has a memory function such as on a USB interface with the digital camera, another interface to connect mobile hard disk, you can easily move the photos from digital camera to hard disk. - Page 64 INITIAL SETUP The first you turn your TV,the setup wizard will guide you through setting up basic settings. Please according to the text tip to first time setup. Agree to Google to get the location information of your "YES" device to get more features,choose to accept.
- Page 65 Press to select whether to search,select "Scan" to search,select "Skip Scan" to skip the search. Confirm the password again and keep it consistent Use the remote control to enter the password and complete the password confirmation Press OK to complete the setup For selecting the mode press key to select...
- Page 66 HOME SCREEN NAVIGATING THE ON-SCREEN MENU There are two ways to enter First in Live TV,press Press the HOME button to go to the home page the menu button to display TV options,press ◀▶select the settings menu and press OK to confirm.Second,in the HOME interface,press the ▶key to select the icon of the circular settings menu,press OK to confirm.
- Page 67 CHANNEL Channel Scan directly enters the ATV+DTV automatic search platform interface of Antenna Update Scan automatically search for Channels :Display the scan sub menu based on frequency points outside the station different Channel installation modes Channel installation mode:Select on-screen display channel sources.You can select the signal type.
- Page 68 APPS Enter Channel Scan,where Numericable are the local operators,and the default Scan Mode is Advance;Others have Advance,Quick and Full Scan modes. In this menu,you can set the APP permissions,and read the app lists 1.Press button to select what you want set. 2.Press OK button to adjust.
- Page 69 TIMER: DATE&TIME Power On Timer Type:Press button to select the option then press OK button to choose ON/OFF/ONCE. Power On Timer :Press button to select the option then press OK button to enter the Automaticdate&time-Press button to select the option then press OK button to enter the sub-menu. sub-menu.
- Page 70 KEYBOARD Sleep Timer :Press button to select the option then press OK button to enter the sub-menu.(Optional: off, 10 minutes, 20 minutes, 30 minutes, 40 minutes, 50 minutes, 60 minutes, 90 minutes, 120 minutes). Picture off :Press button to select the option then press OK button to turn off the TV.
- Page 71 SOUND STORAGE Internal shared storage : Press button to select the option then press OK button to enter the sub-menu. Removeable Storage : Press button to select the option then press OK button to enter the sub-menu.(Note:Show external devices if available) HOME SCREEN Sound style: Press...
- Page 72 Start now: Press button to select the option GOOGLE then press OK button to enter screen saver. LOCATION In this menu, you can set searchable apps,safe search filter,block offensive words,open source licenses. Location status: Press button to select the Press button to select what you want set.
- Page 73 In this menu, you can pair Bluetooth devices. RESET 1.Press the “ MENU ” and “ LEFT ” buttons at Press OK button to enter the sub-menu Reset- Erase everything. the bottom of the remote control for 5 seconds. 2.When the LED starts to flash, release it.The remote controller will send the pairing signal to the TV and display the information of the remote control on the right side of the screen.
- Page 74 OPERATING MANAGEMENT: Your product is guaranteed 2 years. To request support, contact the customer service al 0811 382 272 You will then be asked the defective part and the original invoice stating the product regulation. We may ask you for photos of your appliance. FAILURE TO PACKING: If it appeared, after unpacking the product or device,...
- Page 75 Imported/distributed by MARKET MAKER GROUP S.A. HY-TVS50UH-001.pdf...