Table des Matières
Publicité
Les langues disponibles
Les langues disponibles
Liens rapides
Publicité
Chapitres
Table des Matières
Dépannage

Manuels Connexes pour Proline PMG20W/S


Sommaire des Matières pour Proline PMG20W/S
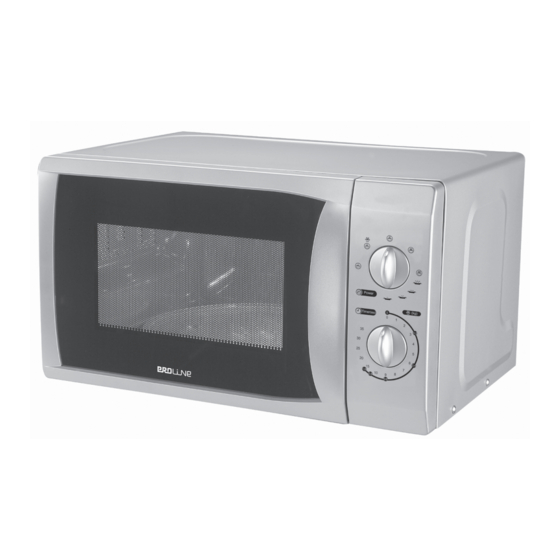
- Page 1 MICROWAVE OVEN MICRO-ONDES MICROWAVE OVEN MAGNETRONOVEN MICRO-ONDES MIKROVINNA MAGNETRONOVEN MICROONDE MIKROVINNA MICROONDE MODEL PMG20W/S Defrost Setting 5 Power Setting 35 Minute Setting Downloaded from www.vandenborre.be...
-
Page 2: Table Des Matières
Table of Contents PRECAUTIONS TO AVOID POSSIBLE EXPOSURE TO EXCESSIVE MICROWAVE ENERGY ................2 IMPORTANT SAFETY INSTRUCTIONS.................. 3 COOKING UTENSILS....................... OTHER HELPFUL INSTRUCTIONS ..................6 OVEN OVERVIEW ........................7 TURNTABLE INSTALLATION ....................7 COUNTERTOP INSTALLATION ....................8 MICROWAVE OVEN INSTALLATION ..................8 CONTROL PANEL........................ -
Page 3: Precautions To Avoid Possible Exposure
The oven cannot be operated with the door open due to the safety interlocks built in the door mechanism which switch off cooking functions when the door is opened. Operating the oven with the door open could result in harmful exposure to microwave energy. It is important not to tamper with the door mechanism. -
Page 4: Important Safety Instructions
READ CAREFULLY AND KEEP FOR FUTURE REFERENCE 1. Read all instructions before using in microwave ovens. (See the appliance and keep for future ‘COOKING UTENSILS’) reference. 10. Do not use wooden or cardboard 2. Use this appliance only for its containers. - Page 5 20. Do not overcook food. swimming pool. 21. Do not use the oven cavity for 28. The temperature of accessible storage purposes. Do not store surfaces may be high when the items, such as bread, cookies, appliance is operating. Keep etc.
-
Page 6: Cooking Utensils
Utensils should be checked to ensure that they are suitable for use in the microwave oven. The following charts summarise the proper use of cooking utensils in your oven. Materials you can use in microwave oven Utensils Remarks Shielding only. Small smooth pieces can be used to cover Aluminium foil thin parts of meat or poultry to prevent overcooking. -
Page 7: Other Helpful Instructions
Materials to be avoided in microwave oven Utensils Remarks Aluminium tray May cause arcing. Transfer food into microwave-safe dish. Food carton with May cause arcing. Transfer food into microwave-safe metal handle dish. Metal or metal- Metal shields the food from microwave energy. Metal trim trimmed utensils may cause arcing. -
Page 8: Oven Overview
NOTE: Air from the vent may become warm during cooking. Browning: There are a few foods which are not cooked long enough in the microwave oven to brown and may need additional colour. Coatings such as paprika and browning agents such as Worcestershire sauce may be used on chops, meat patties or chicken pieces. -
Page 9: Countertop Installation
Remove all packing material and Cabinet: Remove any protective film accessories. Examine the oven for found on the microwave oven any damage such as dents or broken cabinet surface. door. Do not install if the oven is Do not remove the light brown damaged. -
Page 10: Control Panel
1. Set the cooking power by turning the power knob to the desired level. 2. Set the cooking time by turning the timer knob to the desired time. 3. The microwave oven will automatically start cooking after the power level and cooking times are set. -
Page 11: Cleaning And Care
Function / Power Output Application 70% grill Chicken pieces, chicken breasts, Combi. 2 30% micro. pork chops 60% grill Whole chicken Combi. 3 40% micro. 100% grill Baked bread, slice food Grill Note: when removing food from the oven, please ensure that the oven is switched off by turning the timer knob to “0”. -
Page 12: Specifications
230V 50Hz 1300W (Microwave) Power Consumption: 1000W (Grill) Rated Microwave Power 800W Output: 433mm(L)×345mm(W)×258mm(H) Outside Dimensions: 20 Litres Oven Capacity: Turntable System Cooking Uniformity: Φ245mm Turntable Diameter: Approx. 10.5kg Net Weight: Specifications are subject to change without prior notice. Q. What is wrong when the oven light will not glow? A. -
Page 13: Troubleshooting
build up enough internal heat to allow the cooking process to continue, even after the food is removed from the oven. Standing time for joints of meat, large vegetables and cakes is to allow the inside to cook completely, without overcooking the outside. -
Page 14: Before You Call For Service
Trouble Possible Cause Remedy (1) Power cord not Unplug. Then plug in plugged in tightly. again after 10 seconds. (2) Fuse blowing or Replace fuse or reset circuit breaker works. circuit breaker Oven can not be (repaired by started. professional personnel of authorised agent) (3) Trouble with outlet. -
Page 15: Important Disposal Instructions
As a responsible retailer we care about the environment. As such we urge you to follow the correct disposal procedure for your product and packaging materials. This will help conserve natural resources and ensure that it is recycled in a manner that protects health and the environment. - Page 16 Sommaire PRÉCAUTIONS POUR ÉVITER UNE EXPOSITION EXCESSIVE AUX MICRO-ONDES .....................2 INSTRUCTIONS DE SÉCURITÉ IMPORTANTES ..............3 USTENSILES DE CUISSON .......................5 AUTRES INSTRUCTIONS UTILES .....................6 PRÉSENTATION DU FOUR ......................7 INSTALLATION DU PLATEAU TOURNANT................7 DÉBALLAGE ..........................8 INSTALLATION DU FOUR ......................8 ÉLÉMENTS DE COMMANDE ......................9 UTILISATION ..........................9 NETTOYAGE ET ENTRETIEN ....................10 SPÉCIFICATIONS ........................11...
-
Page 17: Précautions Pour Éviter Une Exposition Excessive Aux Micro-Ondes
P RÉCAUTIONS POUR ÉVITER UNE EXPOSITION E XCESSIVE AUX MICRO-ONDES Des verrous de sécurité ont été placés sur la porte afin d'empêcher le four de fonctionner lorsque la porte est ouverte, désactivant alors toutes les fonctions de cuisson. Cette sécurité est essentielle lorsqu'on sait que l'exposition aux micro-ondes peut être dangereuse pour le corps.Aussi, veillez à... -
Page 18: Instructions De Sécurité Importantes
INSTRUCTIONS DE SÉCURITÉ IMPORTANTES LISEZ ATTENTIVEMENT LES INSTRUCTIONS DE CE GUIDE ET CONSERVEZ-LES POUR RÉFÉRENCE ULTÉRIEURE. 1. Lisez toutes les instructions de ce 8. N’utilisez pas le four pour sécher des serviettes ou autres produits en guide d'avant d'utiliser votre four pour la première fois et conservez papier. - Page 19 25. Nettoyez régulièrement votre four 19. Si de la fumée s'échappe du four, et retirez tous les restes d'aliment éteignez- le ou débranchez-le de la qui se sont déposés. prise secteur et laissez la porte du 26. Ne rangez pas ni n'utilisez votre four fermée afin d’étouffer les flammes, le cas échéant.
-
Page 20: Ustensiles De Cuisson
USTENSILES DE CUISSON N'employez que des ustensiles dont la notice mentionne explicitement qu'ils conviennent pour la cuisson dans un four à micro-ondes. Le tableau ci-dessous rapporte quelques recommandations pour chaque ustensile que vous pouvez être à même d'utiliser avec votre four à micro-ondes. Matériaux utilisables dans votre four à... -
Page 21: Autres Instructions Utiles
Matériaux à ne pas utiliser dans un four à micro-ondes Ustensile Recommandations Plateau en Risque de provoquer un effet d'arc électrique. Transférez aluminium l'aliment dans un plat insensible aux micro-ondes. Carton alimentaire avec une poignée Risque de provoquer un effet d'arc électrique. Transférez l'aliment dans un plat insensible aux micro-ondes. -
Page 22: Présentation Du Four
REMARQUE : L’air sortant des ouvertures d’aération peut devenir chaud durant la cuisson. Brunissement : Certains aliments ne restent pas suffisamment longtemps dans le four à micro- ondes pour brunir,aussi un élément colorant pourra être nécessaire. Pour des côtelettes, des boulettes de viande et des morceaux de poulet, utilisez du paprika ou une sauce Worcestershire. -
Page 23: Déballage
DÉBALLAGE Enlevez tous les matériaux Intérieur du four : enlevez tout film d’emballage et les accessoires. protecteur situé sur les surfaces Vérifiez que le four n'est pas intérieures du four. endommagé (chocs, porte cassée, Laissez en place le revêtement etc.). N'utilisez jamais votre four s'il marron de mica fixé... -
Page 24: Utilisation
PANNEAU DE COMMANDE UTILISATION 1. Tournez le sélecteur de température sur la position appropriée à l'aliment que vous voulez cuire ou réchauffer. 2. Tournez la minuterie sur la durée de cuisson ou de réchauffement requise. 3. Le processus de cuisson ou de réchauffement commence immédiatement. 4. -
Page 25: Nettoyage Et Entretien
Sélecteur de température Puissance Application 70% grill Morceaux de poulet, blancs de Combi. 2 poulet, côtelettes de porc 30% micro. 60% grill Poulet entier Combi. 3 40% micro. 100% grill Pain cuit au four, nourriture en Grill tranche Remarque: ramenez le sélecteur de température sur la position "0" avant de retirer un aliment du four. -
Page 26: Spécifications
Spécifications 230V 50Hz Consommation d’énergie : 1300 W (four) 1000W (Grill) Puissance en sortie mesurée 800W Output: Dimensions extérieures : 433mm(L)×345mm(W)×258mm(H) Capacité du four : 20 litres Cuisson uniforme : Plateau tournant Diamètre du plateau : Φ245mm Poids net : Approx. -
Page 27: Dépannage
sont les aliments qui accumulent alors suffisamment de chaleur en eux pour que le processus de cuisson se continue même après que ces aliments ont été retirés du four. Pour des gros morceaux de viande, des gros légumes et des gâteaux, le temps d'attente permet de terminer la cuisson à l’intérieur de ces aliments sans trop cuire l’extérieur. -
Page 28: Avant D'amener Votre Four À Réparer
Causes possibles Symptôme Action (1) Vous n'avez pas branché Débranchez le cordon correctement le cordon d'alimentation. Attendez d'alimentation dans la 10 secondes et rebranchez- prise secteur. (2) Le fusible a sauté ou Remplacez le fusible ou le disjoncteur s'est réactivez le disjoncteur Le four ne s'allume pas. -
Page 29: Importantes Instructions De Mise Au Rebut
IMPORTANTES INSTRUCTIONS DE MISE AU REBUT En tant que revendeur, nous nous préoccupons de l'environnement. Aidez-nous en observant toutes les instructions et règlementations de mise au rebut de vos appareils, piles et emballages. Nous devons tous oeuvrer pour la protection des ressources naturelles et la conservation de notre environnement.