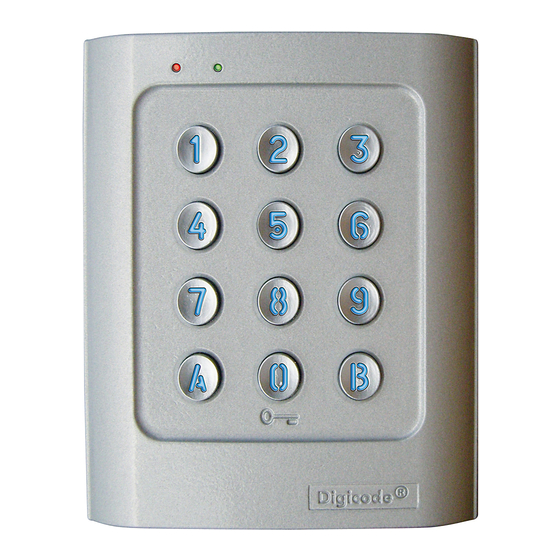
Sommaire des Matières pour CDVI DGA
- Page 1 Self Contained Digicode Keypad ® ® Digicode avec électronique intégrée Range: Digicode Gamme: Digicode ® ® INSTALLATION MANUAL MANUEL D’INSTALLATION Group Company...
- Page 2 Its design and its high resistance to vandalism make it suitable to secure residential as well as industrial sites. Its compatibility with all CDVI locking devices gives you the flexibility to set your own personalized system while keeping a high security level.
-
Page 3: Audible Signal
- the red LED lights on to confirm entry in programming mode 2] Press A4 to program the code length: - the green LED lights on during 1 second, - press 4, 5 or 6 to enter the code length, cdvi.com cdvigroup.com... - Page 4 - If the user number is already programmed, the red LED flashes 4 times, - To modify the user code enter a 4, 5 or 6 digit code, - To cancel the user code enter 000000 or 00000 or 0000 code, cdvi.com cdvigroup.com...
- Page 5 SETTING ILLUMINATION AND OUTPUT TIME 1] Enter the master code twice (12345 default value master code): - the red LED lights on to confirm entry in programming mode 2] Press A0 to program the key-in keypad time and the illumination time: cdvi.com cdvigroup.com...
- Page 6 This feature makes it easier and faster to change its code 1] Enter the master code twice (12345 default master code): - the red LED lights on to confirm entry in programming. cdvi.com cdvigroup.com...
- Page 7 - Press 0 to disable the audible signal during a keypress, - Press 1 to enable the audible signal during a keypress, - One beep confirms the modification. 3] Press B to exit from programming: - 2 beeps are emitted to confirm exit from programming mode. cdvi.com cdvigroup.com...
-
Page 8: Wiring Diagram
– back emf. Dark Green Relay 1 request-to-exit input Light Green H Timer input Blue User code modification Dark Blue Relay 2 N/C contact Purple Relais 2 common Gray Relay 2 N/O contact White Reset cdvi.com cdvigroup.com... -
Page 9: Mounting Kit
Once you have made sure that the mounting kit is complete and that you prepared the cables of the DGA keypad then you can proceed and mount the product. Make sure that you have all the appropriate tools (drill, screw drivers and a meter tape...) and follow the mounting instructions of the DGA keypad. -
Page 10: Presentation Du Produit
(équipés ou non d’un automatisme). Son design et sa haute résistance au vandalisme prédispose le DGA à sécuriser les accès des environnements industriels et résidentiels. Compatible avec l’ensemble des solutions de verrouillage CDVI, il pourra s’adapter à... -
Page 11: Commande Par Bouton Poussoir
- attendre quelques secondes, un bip est émis, - la led verte s’éteint, - séparez les fils. 3] Le code maître est de nouveau 12345 et tous les codes sont effacés: - les valeurs par défaut sont rétablies. cdvi.com cdvigroup.com... -
Page 12: Programmation Du Nombre De Termes
1] Tapez 2 fois le code maître ( pour la première utilisation, le code maître usine est 12345 ) : - la led rouge s’allume pour confirmer l’entrée en programmation. - Pour programmer des codes : CODE MAîTRE CODE MAîTRE LED ROUGE ACTIVéE cdvi.com cdvigroup.com... - Page 13 Les codes 000000 ou 00000 ou 0000 servent à annuler un code existant et ne peuvent donc pas servir comme code d’ouverture de porte. 3] Tapez B pour sortir de la programmation, la led rouge s’éteint pour confirmer le retour au mode normal de fonctionnement. CODES DE COMMANDE D’OUVERTURE cdvi.com cdvigroup.com...
-
Page 14: Programmation Des Temporisations
- La led rouge s’allume pour autoriser le changement. 3] Composez le nouveau code d’ouverture : - la led verte s’allume 1 seconde, confirmant la validation du nouveau code et le retour à un fonctionnement normal, - la led rouge s’éteint, cdvi.com cdvigroup.com... -
Page 15: Programmation Des Termes De Modifications
3] Tapez B pour sortir de la programmation : - deux bips sont émis pour confirmer le retour au mode normal de fonctionnement. - deux bips sont émis pour confirmer le retour au mode normal de fonctionnement. - deux bips sont émis pour confirmer cdvi.com cdvigroup.com... -
Page 16: Digicode ® Avec Électronique Intégrée
– effet de self. Vert clair Horloge H Bleu Changement de code utilisateur Bleu foncé Contact repos du relais 2 Violet Commun du relais 2 Gris Contact travail du relais 2 Blanc Remise à zéro cdvi.com cdvigroup.com... -
Page 17: Kit De Montage
Réunissez le matériel approprié (Perçeuse, tournevis, mètre,...) et suivez les recommandations de montage du DGA. (X2) Digicode (X2) A l’aide du DGA, prenez les marques Positionnez les 2 chevilles plastiques Bloquez le DGA sur son support ® ®... - Page 18 INSTALLATION MANUAL Digicode avec électronique intégrée ® NOTES ..........................................................................................................................................................................................................................................................................................................................................................................................................................................................................................................................................................................................................................................................................................................................................................................................................................................................................................................................................................................................................................................................................................................................cdvi.com cdvigroup.com...
- Page 19 INSTALLATION MANUAL Digicode avec électronique intégrée ® ..............................................................................................................................................................................................................................................................................................................................................................................................................................................................................................................................................................................................................................................................................................................................................................................................................................................................................................................................................................................................................................................................................................................................................................................................................cdvi.com cdvigroup.com...
- Page 20 Reference : G0301FR0293V01 Extranet : EXE-CDVI_IM DGA CMYK A5 FR-EN 01 Manufacturing Access Control since 1985 CDVI CDVI CDVI CDVI (Headquarters/Siège social) FRANCE SWITZERLAND ITALIA Phone: +33 (0)1 48 91 01 02 Phone: +41 (0)21 882 18 41 Phone: +39 0331 97 38 08...


