Table des Matières
Publicité
Les langues disponibles
Les langues disponibles
Liens rapides
Publicité
Table des Matières

Manuels Connexes pour Cameo ZENIT W300


Sommaire des Matières pour Cameo ZENIT W300
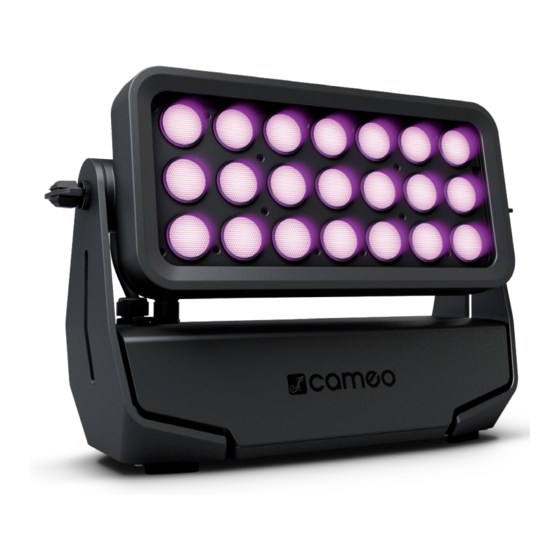
- Page 1 USER´S MANUAL BEDIENUNGSANLEITUNG MANUEL D`UTILISATION MANUAL DE USUARIO INSTRUKCJA OBSŁUGI MANUALE D‘ USO MULTIPLE ANGLES SNAPMAG ® TECHNOLOGY iDMX ® CONTROL ZENIT W300 ® LED OUTDOOR WASHLIGHT CLZW300...
-
Page 2: Table Des Matières
CONTENTS / INHALTSVERZEICHNIS / CONTENU / CONTENIDO / TREŚĆ / CONTENUTO ENGLISH ESPAÑOL PREVENTIVE MEASURES MEDIDAS DE SEGURIDAD INTRODUCTION INTRODUCCIÓN CONNECTIONS, OPERATING AND DISPLAY ELEMENTS CONEXIONES, ELEMENTOS DE MANEJO Y ELEMENTOS OPERATION DE VISUALIZACIÓN IR REMOTE CONTROL FUNCIONAMIENTO INSTALLATION MANDO A DISTANCIA POR IR OPTIONAL ACCESSORIES INSTALACIÓN Y MONTAJE DMX TECHNOLOGY... -
Page 3: English
We have designed this product to operate reliably over many years. Please read this User‘s Manual carefully, so that you can begin making optimum use of your Cameo Light product quickly. Learn more about Cameo Light on our website WWW.CAMEOLIGHT.COM. -
Page 4: Introduction
to the power IN connection of an additional device. Make sure that the total current consumption of all connected devices does not exceed the specified value on all connected devices (label on the device). Make sure to keep power cable connections as short as possible. CAUTION: To reduce the risk of electric shock, do not remove cover (or back). -
Page 5: Connections, Operating And Display Elements
POWER OUT IP65 power output socket with rubber sealing cap. Facilitates power supply to other CAMEO lights. Ensure that the total current consumption of all connected devices does not exceed the value specified on the device in amperes (A) (when not in use, always close with the rubber sealing cap). -
Page 6: Operation
PLEASE NOTE • As soon as the spotlight is correctly is connected to the power supply, the following will be displayed in succession: “Welcome to Cameo”, the model name and the software version. After this process, the lamp is ready for operation and starts in the previously enabled mode. -
Page 7: W-Dmx™ Status
W-DMX™ STATUS W-DMX™ W-DMX™ W-DMX™ W-DMX W-DMX™ W-DMX™ and W-DMX™ and deactivated activated as activated as activated and activated as transmission transmission receiver, receiver and is coupled to receiver and mode G3 is mode G4S is not paired is coupled to device, is coupled to enabled... -
Page 8: Auto Program
AUTO MODE (programme 1 - programme 6) The 6 different auto-programmes each comprise non-editable color-change sequences. Brightness and speed are independently adjustable. Select auto mode as per the procedure previously described in SETTING STAND ALONE MODE and confirm with ENTER. Using the UP and DOWN controls, now select one of the 6 auto-programmes (observe arrow) and confirm with ENTER. - Page 9 Color TEMPERATURE (Tunable White) The color temperature mode enables you to configure the color temperature from cold white to warm white (CTC) and the brightness (Dim) of the light directly on the device. Select the color temperature mode as per the procedure previously described in SETTING STAND ALONE MODE and confirm with ENTER.
- Page 10 SLAVE MODE CONFIGURATION Press MODE to access the selection menu. Using the UP and DOWN controls, select the menu item “Slave” (observe arrow) and confirm with ENTER. Connect the slave and the master units (same model) with a DMX cable and enable one of the standalone modes on the master unit (Auto, Color Macro, Static, Tunable White, User Color).
- Page 11 Dimmer Response Dimmer sensitivity Lamp responds abruptly to changes in DMX value Halogen Lamp behaves like a halogen spotlight with soft bright- ness changes Color Calibration Color calibration individual color calibration. Brightness adjustment of 4 (If one of the DMX factory RGBW LED groups for all modes in the range 000-255 calibration modes is activated, no other calibration can be...
-
Page 12: Ir Remote Control
System Info Firmware Displays device firmware Main CPU Vx.xx LED driver Vx.xx Temperature Displays temperature of LED unit xx°C / xx°F Unit °C (= display in degrees Celsius) °F (= display in degrees Fahrenheit) Operation Hours Displays operating time xx:xx h Displays total operating time in hours and minutes MANUAL LOCKING FUNCTION In addition to the ability to protect the lamp automatically from accidental and unauthorised operation (see "Settings"... -
Page 13: Installation
INSTALLATION AND MOUNTING Thanks to its integrated plastic feet, the lamp can be positioned in a suitable location on a level surface. on a traverse is carried out with an Omega bracket, mounted in the centre of the base of the device (A). A Omega bracket is included. Suitable beam clamps are available as an option. -
Page 14: Dmx Technology
CLZW300B200SMLSD6010 60° x 10° diffuser Tool-free installation via SNAPMAG technology ® DMX TECHNOLOGY DMX-512 DMX (Digital Multiplex) is the designation for a universal transmission protocol for communications between corresponding devices and controllers. A DMX controller sends DMX data to the connected DMX device(s). The DMX data is always transmitted as a serial data stream that is forwarded from one connected device to the next via the "DMX IN"... -
Page 15: Technical Data
DMX CABLES When fabricating your own cables, always observe the illustrations on this page. Never connect the shielding of the cable to the ground contact of the plug, and always make certain that the shielding does not come into contact with the housing of the XLR plug. If the shielding is connected to the ground, this can lead to short-circuiting and system malfunctions. -
Page 16: Manufacturer's Declarations
System settings: W-DMX settings, display rotate 180°, display lighting, DMX fail, dimmer curves, dimmer sensitivity, color calibration, display lock Function, LED PWM frequency, IR remote control, fan control factory reset Control: DMX512, W-DMX™, IR remote control, RDM-enabled Operating controls: Mode, enter, up, down Display elements: OLED display Operating voltage:... - Page 17 NOTE: This equipment has been tested and found to comply with the limits for a Class B digital device, pursuant to Part 15 of the FCC Rules. These limits are designed to provide reasonable protection against harmful interference in a residential installation. This equipment generates, uses and can radiate radio frequency energy and, if not installed and used in accordance with the instructions, may cause harmful interference to radio communications.
-
Page 18: Deutsch
Dieses Gerät wurde unter hohen Qualitätsanforderungen entwickelt und gefertigt, um viele Jahre einen reibungslosen Betrieb zu gewähr- leisten. Bitte lesen Sie diese Bedienungsanleitung sorgfältig, damit Sie Ihr neues Produkt von Cameo Light schnell und optimal einsetzen können. Weitere Informationen über Cameo Light erhalten Sie auf unserer Website WWW.CAMEOLIGHT.COM. -
Page 19: Einführung
36. Der Abstand zu brennbaren Materialien muss mindestens 0,5 m betragen. 37. Netzleitungen zur Spannungsversorgung mehrerer Geräte müssen mindestens 1,5 mm² Aderquerschnitt aufweisen. In der EU müssen die Leitungen H05VV-F, oder gleichartig, entsprechen. Geeignete Leitungen werden von Adam Hall angeboten. Mit diesen Leitungen können Sie mehrere Geräte über den Power out Anschluss mit dem Power IN Anschluss eines weiteren Gerätes verbinden. -
Page 20: Anschlüsse, Bedien- Und Anzeigeelemente
Netzkabels (bei Nichtgebrauch stets mit der Gummidichtkappe verschließen). POWER OUT IP65 Netzausgangsbuchse mit Gummidichtkappe. Dient der Netzversorgung weiterer CAMEO Scheinwerfer. Achten Sie darauf, dass die gesamte Stromaufnahme aller angeschlossenen Geräte den auf dem Gerät in Ampere (A) angegebenen Wert nicht überschreitet (bei Nichtgebrauch stets mit der Gummidichtkappe verschließen). -
Page 21: Bedienung
• Sobald der Scheinwerfer korrekt am Stromnetz angeschlossen ist, werden während des Startvorgangs nacheinander, „Welcome to Cameo“, die Modellbezeichnung und die Software Version im Display angezeigt. Nach diesem Vorgang ist der Scheinwerfer betriebsbereit und startet in der Betriebsart, die zuvor aktiviert war. -
Page 22: System Info
W-DMX™ STATUS W-DMX™ W-DMX™ W-DMX™ als W-DMX W-DMX™ als W-DMX™ W-DMX™ deaktiviert als receiver receiver aktiviert aktiviert und reveicer aktiviert und Übertra- und Übertra- aktiviert, und Gerät Gerät gekoppelt, und Gerät gungs-Modus gungs-Modus nicht gekoppelt gekoppelt, kein DMX-Signal gekoppelt, G3 aktiviert G4S aktiviert Transmitter DMX-Signal... - Page 23 STAND-ALONE-BETRIEBSART EINSTELLEN Durch Drücken auf MODE gelangen Sie in das Auswahl-Menu. Mit Hilfe der Bedienfelder UP und DOWN wählen Sie nun den Menu-Punkt „Stand Alone“ aus (Pfeil beachten) und bestätigen mit ENTER. Im Untermenü können Sie nun unter den Stand-Alone-Betriebsarten „Auto“, „Color Macro“, „Static“, „Tunable White“, und „User Color“...
- Page 24 STATISCHER MODUS (Static) Der Statische Modus ermöglicht es, ähnlich wie mit einem DMX-Steuergerät, Dimmer, Stroboskop (Strobe), R, G, B und W direkt am Gerät mit Werten von 000 bis 255 einzustellen. Somit kann eine individuelle Szene erstellt werden, ohne einen zusätzlichen DMX-Controller zu be- nötigen.
- Page 25 TIMER-FUNKTION (Timer) Die Timer-Funktion ermöglicht die zeitgesteuerte Kontrolle der Stand-Alone-Betriebsarten „Color Macro“, „Static“, „Tunable White“, und „User Color“ in der Art, dass die Einblendzeit (Fade In) von 0 bis 60 Minuten, die Haltezeit (Dwell Time) von 1 bis 24 Stunden und die Aus- blendzeit (Fade Out) von 0 bis 60 Minuten eingestellt werden kann.
- Page 26 Settings Wireless Setting W-DMX Einstellungen W-DMX On/Off On = W-DMX aktiviert (Wireless-DMX) Off = W-DMX deaktiviert Operating Mode Receive = W-DMX-Modul als Empfänger Transmit = W-DMX-Modul als Sender Transmitting Mode G3 = G3 Sendestandard G4S = G4S Sendestandard Link Link = mit W-DMX-Geräten koppeln. W-DMX muss bei allen Geräten aktiviert und die Kopplung mit einem Transmitter aufgehoben sein (Receive Reset).
-
Page 27: Dmx Mode
Lüftersteuerung Auto Automatische Regelung der Lüfterleistung anpassen Max Intensity Maximale Lüfterleistung für maximale Helligkeit Low Noise deaktivierte Lüfter bei reduzierter Helligkeit Factory Reset Zurücksetzen auf Werk- Reset Now! Zurücksetzen auf Werkseinstellungen: seinstellungen bestätigen mit ENTER, abbrechen mit MODE Dimmerkurven linear exponentiell logarithmisch S-Kurve... -
Page 28: Ir Fernbedienung
IR FERNBEDIENUNG Richten Sie die Infrarot-Fernbedienung in Sichtverbindung direkt auf den auf der Vorderseite des Strahlers verbauten Infrarot-Sensor. Die maximale Reichweite beträgt ca. 8 Meter. In der DMX- und der Slave-Betriebsart sind die Funktionen der Fernbedienung deaktiviert. Batterie für die IR Fernbedienung = CR2025. -
Page 29: Aufstellung Und Montage
AUFSTELLUNG UND MONTAGE Dank der integrierten Kunststofffüße kann der Scheinwerfer an einer geeigneten Stelle auf eine ebene Fläche gestellt werden. Die Montage an einer Traverse erfolgt mit Hilfe eines Omega-Bügels, der in der Mitte der Gerätebasis befestigt wird (A). Ein Omega-Bügel ist im Liefer- umfang enthalten, geeignete Traversenklemmen sind optional erhältlich. -
Page 30: Dmx Technik
CLZW300B200SMLSD6010 60° x 10° Streuscheibe Werkzeuglose Montage durch SNAPMAG Technologie ® DMX TECHNIK DMX-512 DMX (Digital Multiplex) ist die Bezeichnung für ein universelles Übertragungsprotokoll für die Kommunikation zwischen entsprechenden Geräten und Controllern. Ein DMX-Controller sendet DMX-Daten an das/die angeschlossene(n) DMX-Gerät(e). Die DMX-Datenübertragung erfolgt stets als serieller Datenstrom, der über die an jedem DMX-fähigen Gerät vorhandenen DMX IN- und DMX OUT-Anschlüsse (XLR-Steckverbinder) von einem angeschlossenen Gerät an das nächste weitergeleitet wird, wobei die maximale Anzahl der Geräte 32 nicht... -
Page 31: Technische Daten
Steckerbelegung: DMX-Kabel mit 3-Pol XLR-Steckern: DMX-Kabel mit 5-Pol XLR-Steckern (Pin 4 und 5 sind nicht belegt.): Shield Shield DMX-ABSCHLUSSSTECKER (TERMINATOR): Um Systemfehler zu vermeiden, ist das letzte Gerät einer DMX-Kette mit einem Abschlusswiderstand zu bestücken (120 Ohm, 1/4 Watt). 3-Pol XLR-Stecker mit Abschlusswiderstand: K3DMXT3 5-Pol XLR-Stecker mit Abschlusswiderstand: K3DMXT5 Steckerbelegung: 3-Pol XLR-Stecker:... -
Page 32: Herstellererklärungen
Bedienelemente: Mode, Enter, Up, Down Anzeigeelemente: OLED-Display Betriebsspannung: 100 - 240V AC / 50 - 60Hz Leistungsaufnahme: 300W Beleuchtungsstärke (@ 48000lx 1m, ohne Streuscheibe): Lichtstrom (RGBW): 10660lm Stromversorgungsan- Ein- und Ausgang, Spezial-Buchsen IP65 (Ausgang max. 8A) schluss: Umgebungstemperatur -15°C - +45°C (in Betrieb): Gehäusematerial: Metall... -
Page 33: Francais
Cet appareil a été développé et fabriqué en appliquant des exigences de qualité très élevées: il garantit des années de fonctionnement sans problème.Veuillez lire attentivement ce Manuel Utilisateur : vous apprendrez rapidement à utiliser votre appareil Cameo Light de façon optimale. -
Page 34: Introduction
34. L‘appareil ne doit pas être alimenté lors de son installation (cordon secteur non relié à la prise murale). 35. Poussière et autres dépôts à l‘intérieur de l‘appareil sont susceptibles de l‘endommager. Si les conditions environnementales sont difficiles (présence de poussière, de nicotine, de gouttelettes d‘eau...), il est recommandé de le confier à un personnel spécialisé pour entretien et nettoyage (non pris en charge par la garantie), afin d‘éviter toute surchauffe et défaillance. -
Page 35: Caractéristiques
POWER OUT Prise de sortie d’alimentation IP65 avec cache en caoutchouc. Permet d’alimenter d’autres projecteurs CAMEO. S’assurer que la consommation totale de tous les appareils connectés ne dépasse pas la valeur en ampères (A) indiquée sur l’appareil (mettre systématiquement le cache étanche en caoutchouc si raccord non utilisé). -
Page 36: Dispositif De Compensation De Pression
REMARQUES • Dès que le projecteur est correctement raccordé au secteur, un message de bienvenue (« Welcome to Cameo »), la désignation du modèle et la version du logiciel s’affichent successivement à l’écran pendant la phase de démarrage. À l’issue de cette phase, le projecteur est opérationnel et passe au mode précédemment activé. -
Page 37: System Info
sélectionner « Transmit » (envoyer) dans les paramètres (Settings -> Wireless Setting -> Operating Mode -> Transmit). Dans les paramètres des appareils W-DMX™ devant être pilotés par W-DMX™, sélectionner « Receive » (Recevoir) (Settings -> Wireless Setting -> Operating Mode -> Receive) et lancer la connexion en sélectionnant « Link » dans les paramètres du CLZW300 piloté via un câble DMX, puis en validant (Settings ->... - Page 38 RÉGLAGE DU MODE DE FONCTIONNEMENT STANDALONE Appuyer sur MODE pour accéder au menu de sélection. Utiliser ensuite les touches UP et DOWN pour sélectionner l’option de menu « Stand Alone » (voir flèche), puis confirmer en appuyant sur ENTER. Ce sous-menu permet de sélectionner les modes de fonctionnement Standalone « Auto », «...
- Page 39 MODE STATIQUE (Static) De façon similaire à un dispositif de commande DMX, le mode statique permet de régler le variateur (Dimmer), le stroboscope (Strobe) et les valeurs R, G, B et W directement sur l’appareil, avec des valeurs comprises entre 000 et 255. Il est ainsi possible de créer une scène personnalisée sans avoir à...
-
Page 40: Réglage Du Mode De Fonctionnement Slave
FONCTION TIMER (Temporisation) La fonction de temporisation permet le contrôle temporisé des modes de fonctionnement Standalone (autonomes) « Color Macro », « Static », « Tunable White », et « User Color » de sorte que le temps d’affichage en fondu (Fade In) soit réglable de 0 à 60 minutes, la durée de temporisation (Dwell Time) de 1 à... - Page 41 Settings Wireless Setting Paramètres W-DMX W-DMX On/Off On = W-DMX activé (DMX sans fil) Off = W-DMX désactivé Operating Mode Receive = Module W-DMX en tant que récepteur Transmit = Module W-DMX en tant qu’émetteur Transmitting Mode G3 = Norme d’envoi G3 G4S = Norme d’envoi G4S Link Link = Connecter aux appareils W-DMX.
-
Page 42: Dmx Mode
LED Frequency Fréquence du signal PWM 800Hz / 1200Hz / Réglage de la fréquence du signal PWM des LED des LED 2000Hz / 3600Hz / 12kHz / 25kHz IR Remote Activer ou désactiver le Pilotage par télécommande infrarouge activé pilotage par la télécommande Pilotage par télécommande infrarouge désactivé... -
Page 43: Télécommande Infrarouge
TÉLÉCOMMANDE INFRAROUGE Diriger la télécommande infrarouge en contact visuel direct vers le capteur infrarouge situé sur la face avant du projecteur. Sa portée maximale est d’environ 8 mètres. En mode DMX et Slave, les fonctions de pilotage par télécommande infrarouge sont désactivées. Pile de la télécommande infrarouge = CR2025. -
Page 44: Installation Et Montage
INSTALLATION ET MONTAGE Grâce aux pieds en plastique intégrés, le projecteur peut être placé à un endroit approprié sur une surface plane. Le montage sur traverse s’effectue à l’aide d’un oméga de fixation à installer au milieu de la base de l’appareil (A). Un oméga de fixation est inclus dans la livraison, des pinces de serrage sur traverse adaptées sont disponibles en option. -
Page 45: Technique Dmx
CLZW300B200SMLSD6010 Diffuseur 60° x 10° Montage sans outil grâce à la technologie SNAPMAG ® TECHNIQUE DMX DMX-512 Le terme DMX (Digital Multiplex) désigne un protocole de transport universel permettant la communication entre des appareils et des contrôleurs à ce format. Un contrôleur DMX envoie des données DMX aux appareils DMX qui lui sont connectés. -
Page 46: Assignation Des Contacts
Shield Shield Pour éviter tout dysfonctionnement, le dernier appareil d'une chaîne DMX doit être équipé d'une résistance de terminaison (120 Ohms, 1/4 Watt). Connecteur XLR 3 points avec résistance de terminaison : K3DMXT3 Connecteur XLR 5 points avec résistance de terminaison : K3DMXT5 Assignation des contacts Connecteur XLR 3 points Connecteur XLR 5 points... -
Page 47: Garantie Fabricant & Limitation De Responsabilité
Éléments d’affichage : Écran OLED Tension de fonctionnement : 100 - 240 V CA / 50 - 60 Hz Puissance absorbée : 300 W Éclairement lumineux (à 1 m 48000 lx sans diffuseur) : Flux lumineux (RGBW) : 10660 lm Connecteurs d’alimentation : Entrée et sortie, prises spéciales IP65 (sortie max. 8 A) Température ambiante (en -15 °C - +45 °C fonctionnement) :... -
Page 48: Español
Este equipo está diseñado y fabricado con los estándares de calidad más exigentes, para garantizar un correcto funcionamiento durante muchos años.Lea atentamente este manual de usuario para poder aprovechar rápidamente toda la funcionalidad de su nuevo producto de Cameo Light. Más información sobre Cameo Light en la web WWW.CAMEOLIGHT.COM. MEDIDAS DE SEGURIDAD 1. -
Page 49: Introducción
34. Al montar el equipo, asegúrese de que no está alimentado eléctricamente (el enchufe no debe estar conectado a la red eléctrica). 35. La acumulación de polvo y otras partículas en el interior del equipo puede causar daños. Dependiendo de las condiciones ambientales (polvo, nicotina, niebla, etc.), deberá... -
Page 50: Conexiones, Elementos De Manejo Y Elementos De Visualización
POWER OUT Toma de salida de alimentación IP65 con tapa de sellado de goma. Sirve para suministrar corriente eléctrica a otros focos Cameo. Asegúrese de que el consumo de corriente total de todos los dispositivos conectados no supere el valor indicado en amperios (A) sobre el dispositivo (mientras no se vaya a usar, guardarlo siempre cerrado con la tapa de sellado de goma). -
Page 51: Funcionamiento
• En cuanto el foco esté correctamente conectado a la red eléctrica, durante el proceso de arranque se mostrarán de forma consecutiva en pantalla el mensaje «Welcome to Cameo» (Bienvenidos a Cameo), así como la denominación de modelo y la versión del software. -
Page 52: Estado W-Dmx
3. Además, mediante W-DMX™ es posible formar un grupo interconectado de equipos W-DMX™ y utilizarlos en modo maestro/esclavo. Para ello, desacople primero todos los equipos que formarán el grupo (Settings -> Wireless Setting -> Receive Reset). Ahora, en los ajustes (Settings -> Wi- reless Setting ->... - Page 53 CONFIGURAR EL MODO OPERATIVO AUTÓNOMO Pulsando MODE accederá al menú de selección. Ahora, utilice los botones UP y DOWN para seleccionar la opción de menú «Stand Alone» (indicada por la flecha) y confirme la selección con ENTER. A continuación, en el submenú seleccione con los botones UP y DOWN el modo operativo autónomo: «Auto», «Color Macro», «Static», «Tunable White»...
- Page 54 MODO ESTÁTICO (Static) De forma similar a la configuración con un equipo de control DMX, ajuste en el modo Estático las funciones Dimmer, Estrobo (Strobe), R, G, B y W directamente en el dispositivo, seleccionando valores entre 000 y 255. De esa forma, se podrá crear un escenario personalizado sin necesidad de un equipo de control DMX adicional.
- Page 55 «Fade In», «Dwell Time» o «Fade Out» (indicados por la flecha) y confirme con ENTER. En la pantalla se mostrará un campo numérico de tres cifras y podrá configurar el valor deseado entre 000 y 060 o entre 001 y 024 mediante los botones UP y DOWN. Vuelva a confirmar con ENTER. Una vez hechos los ajustes deseados, active la función de temporizador seleccionando la opción de submenú...
- Page 56 Display Backlight Retroiluminación de la Permanentemente activada pantalla Desactivación tras aproximadamente 1 minuto sin actividad DMX Fail Estado operativo en caso Hold Se mantendrá el último comando de interrupción de la Blackout Activa el apagón señal DMX Full On Todos los LED funcionan con un 100 % de potencia Stand Alone El foco cambia al último modo autónomo seleccionado.
-
Page 57: Dmx Mode
Curvas de atenuación lineal exponencial logarítmica Curva en S Valor DMX Valor DMX Valor DMX Valor DMX INFORMACIÓN DEL SISTEMA (System Info) Pulsando MODE accederá al menú de selección. Mediante los botones UP y DOWN, seleccione ahora la opción de menú «System Info» (indicada por la flecha) y confirme con ENTER. -
Page 58: Mando A Distancia Por Infrarrojos
MANDO A DISTANCIA POR INFRARROJOS Oriente el mando a distancia por infrarrojos de manera que esté en la línea de visión directa con la parte delantera del sensor de infrarrojos incorporado en el proyector. El rango de alcance máximo es de unos 8 metros. -
Page 59: Instalación Y Montaje
INSTALACIÓN Y MONTAJE Gracias a las patas de plástico integradas, el foco puede instalarse en un lugar adecuado sobre una superficie nivelada. El montaje en travesaño se realiza fijando una percha de montaje Omega en el centro de la base del equipo (A). El volumen de suministro incluye una percha de montaje Omega;... -
Page 60: Tecnología Dmx
CLZW300B200SMLSD6010 Difusor de 60° x 10° Montaje sin herramientas mediante la tecnología SNAPMAG ® TECNOLOGÍA DMX DMX512 DMX (Digital Multiplex) es el nombre de un protocolo universal utilizado como medio de comunicación entre dispositivos y controladores. El controlador DMX envía datos DMX a los equipos DMX conectados. -
Page 61: Asignación De Pines
Asignación de pines: Cable DMX con XLR de 3 pines: Cable DMX con XLR de 5 pines (los pines 4 y 5 no se utilizan): Shield Shield TERMINACIÓN DMX (TERMINADOR): Para evitar errores de sistema, debe conectarse una resistencia de terminación (120 ohmios, 1/4 W) en el último equipo de la cadena DMX. XLR aéreo de 3 pines con resistencia de terminación: K3DMXT3 XLR aéreo de 5 pines con resistencia de terminación: K3DMXT5 Asignación de pines:... -
Page 62: Declaraciones Del Fabricante
Configuración del Configuración de W-DMX, giro de 180° de la imagen en pantalla, iluminación de la pantalla, DMX Fail, curvas sistema: de atenuación, respuesta de atenuación, calibración del color, función de bloqueo de la pantalla, frecuencia de la modulación por ancho de pulsos (PWM) de los LED, mando a distancia por infrarrojos, control de ventila- dores, restablecimiento de la configuración de fábrica Control: DMX-512, W-DMX™, mando a distancia por infrarrojos, habilitado para RDM... -
Page 63: Polski
To urządzenie zostało zaprojektowane i wyprodukowane przy zastosowaniu najwyższych kryteriów jakościowych w celu zapewnienia wieloletniej bezawaryjnej eksploatacji. Proszę starannie przeczytać niniejszą instrukcję obsługi, aby móc jak najszybciej zacząć użytkować ten produkt marki Cameo Light. Więcej informacji na temat Cameo Light znajdą Państwo na naszej stronie internetowej pod adresem WWW.CAMEOLIGHT.COM. -
Page 64: Wprowadzenie
33. W przypadku zagrożenia uderzeniem pioruna lub jeśli urządzenie przez dłuższy czas nie jest używane, należy wyjąć kabel sieciowy i adapter sieciowy z gniazda. 34. Instalacja urządzenia powinna odbywać się, gdy urządzenie nie jest podłączone do źródła zasilania (należy wyjąć wtyczkę z gniazda). 35. -
Page 65: Gniazda, Elementy Obsługi I Wskaźniki
(nieużywane gniazdo zawsze należy zabezpieczać gumową zaślepką). POWER OUT Gniazdo wyjściowe IP65 z gumową zaślepką. Źródło zasilania dla dodatkowych reflektorów CAMEO. Całkowity pobór prądu wszystkich podłączo- nych urządzeń nie może przekroczyć wartości w amperach (A) podanej na urządzeniu (nieużywane gniazdo zawsze należy zabezpieczać gumową... -
Page 66: Obsługa
UWAGI • Po prawidłowym podłączeniu reflektora do sieci zasilania podczas procesu uruchamiania jest wyświetlana następująca sekwencja komunikatów: „Welcome to Cameo”, nazwa modelu i wersja oprogramowania. Po tej procedurze reflektor jest gotowy do pracy i przełącza się na ostatnio wybrany tryb. -
Page 67: Status W-Dmx
3. Istnieje możliwość utworzenia grupy urządzeń W-DMX™ połączonej w sieć za pośrednictwem W-DMX™ oraz jej używania w trybie Master/ Slave. W tym celu najpierw anuluj skojarzenie wszystkich urządzeń, które mają tworzyć grupę (Settings -> Wireless Setting -> Receive Reset). Teraz w ustawieniach jednostki Master wybierz (Settings ->... - Page 68 USTAWIANIE TRYBU PRACY STAND ALONE Naciśnięcie przycisku MODE spowoduje przejście do menu wyboru. Przyciskami UP i DOWN wybierz pozycję menu „Stand Alone” (zwróć uwagę na strzałkę) i potwierdź przyciskiem ENTER. Przejdziesz do podmenu, w którym przyciskami UP i DOWN możesz wybrać jeden z następujących trybów pracy Stand Alone: „Auto”, „Color Macro”, „Static”, „Tunable White”, „User Color”...
- Page 69 TRYB STATYCZNY (Static) Tryb statyczny umożliwia, podobnie jak sterownik DMX, ustawienie ściemniacza, stroboskopu (Strobe) oraz wartości R, G, B i W bezpośred- nio w urządzeniu w przedziale od 000 do 255. Dzięki temu można utworzyć pojedynczą scenę bez dodatkowego sterownika DMX. Najpierw wybierz tryb statyczny i potwierdź...
- Page 70 FUNKCJA TIMERA (Timer) Funkcja timera pozwala, aby tryby autonomiczne „Color Macro”, „Static”, „Tunable White” i „User Color” były sterowane czasowo. Czas pojawiania się (Fade In) można ustawić od 0 do 60 minut, czas zatrzymania (Dwell Time) od 1 do 24 godzin, a czas zaniku (Fade Out) od 0 do 60 minut.
- Page 71 Settings Wireless Setting Ustawienia W-DMX W-DMX On/Off On = W-DMX włączone (Wireless-DMX) On = W-DMX wyłączone Operating Mode Receive = moduł W-DMX jako odbiornik Transmit = moduł W-DMX jako nadajnik Transmitting Mode G3 = standard transmisji G3 G4S = standard transmisji G4S Link Link = skojarzenie z urządzeniami W-DMX.
- Page 72 Autolock Automatyczna blokada przycisków Automatyczna blokada przycisków po ok. 1 minucie bezczyn ności. W razie próby obsługi urządzenia pojawi się na wyświetlaczu komunikat: „Locked!” (Zablokowane) Zniesienie blokady: naciśnij jedno- cześnie przyciski UP i DOWN przez ok. 5 sekund Wyłączenie automatycznej blokady przycisków LED Frequency Częstotliwość...
-
Page 73: Pilot Na Podczerwień
PILOT NA PODCZERWIEŃ Skieruj pilot na podczerwień bezpośrednio na czujnik podczerwieni wbudowany we front reflektora. Maksymalny zasięg wynosi ok. 8 metrów. W trybie pracy DMX oraz slave sterowanie pilotem jest nieaktywne. Typ baterii do pilota na podczerwień: CR2025. Przycisk Blackout służy do wyłączenia wszystkich diod LED, niezależnie od włączonego trybu pracy urządzenia Blackout kontrolowanego pilotem. -
Page 74: Ustawianie I Montaż
USTAWIANIE I MONTAŻ Do ustawienia reflektora w odpowiednim miejscu na płaskiej powierzchni służą zamontowane na stałe nóżki z tworzywa sztucznego. Mocowanie do kratownicy odbywa się za pomocą uchwytu Omega, który jest zamocowany na środku podstawy (A). Jeden uchwyt Omega jest ujęty w zestawie, a odpowiednie zaciski do kratownicy są opcjonalne. Zapewnij stałe połączenia i zamocuj reflektor odpowiednią liną zabezpieczającą... -
Page 75: Technika Dmx
CLZW300B200SMLSD6010 Dyfuzor 60° x 10° Montaż bez użycia narzędzi za pomocą technologii SNAPMAG ® TECHNIKA DMX DMX-512 DMX (Digital Multiplex) to nazwa uniwersalnego protokołu transmisji do komunikacji między odpowiednimi urządzeniami a kontrolerami. Kontroler DMX wysyła dane DMX do podłączonych urządzeń DMX. Transmisja danych DMX następuje zawsze w formie szeregowego strumienia danych, który jest przekazywany z jednego urządzenia do następnego przez znajdujące się... -
Page 76: Dane Techniczne
Przyporządkowanie wtyczek: Kabel DMX z 3-stykowymi wtyczkami XLR: Kabel DMX z 5-stykowymi wtyczkami XLR (pin 4 i 5 są niepodłączone): Shield Shield TERMINATOR DMX: Aby zapobiec awariom systemu, należy wyposażyć ostatnie urządzenie w łańcuchu DMX w terminator (120 Ω, 1/4 W). 3-stykowa wtyczka XLR z terminatorem: K3DMXT3 5-stykowa wtyczka XLR z terminatorem: K3DMXT5 Przyporządkowanie wtyczek:... -
Page 77: Deklaracje Producenta
Ustawienia systemu Ustawienia W-DMX, obrócić wyświetlacz o 180°, podświetlenie wyświetlacza, DMX Fail, krzywe ściemniania, charakterystyka ściemniania, kalibracja kolorów, funkcja Display Lock, częstotliwość modulacji PWM LED, pilot na podczerwień, sterowanie wentylatorem, Factory Reset Sterowanie: DMX512, W-DMX™, zdalne sterowanie na podczerwień, możliwość pracy w standardzie RDM Przyciski: Mode, Enter, Up, Down Wskaźniki:... -
Page 78: Italiano
Questo dispositivo è stato sviluppato e prodotto in conformità con elevati standard qualitativi che ne garantiscono il regolare funzionamento per molti anni. Leggete attentamente questo manuale d‘uso per utilizzare al meglio il vostro nuovo prodotto Cameo Light. Per maggiori informazioni su Cameo Light consultare la nostra pagina Web WWW.CAMEOLIGHT.COM. -
Page 79: Introduzione
nicotina, nebbia ecc.) il dispositivo deve essere sottoposto a regolari interventi di manutenzione e pulizia da parte di personale specializzato (senza garanzia, interventi a carico del proprietario) per evitare surriscaldamento e malfunzionamenti. 36. La distanza dai materiali infiammabili deve essere di almeno 0,5 m 37. -
Page 80: Connettori, Elementi Di Comando E Di Visualizzazione
POWER OUT Presa di uscita IP65 con tappo ermetico in gomma. Serve per l’alimentazione di altri proiettori Cameo. Tenere presente che la corrente assorbita complessiva di tutti i dispositivi collegati non deve superare il valore riportato in ampere (A) sul dispositivo (in caso di mancato utilizzo, chiudere sempre con tappo ermetico in gomma). -
Page 81: Utilizzo
• Non appena il proiettore è correttamente allacciato alla rete elettrica, durante la procedura di avvio, sul display appaiono in successione il messaggio “Welcome to Cameo”, la denominazione del modello e la versione del software. Dopo questa procedura, il proiettore è pronto per l’uso e si avvia nella modalità operativa precedentemente attivata. - Page 82 2. Collegare un gruppo di dispositivi W-DMX™ per formare con loro un universo DMX. Anzitutto disaccoppiare tutti i dispositivi che devono formare il gruppo (Settings -> Wireless Setting -> Receive Reset). A questo punto azionare un CLZW600 con un controller DMX via cavo DMX e selezionare "Transmit"...
- Page 83 IMPOSTAZIONE DELLA MODALITÀ DI FUNZIONAMENTO STAND-ALONE Premendo MODE si accede al menu di selezione. Con i tasti UP e DOWN, selezionare la voce di menu “Stand-Alone” (prestare attenzione alla freccia) e confermare con ENTER. Nel sottomenu, selezionare una delle modalità di funzionamento stand-alone “Auto”, “Color Macro”, “Static”, “Tunable White”...
- Page 84 MODALITÀ STATICA (Static) Analogamente a quanto avviene in un dispositivo di comando DMX, la modalità statica consente di impostare direttamente sul dispositivo le funzioni dimmer, stroboscopio, R, G, B e W con valori da 000 a 255. È quindi possibile creare una scena personalizzata, senza necessità di utilizzare un controller DMX aggiuntivo.
- Page 85 FUNZIONE TIMER (Timer) Con la funzione “Timer” è possibile controllare il tempo delle modalità di funzionamento “Color Macro”, “Static”, “Tunable White” e “Used Color” in modo tale da impostare il tempo di accensione (Fade In) da 0 a 60 minuti, il tempo di sospensione (Dwell Time) da 1 a 24 ore e il tempo di spegni- mento (Fade Out) da 0 a 60 minuti.
- Page 86 Settings Wireless Setting Impostazioni W-DMX W-DMX On/Off On = W-DMX attivato (Wireless-DMX) Off = W-DMX disattivato Operating Mode Receive = modulo W-DMX come ricevitore Transmit = Modulo W-DMX come trasmettitore Transmitting Mode G3 = standard di trasmissione G3 G4S = standard di trasmissione G4S Link Link = accoppiamento con dispositivi W-DMX.
- Page 87 Autolock Blocco automatico degli Blocco automatico degli elementi di comando dopo ca. elementi di comando 1 minuto di inattività. Visualizzazione sul display dopo il test di funzionamento: "Locked!" Per sbloccare: premere contemporaneamente UP e DOWN per ca. 5 secondi Blocco automatico degli elementi di comando disattivato LED Frequency Frequenza LED PWM...
-
Page 88: Telecomando A Infrarossi
TELECOMANDO A INFRAROSSI Indirizzare il telecomando a infrarossi direttamente verso il sensore a infrarossi presente nella parte anteriore del proiettore. La portata massima è pari a ca. 8 metri. Nella modalità di funzionamento DMX e slave, le funzioni del telecomando sono disattivate. Batteria per il telecomando a infrarossi: CR2025. Con il tasto Blackout è... -
Page 89: Installazione E Montaggio
INSTALLAZIONE E MONTAGGIO Grazie ai piedini in plastica integrati, il proiettore può essere collocato in un punto adatto su una superficie piana. Il montaggio a una traversa viene effettuato tramite una staffa a Omega, fissata al centro della base dell'apparecchio (A). Una staffa a Omega è inclusa nella dotazione;... -
Page 90: Tecnologia Dmx
CLZW300B200SMLSD6010 Diffusore 60° x 10° Montaggio senza utensili grazie alla tecnologia SNAPMAG ® TECNOLOGIA DMX DMX512 DMX (Digital Multiplex) è la sigla di un protocollo di trasmissione universale per la comunicazione tra dispositivi e controller. Un controller DMX invia dati DMX ai dispositivi DMX collegati. -
Page 91: Dati Tecnici
Configurazione dei connettori: Cavo DMX con connettori XLR a 3 poli: Cavo DMX con connettori XLR a 5 poli (pin 4 e 5 non assegnati): Shield Shield CONNETTORE TERMINALE DMX (TERMINATORE): Per evitare errori di sistema, l'ultimo dispositivo di una catena DMX deve essere dotato di una resistenza di terminazione (120 ohm, 1/4 W). Connettore XLR a 3 poli con resistenza di terminazione: K3DMXT3 Connettore XLR a 5 poli con resistenza di terminazione: K3DMXT5 Configurazione dei connettori:... -
Page 92: Dichiarazioni Del Produttore
Elementi di comando: Mode, Enter, Up, Down Elementi di visualiz- Display OLED zazione: Tensione di esercizio: 100 - 240 V CA, 50 - 60 Hz Potenza assorbita: 300W Intensità di illumina- 48000 lx zione (a 1 m, senza diffusore): Flusso luminoso 10660 lm (RGBW): Collegamento alimenta-... -
Page 93: Control Dmx
DMX CONTROL / DMX STEUERUNG / PILOTAGE DMX / CONTROL DMX / STEROWANIE DMX / CONTROLLO DMX 15 CH Full Access 16 Bit Function Values Sub-Group Dimmer 0% to 100% Dimmer Dimmer fine 0% to 100% Strobe open Strobe closed Pulse random slow ->... - Page 94 No function Linear dimmer curve Set dimmer curve Exponential dimmer curve Set dimmer curve Logarithmic dimmer curve S-Curve dimmer curve No function Dimmer response LED (hold 1,5 s) Dimmer response halogen (hold 1,5s) No function Silent fan (hold 3s) Auto fan (hold 3s) No function PWM 1 (800 Hz) (hold 3s) PWM 2 (1200 Hz) (hold 3s)
- Page 95 Turquoise Cyan Blue Lavender Mauve Magenta Pink Color Macros Color Macros Warm White (override RGBW) White Cold White Color Jumping stop Color Jumping speed slow -> fast / color 1 -> 12 Color Fading speed slow -> fast / color 1 ->...
- Page 96 8 CH 8 Bit Function Values Sub-Group Dimmer 0% to 100% Dimmer Strobe open Strobe closed Pulse random, slow -> fast Ramp up random, slow -> fast Ramp down random, slow -> fast Multifunctional Strobe functions Strobe Random Strobe effect, slow -> fast Strobe Break effect, 5s…..1s (short burst with break) Strobe slow ->...
- Page 97 no function Dimmer response LED (hold 1,5 s) Dimmer response halogen (hold 1,5s) No function Silent fan (hold 3s) Auto fan (hold 3s) No function PWM 1 (800 Hz) (hold 3s) PWM 2 (1200 Hz) (hold 3s) PWM 3 (2000 Hz) (hold 3s) Device Settings PWM 4 (3600 Hz) (hold 3s) Control...
- Page 98 4 CH User-Calibrated 8 Bit Function Values Sub-Group 0% to 100% Green 0% to 100% Green Blue 0% to 100% Blue White 0% to 100% White 3 CH Factory-Calibrated 8 Bit Function Values Sub-Group 0% to 100% Green 0% to 100% Green Blue 0% to 100%...
- Page 99 2 CH CCT Factory-Calibrated Function Values Sub-Group Dimmer 0% to 100% Dimmer Color Temperature Cold <-> warm Color Temperature EN: (1*) After the adjustments have been made, set the value to 000 to avoid disturbance by endless function call. DE: (1*) Nachdem die Einstellungen vorgenommen wurden, stellen Sie den Wert auf 000 ein, um Störungen durch endlosen Funktionsaufruf zu vermeiden.
- Page 100 CAMEOLIGHT.COM Adam Hall GmbH | Adam-Hall-Str. 1 | 61267 Neu-Anspach | Germany Phone: +49 6081 9419-0 | adamhall.com REV: 05...