Se connecter
Télécharger
Manuels
Marques
Olympus Manuels
Accessoires de caméra
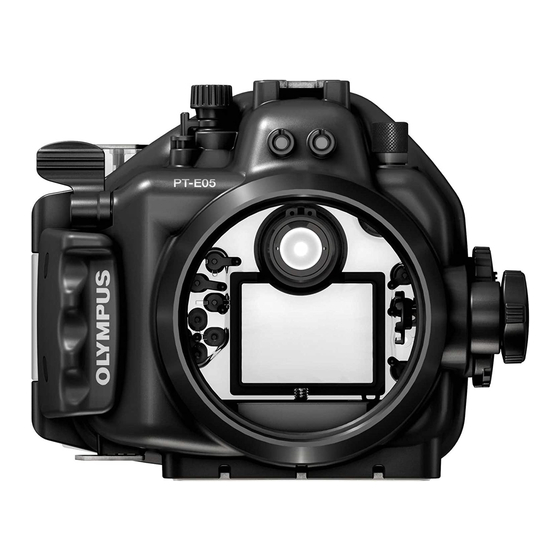
PT-E05
Olympus PT-E05 Manuels
Manuels et Guides d'utilisation pour Olympus PT-E05. Nous avons
1
Olympus PT-E05 manuel disponible en téléchargement PDF gratuit: Mode D'emploi
Olympus PT-E05 Mode D'emploi (284 pages)
Marque:
Olympus
| Catégorie:
Accessoires de caméra
| Taille: 16.65 MB
Table des Matières
日本語
6
はじめに
2
ご使用の前に必ずお読みください
2
安全にお使いいただくために
2
電池について
4
お取り扱いについて
5
Table des Matières
6
1 準備をしましょう
8
箱の中を確認します
8
各部名称
9
別売の防水ポートを取り付けます
10
ハンドストラップを取り付けます
10
基本操作をマスターします
11
プロテクターの構え方
11
シャッターレバーの押し方
11
モードダイヤルノブの使い方
11
ズームダイヤルの使い方
12
パワースイッチレバーの操作方法
12
水中光ファイバーケーブルの接続
13
Ttlコネクタキャップの取りはずし方
13
Ttlコネクタ部の清掃について
14
ホットシューケーブルの取り付け方
14
カメラ台の取り付け方・取りはずし方
15
2 プロテクターの事前チェックをしましょう
16
使用前の事前テスト
16
プロテクターの防水部チェック
16
事前テスト
16
3 デジタルカメラを装填しましょう
17
デジタルカメラをチェックします
17
電池の確認
17
撮影可能枚数の確認
17
デジタルカメラのストラップやレンズキャップをはずしましょう
17
デジタルカメラのアイカップをはずします
17
デジタルカメラのフィルタを取りはずします
18
カメラを準備します
18
装填できるデジタルカメラは
18
カメラの動作チェックをします
18
プロテクターを開けます
18
別売の防水ポートに付属のズームギア、フォーカスギアのレンズへのセット
19
デジタルカメラへのカメラ台の取り付け方
20
水中エレクトロニックフラッシュUfl-2を水中光ファイバーケーブル で接続して使用する場合
20
エレクトロニックフラッシュをTtlケーブルで接続して使用する場合
21
デジタルカメラを装填します
22
シリカゲルを装填します
25
装填状態のチェックをします
25
プロテクターを密閉します
26
装填後の動作チェック
27
最終チェックをします
27
目視検査
27
最終テスト
28
4 水中での撮影方法
29
ハンドストラップの使い方
29
注意して構えましょう
29
撮影画面を確認します
29
シャッターレバーを静かに押します
29
5 撮影終了後の取り扱い方法
30
水滴を拭き取りましょう
30
デジタルカメラを取り出します
31
プロテクターを真水で洗います
32
プロテクターを乾燥させましょう
32
6 防水機能のメンテナンスをしましょう
33
Oリングを取りはずします
33
Oリングの取りはずし方
33
砂・ゴミなどを取り除きましょう
33
Oリングを取り付けます
34
Oリングへのグリス塗布方法
34
消耗品は取り替えましょう
35
TtlコネクタとTtlケーブルの固定ネジ部メンテナンス
35
Ttlコネクタキャップのメンテナンス
35
ご使用上のQ&A
36
English
46
For Safe Use
42
Introduction
42
Please Read the Following Items before Use
42
Batteries
44
Handling the Product
45
1 Preparations
48
Check the Contents of the Package
48
Names of the Parts
49
Install the Waterproof Port
50
Attach the Hand Strap
50
Mastering Basic Case Operations
51
How to Hold the Case
51
How to Press the Shutter Lever
51
How to Use the Mode Dial Knob
51
How to Use the Zoom Dial
52
How to Control the Power Switch Lever
52
Connecting the Underwater Optical Fiber Cable
53
Removing the TTL Connector Cap
53
Cleaning the TTL Connector
54
How to Connect the Hot Shoe Cable
54
How to Attach and Detach the Camera Table
55
2 Advance Check of the Case
56
Advance Test before Use
56
Check the Waterproof Parts of the Case
56
Advance Test
56
3 Installing the Digital Camera
57
Check the Digital Camera
57
Battery Confirmation
57
Check the Remaining Number of Pictures
57
Remove the Strap and Lens Cap from the Camera
57
Remove the Eyecup from the Digital Camera
57
Remove the Filter from the Digital Camera
58
Prepare the Digital Camera
58
Compatible Digital Camera
58
Checking Camera Operation
58
Open the Case
58
Attach the Zoom and Focus Gears Provided with the Optional Underwater Port to the Lens
59
How to Attach the Camera Table to the Digital Camera
60
Using the UFL-2 Underwater Electronic Flash with the Underwater Optical Fiber Cable
60
Using the Electronic Flash with the TTL Cable
61
Insert the Digital Camera in the Case
62
Insert the Silica Gel
65
Check the Loading Status
65
Seal the Case
66
Check the Operation of the Loaded Camera
67
Perform the Final Checks
67
Visual Inspection
67
Final Test
68
4 Underwater Shooting
69
How to Use the Hand Strap
69
Hold the Case Carefully
69
Confirm that You Can See an Image in the Pick-Up Finder or LCD Monitor
69
Gently Press the Shutter Lever
69
5 Handling after Shooting
70
Wipe off any Waterdrop
70
Unload the Digital Camera
71
Wash the Case with Pure Water
72
Dry the Case
72
6 Maintaining the Waterproof Function
73
Remove the O-Ring
73
Procedure
73
Remove any Sand, Dirt, Etc
73
Install the O-Ring
74
How to Apply Grease to the O-Ring
74
Replace Consumable Products
75
Maintenance of the Threaded Sections on the TTL Cable and TTL Cable Connector
75
Maintenance of the TTL Connector Cap
75
7 Appendix
76
Q & a on Use
76
Specifications
80
Français
86
1 Préparatifs
88
Contrôle du Contenu de L'emballage
88
Nomenclature des Pièces
89
Mise en Place du Port Étanche
90
Mise en Place de la Dragonne
90
Maîtriser le Fonctionnement de Base
91
Tenue du Caisson
91
Comment Appuyer Sur le Levier du Déclencheur
91
Comment Utiliser le Bouton de Molette Mode
91
Comment Utiliser la Molette de Zoom
92
Comment Commander le Levier D'interrupteur D'alimentation
92
Raccordement du Câble Fibre Optique Sous-Marin
93
Retrait du Bouchon du Connecteur TTL
93
Nettoyage du Connecteur TTL
94
Comment Raccorder le Câble du Sabot Actif
94
Comment Monter et Retirer le Support D'appareil
95
2 Contrôle Préliminaire du Caisson
96
Test Préliminaire Avant Utilisation
96
Contrôle des Pièces D'étanchéité du Caisson
96
Test Préliminaire
96
3 Mise en Place de L'appareil Photo Numérique
97
Contrôle de L'appareil Photo Numérique
97
Contrôle de Batterie
97
Confirmation du Nombre de Vues Restant à Prendre
97
Retirer la Dragonne et le Bouchon D'objectif de L' Appareil Photo Numérique
97
Retirer L'œillère de L'appareil Photo Numérique
97
Retirer le Filtre de L'appareil Photo Numérique
98
Préparation de L'appareil Photo Numérique
98
Appareil Photo Numérique Pouvant Être Mis en Place
98
Contrôle du Fonctionnement de L'appareil Photo
98
Ouvrir le Caisson
98
Fixer les Mécanismes de Zoom et de Mise au Point, Fournis Avec le Port D'objectif Étanche en Option, Sur L'objectif
99
Montage du Support D'appareil Sur L'appareil Photo Numérique
100
Utilisation du Flash Électronique Sous-Marin UFL-2 Avec le Câble Fibre Optique Sous-Marin
100
Utilisation du Flash Électronique Avec le Câble TTL
100
Insérer L'appareil Photo Numérique Dans le Caisson
102
Introduction du Gel de Silice
105
Vérifier après Insertion
105
Sceller le Caisson
106
Vérifier le Fonctionnement de L'appareil Photo Installé
107
Effectuer les Contrôles Finaux
107
Inspection Visuelle
107
Test Final
108
4 Prise de Vue Sous L'eau
109
Utilisation de la Dragonne
109
Tenir le Caisson Soigneusement
109
Confirmer la Vue de L'image Dans la Fenêtre de Viseur ou L'écran ACL
109
Appuyer Doucement Sur le Levier du Déclencheur
109
5 Manipulation après la Prise de Vue
110
Essuyer Toute Goutte D'eau
110
Sortir L'appareil Photo Numérique
111
Laver le Caisson Avec de L'eau Pure
112
Sécher le Caisson
112
6 Maintien de la Fonction D'étanchéité
113
Retirer le Joint
113
Procédure
113
Retirer Tout Grain de Sable, Poussière, Etc
113
Installer le Joint
114
Comment Appliquer la Graisse Sur le Joint
114
Changer les Pièces Consommables
115
Entretien des Parties Filetées Sur le Câble TTL et le Connecteur de Câble TTL
115
Entretien du Bouchon du Connecteur TTL
115
7 Annexe
116
Q & R Sur L'utilisation
116
Fiche Technique
120
Deutsch
126
1 Vorbereitende Schritte
128
Packungsinhalt auf Vollständigkeit Prüfen
128
Bezeichnung der Teile
129
Anbringen des Objektiv-Ports
130
Anbringen der Handgelenkschlaufe
130
Grundsätzliche Bedienungsschritte
131
So Halten Sie das Gehäuse Richtig
131
Richtiges Drücken des Auslösers
131
So Verwenden Sie den Programmwählknopf
131
Verwendung des Zoomreglers
132
So Verwenden Sie den Hauptschalterhebel
132
Anschluss des Unterwasser-Glasfaserkabels
133
Abnehmen der TTL-Anschlusskappe
133
Reinigen des TTL-Anschlusses
134
Anschluss des Blitzschuhkabels
134
So Verwenden Sie den Kameraschlitten
135
2 Check vor Benutzung des Gehäuses
136
Erster Systemcheck vor dem Gebrauch
136
Überprüfen der Abdichtenden Teile des Gehäuses
136
Erster Systemcheck
136
3 Einsetzen der Digitalkamera
137
Überprüfen der Digitalkamera
137
Batterieleistung
137
Kameraspeicher (Anzahl der Verfügbaren Aufnahmen Überprüfen)
137
Gurt und Objektivdeckel Müssen von der Kamera Abgenommen werden
137
Entfernen Sie die Okularmuschel von der Digitalkamera
137
Abnehmen des Objektivfilters von der Digitalkamera
138
Vorbereiten der Digitalkamera
138
Verwendbare Digitalkamera
138
Betriebsüberprüfung der Digitalkamera
138
Öffnen Sie das Gehäuse
138
Bringen Sie das zum Optional Erhältlichen Unterwasserport Mitgelieferte Zoom- und Fokussiergetriebe am Objektiv an
139
So Befestigen Sie die Digitalkamera am Kameraschlitten
140
Verwendung des Elektronischen Unterwasserblitzes UFL-2 mit dem Unterwasser-Glasfaserkabel
140
Verwendung des Elektronischen Blitzes mit dem TTL-Kabel
141
Setzen Sie die Digitalkamera in das Unterwassergehäuse ein
142
Den Silicagel-Beutel Einsetzen
145
Überprüfen auf Einwandfreies Einsetzen
146
Schließen des Gehäuses
146
Überprüfen Sie die Eingesetzte Kamera auf Einwandfreie Funktionsweise
147
Abschließende Überprüfung des Gehäuses
147
Visuelle Inspektion
147
4 Unterwasseraufnahmen
149
Verwendung der Handgelenkschlaufe
149
Das Unterwassergehäuse Vorsichtig Halten
149
Überprüfen Sie, ob IM Aufsteck-Sucher oder auf dem LCD-Monitor ein Bild zu Sehen ist
149
Ruckfreies Drücken des Auslösers
149
5 Behandlung nach dem Gebrauch
150
Entfernen von Wassertropfen
150
Entnehmen der Digitalkamera
151
Reinigen des Gehäuses mit Klarem Wasser
151
Abtrocknen des Gehäuses
152
6 Wartung der Wasserdichtigkeit
153
Entfernen Sie den O-Ring
153
Vorgehensweise
153
Reinigen des O-Rings
153
Anbringen des O-Rings
154
Einfetten des O-Rings
154
Austausch von Verschleißteilen
155
Wartung der Gewinde des TTL-Kabels und des TTL-Kabelanschlusses
155
Wartung der TTL-Anschlusskappe
155
7 Anhang
156
Fragen und Antworten zum Gebrauch
156
Technische Daten
160
Español
166
1 Preparaciones
168
Verifique Los Contenidos del Paquete
168
Nombres de las Piezas
169
Coloque el Puerto Hermético
170
Coloque la Correa de Mano
170
Aprenda las Operaciones Básicas
171
Cómo Sostener la Carcasa
171
Cómo Presionar el Disparador
171
Cómo Usar la Perilla de la Rueda de Modo
171
Cómo Usar la Perilla del Zoom
172
Cómo Controlar la Palanca del Interruptor de Alimentación
172
Conexión del Cable de Fibra Óptica Submarino
173
Retirando la Tapa del Conector TTL
173
Limpiando el Conector TTL
174
Cómo Conectar el Cable de la Zapata de Conexión
174
Cómo Fijar y Retirar la Mesa de la Cámara
175
2 Verificación Anticipada de la Caja
176
Prueba Anticipada Antes del Uso
176
Comprobando las Partes Herméticas de la Carcasa
176
Prueba Previa
176
3 Compruebe la Cámara Digital
177
Confirmación de Pila
177
Confirmando el Número Restante de Fotografías a Ser Tomadas
177
Retire la Correa y la Tapa de Objetivo de la Cámara Digital
177
Retire el Ocular desde la Cámara Digital
177
Retirando el Filtro desde la Cámara Digital
178
Prepare la Cámara Digital
178
Coloque la Cámara Digital
178
Comprobando la Operación de la Cámara
178
Abra la Carcasa
178
Fije Los Engranajes del Zoom y Enfoque sobre el Objetivo con el Puerto Hermético Opcional
179
Cómo Fijar la Mesa de la Cámara a la Cámara Digital
180
Utilización del Flash Electrónico Submarino UFL-2 con el Cable de Fibra Óptica Submarino
180
Usando el Flash Electrónico
181
Inserte la Cámara Digital en la Carcasa
182
Coloque la Bolsa de Silicagel
185
Compruebe la Condición de la Colocación
185
Selle la Carcasa
186
Compruebe la Operación de la Cámara Colocada
187
Realice las Verificaciones Finales
187
Inspección Visual
187
Prueba Final
188
4 Tomando Fotografías Debajo del Agua
189
Cómo Usar la Correa de Mano
189
Sostenga la Carcasa Cuidadosamente
189
La Cantidad es de Cinco Bolsas por Paquete. sólo Se Necesita una para cada Uso
189
Presionando Suavemente la Palanca del Disparador
189
5 Manipulación Después de la Toma Fotográfica
190
Limpie Secando todo Vestigio de Agua
190
Extracción de la Cámara Digital
191
Lave la Caja con Agua Limpia
192
Seque la Caja
192
6 Manteniendo la Función de Hermeticidad al Agua
193
Extraiga la Junta Tórica
193
Procedimiento
193
Quite toda Arena, Suciedad, Etc
193
Coloque la Junta Tórica
194
Cómo Aplicar Grasa a la Junta Tórica
194
Reemplace las Piezas Consumibles
195
Mantenimiento de las Secciones de Rosca sobre el Cable TTL y el de Cable TTL
195
Mantenimiento de la Tapa del Conector TTL
195
7 Apéndice
196
P&R Acerca del Uso
196
Especificaciones
200
汉语
206
检查包装盒中的内容
208
部件名称
209
安装手带
210
安装镜头防水罩
210
掌握基本操作
211
把持防水机壳的姿势
211
怎样按快门杆
211
怎样使用模式拨盘
211
怎样使用调焦按钮
212
怎样使用主电源开关拨盘
212
连接水下光纤电缆
213
取下Ttl连接器盖的方法
213
关于Ttl连接器部的清洁
214
热靴电缆的安装方法
214
照相机台的安装/拆卸方法
215
2 防水机壳的预先检测
216
使用前的预先检测
216
检查防水机壳的防水部
216
预先检查
216
3 装入数码照相机
217
检查数码照相机
217
确认电池
217
确认可拍摄图像数量
217
取下数码照相机的手带和镜头盖
217
取下数码照相机取景器的眼罩
217
取下数码照相机的滤光器
218
照相机的准备工作
218
可装入哪些型号的数码照相机
218
检查照相机的操作情况
218
打开防水机壳
218
将另售镜头防水罩所附带的调焦和聚焦齿轮安装在镜头上
219
数码照相机安装于照相机台的方法
220
使用带水下光纤电缆的Ufl-2水下电子闪光灯
220
使用带Ttl电缆的电子闪光灯
221
装入数码照相机
222
插入硅胶
225
装入后的操作检测
227
进行最终检测
227
肉眼检查
227
4 水中的拍摄方法
229
怎样使用手带
229
小心手持机壳
229
确认您可在取景器或液晶显示屏上看到图像
229
轻按快门杆
229
5 拍摄后的处理方法
230
取出数码照相机
231
用清水清洗防水机壳
232
晾干防水机壳
232
6 防水功能的维护
233
取下O形环的方法
233
如何使用O形环软膏
234
更换消耗品
235
Ttl连接器和Ttl电缆固定螺丝部的维护
235
Ttl连接器盖的维护
235
조선말/한국어
246
1 시작하기
248
구성품 확인
248
부품 명칭
249
별매의 방수 포트 연결하기
250
핸드 스트랩 연결하기
250
기본 조작 익히기
251
케이스 잡는 방법
251
셔터 레버 누르는 법
251
모드 다이얼 사용법
251
줌 다이얼 사용법
252
전원 스위치 레버의 조작 방법
252
수중 광 섬유 케이블 연결
253
Ttl 커넥터 캡 분리방법
253
Ttl 커넥터부 청소에 관해서
254
핫슈 케이블의 장착 방법
254
카메라대의 장착방법과 분리방법
255
2 케이스 사전 점검
256
사용 전 사전 검사
256
케이스의 방수 부분 체크
256
사전 검사
256
3 디지털 카메라 장착하기
257
디지털 카메라 확인
257
배터리 확인
257
촬영 가능횟수 확인
257
디지털 카메라의 스트랩 또는 렌즈 뚜껑을 분리합니다
257
디지털 카메라의 아이컵을 분리합니다
257
디지털 카메라의 필터를 분리합니다
258
카메라를 준비합니다
258
장착 가능한 디지털 카메라는
258
카메라 조작상태 점검
258
케이스 열기
258
별매의 수중 포트와 함께 제공되는 줌 기어와 포커스 기어를 렌즈에 장착합니다
259
디지털 카메라에 카메라대 장착 방법
260
수중 전자 플래시 Ufl-2를 수중 광 섬유 케이블로 연결하여 사용하는 경우
260
전자 플래시를 Ttl 케이블로 연결하여 사용하는 경우
261
디지털 카메라를 케이스에 넣습니다
262
실리카겔 삽입
265
육안 검사
267
4 수중 촬영방법
269
핸드 스트랩 사용법
269
케이스를 조심해서 잡습니다
269
픽업 파인더나 Lcd 모니터에서 이미지를 확인합니다
269
셔터 레버를 부드럽게 누릅니다
269
5 촬영 후 취급 방법
270
디지털 카메라 꺼내기
271
케이스는 물을 이용해 충분히 세척할 수 있습니다
272
케이스 건조
272
6 방수기능 유지관리
273
이물질 제거
273
O-링에 윤활제 바르기
274
소모품 교체
275
Ttl 커넥터와 Ttl 케이블의 고정 나사부분 정비
275
Ttl 커넥터 캡 정비
275
사용 관련 질의 및 답변
276
Publicité
Publicité
Produits Connexes
Olympus PT-EP08
Olympus PT-E Série
Olympus PT-EP01
Olympus PT-E06
Olympus PT-E03
Olympus PT-E02
Olympus PT-026
Olympus PT-051
Olympus PT-035
Olympus PT-036
Olympus Catégories
Appareils photo numériques
Dictaphones
Objectifs de l'appareil photo
Accessoires de caméra
Équipement médical
Plus Manuels Olympus
Connexion
Se connecter
OU
Se connecter avec Facebook
Se connecter avec Google
Télécharger le manuel
Télécharger depuis le disque dur
Télécharger depuis l'URL