Publicité
Les langues disponibles
Les langues disponibles
Liens rapides
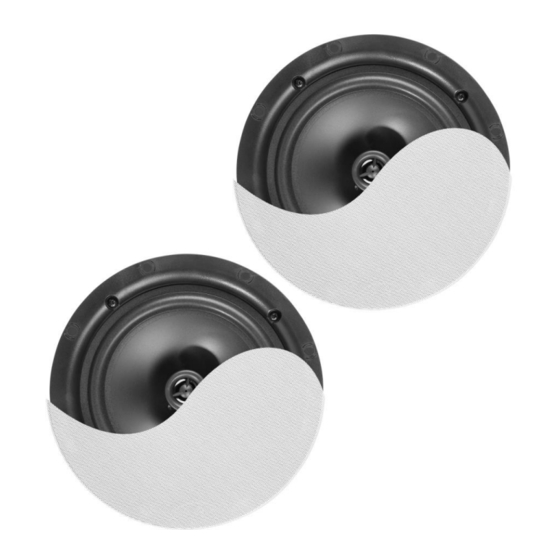
NCBT Series Amplified Ceiling Speaker BT
Ref. nr.: 952.628; 952.630; 952.631; 952.632; 952.634; 952.635; 952.636;
952.640
INSTRUCTION MANUAL
GEBRUIKSAANWIJZING
BEDIENUNGSANLEITUNG
MANUAL DE INSTRUCCIONES
MANUEL D'INSTRUCTIONS
INSTRUKCJA OBSŁUGI
V1.5
Publicité

Sommaire des Matières pour Power Dynamics NCBT Serie
- Page 1 NCBT Series Amplified Ceiling Speaker BT Ref. nr.: 952.628; 952.630; 952.631; 952.632; 952.634; 952.635; 952.636; 952.640 INSTRUCTION MANUAL GEBRUIKSAANWIJZING BEDIENUNGSANLEITUNG MANUAL DE INSTRUCCIONES MANUEL D'INSTRUCTIONS INSTRUKCJA OBSŁUGI V1.5...
- Page 2 ENGLISH Congratulations to the purchase of this Power Dynamics product. Please read this manual thoroughly prior to using the unit in order to benefit fully from all features. Read the manual prior to using the unit. Follow the instructions in order not to invalidate the warranty. Take all precautions to avoid fire and/or electrical shock.
- Page 3 INSTALLATION 1. Drill a hole in the ceiling, big enough to fit the speaker (check technical specification sheet for size). 2. Connect the active speaker with the 12VDC adapter. 3. Connect active and passive speaker with speaker cable (+/-) if applicable. 4.
- Page 4 NEDERLANDS Hartelijk dank voor de aanschaf van dit Power Dynamics product. Neemt u a.u.b. een paar momenten de tijd om deze handleiding zorgvuldig te lezen, aangezien wij graag willen dat u onze producten snel en volledig gebruikt. Lees deze handleiding eerst door alvorens het product te gebruiken. Volg de instructies op anders zou de garantie wel eens kunnen vervallen.
- Page 5 INSTALLATIE 1. Boor een gat, groot genoeg voor de luidspreker (zie technische specificaties voor de maten). 2. Sluit de actieve luidspreker aan met de 12VDC adapter. 3. Koppel de actieve en de passieve luidspreker door middel van een luidsprekerkabel (+/-) indien van toepassing.
- Page 6 DEUTSCH Vielen Dank für den Kauf dieses Power Dynamics gerat. Nehmen Sie sich einen Augenblick Zeit, um diese Anleitung sorgfältig durchzulesen, damit sie die Möglichkeiten, die unser Produkt bietet, sofort voll ausnutzen können. Lesen Sie erst die Anleitung vollständig vor der ersten Inbetriebnahme durch. Befolgen Sie die Anweisung, da sonst jeglicher Garantieanspruch verfällt.
- Page 7 INSTALLATION 1. Bohren sie ein Loch, groß genug um den Lautsprecher zu passen (Abmessungen siehe technisches Datenblatt). 2. Verbinden Sie den Aktivlautsprecher mit dem 12VDC Adapter. 3. Verbinden Sie beide Lautsprecher mit Lautsprecherkabel (+/-) falls zutreffend. 4. Stellen Sie den Lautsprecher in das Loch. 5.
- Page 8 Esta garantía no es aplicable en caso de accidente o daños ocasionados por uso indebido del aparato o mal uso del mismo. Power Dynamics no se hace responsable de daños personales causados por el no seguimiento de las normas e...
- Page 9 INSTALACIÓN 1. Perforar un agujero en el techo, lo suficientemente grande para que quepa el altavoz. 2. Conectar el altavoz activo con el enchufe de 12 V CC. 3. Conectar altavoz activo y pasivo con el cable del altavoz (+/-) si procede. 4.
- Page 10 FRANÇAIS Nous vous remercions d’avoir acheté un produit Power Dynamics. Veuillez lire la présente notice avant l’utilisation afin de pouvoir en profiter pleinement. Veuillez lire la notice avant toute utilisation. Respectez impérativement les instructions afin de continuer à bénéficier de la garantie.
- Page 11 INSTALLATION 1. Percez un trou dans le plafond, assez large pour que le haut-parleur puisse entrer. 2. Reliez le haut-parleur actif à la prise 12 VDC. 3. Reliez l’enceinte active et l’enceinte passive avec le câble haut-parleur (+ / -) si nécessaire. 4.
- Page 12 POLSKI Gratulujemy zakupu urządzenia marki Power Dynamics. Proszę o przeczytanie instrukcji przed użyciem urządzenia, aby jak najlepiej móc wykorzystać jego możliwości. Przeczytaj tę instrukcję przed pierwszym użyciem urządzenia. Postępuj zgodnie z instrukcją, aby nie utracić gwarancji. Zwróć uwagę na wszystkie ostrzeżenia, aby uniknąć pożaru lub/oraz porażenia prądem. Naprawy mogą być przeprowadzane jedynie przez autoryzowany serwis.
- Page 13 INSTALACJA 1. Wywiercić dziurę w suficie wystarczająco duża, aby zmieścił się głośnik (można sprawdzić rozmiar w specyfikacji technicznej produktu). 2. Podłączyć aktywną kolumnę za pomocą wtyczki 12VDC. 3. Połączyć aktywną i pasywną kolumnę kablem głośnikowym (+/-), jeśli dotyczy. 4. Wsadzić głośnik w dziurę. 5.
- Page 15 TECHNICAL SPECIFICATION / TECHNISCHE SPECIFICATIE / TECHNISCHE DATEN / ESPECIFICACIONES TÉCNICAS / SPÉCIFICATIONS TECHNIQUES / SPECYFIKACJA TECHNICZNA NCBT5 NCBT6/601/604 NCBT8 NCBT5B NCBT6B NCBT8B Ref.nr. 952.630 952.628/ 952.632 952.634 952.635 952.636 952.631/ 952.640 Power RMS 40Watt 30/60/120Watt 80Watt 40Watt 60Watt 80Watt 80Hz –...
- Page 16 Specifications and design are subject to change without prior notice. www.tronios.com Copyright © 2022 by Tronios The Netherlands...


