
Manuels Connexes pour FAR R2135


Sommaire des Matières pour FAR R2135
- Page 1 All manuals and user guides at all-guides.com Imported by / Importé par CONFORAMA France SA 80 Boulevard du Mandinet Lognes 77432 Marne la Vallée Cedex 2 FRANCE R2135 R2135S...
- Page 2 MANUEL D’UTILISATION R2135 R2135S Nous vous remercions d’avoir choisi la qualité FAR. Ce produit a été créé par notre équipe de professionnels et selon la réglementation européenne. Pour une meilleure utilisation de votre nouvel appareil, nous vous recommandons de lire attentivement ce manuel d’instructions et de le conserver pour toute référence ultérieure.
- Page 3 All manuals and user guides at all-guides.com FRANÇAIS FRANÇAIS • MISE EN GARDE: Ne pas utiliser INSTRUCTIONS DE SECURITE d’appareils électriques à l’intérieur du MISES EN GARDE IMPORTANTES: compartiment de stockage des denrées, à moins LIRE ATTENTIVEMENT ET qu’ils ne soient du type recommandé par le CONSERVER POUR REFERENCE fabricant. ULTERIEURE • Cet appareil peut être utilisé par des enfants • Cet appareil est destiné à être utilisé dans des âgés d’au moins 8 ans et par des personnes applications domestiques et analogues telles que: ayant des capacités physiques, sensorielles ou – des coins cuisines réservés au personnel mentales réduites ou dénuées d’expérience dans des magasins, bureaux et autres ou de connaissance, s’ils (si elles) sont environnements professionnels;...
- Page 4 All manuals and user guides at all-guides.com FRANÇAIS FRANÇAIS • Ne pas stocker dans cet appareil des substances que celle-ci soit désactivée afin d’éviter que des explosives telles que des aérosols contenant des enfants ne risquent de se retrouver enfermés à gaz propulseurs inflammables. l’intérieur en jouant. • Ne pas mettre en marche au moyen d’un • Les anciens réfrigérateurs peuvent contenir programmateur, d’une minuterie, ou d’un des CFC qui détruisent la couche d’ozone; système de commande à distance séparé ou contactez le centre de traitement des déchets le tout autre dispositif qui met l’appareil sous plus près de chez vous pour plus de détails sur tension automatiquement. les procédures correctes de mise au rebut. • MISE EN GARDE: Remplir les bacs à • Débranchez toujours l’appareil après usage et glaçons uniquement avec de l’eau potable. avant de le nettoyer. Enlevez tous les aliments • En ce qui concerne les informations pour avant de nettoyer l’appareil. l’installation, la manipulation, l’entretien et • Évitez de mettre des aliments trop volumineux, la mise au rebut de l’appareil, référez-vous au le fonctionnement de l’appareil risquerait d’être paragraphe ci-après de la notice.
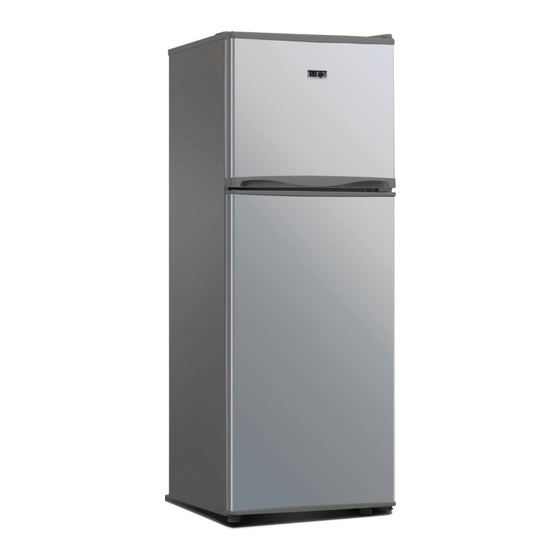
- Page 5 All manuals and user guides at all-guides.com FRANÇAIS FRANÇAIS CARACTERISTIQUES TECHNIQUE DESCRIPTION DE L’APPAREIL Modèle FAR R2135 R2135S Catégorie d’appareil de catégorie 7 réfrigération ménager: Classe d’efficacité énergétique Consommations 187 kWh/an d’énergie annuelle (1) Volume utile des Réfrigérateur : 94L compartiments Congélateur : 33L Dégivrage Réfrigérateur: automatique Congélateur: manuel Autonomie Pouvoir de congélation 2.0kg / 24h Classe climatique + fourchette de (de +16°C à +38°C) températures ambiantes Émissions acoustiques...
- Page 6 All manuals and user guides at all-guides.com FRANÇAIS FRANÇAIS INSTALLATION REGLAGE DU THERMOSTAT Le réfrigérateur est commandé par un bouton de thermostat situé en haut. Pour régler • Mettez l’appareil en position puis attendez deux à trois heures avant de le mettre en le réfrigérateur plus froid, tournez le bouton du cran STOP (0) vers les nombres marche pour la première fois, le temps que le système se mette en place. L’appareil élevés. Le thermostat peut être réglé de 1 à 7. ne doit pas être placé à proximité d’une source de chaleur (ex: cuisinière, chaudière, Plus le bouton est sur un chiffre élevé, plus la température est basse dans tous les lumière directe du soleil etc.). compartiments de l’appareil. • Afin de permettre une bonne ventilation, laissez un espace d’au moins 10cm au- Les changements de température ambiante affectent la température à l’intérieur dessus de l’appareil et de 10 cm sur les côtés et derrière. Cet appareil n’est pas de l’appareil ; il est donc important de régler l’appareil en fonction des conditions conçu pour une installation encastrée. ambiantes. • L’appareil doit être installé sur une surface plane, solide et stable ; toute irrégularité Sur le cran STOP (0), l’appareil ne fonctionne pas (le système de refroidissement est du plancher doit être corrigée avant l’installation ; si l’appareil est légèrement désactivé), mais il est quand même sous tension. bancal, ajustez la hauteur des pieds de devant. Mettez le thermostat sur un cran intermédiaire pour une température de -18°C dans • REMARQUE : Si l’appareil est placé sur un tapis ou un revêtement de sol souple, le congélateur.
- Page 7 All manuals and user guides at all-guides.com FRANÇAIS FRANÇAIS A chaque modification du réglage du thermostat, attendez la stabilisation de la Les données techniques mentionnées dans les “Spécifications” correspondent à une température à l’intérieur de l’appareil avant de procéder si nécessaire à un nouveau utilisation de l’appareil sans les tiroirs du congélateur. réglage. Ne modifiez la position du thermostat que progressivement et attendez au FABRICATION DE GLAÇONS moins 12 heures avant de procéder à une nouvelle vérification. Remplissez le bac à glaçons aux 3/4 avec de l’eau potable. Remarque: après chargement de l’appareil de denrées fraîches ou après des Mettez le bac dans le tiroir du haut. ouvertures répétées ou prolongées de la porte il est normal que l’inscription « OK » Fermez la porte. n’apparaisse pas dans l’indicateur de température ; attendez au moins 12 heures avant Pour sortir les glaçons du bac: mettez-le sous le robinet pendant quelques instants de réajuster le thermostat. puis tordez-le légèrement pour détacher les glaçons. ACHAT DE PRODUITS SURGELÉS CONSEILS EN MATIÈRE D’ÉCONOMIE D’ÉNERGIE Cet appareil est un congélateur à 4 étoiles; il peut servir à congeler des produits frais Installez le réfrigérateur ou le congélateur dans un endroit frais à l’abri des rayons et à conserver des produits surgelés. Lorsque vous achetez des produits surgelés, lisez directs du soleil et en le tenant éloigné de toute cuisinière, radiateur, lave-vaisselle ou les instructions de rangement figurant sur leur emballage. La durée maximale de tout appareil émettant de l’air chaud.
- Page 8 All manuals and user guides at all-guides.com FRANÇAIS FRANÇAIS INVERSION DE PORTE Retirez la vis de la charnière inférieure et le remonter à la position du miroir. Retirez le couvercle de la charnière supérieure droite avec un tournevis. Puis dévisser les vis et retirer la charnière supérieure. Déposez la porte du compartiment de congélation. Retirez la charnière au milieu à droite; déposer la porte du compartiment de réfrigération. Enlevez la butée de porte du réfrigérateur et la déplacez vers le côté opposé. Retirez ensuite la charnière inférieure. ASSEMBLEE DES PORTES Fixer la charnière inférieure sur le réfrigérateur à gauche, aligner le trou de la porte du compartiment de réfrigération à l’arme de la charnière tout en prenant soin de l’alignement de la porte par rapport au réfrigérateur. FR-12 FR-13...
- Page 9 All manuals and user guides at all-guides.com FRANÇAIS FRANÇAIS ENTRETIEN Placez la charnière intermédiaire sur le côté gauche du réfrigérateur en insérant le canon dans le trou de la DEGIVRAGE DU REFRIGERATEUR porte puis fixez-la fermement. • Le processus de dégivrage du réfrigérateur se déclenche automatiquement chaque fois que le compresseur s’arrête. • L’eau de dégivrage est automatiquement dirigée vers le trou d’évacuation d’où elle s’écoule dans un bac placé sur le compresseur, derrière l’appareil, avant de s’évaporer. • Assurez-vous que le trou d’évacuation du réfrigérateur, situé derrière l’appareil, reste bien dégagé en permanence. Fixer la butée de porte fournie au côté gauche de la porte du compartiment de congélation. Aligner le trou inférieur de la porte au canon de la charnière intermédiaire tout en prenant soin de l’alignement de la porte par rapport au réfrigérateur. DEGIVRAGE DU CONGELATEUR • Le givre s’accumule dans le congélateur à une vitesse qui dépend de la durée d’ouverture de la porte, ainsi que de la quantité d’humidité qui y est introduite. Insérez le canon de la charnière • Il est essentiel de faire en sorte que le givre ou la glace ne se forme pas à un endroit supérieure dans le trou supérieur où ils pourraient compromettre l’étanchéité du joint de la porte.
- Page 10 All manuals and user guides at all-guides.com FRANÇAIS FRANÇAIS • Pour enlever les dépôts de glace épais, débranchez l’appareil, videz son contenu • Ne conservez pas des substances toxiques ou dangereuses dans ce congélateur. Il est et placez-le dans des boîtes en carton que vous envelopperez dans des couvertures conçu pour la congélation des aliments comestibles uniquement. épaisses ou dans plusieurs couches de papier pour les garder au froid. Le dégivrage • Évitez de consommer des aliments qui sont restés congelés pendant trop est plus efficace si le congélateur est vide; il doit s’effectuer le plus rapidement longtemps. possible. • Évitez de laisser la porte ouverte pendant trop longtemps: cela augmente la • Pendant le dégivrage, toute hausse de température des aliments surgelés raccourcit consommation d’électricité et entraîne une formation excessive de glace. leur durée de conservation. Si les aliments sont correctement emballés et placés • N’utilisez jamais des objets pointus (ex: un couteau) pour enlever la glace de dans un endroit frais, ils doivent pouvoir se conserver pendant plusieurs heures. l’appareil. Utilisez toujours un grattoir en plastique. • Au moment où vous remettez les aliments dans le congélateur, examinez leur • Ne mettez jamais des aliments chauds dans l’appareil. Laissez-les refroidir à contenu afin de vous assurer qu’ils n’ont pas été décongelés. température ambiante. • Une fois le dégivrage terminé, lavez l’intérieur avec un mélange d’eau chaude et • Ne mettez jamais dans le congélateur des bouteilles remplies de liquide ou des d’un peu de bicarbonate de soude, puis séchez soigneusement. Lavez de la même boîtes scellées contenant des liquides gazeux, car elles pourraient éclater.
- Page 11 Branchez un autre appareil sur la même prise afin de vous assurer qu’elle est bien alimentée; si l’autre appareil marche, vérifiez le fusible de la prise. Thank you to have chosen the FAR quality. This product has been created by our professional L’APPAREIL FAIT BEAUCOUP DE BRUIT PENDANT QU’IL FONCTIONNE. team and according to the European regulation. For a better use of your new device, we recommend you to read carefully this user manual and keep it for record.
- Page 12 All manuals and user guides at all-guides.com English English • This appliance can be used by children aged SAFETY INSTRUCTIONS from 8 years and above and persons with IMPORTANT SAFETY INSTRUCTIONS: reduced physical, sensory or mental capabilities READ CAREFULLY AND KEEP FOR or lack of experience and knowledge if they FUTURE REFERENCE have been given supervision or instruction • This appliance is intended to be used in concerning use of the appliance in a safe way household and similar applications such as: and understand the hazards involved. Children – staff kitchen areas in shops, offices and other shall not play with the appliance. Cleaning working environments; and user maintenance shall not be made by – farm houses; children without supervision. –...
- Page 13 All manuals and user guides at all-guides.com English English • Regarding the information for the installation, • Do not insert oversized food as this could operation, maintenance and disposal of the cause incorrect operation. device, refer to the following paragraph of the • Extreme caution must be used when moving instruction manual. an appliance. • Refer to the paragraph after the manual for • To turn the appliance off, turn the thermostat information on how to replace the lighting. knob fully anticlockwise to OFF, then remove the plug from the mains socket. • Caution: Risk of fire • Do not give children ice-cream and water ices direct from the freezer as the low temperature WARNINGS may cause ‘freezer burns’ on the lips. • If you are discarding an old freezer or refrigerator with a lock / catch fitted to the door, ensure that it is left in a disabled condition to prevent the entrapment of young children when playing. • As old refrigeration equipment may contain CFC’s which will damage the ozone layer, when disposing of any refrigeration equipment...
- Page 14 All manuals and user guides at all-guides.com English English TECHNICAL INFORMATION DESCRIPTION OF THE DEVICE Brand FAR R2135 R2135S Category of household catalogue 7 refrigerating appliance Energy class Annual energy 187 kW/an consumption Storage volume Refrigerator : 94L Freezer : 33L Defrost Refrigerator: automatic Freezer: manual Autonomy Freezing capacity 2.0kg / 24h Climate class + Ambient range (+16°C to +38°C) Noise 41dB...
- Page 15 All manuals and user guides at all-guides.com English English INSTALLATION SETTING THE THERMOSTAT KNOB The refrigerator is controlled with a thermostat knob located inside the fridge, • Position the appliance and allow it to stand for two to three hours before it is towards the upper right-hand corner. Turn the knob from the STOP (0) position turned on for the first time to allow the system to settle. Do not position next to towards the higher numbers for colder temperatures. The knob can be adjusted from setting 1 to 7. any heat source e.g. cooker, boiler or in direct sunlight etc. Higher settings on the knob (higher numbers) mean lower temperatures (colder) in • Allow at least 10cm of space at the top and 10 cm of space on both sides of the all compartments of the appliance. appliance and between the back of the appliance and the wall for adequate air circulation. The appliance is not designed for recessed installation (“building in”). Changes of the ambient temperature affect temperature in the interior of the • Install on a good firm level surface, and any unevenness of the floor should be appliance so choose a correct setting of the temperature control knob, depending on corrected prior to installation, slight unevenness can be overcome by adjusting the your ambient conditions. front feet. In the STOP (OFF) position the appliance does not operate (the cooling system is switched off), but power supply is not interrupted. • NOTE: If the appliance is positioned on a carpet, soft floor covering you should readjust the front feet once the appliance has had time to settle. Set the thermostat knob to a middle position to achieve -18°C in the freezer compartment.
- Page 16 All manuals and user guides at all-guides.com English English For every modification of your thermostat, you are supposed to wait for the The technical data mentioned in the ‘Specifications’ are obtained in the case that the stabilization of the temperature inside the unit before proceeding, if necessary, to a freezing drawers are removed. new setting. Do change the position of the thermostat gradually and wait at least 12 MAKING ICE CUBES hours before re-checking. 1. Fill the ice tray with ¾ full of clean water. NOTE: after charging the device for fresh food or after repeated or prolonged door 2. Place the tray in the top freezing drawer. openings, it is normal that the inscription “OK” does not appear in the temperature indicator. 3. Close the door. Wait at least 12 hours before readjusting the thermostat. To remove the ice cubes from the tray, put the tray under running water for a while and then twist the tray slightly to loosen the ice cubes. SHOPPING FOR FROZEN FOOD ENERGY-SAVING TIPS The appliance is rated as a 4 star freezer and can freeze fresh food and store pre- Install the fridge or freezer in a cool place out of direct sunlight and away from frozen food. When you are buying frozen food, look at the Storage Guidelines on the packaging. You will be able to store each item of frozen food for the period shown cookers, heaters, dishwashers or any hot air emitting items. against the 4 star rating. Do not set the fridge and freezer temperatures lower than necessary. Set the internal temperature within the correct range e.g. adjust the thermostat at middle position for FREEZING FRESH FOOD 4°C in the fridge compartment and -18°C in the freezer respectively.
- Page 17 All manuals and user guides at all-guides.com English English REVERSE DOOR Remove the screw from the bottom hinge and refit it to the mirror Follow the following stages to reverse the door from its initial position. position. DEPOSIT DOORS Withdraw the lid of the right upper hinge with a screwdriver. Then unscrew the screws and remove the upper hinge. Deposit the door of the freezing compartment. Remove door stopper from the fridge door. Move the stopper to the opposite side. Remove the right middle hinge; deposit the door of the refrigerating compartment. Then remove the bottom hinge. ASSEMBLY OF THE DOORS Fix the lower hinge on the left refrigerator, align the hole of the door of the refrigerating compartment to the gun of the hinge while taking care of the alignment of the door compared to the refrigerator. GB-12 GB-13...
- Page 18 All manuals and user guides at all-guides.com English English MAINTENANCE Position the middle hinge on the left of the refrigerator and insert the gun of hinge in the hole of the door then FRIDGE DEFROSTING fix it firmly. • The fridge defrosting process is carried out automatically every time the compressor stops. • The defrost water is automatically routed to the drain port and into a tray placed on the top of the compressor to the rear of the appliance from which it evaporates. • Make sure the drain port on the fridge at the rear of the appliance is kept clear. Fix the left door stop on the left of the door of the freezing compartment. Align the lower hole of the door to the gun of the left middle hinge while taking care of the alignment of the door compared to the refrigerator. FREEZER DEFROSTING • Frost will accumulate inside the freezer depending upon the length of time during which the door is left open or the amount of moisture introduced. • It is essential to ensure that no frost or ice is allowed to form at places where it will affect the close fitting of the door seal. Insert the gun of the upper hinge in the upper hole of the door then fix it • This might allow air to penetrate the cabinet, thus encouraging continuous running firmly. Cover the hinge with the lid. of the compressor.
- Page 19 All manuals and user guides at all-guides.com English English • After defrosting is finished clean the inside with a solution of warm water with a • Do Not try to keep frozen food which has thawed; it should be eaten within 24 little bicarbonate of soda and then dry thoroughly. Wash all removable parts in the hours or cooked and re-frozen. same way and reassemble. CHANGING THE LIGHT BULB • Reconnect the appliance to the mains supply and leave for 2 to 3 hours on setting Set the thermostat knob to the off position (0) then unplug the appliance. number 7 before introducing the food back into the freezer and setting the Remove the food. thermostat to your normal setting. Push upward to remove the light shield. NOISE FROM YOUR APPLIANCE Unscrew the bulb and screw a new bulb of the same shape same power (230V-10W • You may notice some rather unusual noises. The noises are caused by circulation E14 base). of refrigerant in the cooling system. It has become more pronounced since Attach the light shield. the introduction of CFC free gases. This is not a fault and will not affect the performance of your fridge. CLEANING PROLONGED OFF PERIODS Unplug the appliance.
- Page 20 All manuals and user guides at all-guides.com English DISPOSAL The refrigerating gas contained in the circuit of this appliance is isobutane (R600a); it causes a low level of pollution but is inflammable. Please contact your local disposal department for advice on the correct method of disposal. DISPOSAL OF OLD ELECTRICAL APPLIANCES The European directive 2012/19/EU on Waste Electrical and Electronic Equipment (WEEE), requires that old household electrical appliances must not be disposed of in the normal unsorted municipal waste stream. Old appliances must be collected separately in order to optimize the recovery and recycling of the materials they contain, and reduce the impact on human health and the environment. The crossed out “wheeled bin” symbol on the product reminds you of your obligation, that when you dispose of the appliance, it must be separately collected. Consumers should contact their local authority or retailer for information concerning the correct disposal of their old appliance. GB-18...