
Sommaire des Matières pour Nexus TH43
- Page 1 Log transducer Loggivare Log Geber Capteur Loch Installation Manual English Installationsanvisning svensk Installations-Anleitung Deutsch Manuel d’Installation Français...
- Page 2 LOG TH43 Svenska 10-1...
- Page 3 Svenska LOG TH43 This manual is written for NX2 Log transducer 1.00 Edition 4: September 2011 10-2...
-
Page 4: Table Des Matières
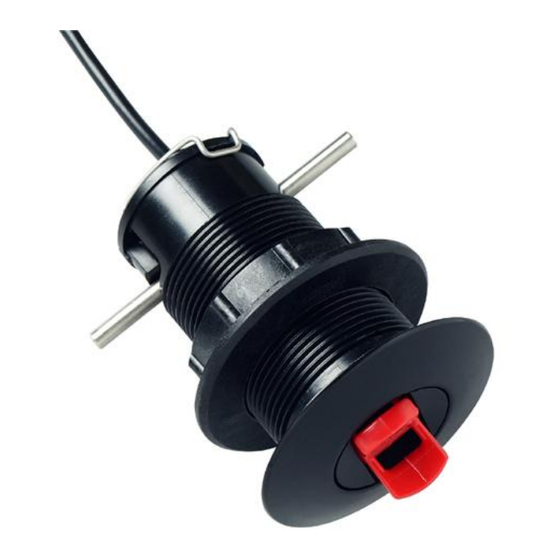
English LOG TH43 Svenska Mounting instruction Nexus/Star log/temp transducer CONTENTS: 1. General 2. Part specification 3. Location of the paddle wheel transducer 4. installing the through-hull fitting 5. Connection to instrument/contacts 6. Calibration 7. Technical data 6. Warranty 1 GENERAL The log/temp transducer is an impeller transducer installed through the hull and designed to meet the requirements of owners of sailing crafts and power boats. - Page 5 English Svenska LOG TH43 3. CORRECT LOCATION OF PADDLEWHEEL TRANSDUCER Generally the transducer should be placed as far forward as possible along the waterline length and close to the centreline. It is important that the transducer is always in the water, within the whole speed range of the boat.
- Page 6 English LOG TH43 Svenska Sailboats with a fin keel must have the transducer located at least 25 cm but not more than 75 cm in front of the keel. It should be placed no more than 10 cm off the centreline.
-
Page 7: Installing The Through-Hull Fitting
English Svenska LOG TH43 4. INSTALLING THE THROUGH HULL FITTING Use a 43 mm (1 11/16”) hole cutter to cut through the hull. (See section 3 for correct location). Apply the polyurethane sealing compound on the outer flange of the through-hull fitting and tighten the nut on the inside by hand. -
Page 8: Connection To Instrument/Contacts
Svenska 5. CONNECTION TO INSTRUMENT/CONTACTS The log/temp transducer connects to the Nexus Server or directly to the Nexus Speed Log. The transducer cable is clearly marked with No 1 and the colours will correspond to input screw terminal on the Server. -
Page 9: General
English Svenska LOG TH43 8 WARRANTY GENERAL All our products are designed and built to comply to the highest class industry standards. If the products are correctly installed, maintained and operated, as described in the installation and operation manual, they will provide long and reliable service. - Page 10 English LOG TH43 Svenska 10-9...
-
Page 11: Allmän Beskrivning
Svenska LOG TH43 Monteringsinstruktion Nexus/Star logg/temp-givare INNEHÅLLSFÖRTECKNING Allmän beskrivning Leveransspecifikation Placering av paddelhjulsgivaren Montering av skrovgenomföringen Inkoppling till instrument/Anslutningar Kalibrering Tekniska data (Prestanda) Garanti 1. ALLMÄN BESKRIVNING Loggivaren är en paddelhjulsgivare med skrovgenomföring, utformad för att tillfredställa kraven från såväl selare som motorbåtsägare. - Page 12 LOG TH43 Svenska 3. PLACERING AV PADDELHJULSGIVAREN Allmänt skall givaren placeras så långt fram som möjligt på vattenlinjens längd och nära mittlinje. Viktigt är att givaren alltid kommer att befinna sig i vattnet i hela fartregistret. För snabb- gående motorbåtar bör man tänka på att båtens vattenlinjelängd förkortas ner ordentligt i högre farter.
- Page 13 Svenska LOG TH43 Fenkölade segelbåtar skall ha givaren 25 - 75 cm framför kölen och max 10 cm vid sidan av mittlinjen. På segelbåtar med starkt V-format skrov, som t.ex långkölade båtar, kan det vara gynnsamt att vrida givaren en aning så att den pekar mot stäven.
- Page 14 LOG TH43 Svenska 4. MONTERING AV SKROVGENOMFÖRINGEN Ta upp ett hål med en 43 mm hålsåg. (Se avsnitt 3 betr. placering.). Lägg tätningsmassa (för undervattensbruk)runt genomföringens yttre fläns och skruva åt mutter på insidan för hand. Montera de båda O-ringarna på blindpluggen.
-
Page 15: Tekniska Data
Skulle du behöva kapa 8 meters kabeln, använd de extra medföljande ändhylsorna. Kläm på hylsorna med en platt tång. 6. KALIBRERING All kalibrering sker i Nexus Multi Control instrumentet eller Nexus Speed Logg instrument.(Se separat bruksanvisning). 7. TEKNISKA DATA Mått, givare: 42 x 86 mm Mått, skrovtjocklek:... - Page 16 LOG TH43 Svenska 8. GARANTI ALLMÄNT Alla produkter är utvecklade och tillverkade för att motsvara den yppersta bransch standarden. När produkten är korrekt installerad, handhavd och underhållen, i enlighet med beskrivningen i produktens manual, kommer den att bidra med många års tillförlitlig drift. Utöver produktens tekniska manual kan också vår världsomspännande återförsäljar- och serviceorganisation bistå...
- Page 17 Svenska LOG TH43 Deutsch Montageanweisung Nexus/Star log-/Temperaturgeber INHALT: 1. Allgemeins 2. Teile-Liste 3. Plazierung des Schaufelrad-Gebers 4. Montage des Bordwanddurchlasses 5. Montage des Instruments/Kontakte 6. Eichung 7. Technische Daten 8. Garantie. 1. ALLGEMEINES Der Log-/ Temperageber ist ein Impellergeber, der durch den Rumpf angebracht wird und für Segel- und Motorboote geeignet ist.
-
Page 18: Plazierung Des Schaufelradgebers
Deutsch LOG TH43 Svenska 3. PLAZIERUNG DES SCHAUFELRADGEBERS Im Allgemeinen sollte das schaufelrad so weit vorne wie möglilich angebracht werden, 25-35% achtern an der Wasserline entlang dicht der Mittellinie. Der Geber muß bei jeder Geschwindigkeit (auch Gleitfahrt) immer unter Wasser sein. - Page 19 Svenska LOG TH43 Deutsch Bei Segelbooten mit einem Flossenkiel muß der Geber mindestens 25 cm, aber nicht mehr als 75 cm, vor dem Kiel montiert werden und max. 10 cm von der Mittellinie Bei Booten mit einem ausgesprochenen, V –Rumpf, wie z.B. Vollkielyachten, ist es vorteilhaft, den geber so zu winkeln, daß...
-
Page 20: Montage Des Borddurchlasses
LOG TH43 Svenska Deutsch 4. MONTAGE DES BORDDURCHLASSES Bohren Sie ein Loch mit 43 mm Durchmesser durch den Rumpf (siehe Kap.3 -Einbauort). Bestreichen Sie die Aussenseite des Borddurchlasses mit Polyurethan-Dichtungsmittel, stecken Sie den Borddurchlass von aussen durch den Rumpf und befestigen ihn von innen mit der Mutter. -
Page 21: Montage Des Instruments/Kontakte
LOG TH43 Deutsch 5. MONTAGE DES INSTRUMENTS/ KONTAKTE Der Log-/Temperaturgeber wird an den Nexus Server (Verteiler) order direkt an das Nexus Log angeschlossen. Das Geberbabel ist deutlich markiert mit Nr. 4. Die Farben entsprechen den Farben am entsprechenden Eingang an der Klemmleiste des Servers. -
Page 22: Garantie
LOG TH43 Svenska Deutsch 8. GARANTIE ALLGEMEINES Alle unsere Produkte sind entsprechend dem höchsten Industriestandard konstruiert und hergestellt. Wenn die Geräte gemäß der Gebrauchsanleitung korrekt installiert sind, ordnungsgemäß gewartet und richtig bedient werden, werden sie lange und zuverlässig arbeiten. Unser internationales Netzwerk von Vertretungen steht Ihnen in allen Wassersportrevieren auf der Welt mit Informationen und Hilfe zur Verfügung, wenn Sie es wünschen. -
Page 23: Generalites
Svenska LOG TH43 Français Instructions de montage du capteur loch/temp Nexus/Star SOMMAIRE: 1. Généralités 2. Spécification des pièces 3. Emplacement du capteur à aubes 4. Montage à travers coque 5 Connection aux instruments/contacts 6. Calibrage 7. Caractéristiques techniques 6. Garantie 1. -
Page 24: Emplecement Correct Du Capteur A Aubes
LOG TH43 Svenska Français 3. EMPLECEMENT CORRECT DU CAPTEUR A AUBES En règle générale, le capteur doit être situé aussi loin que possible en avant sur la longueur de la ligne de flottaison et à proximité de l’axe central. I’l est important que le capteur soit toujours immergé... - Page 25 Svenska LOG TH43 Français Les bateaux à voile avec une quille doivent avoir un capteur placé au moins à 25 cm en avant de la quille, sans toutefois excéder 75 cm. Il ne doit pas êtr décalé de plus de 10 cm par rapport à l’...
-
Page 26: Montage A Travers Coque
LOG TH43 Svenska Français 4. MONTAGE A TRAVERS COQUE Utilisez une perceuse 43 mm (1 11/16 ) pour percer la coque (voir chapitre 3 pour un emplacement correct). Appliquez le polyuréthane d’étanchéité sur la bride externe de le passe coque et serrez l’écrou de l’intérieur à... -
Page 27: Calibrage
LOG TH43 Français 5. CONNECTION A L´INSTRUMENT/ CONTACTS Le capteur loch/temp se connecte au serveur Nexus ou directement au loch Nexus. Le câble de capteur est clairement marqué nº 1 et les couleurs correspondent à la borne `vis d’enrée du serveur. - Page 28 LOG TH43 Svenska Français 8. GARANTIE GENERALITES Tous nos produits sont conçus et fabriqués selon les normes industrielles les plus sévères. Si les appareils sont installés, entretenus et utilisés suivant les instructions contenues dans le manuel d'installation et d'utilisation, ils vous donneront satisfaction durant de nombreuses années.
- Page 29 Svenska LOG TH43 10-28...
- Page 30 LOG TH43 Svenska Copyright ©: Nexus Marine AB Karlsbodavägen 20B, 168 67 Bromma, Sweden Tel: +46 -(0) 8 – 506 939 00. Fax: +46 -(0) 8 – 506 939 01 www.nexusmarine.se 10-29...