Publicité
Les langues disponibles
Les langues disponibles
Liens rapides
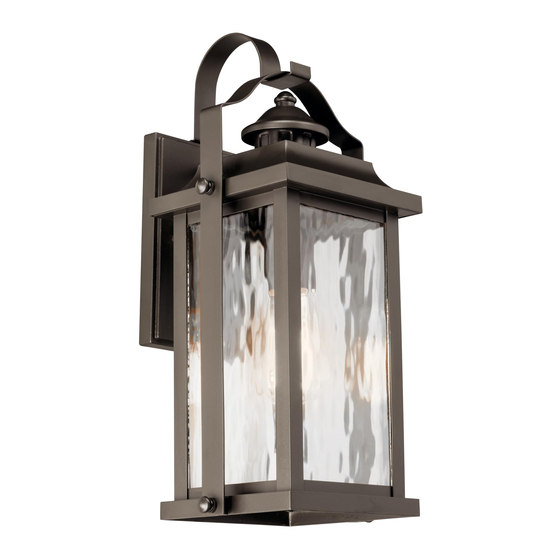
ITEM #0616264, 31885177
OUTDOOR WALL LANTERN
MODEL #39456A
Français p. 8
Español p. 15
ATTACH YOUR RECEIPT HERE
Serial Number
Purchase Date
Questions, problems, missing parts? Before returning to your retailer, call our customer
service department at 1-800-554-6504, 8 a.m. - 4:30 p.m, EST, Monday - Friday.
kichler.com/customer-care/contact-us
1
Publicité

Manuels Connexes pour Kichler 39456A

Sommaire des Matières pour Kichler 39456A
- Page 1 ITEM #0616264, 31885177 OUTDOOR WALL LANTERN MODEL #39456A Français p. 8 Español p. 15 ATTACH YOUR RECEIPT HERE Serial Number Purchase Date Questions, problems, missing parts? Before returning to your retailer, call our customer service department at 1-800-554-6504, 8 a.m. - 4:30 p.m, EST, Monday - Friday.
- Page 2 PACKAGE CONTENTS PART DESCRIPTION QUANTITY Canopy Mounting Bracket Socket Decorative Scroll Fixture Top...
- Page 3 HARDWARE CONTENTS Threaded Decorative Wire Knob Scroll Short Connector Screw Machine Qty: 2 Qty: 3 Qty: 2 Screw Long Qty: 2 Machine Screw Qty: 2 SAFETY INFORMATION Please read and understand this entire manual before attempting to assemble, operate or install the product.
- Page 4 ASSEMBLY INSTRUCTIONS 1. Orient the mounting bracket (B) so the raised center portion protrudes into the outlet box (not included). Insert long machine screws (DD) through mounting bracket (B) so the long Outlet machine screws (DD) protrude outward. Connect the mounting bracket (B) to the outlet box with short machine screws (BB).
- Page 5 ASSEMBLY INSTRUCTIONS 3. Wire connection guide: BARE COPPER, Ground wire: OR GREEN • For installation in the United States: Wrap GROUND BARE COPPER, FIXTURE OR GREEN ground wire from outlet box around ground screw on WIRE GROUND mounting bracket (B) no less than 2 in. from wire SUPPLY WIRE end.
- Page 6 ASSEMBLY INSTRUCTIONS 5. Pass the canopy (A) over the long machine screws (DD) protruding from the mounting bracket (B) and secure in place with threaded knobs (CC). Hardware Used Threaded Knob 6. Insert 60-watt max. medium base bulb or LED equivalent (not included) into socket (C).
- Page 7 1. Check wiring. Fixture does not light. 1. Fixture may be wired incorrectly. 1. Check wiring. 2. Worn or broken bulb. 2. Replace bulb. Distributed by: Kichler Lighting LLC 30455 Solon Rd Solon, OH 44139 Printed in China REV 15-JUN-2022...
- Page 8 Numéro de série Date d’achat Des questions, des problèmes, des pièces manquantes? Avant de retourner le produit à votre détaillant, appelez notre service à la clientèle au 1-800-554-6504, entre 8 h et 16 h 30 (HNE) du lundi au vendredi. kichler.com/customer-care/contact-us...
- Page 9 CONTENU DE L’EMBALLAGE PIÈCE DESCRIPTION QUANTITÉ Pavillon Support de fixation Douille Volute décorative Dessus du luminaire...
- Page 10 QUINCAILLERIE INCLUSE Bouton Vis à Capuchon fileté volute Vis à de connexion décorative métaux Qté : 2 Qté : 3 Qté : 2 courte Vis à Qté : 2 métaux longue Qté : 2 CONSIGNES DE SÉCURITÉ Veuillez vous assurer de lire et de comprendre l’intégralité du présent guide avant d’assembler, d’utiliser ou d’installer ce produit.
- Page 11 INSTRUCTIONS POUR L'ASSEMBLAGE 1. Insérez les vis à métaux longues (DD) dans le support de fixation (B). En laissant les vis à métaux longues (DD) dépasser vers l’extérieur, fixez le support de fixation (B) à la boîte de Boîte sortie (non incluse) à l’aide des vis à métaux courtes (BB).
- Page 12 INSTRUCTIONS POUR L'ASSEMBLAGE 3. Guide de raccordement électrique CUIVRE NU, OU FIL VERT DE MISE À LA TERRE DU Fil de mise à la terre : CUIVRE NU, OU LUMINAIRE FIL VERT DE MISE À LA TERRE • Pour une installation aux États-Unis : enroulez le DE LA RÉSIDENCE fil de mise à...
- Page 13 INSTRUCTIONS POUR L'ASSEMBLAGE 5. Insérez le pavillon (A) sur les vis à métaux longues (DD) sortant du support de fixation (B) et fixez-le à l'aide des boutons filetés (CC). Quincaillerie utilisée Bouton fileté 6. Insérez 60 watts max. ampoule à culot moyen ou équivalent DEL (non inclus) dans la douille (C).
- Page 14 1. Vérifiez si le luminaire Le luminaire 1. Le luminaire est mal branché. est bien branché. ne s’allume pas. 2. L’ampoule est usée ou brisée. 2. Remplacez l’ampoule. Distribué par: Kichler Lighting LLC 30455 Solon Rd Solon, OH 44139 Imprimé en Chine REV 15-JUN-2022...
- Page 15 Número de serie Fecha de compra ¿Preguntas, problemas, piezas faltantes? Antes de devolverlo a la tienda, llame a nuestro departamento de servicio al cliente al 1-800-554-6504, de 8:00 a.m. a 4:30 p.m. hora del Este (EST), de lunes a viernes. kichler.com/customer-care/contact-us...
- Page 16 CONTENIDO DEL PAQUETE PIEZA DESCRIPCIÓN CANTIDAD Cubierta Soporte de montaje Portalámparas Voluta decorativa Parte superior de la lámpara...
- Page 17 ADITAMENTOS Conector Perilla Tornillo de cables Tornillo roscada Voluta Cant.: 3 corto decorativa Cant.: 2 para Cant.: 2 Tornillo metales largo Cant.: 2 para metales Cant.: 2 INFORMACIÓN DE SEGURIDAD Lea y comprenda completamente este manual antes de intentar ensamblar, usar o instalar el producto.
- Page 18 INSTRUCCIONES DE ENSAMBLAJE 1. Oriente el soporte de montaje (B) de modo que la parte central elevada sobresalga en la caja eléctrica. Introduzca los tornillos largos para metales (DD) a través del soporte de montaje Caja (B). Con los tornillos largos para metales (DD) proyectándose hacia afuera, conecte el soporte salida de montaje (B) a la caja eléctrica (no se incluye)
- Page 19 INSTRUCCIONES DE ENSAMBLAJE 3. Guía de conexión de cables: CABLE DE A TIERRA DE LA LÁMPARA DE COBRE Cable a tierra: CABLE DE DESNUDO ALIMENTACIÓN • Para la instalación en los Estados Unidos: O VERDE A TIERRA DE COBRE Enrolle el cable a tierra de la caja eléctrica DESNUDO O VERDE alrededor del tornillo a tierra en la abrazadera de montaje (B), a no menos de...
- Page 20 INSTRUCCIONES DE ENSAMBLAJE 5. Pase la cubierta (A) sobre los tornillos largos para metales (DD) que sobresalen del soporte de montaje (B) y asegúrela en su sitio con las perillas roscadas (CC). Aditamentos utilizados Perilla roscada 6. Inserte un foco de base mediana de 60 vatios como máximo o un equivalente LED (no incluido) en el portalámparas (C).
- Page 21 1. La lámpara puede estar La lámpara no se 1. Inspeccione el cableado. incorrectamente cableada. enciende. 2. La bombilla está quemada o rota. 2. Reemplace la bombilla. Distribuido por: Kichler Lighting LLC 30455 Solon Rd Solon, OH 44139 Impreso en China REV 15-JUN-2022...