Publicité
Liens rapides
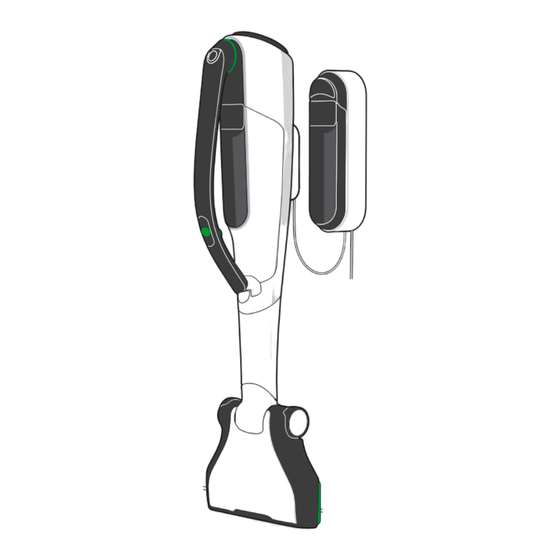
Befestigung PC7 an Wand
Mounting the PC7 on the wall
Fixation PC7 au mur
Sujeción del PC7 a la pared
Upevnění PC7 na stěnu
Montaggio del PC7 alla parete
Zamocowanie PC7 na ścianie
Montageanleitung / Assembly instructions / Instructions de montage /
Manual de montaje / Montážní návod /
Istruzioni di montaggio / Instrukcja montażu
Publicité

Sommaire des Matières pour Vorwerk Kobold PC7 Set
- Page 1 Befestigung PC7 an Wand Mounting the PC7 on the wall Fixation PC7 au mur Sujeción del PC7 a la pared Upevnění PC7 na stěnu Montaggio del PC7 alla parete Zamocowanie PC7 na ścianie Montageanleitung / Assembly instructions / Instructions de montage / Manual de montaje / Montážní...
- Page 2 Benötigte Teile CZ P otřebné díly Parts required Pezzi necessari Pièces requises PL P otrzebne części Piezas necesarias Netzkabel Síťový kabel Mains cable Cavo di alimentazione Cordon d'alimentation Kabel sieciowy Cable de alimentación Montageplatte Mounting plate Plaque de montage Placa de montaje Montážní...
- Page 3 Benötigte Werkzeuge CZ P otřebné nástroje Tools required Utensili richiesti Outils requis PL P otrzebne narzędzia Herramientas necesarias Befestigungsmaterial entsprechend der CZ U pevňovací materiál zvolte podle vlastností zdi Beschaffenheit der Wand wählen IT S cegliere il materiale di fissaggio in base alle EN S elect the appropriate fixing for the wall type caratteristiche della parete FR C hoisir le matériel de fixation en fonction de la PL D obierz materiał montażowy w zależności od qualité du mur właściwości ściany...
- Page 4 DE S chablone aus der Mitte entnehmen. Nach CZ V yjměte šablonu ze středu. V případě potřeby ji Bedarf entlang der Schneidelinie zerschneiden, rozstřihněte podél linie řezu (A → B) um Positionierung zu wechseln (A → B) IT T ogliere la maschera dal centro. Se necessario, EN R emove the template from the centre. ritagliare lungo la linea di taglio per modificare il If required, cut along the dotted line to change posizionamento (A → B) the positioning (A → B) PL W yjmij szablon ze środka. W razie potrzeby FR R etirer le gabarit du centre de ce manuel. Décou- rozetnij wzdłuż linii cięcia, aby zmienić...
- Page 5 DE S chablone aufhängen, Löcher markieren ES C olgar la plantilla, marcar los orificios y taladrar und bohren CZ Š ablonu umístěte, označte a vyvrtejte otvory EN H ang the template on the wall, mark the position IT A gganciare la maschera, contrassegnare e of the holes and drill them praticare i fori FR A ccrocher le gabarit, marquer la position des PL Zawieś szablon, zaznacz i wywierć otwory trous et percer min. 65 cm - max. 100 cm DE B eachten Sie elektrische Leitungen in der Wand EN M ake sure that you are aware of the position of electrical cables in the wall...
- Page 6 DE D übel einsetzen CZ V ložte hmoždinky EN I nsert the dowels Inserire i tasselli FR I nsérer les chevilles PL Włóż kołki Colocar los tacos DE A bdeckung WM7 lösen CZ U volněte kryt WM7 EN R elease the cover on the WM7 IT A llentare il coperchio WM7 FR D étacher le cache de WM7 PL Zdejmij pokrywę WM7 ES S oltar la cubierta del WM7...
- Page 7 DE Unterteil WM7 und Montageplatte festschrauben ES A tornillar el WM7 y el placa de montaje EN S crew the WM7 and mounting plate into place CZ P řišroubujte spodní část WM7 a montážní deska FR V isser la partie inférieure WM7 et plaque de IT A vvitare il WM7 e il piastra di montaggio montage PL Skręć WM7 z płytą montażową DE N etzkabel in Buchse am PC7 (Unterseite) Brancher le cordon d’alimentation dans la prise einstecken und Ladekabel abwickeln de PC7 (face inférieure) et dérouler le câble du EN P lug the mains cable into the socket on the PC7 chargeur secteur (underside) and unwind the charging cable ES C onectar el cable de alimentación en la toma...
- Page 8 DE P C7 auf Montageplatte aufrasten CZ P C7 nasaďte na montážní deska EN C lick the PC7 into place on the mounting plate IT I ncastrare il PC7 sul piastra di montaggio FR E nclencher PC7 sur plaque de montage PL Zatrzaśnij PC7 na płycie montażowej ES E ncajar el PC7 en el placa de montaje DE Ladetatze in WM7 einschieben CZ Z asuňte konektor do WM7 EN I nsert the connector into the WM7 IT Inserire l‘adattatore per ricarica nel WM7 FR I nsérer la fiche dans WM7 PL W łóż wsuwkę ładowania w WM7 ES I nsertar el conector en el WM7...
- Page 9 DE L adekabel durch Kabelführung am WM7 führen ES P asar el cable de carga por la ranura del WM7 EN G uide the charging cable through the groove CZ N abíjecí kabel veďte drážkou na WM7 on the WM7 Inserire il cavo di ricarica nella scanalatura FR P asser le câble du chargeur secteur dans del WM7 la rainure de WM7 PL Poprowadź kabel ładujący przez rowek na WM7 DE A bdeckung des WM7 aufsetzen CZ N asaďte kryt WM7 EN P ut the cover on the WM7 IT Applicare il coperchio del WM7 FR M ettre le cache de WM7 en place...
- Page 10 Zusatzakku einsetzen DE V K7 einhängen EN Insert the additional battery EN Mount the VK7 FR Insérer la batterie d’appoint FR Accrocher le VK7 ES Colocar la batería adicional ES Colgar el VK7 CZ Vložte náhradní akumulátor CZ VK7 zavěste IT Inserire la batteria supplementare IT Agganciare il VK7 PL Włożyć dodatkowy akumulator PL Zawieś VK7...
- Page 11 DE D rücken Sie die grüne Aktivierungstaste (1) zum Deaktivieren des Transportmodus (z.B. bei Erstinbe- triebnahme oder nach Tiefentladung). EN P ress the green button (1) to deactivate transport mode (e.g. when using the device for the first time or after deep discharge). FR A ppuyez sur la touche verte (1) pour désactiver le mode de transport (p.ex. lors de la première mise en service ou suite à la décharge profonde). ES P ulse el botón verde (1) para desactivar el modo de transporte (p. ej., al poner en marcha el aparato por primera vez o tras una descarga profunda). CZ P ro deaktivaci přepravního režimu stiskněte zelené tlačítko (1) (např. při prvním uvedení do provozu nebo po úplném vybití). IT P remere il tasto verde (1) per disattivare la modalità Trasporto (ad es. al primo utilizzo o dopo lo scaricamento completo). PL N aciśnij zielony przycisk (1) w celu dezaktywacji trybu transportowego (np. podczas pierwszego uruchomienia lub po głębokim rozładowaniu). www.vorwerk.com/user-manual-Kobold-VK7 www.vorwerk.com/user-manual-Kobold-VK7 www.vorwerk.com/assembly-video-PC7 www.vorwerk.com/assembly-video-PC7...
- Page 14 Aufbau PC7 auf RB7 Assembly of the PC7 on the RB7 Mise en place PC7 sur RB7 Montaje del PC7 en el RB7 Montáž PC7 na RB7 Montaggio del PC7 sull'RB7S Montaż PC7 na RB7 Montageanleitung / Assembly instructions / Instructions de montage / Manual de montaje / Montážní...
- Page 15 Benötigte Teile CZ Potřebné díly Parts required Pezzi necessari Pièces requises PL Potrzebne części Piezas necesarias...
- Page 16 DE K leine und große Abdeckung (A und B) ES R etirar la cubierta pequeña y la grande (A y B), herausnehmen und aufbewahren y guardarlas EN R emove the small and large cover (A and B) and CZ Malý a velký kryt (A a B) vyjměte a uschovejte store them Togliere e conservare il coperchio piccolo e FR R etirer le petit et le grand cache (A et B) et les grande (A e B) mettre de côté PL Wyjmij i zachowaj małą i dużą pokrywę (A i B)
- Page 17 DE P C7 umdrehen CZ O točte PC7 EN I nvert the PC7 IT G irare il PC7 FR R etourner PC7 PL Obróć PC7 ES G irar el PC7 DE L adekabel abwickeln und durch Kabelführung ES D esenrollar el cable de carga y pasarlo por la führen ranura EN U nwind the charging cable and guide it through CZ N abíjecí kabel odviňte a veďte jej drážkou the groove Svolgere il cavo di ricarica e inserirlo nella sca-...
- Page 18 DE N etzkabel in Buchse am PC7 (Unterseite) ES C onectar el cable de alimentación en la toma einstecken del PC7 (parte inferior) EN P lug the mains cable into the socket CZ S íťový kabel zasuňte do zdířky na PC7 on the PC7 (underside) (spodní strana) Brancher le cordon d’alimentation dans la prise Inserire il cavo di alimentazione nella presa del de PC7 (face inférieure) PC7 (lato inferiore) PL W epnij kabel sieciowy do gniazda na PC7 (na spodzie) DE L adekabel durch Kabelführung am RB7 führen ES P asar el cable de carga por la ranura del RB7...
- Page 19 DE P C7 auf RB7 aufsetzen und nach rechts einrasten CZ P C7 nasaďte na RB7 a aretujte směrem doprava EN P lace the PC7 on the RB7 and slide it to the right IT A pplicare il PC7 sull’RB7 e far scattare in until it clicks into place posizione verso destra FR P lacer PC7 sur RB7 et l’enclencher à droite PL Z ałóż PC7 na RB7 i przesuń w prawo aż usłyszysz ES C olocar el PC7 sobre el RB7 y encajarlo hacia la kliknięcie derecha DE ST7 in Stielaufnahme der RB7 einsetzen CZ S T7 nasaďte do otvoru v RB7 EN I nsert the ST7 into the opening on the RB7 IT I nserire l’ST7 nell’apertura dell’RB7...
- Page 20 DE A bdeckung WM7 lösen CZ U volněte kryt WM7 EN R elease the cover on the WM7 IT A llentare il coperchio WM7 FR D étacher le cache de WM7 PL Odkręć pokrywę WM7 ES S oltar la cubierta del WM7 DE U nterteil WM7 auf ST7 aufsetzen CZ S podní část WM7 nasaďte na ST7 EN A ttach the lower section of the WM7 to the ST7 IT A pplicare la parte inferiore del WM7 sull’ST7 FR P lacer la partie inférieure de WM7 sur ST7 PL Załóż dolną część WM7 na ST7 ES C olocar la parte inferior del WM7 sobre el ST7...
- Page 21 DE Ladetatze in WM7 einschieben CZ Z asuňte konektor do WM7 EN I nsert the connector into the WM7 IT Inserire l‘adattatore per ricarica nel WM7 FR I nsérer la fiche dans WM7 PL Wsuń wtyczkę w WM7 ES I nsertar el conector en el WM7 DE L adekabel durch Kabelführung am WM7 führen ES P asar el cable de carga por la ranura del WM7 EN G uide the charging cable through the groove CZ N abíjecí kabel veďte drážkou na WM7 on the WM7 Inserire il cavo di ricarica nella scanalatura FR P asser le câble du chargeur secteur dans del WM7 la rainure de WM7...
- Page 22 DE A bdeckung des WM7 aufsetzen CZ N asaďte kryt WM7 EN P ut the cover on the WM7 IT A pplicare il coperchio del WM7 FR Mettre le cache de WM7 en place PL Załóż pokrywę WM7 ES C olocar la cubierta del WM7 DE L adekabel durch Kabelführung am ST7 führen ES P asar el cable de carga por la ranura del ST7 e und Überstand unter PC7 schieben insertar el sobrante por debajo del PC7 EN G uide the charging cable along the groove on the CZ N abíjecí kabel veďte drážkou na ST7 a přesahující ST7, pushing any excess cable under the PC7 část zasuňte pod PC7 FR P asser le câble du chargeur secteur dans la...
- Page 23 DE A kku einsetzen DE V K7 einhängen EN I nsert the battery EN Mount the VK7 FR I nsérer la batterie FR Accrocher le VK7 ES C olocar la batería ES Colgar el VK7 CZ V ložte akumulátor CZ VK7 zavěste IT I nserire la batteria IT Agganciare il VK7 PL Włóż akumulator PL Zawieś VK7...
- Page 24 DE D rücken Sie die grüne Aktivierungstaste (1) zum Deaktivieren des Transportmodus (z.B. bei Erstinbe- triebnahme oder nach Tiefentladung). EN P ress the green button (1) to deactivate transport mode (e.g. when using the device for the first time or after deep discharge). FR A ppuyez sur la touche verte (1) pour désactiver le mode de transport (p.ex. lors de la première mise en service ou suite à la décharge profonde). ES P ulse el botón verde (1) para desactivar el modo de transporte (p. ej., al poner en marcha el aparato por primera vez o tras una descarga profunda). CZ P ro deaktivaci přepravního režimu stiskněte zelené tlačítko (1) (např. při prvním uvedení do provozu nebo po úplném vybití). IT P remere il tasto verde (1) per disattivare la modalità Trasporto (ad es. al primo utilizzo o dopo lo scaricamento completo). PL N aciśnij zielony przycisk (1) w celu dezaktywacji trybu transportowego (np. podczas pierwszego uruchomienia lub po głębokim rozładowaniu). www.vorwerk.com/user-manual-Kobold-VR7 www.vorwerk.com/user-manual-Kobold-VR7 www.vorwerk.com/user-manual-Kobold-VK7 www.vorwerk.com/user-manual-Kobold-VK7 www.vorwerk.com/assembly-video-PC7 www.vorwerk.com/assembly-video-PC7...