Publicité
Liens rapides
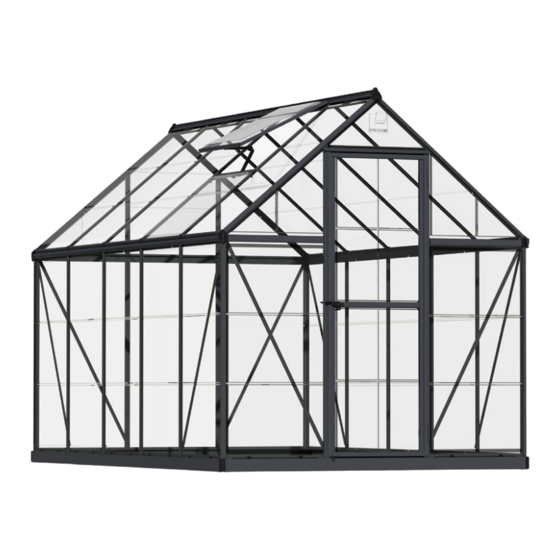
HOW TO
ASSEMBLE
HARMONY
HARMONY
| HYBRID
| MYTHOS
™
™
™
6x8 / 2x2.5
HYBRID
MYTHOS
IMPORTANT!
Please read these instructions carefully before starting assembly.
Keep these instructions in a safe place for future reference.
www.canopia.com
A member of Palram Industries Ltd.
Publicité

Manuels Connexes pour Palram Canopia HARMONY


Sommaire des Matières pour Palram Canopia HARMONY
- Page 1 HARMONY HARMONY | HYBRID | MYTHOS ™ ™ ™ 6x8 / 2x2.5 HYBRID MYTHOS IMPORTANT! Please read these instructions carefully before starting assembly. Keep these instructions in a safe place for future reference. www.canopia.com A member of Palram Industries Ltd.
- Page 2 HAVE A CONCERN? Please take a look at our You didn't find what you Still can't find what you "How to Assemble" video guide. were looking for? are looking for? WE CAN HELP. Scan the QR Code below or go to We can help at Please see next page for Before returning your purchase:...
- Page 3 905-5646007 | sales@footprintproducts.com +420-493-523-523 | servis@garland.cz UNITED KINGDOM • IRELAND GERMANY NEW ZEALAND 0180-522-8778 | customer.serviceDE@palram.com 01302-380775 | customer.serviceUK@palram.com 0800 800 880 | customer.service@palram.com FRANCE • BELGIUM ISRAEL DENMARK +33-169-791-094 | customer.serviceFR@palram.com 04-848-6800 | customer.service@palram.com 07-575 42 70 | post@nshnordic.com AUSTRIA •...
- Page 4 BASE DIMENSIONS HARMONY HYBRID MYTHOS MODEL 6x8 / 2x2.5 WIDTH 185 cm / 6'1" LENGTH 246 cm / 8'1" TOOLS & EQUIPMENT Philips head … … 2 people needed Work gloves Spirit Level Tape measure … … … … … …...
- Page 5 SITE PREPARATION & FOUNDATION A - PREPARE THE SITE PRÉPARER LE TERRAIN Déblayer le terrain Niveler le sol The product must be positioned and La produit doit être positionnée et fixée sur une surface plane fixed on a flat level surface. VORBEREITUNG DES UNTERGRUNDES Untergrund ausgleichen Standort säubern...
- Page 6 B - CHOOSE YOUR FOUNDATION TYPE Option 1 Option 2 Option 3 For a foundation, we recommend using three material types : CHOISIR VOTRE TYPE DE FONDATIONS Concrete / Pressure treated wood / wood deck / Paver blocks Pour la fondations, nous recommandons d’utiliser trois types de matériaux : Terre / Béton / Bois traité...
- Page 7 B - CHOOSE YOUR FOUNDATION TYPE Option 1 Option 2 Option 3 For a foundation, we recommend using three material types : Concrete / Pressure treated wood / wood deck / Paver blocks VYBERTE SI TYP PODLOŽENIA Pre základňu odporúčame použiť...
- Page 8 C - ANCHOR TO FOUNDATION Sur une fondation solide / cadre Fixez le produit à la fondation de votre choix, - On a solid Sur la terre ou l’herbe Fixez le produit à la surface du sol à l’aide de longs ANCRAGE A LA à...
- Page 9 C - ANCHOR TO FOUNDATION Izdelek na trdni temelja / Na trdnem okvirju poskrbite Na temelj po vaši - On a solid izbiri z uporabo primernih vijakov & zatičev ali zidarskih sider (niso dobavljeni). Izdelek na zemlji / travi pritrdite V tla z uporabo primernih dolgih kavljev foundation / frame SIDRANJE TEMELJA Poskrbite,...
- Page 20 Assicuratevi che non ci siano ostacoli tra l'area di montaggio e la posizione finale del prodotto. Il kit di ancoraggio Palram - Canopia può essere acquistato separatamente. Tutti i pannelli con le parole stampate “THIS SIDE OUT” devono ISTRUZIONI PER LA PULIZIA essere rivolti verso l’esterno per creare una protezione UV completa.
- Page 30 IMPORTANT ASSEMBLY STEPS PRINCIPALES ÉTAPES D'ASSEMBLAGE When encountering this information icon during assembly, Lorsque vous rencontrez cette icône d’information pendant please refer the relevant assembly step for important additional l’assemblage, veuillez vous référer à l’étape d’assemblage comments. correspondante pour d’autres commentaires importants. Step 5: Parts #994 &...
- Page 31 PASOS DE MONTAJE IMPORTANTES WICHTIGE MONTAGESCHRITTE Al encontrar este icono de información durante el montaje, Wenn Sie bei der Montage auf dieses Informationssymbol stoßen, consulte el paso de montaje correspondiente para obtener finden Sie im jeweiligen Montageschritt wichtige Zusatzhinweise. importantes comentarios adicionales. Schritt 5: Teile Nr.
- Page 32 VIKTIGA MONTERINGSSTEG שלבים חשובים בהרכבה När du ser denna ikon under montering, se relevant ,כאשר אתם רואים את הסמל הזה במהלך ההרכבה .אנא פנו אל שלב ההרכבה לקבלת הערות חשובות נוספות monteringssteg för viktiga ytterligare kommentarer. Steg 5: Delar nr.994 och nr.995 är finns bak i växthuset. .חלקים...
- Page 33 VIKTIGE MONTERINGSTRINN TÄRKEÄT ASENNUSVAIHEET Når du ser dette ikonet under montering, vennligst Kun näet tämän tietokuvakkeen asennuksen aikana, se relevant monteringstrinn for viktige tilleggskommentarer. katso tärkeät lisähuomautukset olennaisesta asennusvaiheesta. Trinn 5: Deler nr.994 og nr.995 er på baksiden av drivhuset. Vaihe 5: Osat nro.
- Page 34 BELANGRIJKE STAPPEN VAN DE OPBOUW VIGTIGE MONTERINGSTRIN Wanneer u dit informatiepictogram tijdens de opbouw Når du støder på dette informationsikon under monteringen, tegenkomt, raadpleeg dan de betreffende stap van de opbouw se det relevante monteringstrin for vigtige yderligere kommentarer. voor belangrijke bijkomende opmerkingen. Trin 5: Dele nr.
- Page 35 FASI DI MONTAGGIO IMPORTANTI DÔLEŽITÉ MONTÁŽNE KROKY Quando si incontra questa icona informativa durante il montaggio, Keď sa počas montáže stretnete s touto informačnou ikonou, fare riferimento alla relativa fase di montaggio per ulteriori ďalšie dôležité poznámky nájdete v príslušnom montážnom kroku. importanti commenti.
- Page 36 POMEMBNI KORAKI MONTAŽE OLULISED KOKKUPANEMISSAMMUD Če med montiranjem naletite na to ikono za informacije, Kui näete kokkupanemisel seda teabeikooni, palun vaadake glejte ustrezni korak montaže za pomembne dodatne opombe. vastavat kokkupanemisetappi oluliste lisakommentaaride saamiseks. korak 5: Dela št. 994 in št. 995 sta na hrbtni strani rastlinjaka. Samm 5: Osad nr.994 ja nr.995 on asuvad kasvuhoone taga.
- Page 37 FONTOS ÖSSZESZERELÉSI LÉPÉSEK WAŻNE KROKI MONTAŻU Amikor összeszerelés során ezzel az információs ikonnal találkozik, Kiedy napotkasz taką ikonę informacyjną w trakcie montażu, úgy kérjük, olvassa el a vonatkozó összeszerelési lépést a további prosimy zapoznać się z odpowiednim krokiem montażu fontos megjegyzésekkel kapcsolatban. opatrzonym ważnym komentarzem dodatkowym.
- Page 38 ВАЖНЫЕ ЭТАПЫ СБОРКИ SVARĪGAS DARBĪBAS MONTĀŽAI Если во время сборки вам встречается такая справочная Saskaroties ar šo informācijas ikonu montāžas laikā, иконка, необходимо обратиться к соответствующему этапу lūdzu, skatiet attiecīgo montāžas darbību, lai iegūtu сборки для ознакомления с дополнительными важынми svarīgus papildu komentārus.
- Page 39 DŮLEŽITÉ MONTÁŽNÍ KROKY VAŽNI KORACI MONTAŽE Když se během montáže setkáte s touto informační ikonou, Kada naiđete na ovu ikonu informacija tijekom sastavljanja, další důležité poznámky najdete v příslušném montážním kroku. pogledajte relevantni korak montaže za važne dodatne komentare. Krok 5: Díly č.994 a č.995 jsou v zadní...