Table des Matières
Publicité
Les langues disponibles
Les langues disponibles
Liens rapides
Publicité
Table des Matières

Manuels Connexes pour AmazonBasics B00UG9HB1Q

Sommaire des Matières pour AmazonBasics B00UG9HB1Q
- Page 1 FINAL V1 Intelligent Electronic Safe B00UG9HB1Q B00UG9HB1Q Security Safe Black_15-0299_MAN_V1_Full.indd 1 B00UG9HB1Q Security Safe Black_15-0299_MAN_V1_Full.indd 1 4/6/2015 12:13:24 PM 4/6/2015 12:13:24 PM...
- Page 2 • • • English ........3 Français ........9 Deutsch ........15 日本語 ........21 中文 .......... 27 Italiano ........33 Español ........39 B00UG9HB1Q Security Safe Black_15-0299_MAN_V1_Full.indd 2 B00UG9HB1Q Security Safe Black_15-0299_MAN_V1_Full.indd 2 4/6/2015 12:13:25 PM 4/6/2015 12:13:25 PM...
-
Page 3: Product Overview
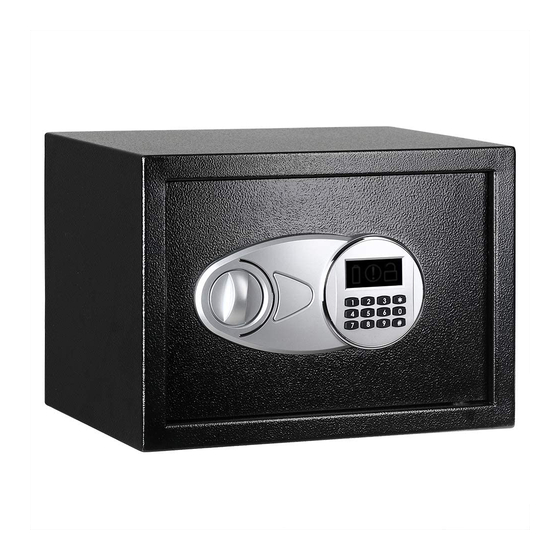
This instruction manual Product overview Bolts Battery Compartment Reset Button Emergency Lock Cover Low Battery Light Warning Light Confi rm Light Confi rming button (#) Knob B00UG9HB1Q Security Safe Black_15-0299_MAN_V1_Full.indd 3 B00UG9HB1Q Security Safe Black_15-0299_MAN_V1_Full.indd 3 4/6/2015 12:13:25 PM 4/6/2015 12:13:25 PM... - Page 4 1. Remove emergency lock cover. 2. Insert the emergency key and turn it clockwise. 3. Turn the knob clockwise to open the door. B00UG9HB1Q Security Safe Black_15-0299_MAN_V1_Full.indd 4 B00UG9HB1Q Security Safe Black_15-0299_MAN_V1_Full.indd 4 4/6/2015 12:13:25 PM 4/6/2015 12:13:25 PM...
-
Page 5: Installing The Batteries
If the warning light fl ashes, the code reset is not accepted and you need to try again. 3. Before you close the door, try the new code to make sure it works. B00UG9HB1Q Security Safe Black_15-0299_MAN_V1_Full.indd 5 B00UG9HB1Q Security Safe Black_15-0299_MAN_V1_Full.indd 5 4/6/2015 12:13:26 PM... -
Page 6: Setting The Master Code
3. Rotate the knob clockwise, then open the door. NOTE: The preset user code is “159”. Locking the safe Close the door, then turn the knob counterclockwise to lock it. B00UG9HB1Q Security Safe Black_15-0299_MAN_V1_Full.indd 6 B00UG9HB1Q Security Safe Black_15-0299_MAN_V1_Full.indd 6 4/6/2015 12:13:26 PM 4/6/2015 12:13:26 PM... - Page 7 3. Move the safe away, then use a 12mm bit to drill mounting holes that are 2 in. (50mm) deep. 4. Align the safe over the holes, then install the expansion bolts (included) through the holes and into the mounting surface. B00UG9HB1Q Security Safe Black_15-0299_MAN_V1_Full.indd 7 B00UG9HB1Q Security Safe Black_15-0299_MAN_V1_Full.indd 7 4/6/2015 12:13:27 PM...
-
Page 8: Safety And Compliance
Where maintenance is required, please contact the local service center or local distributor. © 2015 Amazon.com, Inc. or its affi liates. All Rights reserved. Amazon and the AmazonBasics logo are trademarks of Amazon. com, Inc. or its affi liates. -
Page 9: Coffre Électronique Intelligent Amazonbasics
Bouton de réinitialisation Capot du verrouillage de secours Voyant de batteries faibles Voyant d'avertissement Voyant de confi rmation Bouton de confi rmation (#) Bouton B00UG9HB1Q Security Safe Black_15-0299_MAN_V1_Full.indd 9 B00UG9HB1Q Security Safe Black_15-0299_MAN_V1_Full.indd 9 4/6/2015 12:13:27 PM 4/6/2015 12:13:27 PM... -
Page 10: Première Ouverture Du Coffre
2. Introduisez la clé de secours et tournez-la dans le sens horaire. 3. Tournez le bouton dans le sens horaire pour ouvrir la porte. Rég B00UG9HB1Q Security Safe Black_15-0299_MAN_V1_Full.indd 10 B00UG9HB1Q Security Safe Black_15-0299_MAN_V1_Full.indd 10 4/6/2015 12:13:28 PM 4/6/2015 12:13:28 PM... -
Page 11: Installation Des Batteries
3. Testez le nouveau code pour vous assurer qu'il fonctionne avant de fermer la porte. B00UG9HB1Q Security Safe Black_15-0299_MAN_V1_Full.indd 11 B00UG9HB1Q Security Safe Black_15-0299_MAN_V1_Full.indd 11 4/6/2015 12:13:28 PM... -
Page 12: Réglages Du Code Passe-Partout
REMARQUE : Le code utilisateur préréglé est « 159 ». Verrouillage du coffre Fermez la porte et tournez le bouton dans le sens anti-horaire pour la verrouiller. B00UG9HB1Q Security Safe Black_15-0299_MAN_V1_Full.indd 12 B00UG9HB1Q Security Safe Black_15-0299_MAN_V1_Full.indd 12 4/6/2015 12:13:28 PM 4/6/2015 12:13:28 PM... -
Page 13: Blocage Automatique
12 mm. 4. Alignez le coffre sur les trous et posez les boulons à expansion (inclus) dans les trous et dans la surface de montage. B00UG9HB1Q Security Safe Black_15-0299_MAN_V1_Full.indd 13 B00UG9HB1Q Security Safe Black_15-0299_MAN_V1_Full.indd 13 4/6/2015 12:13:28 PM 4/6/2015 12:13:28 PM... -
Page 14: Dépannage
© 2015 Amazon.com, Inc. ou ses filiales Tous droits réservés. Amazon et le logo AmazonBasics sont des marques commerciales d'Amazon.com, Inc. ou de ses filiales. -
Page 15: Überblick Über Das Produkt
Schlüssel für Notfälle • Spreizschrauben (4) • Diese Bedienungsanleitung Überblick über das Produkt Bolzen lés Batteriefach Reset-Taste Abdeckung des Notfallschlosses Batterie-Niedrigstand-Leuchtanzeige Warnleuchte Bestätigungsleuchte Bestätigungstaste (#) Drehknopf B00UG9HB1Q Security Safe Black_15-0299_MAN_V1_Full.indd 15 B00UG9HB1Q Security Safe Black_15-0299_MAN_V1_Full.indd 15 4/6/2015 12:13:28 PM 4/6/2015 12:13:28 PM... - Page 16 2. Stecken Sie den Schlüssel für Notfälle in das Schloss und drehen Sie ihn nach rechts. 3. Drehen Sie den Drehknopf nach rechts und öffnen Sie die Tür. B00UG9HB1Q Security Safe Black_15-0299_MAN_V1_Full.indd 16 B00UG9HB1Q Security Safe Black_15-0299_MAN_V1_Full.indd 16 4/6/2015 12:13:29 PM...
-
Page 17: Einsetzen Der Batterien
Wenn die Warnleuchte blinkt, wurde die Code-Rücksetzung nicht akzeptiert, und Sie müssen einen neuen Versuch unternehmen. 3. Probieren Sie vor dem Schließen der Tür den neuen Code aus, um sicherzustellen, dass er auch funktioniert. B00UG9HB1Q Security Safe Black_15-0299_MAN_V1_Full.indd 17 B00UG9HB1Q Security Safe Black_15-0299_MAN_V1_Full.indd 17 4/6/2015 12:13:29 PM 4/6/2015 12:13:29 PM... - Page 18 HINWEIS: Der voreingestellte Benutzercode lautet „159“. Absperren des Tresors Schließen Sie die Tür und drehen Sie den Drehknopf nach rechts, um die Tür abzusperren. B00UG9HB1Q Security Safe Black_15-0299_MAN_V1_Full.indd 18 B00UG9HB1Q Security Safe Black_15-0299_MAN_V1_Full.indd 18 4/6/2015 12:13:29 PM 4/6/2015 12:13:29 PM...
- Page 19 Tiefe von 50 mm. 4. Richten Sie den Tresor über den Löchern aus und schrauben Sie die (im Lieferumfang enthaltenen) Spreizschrauben durch die Löcher in die Montagefl äche hinein. B00UG9HB1Q Security Safe Black_15-0299_MAN_V1_Full.indd 19 B00UG9HB1Q Security Safe Black_15-0299_MAN_V1_Full.indd 19 4/6/2015 12:13:29 PM...
-
Page 20: Technische Daten
Schaltkreis beschädigen und seine Funktion beeinträchtigen. Falls Wartungsmaßnahmen erforderlich sind, wenden Sie sich bitte an Ihr örtliches Service-Center oder Ihren örtlichen Vertragshändler. © 2015 Amazon.com, Inc. oder seine verbundenen Unternehmen. Alle Rechte vorbehalten. Amazon und das AmazonBasics-Logo sind Marken von Amazon.com, Inc. oder seiner verbundenen Unternehmen. - Page 21 目次 インテリジェント電子金庫 • 非常用キー • 拡張ボルト (4個) • この取扱説明書 • 製品概要 ボルト n im 電池ケース リセッ トボタン 非常用ロックカバー 電池残量低下ランプ 警告ランプ 確認ランプ 確認ボタン (#) ノブ B00UG9HB1Q Security Safe Black_15-0299_MAN_V1_Full.indd 21 B00UG9HB1Q Security Safe Black_15-0299_MAN_V1_Full.indd 21 4/6/2015 12:13:30 PM 4/6/2015 12:13:30 PM...
- Page 22 金庫を初めて開く場合 電池 初めて金庫を開く 、 コードを知らない、 あるいは電子回路に異常が発生した場合、 非常用キーを使用して ください。 1. 非常用キーのカバーをはずしてください。 2. 非常用キーを差し込んで時計回りに回して下さい。 3. 扉を開くにはノブを時計回りに回して下さい。 ユー B00UG9HB1Q Security Safe Black_15-0299_MAN_V1_Full.indd 22 B00UG9HB1Q Security Safe Black_15-0299_MAN_V1_Full.indd 22 4/6/2015 12:13:30 PM 4/6/2015 12:13:30 PM...
- Page 23 1. 扉を開いた状態でリセッ トボタンを押してください ビー という電子音が二回鳴ります。 2. キーパッ ド上から新規コード (3–8桁) を入力し、 確認のため、 # ボタンを押してください。 確認ランプが 点灯した場合、 正常にリセッ トされています。 警告ランプが点灯した場合、 コードリセッ トが失敗してお り、 やりなおす必要があります。 3. 扉を閉じる前に新規コードを試し、 正常に作動するか確かめてください。 B00UG9HB1Q Security Safe Black_15-0299_MAN_V1_Full.indd 23 B00UG9HB1Q Security Safe Black_15-0299_MAN_V1_Full.indd 23 4/6/2015 12:13:30 PM 4/6/2015 12:13:30 PM...
- Page 24 • 1. あなたのユーザーコード (3–8桁) をキーパッ ド上に入力してく ださい。 確認のため、 #を押してく ださい。 • 2. 確認ランプが点灯します。 3. ノブを時計回りに回し、 扉を開いてください。 注意 : デフォルトのユーザーコードは 159 です。 金庫の施錠 扉を閉め、 ノブを反時計回りに回して下さい。 B00UG9HB1Q Security Safe Black_15-0299_MAN_V1_Full.indd 24 B00UG9HB1Q Security Safe Black_15-0299_MAN_V1_Full.indd 24 4/6/2015 12:13:30 PM 4/6/2015 12:13:30 PM...
- Page 25 1. 金庫を設置する場所として、 周囲に何もなく、 乾いた安全な場所を選びましょ う。 壁に取り付ける場合、 金庫が床や本棚などの支持面に触れている位置に取り付けましょ う。 金庫を床と壁の両方に固定する ことを避けてください。 2. 金庫を取り付ける位置に置き、 鉛筆を使って取り付け穴を床、 または壁にマークしてください。 3. 金庫をどかし、 ドリルの12mmビッ トを使って取り付け穴を2インチ (50mm) の深さに掘ってください。 4. 金庫を穴の位置に合わせ、 拡張ボルト (製品に含まれています) を穴から取り付ける面へ取り付けて ください。 B00UG9HB1Q Security Safe Black_15-0299_MAN_V1_Full.indd 25 B00UG9HB1Q Security Safe Black_15-0299_MAN_V1_Full.indd 25 4/6/2015 12:13:30 PM 4/6/2015 12:13:30 PM...
- Page 26 1. 本金庫をご使用になる前に取扱説明書を注意深く読んでください。 2. 盗難のリスクを下げるため、金庫は壁、または床に固定されていなくてはなりません。取り付け手順は25ページの 金庫の確保を参照してください。 3. 非常用キーを大事に、金庫以外の秘密の隠し場所に保管してください。金庫の中に非常用キーを入れないでください。 電池が切れたときに金庫を開くことができなくなるからです。 4. あなたの資産の安全のため、デフォルトで設定されているコードを変更してください。 5. 製品を不安定な高所に置かないでください。落下し、製品自体に傷がついたり、怪我の元になります。コントロール パネルの上に液体をかけないでください。内部の電子部品に感電を引き起こし、正常に作動しなくなる場合があります。 6. 本製品を自分で分解することは避けてください。後蓋の中を専門知識なく分解、または組み立てを行うなら、電子回路 を傷つき、正常に作動しなくなる可能性があります。メンテナンスが必要な場合は、現地のサービスセンター、または 現地の販売業者にご連絡ください。 © 2015 Amazon.com, Inc. または関連団体。すべての権利は保有されています。Amazon及びAmazonBasicsのロゴはAmazon.com, Inc. 、または関連団体の商標です。 B00UG9HB1Q Security Safe Black_15-0299_MAN_V1_Full.indd 26 B00UG9HB1Q Security Safe Black_15-0299_MAN_V1_Full.indd 26 4/6/2015 12:13:31 PM 4/6/2015 12:13:31 PM...
- Page 27 • め • • • • の い。 ール す。 回路 たは B00UG9HB1Q Security Safe Black_15-0299_MAN_V1_Full.indd 27 B00UG9HB1Q Security Safe Black_15-0299_MAN_V1_Full.indd 27 4/6/2015 12:13:31 PM 4/6/2015 12:13:31 PM...
- Page 28 B00UG9HB1Q Security Safe Black_15-0299_MAN_V1_Full.indd 28 B00UG9HB1Q Security Safe Black_15-0299_MAN_V1_Full.indd 28 4/6/2015 12:13:31 PM 4/6/2015 12:13:31 PM...
- Page 29 注意: B00UG9HB1Q Security Safe Black_15-0299_MAN_V1_Full.indd 29 B00UG9HB1Q Security Safe Black_15-0299_MAN_V1_Full.indd 29 4/6/2015 12:13:31 PM 4/6/2015 12:13:31 PM...
- Page 30 0,0, 注意: • • • 注意: B00UG9HB1Q Security Safe Black_15-0299_MAN_V1_Full.indd 30 B00UG9HB1Q Security Safe Black_15-0299_MAN_V1_Full.indd 30 4/6/2015 12:13:32 PM 4/6/2015 12:13:32 PM...
- Page 31 • • • B00UG9HB1Q Security Safe Black_15-0299_MAN_V1_Full.indd 31 B00UG9HB1Q Security Safe Black_15-0299_MAN_V1_Full.indd 31 4/6/2015 12:13:32 PM 4/6/2015 12:13:32 PM...
- Page 32 • • 黄色和绿色指示灯同时亮起。 黄色和绿色指示灯同时亮起。 • • 警告灯闪亮。 警告灯闪亮。 • • • • • • “ ” © 2015 Amazon.com, Inc. Amazon AmazonBasics Amazon.com, Inc. B00UG9HB1Q Security Safe Black_15-0299_MAN_V1_Full.indd 32 B00UG9HB1Q Security Safe Black_15-0299_MAN_V1_Full.indd 32 4/6/2015 12:13:32 PM 4/6/2015 12:13:32 PM...
-
Page 33: Manuale D'istruzioni
Pulsante di ripristino Coperchio serratura di emergenza Spia di bassa carica della batteria Spia di avviso Spia di conferma Pulsante di conferma (#) Manopola B00UG9HB1Q Security Safe Black_15-0299_MAN_V1_Full.indd 33 B00UG9HB1Q Security Safe Black_15-0299_MAN_V1_Full.indd 33 4/6/2015 12:13:32 PM 4/6/2015 12:13:32 PM... - Page 34 1. Rimuovere il coperchio della serratura di emergenza. 2. Inserire la chiave di emergenza e girarla in senso orario. 3. Girare la manopola in senso orario per aprire lo sportello. B00UG9HB1Q Security Safe Black_15-0299_MAN_V1_Full.indd 34 B00UG9HB1Q Security Safe Black_15-0299_MAN_V1_Full.indd 34 4/6/2015 12:13:33 PM...
-
Page 35: Installazione Delle Pile
Se la spia di conferma si accende, il ripristino è stato eseguito. Se la spia di avviso lampeggia, il ripristino della combinazione non è stato eseguito e occorre riprovare. 3. Prima di chiudere lo sportello, provare la nuova combinazione per accertarsi che funzioni. B00UG9HB1Q Security Safe Black_15-0299_MAN_V1_Full.indd 35 B00UG9HB1Q Security Safe Black_15-0299_MAN_V1_Full.indd 35 4/6/2015 12:13:33 PM... - Page 36 NOTA BENE La combinazione dell’utente preimpostata è “159”. Chiusura della cassaforte Chiudere lo sportello, quindi girare la manopola in senso antiorario per chiudere la cassaforte. B00UG9HB1Q Security Safe Black_15-0299_MAN_V1_Full.indd 36 B00UG9HB1Q Security Safe Black_15-0299_MAN_V1_Full.indd 36 4/6/2015 12:13:33 PM 4/6/2015 12:13:33 PM...
- Page 37 4. Allineare la cassaforte con i fori eseguiti, quindi inserire i bulloni a espansione (inclusi) attraverso i fori della cassaforte nella superfi cie di fi ssaggio. B00UG9HB1Q Security Safe Black_15-0299_MAN_V1_Full.indd 37 B00UG9HB1Q Security Safe Black_15-0299_MAN_V1_Full.indd 37 4/6/2015 12:13:33 PM...
-
Page 38: Dati Tecnici
Se è necessaria manutenzione, rivolgersi al centro di assistenza o al distributore locali. © 2015 Amazon.com, Inc. o le sue affiliate. Tutti i diritti riservati. Amazon e il logo AmazonBasics sono marchi di Amazon.com, Inc. o delle sue affiliate. -
Page 39: Sinopsis Del Producto
Tapa de la cerradura de emergencia Luz de pilas bajas Luz de advertencia Luz de confi rmación Botón de confi rmación (#) Mando Inc. B00UG9HB1Q Security Safe Black_15-0299_MAN_V1_Full.indd 39 B00UG9HB1Q Security Safe Black_15-0299_MAN_V1_Full.indd 39 4/6/2015 12:13:33 PM 4/6/2015 12:13:33 PM... - Page 40 2. Introduzca la llave de emergencia y gírela en el sentido de las agujas del reloj. 3. Gire el mando en el sentido de las agujas del reloj para abrir la puerta. Cóm B00UG9HB1Q Security Safe Black_15-0299_MAN_V1_Full.indd 40 B00UG9HB1Q Security Safe Black_15-0299_MAN_V1_Full.indd 40 4/6/2015 12:13:34 PM...
- Page 41 3. Antes de cerrar la puerta, pruebe el nuevo código para comprobar que funciona. B00UG9HB1Q Security Safe Black_15-0299_MAN_V1_Full.indd 41 B00UG9HB1Q Security Safe Black_15-0299_MAN_V1_Full.indd 41 4/6/2015 12:13:34 PM...
-
Page 42: Cómo Cerrar La Caja Fuerte
NOTA: El código de usuario predefi nido es “159”. Cómo cerrar la caja fuerte Cierre la puerta y luego gire el mando en el sentido contrario a las agujas del reloj para bloquearla. B00UG9HB1Q Security Safe Black_15-0299_MAN_V1_Full.indd 42 B00UG9HB1Q Security Safe Black_15-0299_MAN_V1_Full.indd 42 4/6/2015 12:13:34 PM... -
Page 43: Bloqueo Automático
4. Alinee la caja fuerte sobre los orifi cios; luego instale los pernos expansibles (se incluyen) a través de los orifi cios al interior de la superfi cie de montaje. B00UG9HB1Q Security Safe Black_15-0299_MAN_V1_Full.indd 43 B00UG9HB1Q Security Safe Black_15-0299_MAN_V1_Full.indd 43... -
Page 44: Seguridad Y Cumplimiento
© 2015 Amazon.com, Inc. o sus filiales. Todos los derechos reservados. Amazon y el logotipo AmazonBasics son marcas comerciales de Amazon.com, Inc. o sus filiales. - Page 45 B00UG9HB1Q Security Safe Black_15-0299_MAN_V1_Full.indd 45 B00UG9HB1Q Security Safe Black_15-0299_MAN_V1_Full.indd 45 4/6/2015 12:13:34 PM 4/6/2015 12:13:34 PM...
- Page 46 B00UG9HB1Q Security Safe Black_15-0299_MAN_V1_Full.indd 46 B00UG9HB1Q Security Safe Black_15-0299_MAN_V1_Full.indd 46 4/6/2015 12:13:34 PM 4/6/2015 12:13:34 PM...
- Page 47 B00UG9HB1Q Security Safe Black_15-0299_MAN_V1_Full.indd 47 B00UG9HB1Q Security Safe Black_15-0299_MAN_V1_Full.indd 47 4/6/2015 12:13:34 PM 4/6/2015 12:13:34 PM...
- Page 48 Amazon.com/AmazonBasics V1 15-0299 Made in China B00UG9HB1Q Security Safe Black_15-0299_MAN_V1_Full.indd 48 B00UG9HB1Q Security Safe Black_15-0299_MAN_V1_Full.indd 48 4/6/2015 12:13:34 PM 4/6/2015 12:13:34 PM...