Publicité
Les langues disponibles
Les langues disponibles
Liens rapides
Thank you for purchasing the DigiPulse Oximeter.
By selecting this product, you have chosen a high quality, innovative device. Before using the DigiPulse™
Oximeter for the first time, please read through these instructions carefully. If you still have any questions
regarding its use, visit the A.M.G. Medical website or contact our Customer Service team at 1-800-363-2381.
The DigiPulse™ Oximeter is an accurate and easy to use device with One-Touch Operation. This compact
oximeter is light weight making it convenient to carry anywhere. Additional state of the art features
include: OLED screen with six different display modes - Low power consumption, new batteries can
last over six hours - Auto shut-off. The DigiPulse™ oximeter is intended for single measurement
home-use for adults and children over the age of 4. This device is indicated for use in measuring
functional oxygen saturation (%SpO2) and pulse rate. This device is not designed for continuous
monitoring, nor meant for life-supporting activities.
Precautions
• Before first time use, read the Pulse Oximeter instructions thoroughly.
Save the user guide for future reference.
• This device is not meant for treatment and does not replace examination by a physician.
• The operation of the DigiPulse Oximeter may be affected by the use of an electrosurgical unit (ESU).
• The pulse oximeter must be able to measure the pulse properly to obtain an accurate SpO2 measurement.
Verify that nothing is hindering the pulse measurement before relying on it.
• Explosive hazard-DO NOT use the oximeter in environments with flammable gas such as ignitable anesthetic agents.
• Do not use the pulse oximeter in an MRI or CT environment.
• Do not sterilize the device using autoclaving, ethylene oxide, or by immersing the device in liquid.
Refer to the cleaning section for more information.
• This equipment complies with IEC 60601-1-11 for electromagnetic compatibility for medical
electrical equipment and/or systems. However, because of the proliferation of radio-frequency
transmitting equipment and other sources of electrical noise in healthcare and other environments,
it is possible that high levels of such interference due to close proximity or strength of a source might
disrupt the performance of this device.
• Portable and mobile RF communications equipment can affect medical electrical equipment.
• This device is not intended for use during patient transport outside a healthcare facility.
• This unit should not be used adjacent to or stacked with other equipment.
• Keep the oximeter away from dust, vibration, corrosive substances, explosive materials,
high temperature and moisture.
• When the device is carried from a cold environment to warm or humid environments,
please do not use the DigiPulse Oximeter immediately.
• If the oximeter gets wet, please stop operating it.
• Do not operate button on front panel with sharp objects.
• If fingers are too thin or too cold, it could affect SpO2 and pulse rate readings.
Please insert the largest finger such as thumb or middle finger deeply into the probe.
• Poor blood circulation can affect oximeter readings. Warm your hands and fingers before taking your measurements.
Note that your DigiPulse™ oximeter is measuring your SpO2 and PR based on your blood flow. If the blood flow in your
finger drops below a perfusion index of 0.2, the oximeter will not be able to get a reading.
• Nail polish (shellac) may produce variable results.
• It may be unsafe to:
- use accessories, detachable parts and materials not described in these instructions.
- interconnect this equipment with other equipment not described in these instructions.
- disassemble, repair or modify the equipment.
• To avoid any possibility of accidental strangulation, keep lanyard away from children and do not wear lanyard
around the neck. If a sensitivity or rash develops from wearing the lanyard, please stop using it.
• This oximeter has a visible low-battery indicator. Please change batteries when it is low.
• Remove the batteries if the unit will not be used for an extended period of time.
Always replace all the batteries with new ones at the same time.
• Keep the oximeter out of reach of children. Some parts are small and may represent a choking hazard.
• Do not use this device on infants. This product is suitable for children over 4 years old.
General Information
Oxygen binds to hemoglobin in red blood cells when moving through the lungs. It is transported throughout the body
as arterial blood. A pulse oximeter uses two frequencies of light (red and infrared) to determine the percentage (%) of
hemoglobin in the blood that is saturated with oxygen. The percentage is called blood oxygen saturation, or SpO2.
A pulse oximeter also measures and displays the pulse rate at the same time it measures the SpO2 level.
The perfusion index (PI) is a useful feature that can be used to determine the reliability of a reading. If your PI is below
0.2%, this means that your blood perfusion is too low for a reliable read. Warm your hands to increase blood flow and
retake your measurement. In general, a higher PI will give you a more reliable reading.
Diagram of Operation Principle
1. Red and Infrared-Ray Emission Tube
2. Red and Infrared-ray Receipt Tube
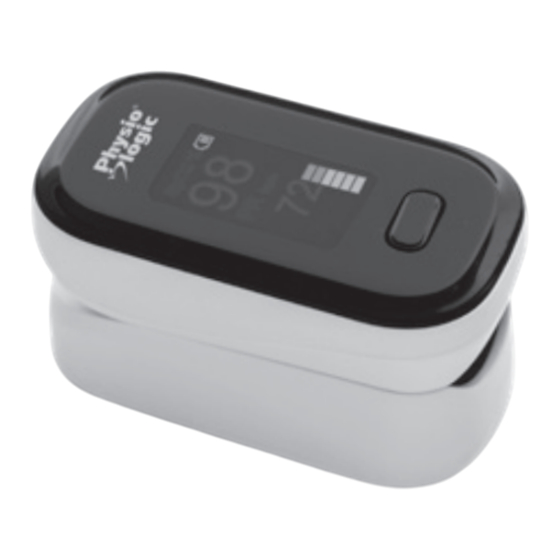
Your Oximeter
CONTENTS: 1 Oximeter, 1 Lanyard, 1 User Guide
Oxygen Saturation
Low Battery Indicator
Pulse Rate
PI % 5.5
Perfusion Index
Power Button
Mode Switch
Battery Installation
1. Slide off the battery cover.
2. Install two AAA batteries by matching the
correct polarity, as shown. If the polarities
are not matched, damage may be caused
to the oximeter.
3. Close the cover.
Note: Remove the batteries if the pulse oximeter
will not be used for long periods of time.
Manufactured and printed in China for / Fabriqué et imprimé en Chine pour :
A.M.G. Medical Inc. 8505 Dalton, Montréal, QC
H4T 1V5 Canada • 1-800-363-2381 • www.amgphysiologic.com
USER GUIDE
OLED Display Modes (6)
PI %
PI %
5.5
5.5
PI % 5.5
PI % 5.5
2X
AAA
Distributed in the USA by / Distribué aux É.U. par :
AMG Medical, Inc. 8396 State Route 9,West Chazy,
NY 12992, USA • 1-888-412-4992
107-100 Digi Pulse_Instruction Rev2 0123
Projet :
Item No. :
Open: 164 x 350 mm
Flat Size :
82 x 50 mm
Assembled Size :
Getting Started
Setting the Alarm, Sound, and Screen Brightness.
1. With power off, press the "Power" button for 3 seconds to activate the set-up mode.
2. Press the "Power" button to toggle between the alarm, sound, and brightness options.
3. By clicking the alarm feature and holding the "Power" button for 1 second, select "ON" or "OFF".
4. Repeat step 3 to select the sound "ON' or "OFF" and brightness level.
5. Click and hold for 3 seconds on "RESTORE" to return to the original factory settings.
Alarm Setting
1. Once alarm setting is activated, hold the "Power" button for 3 seconds to adjust
the high and low limits for the SPO2 and Pulse alarms.
2. Choose "+" or "-" to increase or decrease values.
3. For each parameter, continue to press the "POWER" button until desired high
and low limits are reached, then release the button.
4. The alarm will beep when a reading is out of range including:
an SPO2 ≥ 99 or < 85 and PR bpm ≥ 130 or < 50.
Settings
Alm Setup
*
Alm
on
Beep
off
Demo
off
Restore
OK
brightness
3
Exit
Operation Instructions
• Install two AAA batteries following the battery installation instructions.
• Place one of your fingers into the rubber opening of the pulse oximeter.
• When placing your finger into the oximeter, your nail surface must be upward.
• Press button on the front panel to turn the pulse oximeter on.
• Keep your hand still. Do not move your finger or body when taking a reading.
• Press the power button if you want to change display mode.
• Read the relevant data from the display screen.
• The device will automatically power off in 8 seconds if there is no finger signal.
Important Note: The rubber inside the device along with the finger being used for testing should be cleaned
with medical alcohol before and after each test. (The rubber inside of the oximeter is medical grade and should
not cause any skin irritations).
Using the Lanyard
1. Put the thinner end of the lanyard through the loop.
2. Then put the thicker end of the lanyard through the threaded end and tighten.
Cleaning Instructions
Before and after each use, wipe finger and device with medical alcohol and a soft cloth.
Do not spray any liquid directly onto the device.
Maintenance
Do not attempt any repairs to the device or any of its accessories. Contact us at 1-800-363-2381 for repair information.
• The manufacturer will not be held responsible for the results of maintenance or repairs by unauthorized persons.
• Check the device before each use for signs of wear and/or damage. Replace worn items as required.
Disposal
• Please dispose of the device in accordance with local regulations
(Waste Electrical and Electronic Equipment).
• Discard used batteries according to local environmental regulations.
• Contact your local distributor for information regarding disposal of the unit and accessories.
Troubleshooting
Problem
Possible Reason
SpO
or PR do not
1. Finger is not inserted correctly
2
display normally
2. The user's SpO2, is too low to be detected
SpO
or PR can not
1. Finger might not be inserted deep enough
2
display stably
2. Finger or body is moving
1. Power of batteries might be
The oximeter can
inadequate or not be there at all
not be powered on
2. Batteries are not inserted properly
1. The device will shut-off automatically
The display screen
when no signal is detected over 8 seconds
suddenly turns off
2. Batteries are almost drained
Technical Specifications
Display Type
OLED Display
Sp02 Measurement Range 70%- 100%
± 2% in stage of 80% - 100% SpO2
Accuracy
± 3% in stage of 70% - 79% SpO2
Below 70% no requirement resolution: ± 1 %
Pulse Rate
Measurement Range: 30 BPM – 240 BPM
Accuracy
±1BPM or ±1% (the larger one)
Perfusion Index
0.2% - 20%
Power
2 AAA 1.5V alkaline batteries
Power Consumption
Below 30mA
Automatic Power-Off
The product powers off by itself when no signal is detected over 8 seconds
Operation Environment
Temperature: 5 °C - 40 °C \ Humidity: 15% - 80% \ Atmospheric Pressure: 70kPa - 106kPa
Transport
Temperature: -1 °C - 55 °C - Humidity: ≤ 95%
Storage Environment
Atmospheric Pressure: 50kPa - 106kPa, non-corrosive gas and well-ventilated environment
Symbol Definitions
Symbol
Definition
Type BF Applied Part
Pulse Rate (BPM)
PI
%
Perfusion Index
Storage Temperature and Relative Humidity
Date of Manufacture
Attention
Limited Warranty
A.M.G. Medical Inc. warrants the device to be free from defects in material and workmanship for a period of one
(1) year, to be proven by means of the sales receipt or invoice. This warranty is valid for the original purchaser only.
Any alterations, abuse, misuse or accidental damage voids this warranty. Repairs under warranty do not extend the
warranty period. For service under warranty, call us at:1-800-363-2381, between 8:30 AM and 5 PM EST.
The following is excluded under the warranty:
A) All damage which has arisen due to improper treatment. For example, nonobservance of the user instructions.
B) All damage which is due to repairs or tampering by the customer or unauthorized third parties.
C) Damage which has arisen during transport from the manufacturer to the consumer or during transport
to the service centre.
107-100
861-107100
Part No. :
Colours :
B/W
CMYK
Spots:
Jean-François Perron
Generated by :
Settings
Sounds Setup
*
SP02 Alm Hi
100
SP02 Alm Lo
85
PR Alm Hi
130
PR Alm Lo
50
+\-
+
Exit
Solution
1. Retry by reinserting finger
2. Retry by reinserting finger. If device is
functioning properly and SpO2 is not
detected, please seek medical attention
1. Retry by reinserting finger
2. Stay still until reading is completed
1. Replace batteries
2. Reinstall batteries
1. Restart the oximeter
2. Replace batteries
Symbol
Definition
Oxygen Saturation
Low Battery Indicator
Power Button
Follow Instructions for Use
Serial No.
Manufacturer's Information
Rev2 0123 P/N 861-107100
Publicité

Sommaire des Matières pour AMG Medical Physio Logic DigiPulse
- Page 1 Manufactured and printed in China for / Fabriqué et imprimé en Chine pour : Distributed in the USA by / Distribué aux É.U. par : A.M.G. Medical Inc. 8505 Dalton, Montréal, QC AMG Medical, Inc. 8396 State Route 9,West Chazy, H4T 1V5 Canada • 1-800-363-2381 • www.amgphysiologic.com NY 12992, USA • 1-888-412-4992...
- Page 2 GUIDE DE L’UTILISATEUR Pour commencer Régler l’alarme, le son et la luminosité de l’écran. 1. Alors que le dispositif est éteint, appuyez sur le bouton « Power » (mise en marche) pendant 3 secondes afin d’ e ntrer dans le mode configuration. 2.