
Manuels Connexes pour Yardworks 60-3856-2


Sommaire des Matières pour Yardworks 60-3856-2
- Page 1 60-3856-2 Electric Mulchinator Blower / Vacuum OPERATOR’S MANUAL FOR QUESTIONS, CALL 1-888-939-0992 IMPORTANT MANUAL DO NOT THROW AWAY...
-
Page 2: Table Des Matières
INTRODUCTION TABLE OF CONTENTS THANK YOU Rules for Safe Operation ..... 3-6 A. Important Safety Information ....3 Thank you for buying this quality product. -
Page 3: Safety Alert Symbol
RULES FOR SAFE OPERATION The purpose of safety symbols is to attract your SYMBOL MEANING attention to possible dangers. The safety symbols, and their explanations, deserve your careful attention DANGER : Failure to obey a safety warning and understanding. The safety warnings do not by will result in serious injury to yourself or to themselves eliminate any danger. -
Page 4: While Operating
RULES FOR SAFE OPERATION • Ground Fault Circuit Interrupter (GFCI) protection • Do not put any object into openings. Do not use with should be provided on the circuit(s) or outlet(s) that will any opening blocked; keep free of dirt, debris and be used for the unit. -
Page 5: Safety And International Symbols
RULES FOR SAFE OPERATION SAFETY AND INTERNATIONAL SYMBOLS This operator's manual describes safety and international symbols and pictographs that may appear on this product. Read the operator's manual for complete safety, assembly, operating and maintenance and repair information. SYMBOL MEANING SYMBOL MEANING •... -
Page 6: Know Your Unit
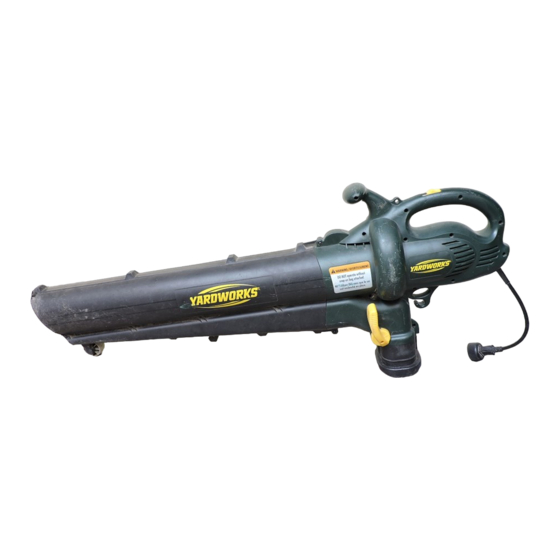
RULES FOR SAFE OPERATION KNOW YOUR UNIT APPLICATION As a blower: • Cleaning yards, garages, driveways, porches, patios and around walls, fences and more As a vacuum: • Picking up leaves and other light debris Latch Support Shoulder Strap Blower/Vacuum Tube Vacuum Inlet Power/Speed Switch Motor Air Vents... -
Page 7: Assembly Instructions
ASSEMBLY INSTRUCTIONS ATTACHING AND REMOVING THE Removing BLOWER/VACUUM TUBE NOTE: It may be necessary to remove the blower/vacuum tube to clear a blocked tube or WARNING: To avoid serious personal injury, impeller. the blower/vacuum tube and vacuum bag must be used when operating this unit. WARNING: To prevent serious personal injury, make sure the unit is in the off position, Attaching... -
Page 8: Attaching And Removing The Vacuum Bag
ASSEMBLY INSTRUCTIONS ATTACHING AND REMOVING THE VACUUM BAG INSTALLING THE SHOULDER HARNESS 1. Push the strap through the center of the buckle. Attaching 2. Pull the strap over the cross bar and down through 1. Attach the vacuum bag to the vacuum bag hook on the slot in the buckle (Fig. -
Page 9: Operating Instructions
OPERATING INSTRUCTIONS CONNECTING THE POWER CORD 2. Plug the female end of the electrical cord into the receptacle at the back of the unit (Fig. 10). Use a minimum 25 foot (7.6 m.) long, 16AWG, outdoor electrical cord when using this unit. Other sizes include: MINIMUM WIRE SIZE FOR EXTENSION CORDS FOR 120 VOLT APPLIANCES USING 0-12 AMPS Cord length (ft.) -
Page 10: Holding The Blower/Vacuum
OPERATING INSTRUCTIONS • Use the shoulder strap when vacuuming. HOLDING THE BLOWER/VACUUM Before operating the unit, stand in the operating position. • Operate power equipment only at reasonable hours— (Fig. 12). Check for the following: not early in the morning or late at night when people might be disturbed. -
Page 11: Operating As A Blower
OPERATING INSTRUCTIONS OPERATING AS A BLOWER Converting to a Blower 1. Place the shoulder harness over your head, onto your shoulder and adjust it if necessary. Refer to Installing the Shoulder Harness. 2. Start the unit. See Starting/Stopping Instructions. 3. Set the blower/vacuum mode change-over lever to the up position (Blower Mode) (Fig. -
Page 12: Operating As A Vacuum
OPERATING INSTRUCTIONS OPERATING AS A VACUUM When the bag is full, suction will noticeably decrease. Turn off the unit and allow the impeller to stop before Converting to Vacuum you unzip the bag. Unzip the bag and empty the contents before continuing. Refer to Emptying the 1. -
Page 13: Clearing A Blocked Impeller
OPERATING INSTRUCTIONS EMPTYING THE VACUUM BAG CLEARING A BLOCKED TUBE / IMPELLER WARNING: To avoid serious personal injury, WARNING: To avoid serious personal be sure the unit is off and unplugged before injury, never unzip or remove the vacuum clearing the impeller. bag without first turning the unit off. -
Page 14: Maintenance And Repair Instructions
MAINTENANCE AND REPAIR INSTRUCTIONS 3. Wash the bag once a year or more often if needed: SERVICING DOUBLE INSULATED UNITS Remove the vacuum bag. This unit is double-insulated. In a double-insulated unit, two systems of insulation are provided instead of b. -
Page 15: Specifications
SPECIFICATIONS Motor Amperage..............................12 Amps Blower Air Output ........................up to 160 mph (257.5 kmh) Vacuum Air Flow..........................up to 424 cfm (12 cmm) Mulching Ratio..............................up to 10:1 Operating Weight ............................10 lb (4.5 kg) Vacuum Bag Capacity ........................0.75 bushels (26.4 L) TROUBLESHOOTING UNIT WILL NOT BLOW OR VACUUM C A U S E... - Page 16 NOTES...
- Page 17 NOTES...
- Page 18 NOTES...
- Page 19 NOTES...
-
Page 20: Warranty
This warranty is limited to ninety (90) days from the date of original retail purchase for any YARDWORKS product that is used for rental or commercial purposes, or any other income-producing purpose. -
Page 21: Souffleuse / Aspirateur A Pailler Électrique
60-3856-2 Souffleuse / Aspirateur a Pailler Électrique MANUEL DE L'UTILISATEUR SI VOUS AVEZ DES QUESTIONS, APPELEZ LE 1-888-939-0992 MANUEL IMPORTANT À NE PAS JETER... -
Page 22: Références, Illustrations Et Spécifications Relatives Au Produit
TABLE DES MATIÈRES INTRODUCTION TOUS NOS REMERCIEMENTS Consignes de sécurité ..... . . F3-F6 A. Importantes consignes de sécurité ... . . F3 Nous vous remercions d'avoir acheté... -
Page 23: Consignes De Sécurité
CONSIGNES DE SÉCURITÉ Les symboles de sécurité attirent votre attention sur SYMBOLE SIGNIFICATION des dangers potentiels. Ces symboles et leurs détails explicatifs méritent que vous les lisiez et compreniez DANGER: le non-respect d’un avertissement bien. Les avertissements de sécurité ne peuvent éviter peut causer dommages matériels ou les dangers de par eux-mêmes. -
Page 24: Pendant L'utilisation
CONSIGNES DE SÉCURITÉ • JEUX DE CORDONS: Vérifiez que votre jeu de cordons est en • Restez toujours en alerte. Faites preuve de bon sens. Pour bon état de fonctionnement. Si vous utilisez un jeu de cordons, éviter de vous blesser ou de blesser les autres, n’utilisez pas assurez vous de bien utiliser un cordon de calibre suffisant pour l’appareil en état de fatigue. -
Page 25: Symboles De Sécurité Et Internationaux
CONSIGNES DE SÉCURITÉ SYMBOLES DE SÉCURITÉ ET INTERNATIONAUX Ce manuel de l'utilisateur décrit les symboles et pictogrammes de sécurité et internationaux pouvant apparaître sur ce produit. Consultez le manuel de l'utilisateur pour les informations concernant la sécurité, le montage, le fonctionnement, l'entretien et les réparations. -
Page 26: Familiarisez-Vous Avec Votre Appareil
CONSIGNES DE SÉCURITÉ FAMILIARISEZ-VOUS AVEC L’APPAREIL USAGE Comme souffleuse : • Nettoyage de cours, garages, chemins, porches, terrasses, autour des murs, clôtures, etc. Comme aspirateur : • Ramassage de feuilles, de débris légers, etc. Soutien du verrou Tube de Bandoulière souffleuse/aspirateur Interrupteur Entrée de aspirateur... -
Page 27: Instructions De Montage
INSTRUCTIONS DE MONTAGE FIXATION ET RETRAIT DU TUBE DE Retrait SOUFFLEUSE/ASPIRATEUR REMARQUE : Il peut s'avérer nécessaire de retirer le tube de souffleuse/aspirateur pour le dégager ou AVERTISSEMENT : Pour éviter des dégager l’hélice. blessures graves, veillez à ce que le tube et le sac soient installés sur l’appareil lors de AVERTISSEMENT : P our éviter des... -
Page 28: Fixation Et Retrait Du Sac D'aspirateur
INSTRUCTIONS DE MONTAGE INSTALLATION DU HARNAIS FIXATION ET RETRAIT DU SAC D'ASPIRATEUR 1.Faites passer la bande au centre de la boucle. Fixation 2.Tirez la bande par-dessus la traverse et à travers la 1. 1. Fixez le sac d’aspirateur à son crochet, sur le tube fente de la boucle (Fig. -
Page 29: Mode D'emploi
MODE D'EMPLOI CONNEXION DU CORDON 2. Branchez l’extrémité femelle du cordon dans la prise D'ALIMENTATION située à l’arrière de l’appareil (Fig. 10). Employez une corde électrique extérieure (minimum 7,6 m ou 25 pieds de long, 16 AWG). D'autres tailles incluent: CALIBRE MINIMUM DES RALLONGES ALIMENTANT DES Prise APPAREILS 120V, A COURANT DE CHARGE DE 0-12 AMPS... -
Page 30: Tenue De La Souffleuse/Aspirateur
MODE D'EMPLOI TENUE DE LA SOUFFLEUSE/ASPIRATEUR • N’utiliser l’outil qu’à des heures raisonnables, c’est-à- dire pas trop tôt le matin ou tard le soir lorsque cela Avant d’utiliser l’outil, se tenir en position de travail peut déranger les personnes vivant aux environs. Se (Fig. -
Page 31: Utilisation De La Souffleuse
MODE D'EMPLOI UTILISATION DE LA SOUFFLEUSE Conventir en Souffleuse 1. Démarrez l'appareil. Voir Instructions de démarrage et d'arrêt. 2. Relevez le levier de bascule des modes souffleuse/aspirateur (mode souffleuse) (Fig. 14). REMARQUE : N’utilisez jamais l’appareil avec le levier sur la position du milieu. Mode aspirateur Fig. -
Page 32: Utilisation Comme Aspirateur
MODE D'EMPLOI UTILISATION COMME ASPIRATEUR Convertir en Aspirateur 1. Démarrez l'appareil. Voir Instructions de démarrage et d'arrêt. 2. Rabaissez le levier de bascule des modes souffleuse/aspirateur (mode aspirateur) (Fig. 18). REMARQUE : N’utilisez jamais l’appareil avec le levier sur la position du milieu. Mode aspirateur Mode... -
Page 33: Dégagement D'un(E) Tube/ Hélice Bloqué(E)
MODE D'EMPLOI DÉGAGEMENT D’UN(E) TUBE/ HÉLICE Vider le Sac D’aspirateur BLOQUÉ(E) AVERTISSEMENT : Afin d'éviter des blessures graves, n’ouvrez et ne retirez AVERTISSEMENT : P our éviter des blessures jamais le sac avant d’éteindre l’appareil. sérieuses, l'appareil doit être mis hors tension et débranché... -
Page 34: Entretien Et Réparations
ENTRETIEN ET RÉPARATIONS 3. Lavez le sac une fois par an ou plus selon le besoin : ENTRETIEN D’APPAREILS À DOUBLE ISOLEMENT Retirez le sac d’aspirateur. Cet appareil possède un double isolement. Au lieu d’une b. Retournez-le à l’envers. mise à la terre, les appareils à double isolement Suspendez-le. -
Page 35: Caractéristiques
CARACTÉRISTIQUES Intensité du moteur............................... 12 A Sortie d’air de la souffleuse ....................... 257,5 km/h (160 m/h) max. Débit d'air de l'aspirateur ...................... 12 m3/min (424 pi3/min) max. Rapport de paillage ............................... 10:1 max. Poids en fonctionnement ..........................4,54 kg (10 lb) Capacité... -
Page 36: Remarques
REMARQUES... - Page 37 REMARQUES...
- Page 38 REMARQUES...
-
Page 39: Parts List
PARTS LIST REPLACEMENT PARTS - MODEL 60-3856-2 120 VOLT ELECTRIC BLOWER/VAC Item Part No. Description Item Part No. Description 791-182410 Mode Control Flipper 753-00148 Left Motor Housing 753-00149 Right Motor Housing 791-182411 Mode Control Lever (includes 3) 753-04102 Blower/Vac Tube Assembly (includes 3) -
Page 40: Garantie Limitée De Deux Ans
éventuellement. La présente garantie est limitée à quatre-vingt-dix (90) jours à compter de la date d’achat au détail initiale pour tout produit YARDWORKS utilisé à des fins locatives ou commerciales, ou toute utilisation produisant des revenus.