Publicité
Les langues disponibles
Les langues disponibles
Liens rapides
Publicité

Sommaire des Matières pour SPIT CL 30
- Page 1 p. 3 Français p. 12 English p. 21 Español p. 30 Italiano p. 39 Deutsch p. 48 Nederland . 57...
- Page 3 3. Remettre le couvercle dans sa position d’origine Note : Le CL 30 peut aussi être alimenté par un courant continu de 4,5 V grâce à la prise jack extérieure. Cette prise ne peut pas servir à recharger des piles rechargeables placées dans l’appareil.
- Page 4 Figure 1 pendant le transport ou si le laser chute. Le CL 30 peut être utilisé soit en mode « niveau verrouillé », soit en mode d’auto nivellement. Niveau verrouillé Dans la position « niveau verrouillé » (figure 2), le pendule est en position verrouillé...
- Page 5 Français Lignes : horizontale, verticale et croix Le CL30 a trois options de ligne, accessibles par le bouton « LINE » situé sur le dessus du laser. Quand le laser est allumé, le point haut et bas sont toujours actifs. Utiliser le bouton « LINE » pour passer de la ligne horizontale, à...
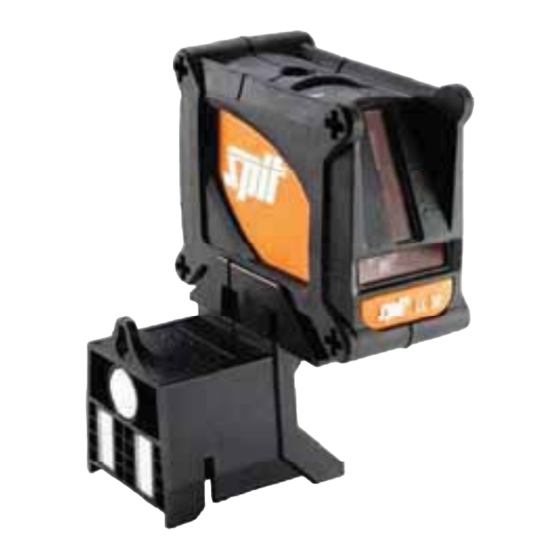
- Page 6 Français Utilisation du guide Montage du laser sur le guide : Positionnez le laser de manière à ce que les repères en creux coïncident et que le téton du guide rentre dans l'insert du laser. Appuyez pour faire rentrer le laser au maximum dans le guide. Placement du guide : Positionnement et aplomb Alignement par rapport à...
- Page 7 Français Vérification du CL30 Il est recommandé de vérifier régulièrement votre CL30 pour assurer sa précision Vérification du niveau : Choisissez deux murs distants de 4 à 5 mètres l’un de l’autre. Figure 1 Allumez votre CL30 en position d’auto nivellement. Placez le laser à...
- Page 8 Français Maintenant, mesurez la distance entre les points A1 et A2 puis la distance entre les points B1 et B2. Si les deux distances sont les mêmes, le laser est bien calibré. Si la différence entre ces deux distances est supérieure à 3,2 mm, le laser doit être calibré.
- Page 9 Français Caractéristiques techniques du laser Précision +/- 3mm à 10m Angle maxi d’auto nivellement +/- 5° Portée 30m sans cellule, 50m avec cellule de détection (accessoire) Angles des lignes laser 140° en vertical, 130° en h orizontal. Indication de non nivellement Ligne laser clignotante et alarme sonore Filetage 1/4'' sur le laser, 5/8'' sur le guide...
- Page 10 été modifié, altéré, ouvert ou réparé par une personne non habilitée. SPIT, à son choix et à ses frais, réparera ou remplacera tout produit trouvé défectueux durant cette période de garantie En aucun cas la garantie ne peut dépasser le coût de fabrication voir au...
- Page 11 General Manager EPT Industrial Unit R&D Manager EPT Industrial Unit 30/10/2008 SPIT SAS, route de Lyon – BP 104 – 26501 Bourg-lès-Valence – France Elimination des déchets Les appareils ainsi que leurs accessoires et emballages, doivent pouvoir suivre chacun une voie de recyclage appropriée.
- Page 12 3. Return the battery cover to its original position. Note : CL 30 can also be powered by DC 4.5V power supply thanks to the external power socket. This external power socket can not be used to charge rechargeable batteries.
- Page 13 English Pendulum Lock The CL30 is a precision instrument and should be treated with care. When not in use, the pendulum should always be in Off position (figure 1). Locking the pendulum allows the L T 40 to better withstand vibration and trauma incurred during transportation or if the unit is dropped.
- Page 14 English Level, Plumb and Cross Line Options The CL30 has three line options, accessible by the line options button located on the top of the instrument If the unit has been turned on, the plumb top and down beams will always be on. Use the line options button to cycle through the level (horizontal), plumb (vertical) or cross line modes, as shown below.
- Page 15 English Using the guide To mount the laser on the guide : Place the laser so as groove marks coincide .Guide spigot location must enter on the laser tripod mount. Push on the laser until it is completely in the guide. To place the guide : Placing on a metal track - Alignment to a metal...
- Page 16 English Checking the CL30 It is recommended that you check your CL30 periodically to assure its accuracy. To check level : Choose two walls approximately 12-15 feet (4-5 meters) apart (figure 1). Figure 1 Turn on the CL30 to the "auto level" setting. With the laser 6 inches (15cm) away from and facing Surface #1, carefully mark the center of the line where the lines cross.
- Page 17 English Next, measure the distance between "A1" and "A2" and between "B1" and "B2" .If the distances are the same, the laser is in calibration. If the difference between the two sets of marks is greater than 1/8" (3, 17mm) the laser is out of calibration.
- Page 18 English Specifications Accuracy +/- 3mm @ 10m Self-leveling range +/- 5° Operating range 30m without receiver, 50m with receiver (optional accessory) Fan angle 140° vertical, 130° horizontal. Out-of-level indication Blinking laser lines and audible alarm Unit tripod mount 1/4 " camera tripod (5/8 " on the guide) Pendulum lock Protects pendulum during transportation and storage for added durability...
- Page 19 SPIT will, at its option and expense, repair or replace any products found to be defective under the above warranty. The only obligation and sole recourse of the buyer will be limited to this repair or exchange.
- Page 20 Jean-Pierre COSTE General Manager EPT Industrial Unit R&D Manager EPT Industrial Unit 30/10/2008 SPIT SAS, route de Lyon – BP 104 – 26501 Bourg-lès-Valence – France Disposal Tools, accessories and packaging should be sorted for environmental- friendly recycling. Only for EC countries:...
- Page 21 All product data are subject to alteration by SPIT. SPIT behält sich das Recht vor, die Produktdaten jederzeit zu ändern. SPIT si riserva il diritto di modificare in qualsiasi momento i dati del prodotto. SPIT behoudt zich het recht voor om de productgegevens op elk moment te wijzigen.
- Page 22 Fax: 0 1293 515186 Service Après Vente Customer Support Tél.: 0 810 504 504 Tel.: 0141 342 1660 ITW Construction Products SA SPIT PASLODE CONSTR. ITALY División Construcción ITW CONSTR.PROD.ITALY S.r.l. Murcia, 36 08830 San Boi de Llobregat Via Reiss Romoli 265/12 BARCELONA Tel.: 93 652 59 52...