Publicité
Les langues disponibles
Les langues disponibles
Liens rapides
FS20
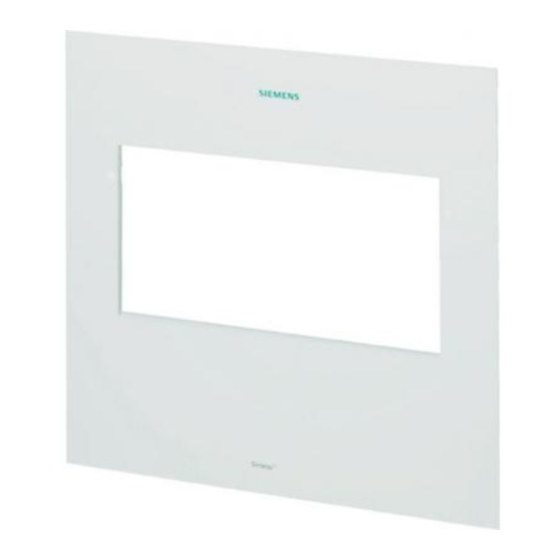
FM blind (1HU) FHA2017-A1
FM blind (2HU) FHA2015-A1
Mounting
Installation
Montage
Montaje
Montaggio
FHA2017-A1:
=> Housing (Eco) FH2002-A1
=> Housing (Standard) FH2002-A1
=> Housing (Large extension) FH2004-A1
Fig. 1
Installation of FM blind
Abb. 1
Montage UP-Blende
Fig. 1
Montage Cadre UP
6.1
A6V10331435_a_--_--
11.2011
FHA2015-A1:
=> Housing (Comfort) FH2003-A1
=> Housing (Large) FH2005-A1
[en]
Fig. 1
[de]
Fig. 1
[fr]
7
6
5
FHA2017-A1
Montaggio del kit montaggio ad incasso
Montaje del kit para montaje empotrado
8
9
4
3
Building Technologies
Control Products and Systems
FHA2015-A1
[it]
[es]
2
1
Publicité

Sommaire des Matières pour Siemens FHA2017-A1
- Page 1 FS20 FM blind (1HU) FHA2017-A1 FM blind (2HU) FHA2015-A1 Mounting Installation Montage Montaje Montaggio FHA2017-A1 FHA2015-A1 FHA2017-A1: FHA2015-A1: => Housing (Eco) FH2002-A1 => Housing (Comfort) FH2003-A1 => Housing (Standard) FH2002-A1 => Housing (Large) FH2005-A1 => Housing (Large extension) FH2004-A1 Fig. 1...
- Page 2 There is one FM blind each for the 1HU and 2HU Rear panel mounting hole enclosure heights 3x washer Ø 6.4/16/0.8 FM blind (1HU) FHA2017-A1 for the Eco, Standard 3x hexagon nut M6 x 0.8 mm and Large Extension enclosures FM blind (2HU) FHA2015-A1 for the Comfort and ...
- Page 3 Align the enclosure by tightening or loosening the Additional documentation hexagon nuts (6.7) so that the surface of the operating unit is level with the plaster. This ensures Information about further installation steps can be found that the FM blind is level with the wall. in the document Installation 008851.
- Page 4 3x Unterlegscheibe Ø 6,4/16/0,8 Für die Gehäusehöhen 1HE und 2HE gibt es jeweils eine 3x Sechskantmutter M6 x 0,8 mm UP-Blende UP-Blende (1HE) FHA2017-A1 für die Gehäuse (Eco), Montage Gehäuse (Standard) und Gehäuse (Large Extension) UP-Blende (2HE) FHA2015-A1 für die Gehäuse ...
- Page 5 Richten Sie das Gehäuse durch Festziehen oder Weiterführende Dokumentation Lösen der Sechskantmuttern (6.7) so aus, dass die Oberfläche der Bedieneinheit mit dem Verputz Informationen zu weiteren Montageschritten sind im fluchtet. So wird gewährleistet, dass die UP-Blende Dokument Installation 008851. bündig zur Mauer ist. Schrauben Sie die Bedieneinheit (8) mit den beiden unteren Schrauben (9) fest.
- Page 6 Pour les hauteurs de boîtier 1HE et 2HE, il existe un 3 rondelles Ø 6,4/16/0,8 cadre UP pour chacun 3 écrous hexagonaux M6 x 0,8 mm UP (1HE) FHA2017-A1 pour boîtier (Eco), Cadre boîtier (Standard) et boîtier (Large Extension) Montage Cadre UP (2HE) FHA2015-A1 pour boîtier (Comfort)
- Page 7 Orienter le boîtier en le serrant ou desserrant les Documentation complémentaire écrous hexagonaux (6.7) de façon à ce que la surface de l'unité d'exploitation soit en alignement Des informations relatives aux étapes suivantes de avec le crépi. Cela permet ainsi au cadre UP d'être montage sont données dans le document d'installation aligné...
- Page 8 Para las alturas de carcasa 1HE y 2HE existe un kit para Orificio de fijación parte trasera montaje empotrado 3 arandelas Ø 6,4/16/0,8 Kit para montaje empotrado (1HE) FHA2017-A1 para 3 tuercas hexagonales M6 x 0,8 mm carcasa (Eco), carcasa (Standard) y carcasa (Large...
- Page 9 Alinee la carcasa apretando o aflojando las tuercas Documentación adicional hexagonales (6.7), de modo que la superficie de la unidad de operación esté a ras con el revoque. Así Para más información sobre los pasos de montaje queda garantizado que el kit para montaje empotrado adicionales, consulte el documento "Instalación"...
- Page 10 Per le altezze armadio 1HE e 2HE è previsto 3x rondella Ø 6,4/16/0,8 rispettivamente un kit montaggio ad incasso 3x dado esagonale M6 x 0,8 mm Kit montaggio ad incasso (1HE) FHA2017-A1 per gli armadi Eco, Standard e Large Extension Montaggio Kit montaggio ad incasso (2HE) FHA2015-A1 per gli ...
- Page 11 Allineare l'armadio serrando o allentando i dadi Documentazione di riferimento esagonali (6.7) in modo che la superficie dell'unità di comando sia a filo con l'intonaco. In questo modo si Le informazioni relative alle fasi di montaggio successive garantisce che la mascherina a incasso sia a filo con sono presenti nel documento Installazione 008851.
- Page 12 FHA2015-A1 A5Q00024621 FM blind (2HU) FHA2017-A1 A5Q00024719 FM blind (2HU) Siemens Switzerland Ltd. © Siemens Switzerland Ltd. 2006-2011 Data and design subject to change without notice. Infrastructure & Cities Sector Building Technologies Division International Headquarters Gubelstrasse 22 CH-6301 Zug Tel. +41 41-724 24 24 www.siemens.com/buildingtechnologies...


