Table des Matières
Publicité
Les langues disponibles
Les langues disponibles
Liens rapides
Publicité
Table des Matières

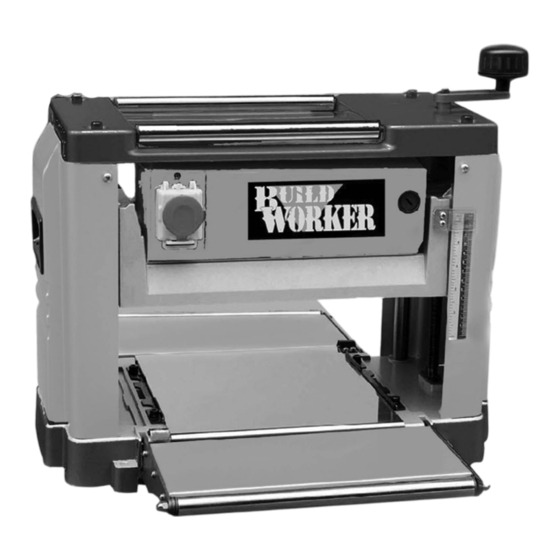
Sommaire des Matières pour Build Worker BTP1800-254
- Page 1 BTP1800-254 FR RABOT STATIONNAIRE GB BENCH STATIONARY PLANER 2007 Conserver le présent manuel pour pouvoir le consulter ultérieurement Bewaar deze handleiding voor toekomstige raadpleging Preserve this handbook for future reference...
- Page 2 LEGENDE DES PICTOGRAMMES DE SECURITE FIGURANT SUR LES PRODUITS VERKLARING WAARSCHUWINGSSYMBOLEN OP PRODUCTEN KEY TO PRODUCT SAFETY SIGNS FR - Lire attentivement le Manuel Opérateur avant toute utilisation NL - Lees vóór gebruik aandachtig de handleiding door GB - Before use, read the handbook carefully FR - Danger: agir avec prudence NL - Gevaar, wees voorzichtig GB - Danger, take care...
- Page 3 FR - NE PAS exposer la machine aux agents atmosphériques NL - Stel de machine NIET aan de weersinvloeden bloot GB - Protect the machine from foul weather FR - NE PAS se rapprocher des machines lorsqu’on porte des vêtements larges NL - Kom NIET in de buurt van de machines met loshangende kleding GB - Do NOT approach the machine with loose clothing...
- Page 7 INTRODUCTION ordinaires. En vue de protéger les ressources Nous vous remercions d’avoir choisi ce produit. naturelles et minimiser les impacts nuisibles pour Il a subi un processus d’assurance de qualité l’environnement, procéder correctement au approfondi et toutes les précautions possibles ont recyclage ou à...
-
Page 8: Protection Contre Les Risques D'electrocution
l'absence de composants cassés ainsi que le Toujours soumettre les outils à une montage correct de l'outil électrique. maintenance soignée Vérifier toute autre condition susceptible d'affecter le Maintenir les outils tranchants affûtés et propres, fonctionnement de l'outil électrique. afin d'assurer les meilleures performances et une Toute protection ou autre partie de l'outil électrique sécurité... - Page 9 CONSIGNES DE SÉCURITÉ EMPLACEMENT ATTENTION ! Attention ! L’outil ne peut être utilisé sans être Certains types de bois et des produits de bois, en monté sur un établi. Tenir compte de la longueur particulier les panneaux de fibres mi-dures, maximale du matériau à...
- Page 10 ROULEAU D’ENTRÉE MOTORISÉ MONTAGE DES LAMES La raboteuse est équipée d’un rouleau d’entrée S’assurer que tous les plans de joint et les trous motorisé. Il est important de laisser l’outil atteindre filetés sont propres et ne contiennent pas de le régime de service et d’alimenter le matériau dans poussière ou des matières étrangères.
-
Page 11: Important
IMPORTANT: Laisser l’outil tourner pendant 5 à 10 secondes avant d’utiliser l’outil pour la première fois et après le remplacement de la courroie ou des lames. Immédiatement arrêter l’outil dans le cas de bruits anormaux ou de vibrations excessives et rechercher la cause. - Page 12 Thankyou for purchasing this product which has passed through our extensive quality assurance ELECTRICAL INFORMATION process. Every care has been taken to ensure that it reaches you in perfect condition. CONNECTION OF THE MAINS PLUG However, in the unlikely event that you should Important! The wires in the mains lead fitted to this experience a problem, or if we can offer any product are coloured in accordance with the...
-
Page 13: General Safety Instructions
When this product reaches the end of it’s life or is Always work on a stable base. disposed of for any other reason, it must not be Always fasten the workpiece securely with a clamp. disposed of in household waste. In Keep the work area clean and tidy. -
Page 14: Specific Safety Instructions
extension cord or reel with the earth core connected COMPONENTS AND CONTROLS (PIC.1) to earth. Always unwind any extension cords fully. For extension cords up to 15 metres, use a wire cross section of 1.5mm2 . For extension cords over 15 metres, use a wire cross section of 2.5mm2 . -
Page 15: Blade Replacement
is also fitted with an emergency stop cover. To start Remove the chip collector cover by removing the 4x the machine, lift the emergency stop cover retaining screws and washers (Pic.7). (Pic.5) (5.1) and press green the ON button (Pic.5) WARNING: Ensure that the machine is switched off (5.2). -
Page 16: Technical Specification
Replace the handle on the lifting pin and lift the planing group as much as possible to remove it from two worm screws. Remove the handle again and extract the planing group from 4 cylindrical guides (Pic. 18). Ease the belt off the small pulley by using side pressure and rotating the spindle at the same time (Pic.19).