Publicité
Les langues disponibles
Les langues disponibles
Liens rapides
Prima
•
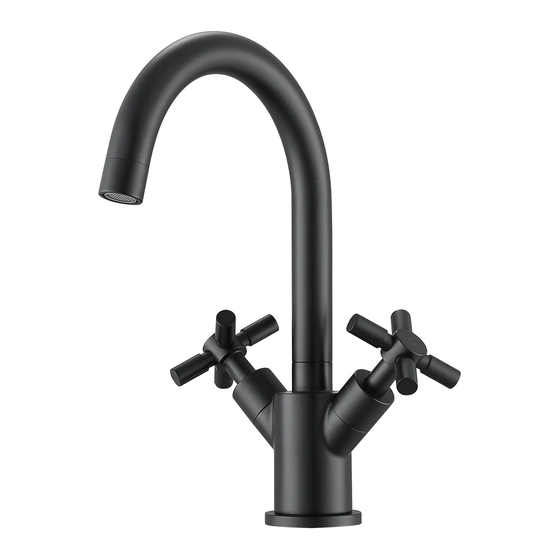
Bathroom Faucet
• STANDARDS
ASME A112.18.1-2012
CSA B125.1-12
NSF 61-9
LISTED IAPMO/cUPC
•
1.2 gpm/4.5 L/min
2020-01-12 MA0421-0005-4
Helpful Information
Tools:
Gather the necessary tools as shown below to complete the installation of this
faucet. Some may not be needed depending on the model of faucet you are
installing. Check with your local hardware store on the requirements of your
installation situation.
PLUMBERS
PUTTY
FLASHLIGHT
SAFETY
GLASSES
CHANNEL LOCKS
ADJUSTABLE WRENCH
SEALED-TUBE
HEX-KEY
A .
B .
C .
Important
Tighten connection
C
with two wrench to
prevent damage to
tube body
Be careful not to
bend the stem as
800-102
this will void the
product warranty
BASIN WRENCH
SCREW DRIVER
PLIERS
TAPE
Connect to water supply lines with either
A 3 8 O D copper tubing ball nose
risers with the coupling nuts or
B 3 8 copper tubing no ball with
supplied tube head interior connector or
C IPS faucet connectors 1 2
Publicité

Manuels Connexes pour Ancona Prima


Sommaire des Matières pour Ancona Prima
- Page 1 Gather the necessary tools as shown below to complete the installation of this faucet. Some may not be needed depending on the model of faucet you are installing. Check with your local hardware store on the requirements of your Prima installation situation. •...
- Page 2 Installation Size Map Three Hole Installation Step 1: Insert plate (1) and metal ring with rubber washer (2 & 3) before inserting spout body into sink deck. Step 2: Repeat steps 1 to 4 from Single Hole Installation. Step 3: Secure plate (1). Step 4: Securing all connectors: Ensure all connections are tightly set in place to avoid...
- Page 3 Réunissez les outils nécessaires comme montrés ci-dessous, pour compléter l'installation de ce robinet. Certains peuvent ne pas être requis, selon le modèle du robinet que vous installez. Vérifiez avec votre quincaillerie locale sur les exigences Prima de votre situation d'installation. •...
- Page 4 Carte de dimension d'installation Étape 1: Insérrez la plaque (1) à trois trous et l’anneau de caoutchouc noir et l’anneau de métal (2 et 3) avant d’inserrer le robinet dans l’évier. Étape 2: Répetez les étapes 1 à 4 de l’Installation à...