Publicité
Liens rapides
JS PRODUCTS | 6445 MONTESSOURI STREET, LAS VEGAS, NV 89113
(APR18)
Part No. 41554
Copyright © 2018 D
D
WALT
and the D
WALT Logo are trademarks of the D
®
E
E
and are used under license. The yellow/black color scheme is a trademark for D
Definitions: Safety Guidelines
The definitions below describe the level of severity for each signal word. Please
read the manual and pay attention to these symbols.
WARNING:
Indicates a potentially hazardous situation which, if not avoided, could
result in death or serious injury.
CAUTION:
Indicates a potentially hazardous situation which, if not avoided, may
result in minor or moderate injury.
(Used without word) Indicates a safety related message.
NOTICE:
Indicates a practice not related to personal injury which, if not avoided,
may result in property damage.
IF YOU HAVE ANY QUESTIONS OR COMMENTS ABOUT THIS OR ANY D
CALL US TOLL FREE AT: 1-844-377-8451
WARNING! Read and understand all instructions.
manual contains important safety and operating instructions.
Please read this manual carefully before assembling this storage
rack and save it for reference.
SAVE THESE INSTRUCTIONS
TECHNICAL SPECIFICATIONS
Technical Specifications
Height
Width
GENERAL SAFETY
• Keep work area clean and dry.
• Use correct/recommended tools for the job.
• Never leave tools unattended.
• Never force a part into place.
• Wear safety apparel.
• Wear safety glasses/goggles.
• Never crawl, sit, stand, or climb on a rack.
• Keep small parts away from children. Never leave a small child unattended
while assembling.
• Always use common sense – your personal safety is your responsibility.
DXST10000PBK
Copyright © 2018, D
E
WALT.
E
WALT Industrial Tool Co., or an affiliate thereof
E
WALT power tools
E
& accessories.
WALT TOOL,
E
24" (60.9 cm)
71" (180.3 cm)
Parts List
No. Description
1
Metal Pegboard
2
Side Mounting Bracket (Right)
3
Side Mounting Bracket (Left)
4
Rear Mounting Bracket (Right)
5
Rear Mounting Bracket (Left)
6
Locking Pin
2
4
6
Pegboard Assembly Orientations
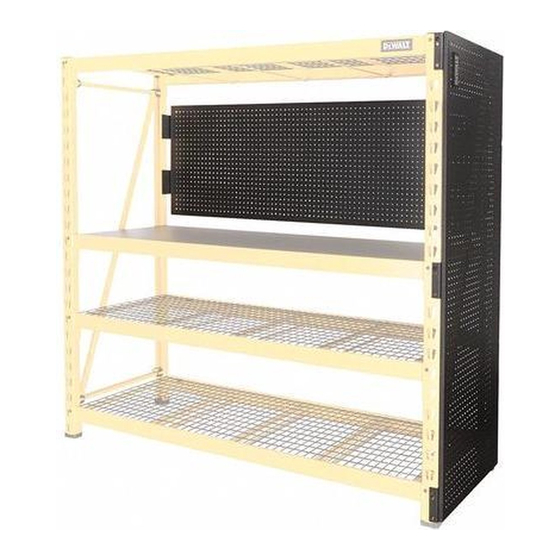
NOTE: Pegboards can be mounted to the back or sides of the DXST10000 Industrial Racks for
multi-functional organization.
NOTE: See images below for different pegboard mounting options.
WALT
This
*Double side panels
NOTE: DXST10000 Industrial Racks are sold separately.
BEFORE YOU BEGIN:
• Read all instructions thoroughly.
• Remove all components from the box, and lay them on the floor in an orderly fashion.
• Wear eye protection.
• Be cautious of sharp edges.
• Keep this information for further reference.
WARNING:
this, the assembled rack must always be secured to a wall, especially in earthquake-prone
environments, where surfaces are uneven, and where children and/or pets are present.
Side Pegboard Panel Assembly (Fig. 1-3)
NOTE: This same process can be used for mounting double side panels.
Qty.
2
1
6
6
2
2
12
3
5
*Double back panels option 1
READ ALL INSTRUCTIONS
Serious or fatal crushing injuries can occur from rack tipping over. To prevent
*Single side and back panels
*Double back panels option 2
Publicité

Sommaire des Matières pour DeWalt DXST10000PBK
- Page 1 NOTE: Pegboards can be mounted to the back or sides of the DXST10000 Industrial Racks for multi-functional organization. NOTE: See images below for different pegboard mounting options. JS PRODUCTS | 6445 MONTESSOURI STREET, LAS VEGAS, NV 89113 (APR18) Part No. 41554 DXST10000PBK Copyright © 2018, D WALT Copyright © 2018 D WALT. WALT...
- Page 2 ® et le logo D WALT sont des marques de commerce de DEWALT Industrial Tool Co. ou d’une société affiliée à cette dernière et sont utilisés sous licence. L’agencement de couleurs jaune et noir est une marque de commerce des outlils électriques et accessorires D WALT.
- Page 3 NOTA: Vea las imágenes que están a continuación para ver las diferentes opciones de montaje del panel. JS PRODUCTS | 6445 MONTESSOURI STREET, LAS VEGAS, NV 89113 (APR18) Part No. 41554 DXST10000PBK Copyright © 2018, D WALT WALT y el logotipo de D WALT son marcas comerciales de D WALT Industrial Tool Co., o una filial del...
- Page 4 FIG. 4 FIG. 5 FIG. 6 RANURA PARTE SUPERIOR DEL PANEL TRASERA DEL PERFORADO MARCO VERTICAL PASADOR DE BLOQUEO SOPORTE DE MONTAJE TRASERO (IZQUIERDO) LENGÜETA PASADOR DE DE MONTAJE BLOQUEO DE LA PARTE SOPORTE POSTERIOR DE MONTAJE DEL SOPORTE TRASERO DE MONTAJE (IZQUIERDO) (IZQUIERDA) Garantía limitada de un año...


