Table des Matières
Publicité
Les langues disponibles
Les langues disponibles
Liens rapides
BGY010C-AmazonBasics-IM-V03 (Multi).indb 1
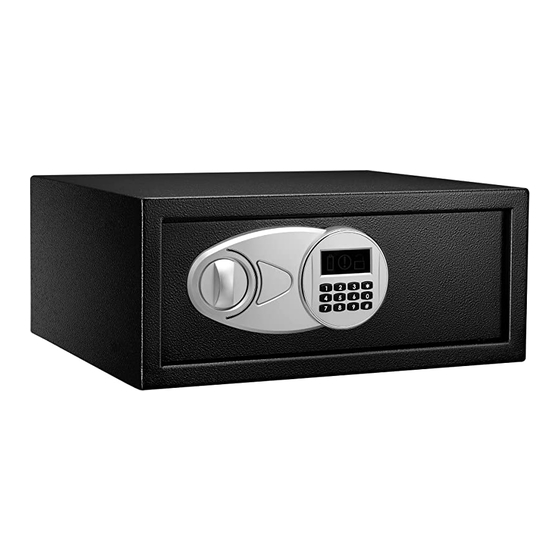
Security Safe
Coffre-Fort
Tresor
Cassaforte
Caja Fuerte
金庫
保险 柜
B01BGY010C
B01BGY043Q
20 Litres
28 Litres
20 Litres
28 Litres
20 Liter
20 Litri
20 Litros
28 Litros
20リットル
28リットル
20L
B01BGY6GPG
34 Litres
34 Litres
28 Liter
34 Liter
28 Litri
34 Litri
34 Litros
34リットル
28L
34L
9/8/16 3:49
Publicité
Table des Matières

Sommaire des Matières pour Amazon Basics B01BGY010C
- Page 1 B01BGY010C B01BGY043Q B01BGY6GPG Security Safe 20 Litres 28 Litres 34 Litres Coffre-Fort 20 Litres 28 Litres 34 Litres Tresor 20 Liter 28 Liter 34 Liter Cassaforte 20 Litri 28 Litri 34 Litri Caja Fuerte 20 Litros 28 Litros 34 Litros 金庫...
- Page 2 English ........3 Français ......... 17 Deutsch ........31 Italiano ........45 Español ........59 日本語 ........73 中文 ........87 BGY010C-AmazonBasics-IM-V03 (Multi).indb 2 9/8/16 3:49...
- Page 3 Welcome Guide • English Security Safe Contents: Before getting started, ensure the package contains the following components: Part Security safe Emergency key Expansion bolts Note: The default preset password is “159”, change it immediately. BGY010C-AmazonBasics-IM-V03 (Multi).indb 3 9/8/16 3:49...
-
Page 4: Product Overview
Product Overview BGY010C-AmazonBasics-IM-V03 (Multi).indb 4 9/8/16 3:49... - Page 5 Setup Step 1: Setting Up the Product Opening the Safe - First Time To open the safe the first time you will need to use the emergency key. Remove the cover of the emergency lock GY010C-AmazonBasics-IM-V03 (Multi).indb 5 9/8/16 3:49...
- Page 6 Setup Step 2: Setting Up the Product Insert the emergency key and turn it clockwise. Turn the knob clockwise to open the door. BGY010C-AmazonBasics-IM-V03 (Multi).indb 6 9/8/16 3:49...
- Page 7 Setup Step 3: Setting Up the Product Open the door. Open the battery compartment and insert 4 x AA batteries (not included). NOTE: When the batteries run out, the icon will turn on. Replace the batteries then. BGY010C-AmazonBasics-IM-V03 (Multi).indb 7 9/8/16 3:49...
- Page 8 Setup Step 4: Setting the Password With the door open, press the Reset button . The safe will emit two beeps. Choose a new password (3-8 digits), punch it on the keypad and press the # key to confirm. If the icon turns on, the new password is successfully set.
- Page 9 Setup Step 5: Securing to a Floor or Wall Select a stable, dry and secure location for your safe. If bolting to a wall, make sure that your safe is resting on a supporting surface (such as the floor or a shelf).
- Page 10 Operation Opening the Safe - Using Your Password Input your password (3 to 8 digits) on the keypad. Press # key to confirm. icon turns on. Rotate the knob clockwise and open the door. NOTE: The default preset password is “159”, change it immediately. Locking the Safe Close the door, then turn the knob counterclockwise to lock it.
-
Page 11: Setting The Master Code
Operation Setting the Master Code Should you forget your password, the safe can still be accessed with the master code. 1. With the door open, press 0 key twice and then press the Reset button 2. Input the new code (3-8 digits), then press # key to confirm. icon turns on. -
Page 12: Cleaning And Maintenance
Automatic Lockout • The safe will enter a 30-second lockout if the wrong password is entered 3 consecutive times. • After the 30-second lockout it will automatically unlock. • ATTENTION: Entering the wrong password 3 more times will lock the safe for 5 minutes. Cleaning and Maintenance •... -
Page 13: Safety And Compliance
Safety and Compliance • Read this instruction manual carefully before using the appliance. Familiarize yourself with the operation, adjustments and functions of switches. Understand and follow the safety and operation instructions in order to avoid possible risks and hazards. Keep for future reference. If you give this device to someone else, this instruction manual must be included too. -
Page 14: Environmental Protection
• Always insert batteries correctly with regard to the polarities (+ and –) marked on the battery and the battery compartment. • Batteries shall be stored in well-ventilated, dry and cool conditions. • Exhausted batteries should be immediately removed from equipment and properly disposed of. •... -
Page 15: Warranty Information
B01BGY010C B01BGY043Q B01BGY6GPG Model No. Power supply 4 x 1.5 V , (AA) (not included) Dimensions Weight 9 kg 10.9 kg 12.2 kg Capacity 20 L 28 L 34 L Warranty Information To obtain a copy of the warranty for this product: Visit amazon.com/AmazonBasics/Warranty... - Page 16 Feedback Love it? Hate it? Let us know with a customer review. AmazonBasics is committed to delivering customer-driven products that live up to your high standards. We encourage you to write a review sharing your experiences with the product. Please visit: amazon.com/review/create-review# For further services: Visit amazon.com/gp/help/customer/contact-us —...
- Page 17 Guide De Bienvenue • Français Coffre-Fort Sommaire : Avant de commencer, veuillez vous assurer que l’emballage contient les composants suivants : Pièce Qté Coffre-fort de sécurité Clé de secours Boulons expansibles Remarque : Le code d’accès par défaut est « 159 ». Il convient de le changer immédiatement. BGY010C-AmazonBasics-IM-V03 (Multi).indb 17 9/8/16 3:49...
-
Page 18: Vue D'ensemble Du Produit
Vue D'ensemble Du Produit BGY010C-AmazonBasics-IM-V03 (Multi).indb 18 9/8/16 3:49... -
Page 19: Préparation
Préparation Étape 1 : Préparation Du Produit Première Ouverture Du Coffre-fort Pour la première ouverture du coffre-fort vous devrez utiliser la clé de secours. Retirez le couvercle de la serrure d’urgence BGY010C-AmazonBasics-IM-V03 (Multi).indb 19 9/8/16 3:49... - Page 20 Préparation Étape 2 : Préparation Du Produit Introduisez la clé de secours, puis tournez-la dans le sens des aiguilles d’une montre. Tournez le bouton dans le sens des aiguilles d’une montre pour ouvrir la porte. BGY010C-AmazonBasics-IM-V03 (Multi).indb 20 9/8/16 3:49...
- Page 21 Préparation Étape 3 : Préparation Du Produit Ouvrez la porte. Ouvrez le compartiment à piles , puis insérez-y 4 x piles de type « AA » (non fournies). REMARQUE : lorsque les piles sont déchargées, l’icône s’allume. Remplacez alors les piles. BGY010C-AmazonBasics-IM-V03 (Multi).indb 21 9/8/16 3:49...
-
Page 22: Étape 4 : Définition Du Code D'accès
Préparation Étape 4 : Définition Du Code D’accès Lorsque la porte est ouverte, appuyez sur le bouton Reset (Réinitialiser) . Le coffre-fort émet deux signaux sonores. Choisissez un nouveau code d'accès (3 à 8 chiffres), saisissez-le sur le clavier numérique, puis appuyez sur la touche # pour confirmer votre choix. Si l’icône s’allume, cela indique que le nouveau code d'accès est défini avec succès. -
Page 23: Étape 5 : Fixation À Un Plancher Ou À Un Mur
Préparation Étape 5 : Fixation à Un Plancher Ou à Un Mur Choisissez un endroit stable, sec et sûr pour y installer votre coffre-fort. En cas de boulonnage à un mur, assurez-vous que votre coffre-fort repose sur une surface d’appui (notamment le sol ou une étagère). Ne boulonnez pas votre coffre-fort à la fois au mur et au sol. Positionnez le coffre-fort à... -
Page 24: Mise En Route
Mise En Route Ouverture Du Coffre-fort : Utilisation De Votre Mot De Passe Saisissez votre code d'accès (3 à 8 chiffres) sur le clavier numérique. Appuyez sur la touche # pour le confirmer. L’icône s’allume. Tournez le bouton dans le sens des aiguilles d’une montre, puis ouvrez la porte. REMARQUE : le code d’accès par défaut est «... - Page 25 Mise En Route Définition Du Code Maître En cas d’oubli de votre code d’accès, le coffre-fort reste tout de même accessible grâce au code maître. 1. Lorsque la porte est ouverte, appuyez à deux reprises sur la touche 0, puis appuyez sur la touche Reset 2.
-
Page 26: Verrouillage Automatique
Verrouillage Automatique • Le coffre-fort se verrouille pendant 30 secondes en cas de saisie à 3 reprises consécutives d’un mauvais code d’accès. • Après le verrouillage de 30 secondes, il se déverrouille automatiquement. • ATTENTION : une saisie à 3 autres reprises du mauvais code d’accès verrouille le coffre-fort pendant 5 minutes. -
Page 27: Sécurité Et Conformité
Sécurité Et Conformité • Lisez attentivement ce manuel d’utilisation avant d’utiliser l’appareil. Familiarisez-vous avec l’utilisation, les réglages et les fonctions des commutateurs. Comprenez et respectez les instructions de fonctionnement et de sécurité afin d'éviter tous risques et dangers potentiels. À conserver pour consultation ultérieure. -
Page 28: Protection De L'environnement
• Ne laissez pas des enfants remplacer les piles sans la surveillance d’un adulte. • Danger d'explosion ! Les piles ne peuvent pas être chargées, réactivées d’autres moyens, désassemblées, incinérées ou court-circuitées. • Insérez toujours les piles correctement en respectant les polarités (+ et –) indiquées sur la pile et le compartiment à... -
Page 29: Caractéristiques
Caractéristiques B01BGY010C B01BGY043Q B01BGY6GPG Modèle N° Alimentation 4 piles 1,5 V , (AA) (non comprises) Dimensions Poids 9 kg 10.9 kg 12.2 kg Capacité 20 l 28 l 34 l Informations Relatives à La Garantie Pour obtenir une copie de la garantie portant sur ce produit : Veuillez visiter amazon.fr/AmazonBasics/Warranty... - Page 30 Vos Avis Vous l’adorez ? Vous le détestez ? Faites-nous savoir grâce à votre témoignage. AmazonBasics s’engage à vous offrir des produits axés sur les besoins de la clientèle et répondant à vos normes élevées. Nous vous encourageons à rédiger un témoignage visant à partager vos expériences avec le produit.
-
Page 31: Lieferumfang
Bedienungsanleitung • Deutsch Tresor Lieferumfang: Bevor Sie beginnen, prüfen Sie, ob die Verpackung die folgenden Teile enthält: Teil Anzahl Tresor Notschlüssel Spreizschrauben Hinweis: Der standardmäßig voreingestellte Zugangscode ist „159“, ändern Sie diesen sofort. BGY010C-AmazonBasics-IM-V03 (Multi).indb 31 9/8/16 3:49... -
Page 32: Produktübersicht
Produktübersicht BGY010C-AmazonBasics-IM-V03 (Multi).indb 32 9/8/16 3:49... - Page 33 Einrichten Schritt 1: Einrichten des Produkts Öffnen des Tresors - beim erstem Mal Um den Tresor zum ersten Mal zu öffnen, benötigen Sie den Notschlüssel. Entfernen Sie die Abdeckung des Notschlosses BGY010C-AmazonBasics-IM-V03 (Multi).indb 33 9/8/16 3:49...
- Page 34 Einrichten Schritt 2: Einrichten des Produkts Stecken Sie den Schlüssel in das Schloss und drehen Sie ihn im Uhrzeigersinn. Drehen Sie den Drehknopf im Uhrzeigersinn, um die Tür zu öffnen. BGY010C-AmazonBasics-IM-V03 (Multi).indb 34 9/8/16 3:49...
- Page 35 Einrichten Schritt 3: Einrichten des Produkts Öffnen Sie die Tür. Öffnen Sie das Batteriefach und legen Sie 4 AA-Batterien ein (nicht im Lieferumfang enthalten). HINWEIS: Wenn die Batterien schwach werden, leuchtet das Symbol auf. Ersetzen Sie dann die Batterien. BGY010C-AmazonBasics-IM-V03 (Multi).indb 35 9/8/16 3:49...
- Page 36 Einrichten Schritt 4: Einstellen des Zugangscodes Drücken Sie bei offener Tür auf die Reset-Taste . Der Tresor gibt zwei Pieptöne ab. Wählen Sie einen neuen Zugangscode (3-8 Ziffern), geben Sie ihn auf der Tastatur ein und drücken Sie zur Bestätigung die Taste #. Wenn das Symbol angezeigt wird, wurde der Zugangscode erfolgreich eingestellt.
- Page 37 Einrichten Schritt 5: Boden- oder Wandbefestigung Wählen Sie einen stabilen, trockenen und sicheren Ort für Ihren Tresor. Wenn Sie ihn an eine Wand schrauben, achten Sie darauf, dass Ihr Tresor an einer tragenden Oberfläche aufliegt (z. B. Fußboden oder Regal). Schrauben Sie Ihren Tresor nicht am Boden und an der Wand an. Platzieren Sie den Tresor am ausgewählten Ort.
- Page 38 Betrieb Öffnen des Tresors - Verwendung Ihres Passworts Geben Sie Ihren Zugangscode (3 bis 8 Ziffern) auf der Tastatur ein. Drücken Sie zur Bestätigung die # Taste. Symbol wird angezeigt. Drehen Sie den Drehknopf im Uhrzeigersinn und öffnen Sie die Tür. HINWEIS: Der voreingestellte Zugangscode ist „159“, ändern Sie diesen sofort.
- Page 39 Betrieb Einstellen des Mastercodes Sollten Sie Ihren Zugangscode vergessen, können Sie immer noch mit dem Mastercode auf den Tresor zugreifen. 1. Drücken Sie bei offener Tür zweimal die Taste 0 und danach die Reset-Taste 2. Geben Sie den neuen Code (3-8 Ziffern) ein und drücken Sie danach zur Bestätigung die # Taste. Symbol wird angezeigt.
-
Page 40: Automatische Sperre
Automatische Sperre • Der Tresor wird für 30 Sekunden gesperrt, wenn 3 Mal hintereinander der falsche Zugangscode eingegeben wurde. • Nach der 30-sekündigen Sperre wird er automatisch entsperrt. • ACHTUNG: Wenn Sie 3 weitere Male einen falschen Zugangscode eingeben, wird der Safe für 5 Minuten gesperrt. -
Page 41: Sicherheit Und Konformität
Sicherheit und Konformität • Lesen Sie diese Bedienungsanleitung vor Gebrauch des Geräts sorgfältig durch. Machen Sie sich mit der Bedienung, den Einstellungen und Funktionen der Schalter vertraut. Verinnerlichen und befolgen Sie die Sicherheits- und Gebrauchsanleitungen, um mögliche Risiken und Gefahren zu vermeiden. Für ein zukünftiges Nachschlagen aufbewahren. -
Page 42: Umweltschutz
• Wenn Batteriesäure ausgelaufen ist, vermeiden Sie den Kontakt mit Haut, Augen und Schleimhäuten. Spülen Sie die betroffenen Stellen sofort nach dem Kontakt mit der Säure ab und waschen Sie sie mit viel sauberem Wasser.Suchen Sie einen Arzt auf. • Lassen Sie nicht zu, dass Kinder ohne Aufsicht von Erwachsenen die Batterien ersetzen. •... -
Page 43: Technische Daten
Technische Daten B01BGY010C B01BGY043Q B01BGY6GPG Modell Nr. Stromversorgung 4 x 1,5 V (AA) (nicht im Lieferumfang enthalten) Abmessungen 9 kg 10.9 kg 12.2 kg Gewicht Kapazität 20 L 28 L 34 L Gew hrleistungsinformationen Eine Kopie der Gew hrleistung für dieses Produkt erhalten Sie unter Besuchen Sie amazon.de/AmazonBasics/Warranty... - Page 44 Feedback Gefällt‘s Ihnen? Gefällt‘s Ihnen nicht? Dann bewerten Sie das Produkt auf unserer Webseite! AmazonBasics vertreibt kundenorientierte Produkte, die Ihre hohen Erwartungen erfüllen. Bitte schreiben Sie eine Rezension, in der Sie Ihre Erfahrungen mit dem Produkt teilen. Bitte besuchen Sie: amazon.de/review/review-your-purchases# Möchten Sie mehr wissen? Besuchen Sie amazon.de/gp/help/customer/contact-us —...
- Page 45 Guida Di Benvenuto • Italiano Cassaforte Contenuto: Prima di iniziare, assicurarsi che la confezione contenga quanto segue: Parte Qtà Cassaforte Chiave di emergenza Bulloni a espansione Nota: Il codice di default è “159”, cambiarlo immediatamente. BGY010C-AmazonBasics-IM-V03 (Multi).indb 45 9/8/16 3:49...
-
Page 46: Panoramica Del Prodotto
Panoramica Del Prodotto BGY010C-AmazonBasics-IM-V03 (Multi).indb 46 9/8/16 3:49... - Page 47 Preparazione Passo 1: Preparazione Del Prodotto Apertura Della Cassaforte – Prima Volta Per aprire la cassaforte la prima volta, sarà necessario utilizzare la chiave di emergenza. Rimuovere la copertura della serratura di emergenza BGY010C-AmazonBasics-IM-V03 (Multi).indb 47 9/8/16 3:49...
- Page 48 Preparazione Passo 2: Preparazione Del Prodotto Inserire la chiave di emergenza e girare in senso orario. Girare la manopola in senso orario per aprire la porta. BGY010C-AmazonBasics-IM-V03 (Multi).indb 48 9/8/16 3:49...
- Page 49 Preparazione Passo 3: Preparazione Del Prodotto Aprire la porta. Aprire il vano batterie e inserire 4 batterie AA (non incluse). NOTA: L’icona si accenderà quando le batterie sono scariche. In questo caso, sostituire le batterie. BGY010C-AmazonBasics-IM-V03 (Multi).indb 49 9/8/16 3:49...
- Page 50 Preparazione Passo 4: Impostazione Del Codice Numerico Con la porta aperta, premere il tasto Reset . La cassaforte emetterà due ‘beep’ (segnali acustici). Scegliere un nuovo codice numerico (da 3 a 8 cifre), inserirlo sul tastierino numerico e premere il tasto # per confermare.
- Page 51 Preparazione Passo 5: Fissaggio Al Pavimento o Al Muro Scegliere un luogo stabile, asciutto e sicuro per la cassaforte. In caso di fissaggio a muro, assicurarsi che la cassaforte poggi su una superficie di supporto (pavimento, mobile, ripiano ecc…). Non fissare la cassaforte sia al muro che al pavimento. Posizionare la cassaforte nel luogo selezionato.
- Page 52 Funzionamento Apertura Della Cassaforte – Utiilizzando Il Vostro Codice Numerico Inserire il codice (da 3 a 8 cifre) sul tastierino. Premere il tasto # per confermare. L’icona si illumina. Girare la manopola in senso orario e aprire la porta. NOTA: Il codice di default è “159”, cambiarlo immediatamente. Chiudere la cassaforte Chiudere la porta, girare la manopola in senso antiorario per serrarla.
- Page 53 Funzionamento Impostazione Del Codice Master Nel caso in cui vi siate scordati il codice, è possibile aprire comunque la cassaforte con il codice master. 1. Con la porta aperta premere due volte il tasto 0 poi premere il tasto Reset 2.
-
Page 54: Blocco Automatico
Blocco Automatico • La cassaforte si bloccherà automaticamente per 30-secondi qualora venisse inserito il codice errato per 3 volte consecutive. • Dopo 30-secondi si sbloccherà automaticamente. • ATTENZIONE: Inserendo un codice errato altre 3 volte si bloccherà la cassaforte per 5 minuti. Pulizia e Manutenzione •... - Page 55 Sicurezza e Conformità • Leggere attentamente questo manuale utente prima di usare l'apparecchio. Familiarizzare con il funzionamento, le regolazioni e le funzioni dei tasti. Comprendere e seguire le istruzioni d’uso e per la sicurezza per evitare possibili rischi e pericoli. Conservare questo manuale utente per futuro riferimento. In caso di cessione dell’apparecchio a terzi, includere anche questo manuale.
-
Page 56: Protezione Ambientale
• Pericolo di esplosione! Le batterie non possono essere ricaricate, riattivate in altro modo, smontate, gettate nel fuoco o messe in corto circuito. • Inserire sempre batterie correttamente rispettando le polarità (+ e -) contrassegnate sulla batteria e il vano batterie. •... -
Page 57: Informazioni Di Garanzia
B01BGY010C B01BGY043Q B01BGY6GPG Modello num. Alimentazione 4 x 1,5 V , (AA) (non incluse) Dimensioni Peso 9 kg 10.9 kg 12.2 kg Capacità 20 L 28 L 34 L Informazioni Di Garanzia Per ottenere una copia della garanzia del prodotto: Visitare amazon.it/AmazonBasics/Warranty... - Page 58 Feedback Ti piace? Oppure no? Faccelo sapere scrivendo la tua recensione. AmazonBasics si impegna a distribuire prodotti orientati al cliente che siano all’altezza degli standard più elevati. Pertanto, invitiamo i clienti a scrivere una recensione per condividere le proprie esperienze con il prodotto.
- Page 59 Guía De Bienvenida • Español Caja Fuerte Contenido: Antes de comenzar, asegúrese de que el embalaje contenga los siguientes componentes: Componente Cant. Caja fuerte Llave de emergencia Pernos de expansión Nota: El código predeterminado es 159; cámbielo inmediatamente. BGY010C-AmazonBasics-IM-V03 (Multi).indb 59 9/8/16 3:49...
-
Page 60: Resumen Del Producto
Resumen Del Producto BGY010C-AmazonBasics-IM-V03 (Multi).indb 60 9/8/16 3:49... -
Page 61: Abrir La Caja Fuerte Por Primera Vez
Configuración Paso 1: Configuración Del Producto Abrir La Caja Fuerte Por Primera Vez Para abrir la caja fuerte por primera vez, se necesita la llave de emergencia. Retire la tapa del bloqueo de emergencia BGY010C-AmazonBasics-IM-V03 (Multi).indb 61 9/8/16 3:49... - Page 62 Configuración Paso 2: Configuración Del Producto Inserte la llave de emergencia y gírela hacia la derecha. Gire el mando hacia la derecha para abrir la puerta. BGY010C-AmazonBasics-IM-V03 (Multi).indb 62 9/8/16 3:49...
- Page 63 Configuración Paso 3: Configuración Del Producto Abra la puerta. Abra el compartimento de la batería e inserte 4 x baterías AA (no incluidas). NOTA: cuando las baterías se agoten, el icono se iluminará. Sustituya las baterías. BGY010C-AmazonBasics-IM-V03 (Multi).indb 63 9/8/16 3:49...
- Page 64 Configuración Paso 4: Configuración Del Código Con la puerta abierta, pulse el botón Restablecer . La caja emitirá dos pitidos. Elija un nuevo código (3-8 dígitos), márquelo en el teclado numérico y pulse la tecla # para confirmar. Si el icono se ilumina, el nuevo código se ha configurado correctamente.
- Page 65 Configuración Paso 5: Fijación Al Suelo o a La Pared Seleccione una ubicación segura, seca y estable para la caja. Si la emperna en una pared, asegúrese de que la caja descansa en un superficie de soporte (como, por ejemplo, el suelo o un estante). No atornille la caja en el suelo y en la pared a la vez. Coloque la caja en el lugar seleccionado.
- Page 66 Funcionamiento Abrir La Caja Fuerte - Usar Su Codigo Introduzca el código (de 3 a 8 dígitos) en el teclado. Pulse la tecla # para confirmar. El icono se ilumina. Gire el mando hacia la derecha y abra la puerta. NOTA: el código predeterminado es 159;...
- Page 67 Funcionamiento Configuración Del Código Principal Si olvidara el código, puede acceder a la caja con el código principal. 1. Con la puerta abierta, pulse la tecla 0 dos veces y, a continuación, pulse el botón Restablecer 2. Introduzca el nuevo código (3-8 dígitos) y, a continuación, pulse la tecla # para confirmar. El icono se ilumina.
-
Page 68: Bloqueo Automático
Bloqueo Automático • Si se introduce un código incorrecto 3 veces seguidas, la caja se bloquea durante 30 segundos. • Transcurridos los 30 segundos, el bloqueo se desactiva automáticamente. • ATENCIÓN: si se introduce el código incorrecto 3 veces más, la caja se bloqueará durante 5 minutos. Limpieza y Mantenimiento •... -
Page 69: Seguridad Y Cumplimiento
Seguridad y Cumplimiento • Lea este manual de instrucciones atentamente antes de utilizar el aparato. Familiarícese con el funcionamiento, los ajustes y las funciones de los botones. Lea y siga las instrucciones de seguridad y funcionamiento para evitar posibles riesgos y peligros. Guárdelo para futuras consultas. Si estrega este dispositivo a terceros, debe incluir también este manual de instrucciones. -
Page 70: Protección Del Medio Ambiente
• ¡Peligro de explosión! Las baterías no se pueden cargar, reactivar de ningún modo, desmontar, arrojar al fuego o cortocircuitar. • Inserte siempre las baterías correctamente según las polaridades (+ y -) marcadas en la batería y en el compartimento de la batería. •... -
Page 71: Información Sobre La Garantía
B01BGY010C B01BGY043Q B01BGY6GPG N.º de modelo Alimentación 4 x 1,5 V , (AA) (no incluidas) Dimensiones Peso 9 kg 10.9 kg 12.2 kg 20 L 28 L 34 L Capacidad Información Sobre La Garantía Para obtener una copia de la garantía de este producto: Visite amazon.es/AmazonBasics/Warranty... - Page 72 Comentarios ¿Le encanta? ¿No le gusta nada? Escriba una opinión como cliente. En AmazonBasics nos comprometemos a proveer productos pensados para satisfacer a nuestros clientes y que estén a la altura de sus elevados estándares de calidad. Le animamos a que escriba una opinión sobre su experiencia con el producto.
- Page 73 ウェルカムガイド • 日本語 金庫 内容: スタートする前に、パッケージに以下のものが含まれていることを必ず確認してください。 パーツ 数量 金庫 緊急用キー 開きボルト 注意:初期設定の暗証番号は 「159」です。即、変更してください。 BGY010C-AmazonBasics-IM-V03 (Multi).indb 73 9/8/16 3:49...
- Page 74 製品概要 BGY010C-AmazonBasics-IM-V03 (Multi).indb 74 9/8/16 3:49...
- Page 75 準備 ステップ 1: 製品の準備 初めて金庫を開ける この金庫を初めて開ける際には緊急用キーが必要となります。 緊急ロックのカバー を取り外します。 BGY010C-AmazonBasics-IM-V03 (Multi).indb 75 9/8/16 3:49...
- Page 76 準備 ステップ 2: 製品の準備 緊急用キーを差し込み、時計回りに廻します。 ノブ を時計回りに廻してドアを開きます。 BGY010C-AmazonBasics-IM-V03 (Multi).indb 76 9/8/16 3:49...
- Page 77 準備 ステップ 3: 製品の準備 ドアを開けます。バッテリ収納部 を開き、単三電池を 4 本(含まれていません)を入れま す。 注意:電池が切れると アイコンが点灯します。点灯したら電池を交換してください。 BGY010C-AmazonBasics-IM-V03 (Multi).indb 77 9/8/16 3:49...
- Page 78 準備 ステップ 4: 暗証番号の設定 ドアが開いた状態でリセットボタン を押します。ブザーが2回鳴ります。 新しい暗証番号 (3-8 桁)を選んでキーパッドを押し、 # キー を押して確認します。 アイコンが表示されれば新しい暗証番号がうまく設定されています。 アイコンが点滅した場合は、新しい暗証番号の設定はうまく行きませんでした。うまく行くま で上記のステップを繰り返してください。注意:ドアをロックする前に、ドアが開いた状態で新 しい暗証番号を試してください。 BGY010C-AmazonBasics-IM-V03 (Multi).indb 78 9/8/16 3:49...
- Page 79 準備 ステップ 5: 床または壁へに固定する 金庫を置くには湿気のない、安定して安全な場所をお選びください。 ボルトを使って壁にとめる場合は、金庫が支持面上(床や棚など)にあることをご確認くださ い。壁と床の両方にボルトを使ってとめることはおやめください。 金庫を、選択した面に置きます。鉛筆を使って床または壁に取り付け穴の位置の印をつけます。 金庫を移動させ、 2インチ (~50mm) の深さの穴を、 12mm のドリルビットを使ってあけます。 金庫をしかるべき位置に戻し、今あけた穴と金庫の取り付け穴の位置を合わせます。開きボルト (含まれています)を金庫の穴に通して取り付け穴に差し込み、しっかり締めてとめます。 BGY010C-AmazonBasics-IM-V03 (Multi).indb 79 9/8/16 3:49...
- Page 80 操作 金庫を開ける(暗証番号を使用) 暗証番号 (3から 8桁)をキーパッドで入れます。確認のため # キーを押します。 アイコンが表示されます。 ノブを 時計回りに廻してドアを開きます。 注意:初期設定の暗証番号は 「159」です。即、変更してください。 金庫をロックする ドアを閉じてからノブ を反時計回りに廻すとロックします。 BGY010C-AmazonBasics-IM-V03 (Multi).indb 80 9/8/16 3:49...
- Page 81 操作 マスターコードの設定 暗証番号を忘れても、マスターコードがあれば金庫を開けることができます。 1. ドアが開いた状態で 0 キーを2回押してからリセットボタンを押します 。 2. 新しい暗証番号 (3-8桁)を入れ、 # キーを押して確認します。 アイコンが表示されます。マスターコードが設定されました。 注意: アイコンが表示されない場合は、新しい暗証番号の設定はうまく行きませんでし た。うまく行くまで上記のステップを繰り返してください。 BGY010C-AmazonBasics-IM-V03 (Multi).indb 81 9/8/16 3:49...
- Page 82 自動ロックアウト • この金庫は 間違った暗証番号を入れると 30秒間ロックアウトします。3回続けて間違った暗証番 号を入れた場合にのみロックアウトします。 • 30秒のロックアウトの後、自動的にロックは解除されます。 • 注意:さらに3回間違った暗証番号を入れると金庫は 5分間ロックします。 掃除およびメンテナンス • 必要であれば製品の内外を少し湿らせた布で拭いてください。 • 酸、アルカリその他そのような腐食性の物質に触れないようにしてください。 トラブルシューティング: 問題 解決策 暗証番号を入れても金 • 正しい暗証番号を入れたか確認してください。 庫が開かない。 • 暗証番号を入れた後、# キーを押してください。 • 金庫がロックアウト状態である可能性があります。5分待って、 再度渡来してください。 • 電池を交換してください。(ステップ 3を参照) ドアが閉じない。 • 邪魔になるものがないかを確認してください。 • ドアのボルト がのびきった状態であれば、暗証番号を入れな おしてノブ を時計回りに廻して縮めます。 •...
- Page 83 安全および守るべきこと • この装置をご使用になる前に取扱説明書をしっかりお読みください。操作、調節やスイッチの 機能を十分ご理解ください。危険やリスクの可能性を避けるため、安全および操作の説明を理 解、実行してください。後日のために、保管してください。この装置を他人にゆずる際は、必 ずこの取扱説明書をつけておゆずりください。 • 東南を防ぐため、金庫は壁または床に固定してください。 • 緊急用キーは誰にも知られず、安全な場所に保管してください。 • 絶対にしてはいけないこと: 緊急用キーを金庫内に保管。電池が切れた状態では金庫を開く ことはできません。 • 初期設定のプリセット暗証番号 は、金庫ご使用前に変更してください。 • 製品を安定して安全な場所、落ちて壊れたり人を傷つけたりしないよう、できれば高くない場 所に置いてください。 • 水分が コントロールパネルやバッテリ収納部にかからないようにしてください。電子パーツに 水こぼしたりすると機会がダメージを受け、故障につながることがあります。 • ご自分で製品を分解しようとなさらないでください。 • メンテナンスが必要な場合は、お近くのサービスセンターまたは販売店にご連絡ください。 バッテリ安全に関するアドバイス • 電池交換の際、違うタイプの電池をお入れになると爆発の恐れがあります。 • 電池交換の際は同じ、または同様のタイプの物をお選びください。 • 警告!電池(バッテリブロックや内蔵バッテリも)は、直射日光や火など、高温にさらされる ことがないようにしてください。 • 警告!電池を飲み込まないでください、化学熱傷の恐れがあります。 • この製品には電池が入っています。もし電池を飲み込んだ場合は、内蔵派の熱傷の恐れがあり、 2時間以内に死ぬ危険もあります。...
- Page 84 • 電池挿入の際は、電池およびバッテリ収納部に表示されている極(+とー)を正しく合せて ください。 • 電池の保存には通気の良い、乾燥した涼しい場所をお選びください。 • 使い切った電池は即、装置から取り外し、正しい方法で破棄してください。 • 正しいタイプの物(単3)をご使用ください。 • しばらくご使用にならない場合は、電池を取り外してください。 環境保護 この意味するところは、この製品は EU を通じて他の生活廃棄物と一緒に破棄し てはならない。法の規制を受けない廃棄物の破棄により環境や人間の健康に害が 及ばぬよう、責任を持ってリサイクルし、資源の再利用に貢献してください。使 用済みのデバイスを返却するには返却・収集システムを利用するか、製品を購入 した小売店にご連絡ください。彼らはこの製品を受け取って環境に大して安全に リサイクルします。 使用済みの電池は有害物質や重金属を含み、環境や人の健康に害を及ぼす可能性 があるため、家庭ゴミと一緒に破棄しないでください。 それゆえ消費者は電池に関しては買った店または無料の収集施設に戻すことを義 務付けられています。使用済みの電池はリサイクルされます。 電池は鉄、亜鉛、マンガンやニッケルといった重要な物質を含んでいます。 ゴミ箱の「禁止」シンボルが意味するところは:電池や充電式電池は家庭ゴミと 一緒に出してはいけないということです。 ゴミ箱の下のシンボルの意味するところは: Pb:電池には鉛が含まれています Cd:電池にはカドミウムが含まれています Hg:電池には水銀が含まれています パッケージングはボール紙と、リサイクル可能でそれに対応するような表示がな されたプラスチックでできています。これらの資材はリサイクルできるようにし てください。 BGY010C-AmazonBasics-IM-V03 (Multi).indb 84 9/8/16 3:49...
- Page 85 規格 B01BGY010C B01BGY043Q B01BGY6GPG モデル番号 電源 4 x 1.5 V , (AA) (含まれていません) 寸法: 9 kg 10.9 kg 12.2 kg 重さ キャパシティ 20 L 28 L 34 L 保証について この製品の保証書のコピーを入手するには: ホームページ: amazon.jp/AmazonBasics/Warranty - または - カスタマーサービス 0120-899-276 にご連絡ください。 GY010C-AmazonBasics-IM-V03 (Multi).indb 85...
- Page 86 フィードバック 気に入っていただけましたか?お気に召しませんでしたか? カスタマーレビューでお知らせください。 Amazon ベーシック は、皆様の高い水準に答えることのできるような消費者志向型の製品をお届 けするのを旨としています。この製品についてのレビューで製品についてのご意見をお聞かせく ださい。 レビューはこちらへ: amazon.jp/review/review-your-purchases# 更なるサービスについては: こちらのリンクへ amazon.jp/gp/help/customer/contact-us - または - カスタマーサービス 0120-899-276 にご連絡ください。 BGY010C-AmazonBasics-IM-V03 (Multi).indb 86 9/8/16 3:49...
- Page 87 欢迎指南 • 中文 保险柜 内装物: 在开始组装之前,确保包装内包含以下组件: 零部件 数量 保险柜 应急钥匙 膨胀螺栓 注意:默认预置密码为“159”,可即时更改。 BGY010C-AmazonBasics-IM-V03 (Multi).indb 87 9/8/16 3:49...
- Page 88 产品概览 BGY010C-AmazonBasics-IM-V03 (Multi).indb 88 9/8/16 3:49...
- Page 89 调试 步骤 1: 产品安装与调试 打开保险柜 - 首次使用 首次打开保险柜时,需要使用应急钥匙。 取下紧急盖锁的护盖 。 BGY010C-AmazonBasics-IM-V03 (Multi).indb 89 9/8/16 3:49...
- Page 90 调试 步骤 2: 产品安装与调试 插入应急钥匙并顺时针旋转。 顺时针转动旋钮 打开柜门。 BGY010C-AmazonBasics-IM-V03 (Multi).indb 90 9/8/16 3:49...
- Page 91 调试 步骤 3: 产品安装与调试 打开柜门。打开电池仓 并放入 4 个 AA 电池(不随附)。 注意:电池电量耗尽后, 图标将亮起。此时请更换电池。 BGY010C-AmazonBasics-IM-V03 (Multi).indb 91 9/8/16 3:49...
- Page 92 调试 步骤 4: 设置密码 打开柜门后,按下重置按钮 。保险柜将发出两声哔哔声。 键盘上输入新的密码(3-8 位数),并按 # 键进行确认。 如果 图标亮起,则表示新密码设置成功。 如果 图标闪烁,则表示保险柜设置新密码失败。请重复以上步骤,直至成功。注意:请在柜门打 开的状态下测试新密码,然后再锁上柜门。 BGY010C-AmazonBasics-IM-V03 (Multi).indb 92 9/8/16 3:49...
- Page 93 调试 步骤 5: 固定于地板或墙上 请将保险柜存放到稳固、干燥安全的场所。 如要固定到墙壁上,请将保险柜放置到支撑面上(如地板或货架)。不要将保险柜同时固定在地板 和墙壁上。 将保险柜放到选定的位置。用铅笔在地板或墙壁上标记安装孔。 移开保险柜,钻 2 英寸深的安装孔(约 50 毫米),钻孔工具请使用 12 毫米钻头。 将保险柜移回原位,安装孔对准保险柜的开口。穿过开口,将膨胀螺栓(随附)插入安装孔,并将 其牢固紧固。 BGY010C-AmazonBasics-IM-V03 (Multi).indb 93 9/8/16 3:49...
- Page 94 操作 打开保险柜 - 使用密码 在键盘上输入密码(3 到 8 位数)。按 # 键进行确认。 图标将亮起。 顺时针旋转旋钮 ,打开柜门。 注意:默认预置密码为“159”,可即时更改。 锁上保险柜 关上柜门,然后逆时针转动旋钮 上锁。 BGY010C-AmazonBasics-IM-V03 (Multi).indb 94 9/8/16 3:49...
- Page 95 操作 设置解锁码 如果您忘记了密码,还可以使用解锁码打开。 1. 打开柜门,按 0 键两次,然后按重置按钮 。 2. 输入新密码(3-8 位数),然后按 # 键进行确认。 图标将亮起。解锁码设置成功。 注意:如果 图标未亮起,则表示保险柜设置解锁码失败。请重复以上步骤,直至成功。 BGY010C-AmazonBasics-IM-V03 (Multi).indb 95 9/8/16 3:49...
- Page 96 自动锁定 • 保险柜将 进入 30 秒锁定期(如果连续 3 次输错密码)。 30 秒锁定期后,保险柜将自动解锁。 • • 注意:如果连续 3 次以上输错密码,保险柜将锁定 5 分钟。 清洁和保养 • 必要时,请用微湿的布擦拭产品的外部和内部。 • 避免与酸、碱或类似的腐蚀性物质接触。 故障排除 故障 解决方案 输入密码后,保险柜未 • 确保输入的密码正确无误。 打开。 • 输入密码后,按 # 键。 • 保险柜可能处于锁定期。请等待 5 分钟,然后重试。 更换电池。(请参见步骤 3) • 柜门无法关闭。...
- Page 97 安全和注意事项 • 使用本机前,请仔细阅读本说明书。熟悉各按钮的操作、调整和功能。理解并遵循安全和操作说 明,以避免可能发生的危险。应妥善保管说明书以便日后查阅。如果将本机转送他人,请务必将 此说明书一并随附。 • 为了降低被盗的风险,请务必将保险柜固定到墙壁或地板上。 • 将应急钥匙存放在隐秘安全的地方。 • 切勿将应急钥匙存放到保险柜内。如果电池电量耗尽,则无法打开保险柜。 • 使用保险柜前,请更改预置密码。 • 将本产品放置到安全稳固并且无法升高的地方,否则可能会掉落而遭受损失或造成人身伤害。 • 保持液体远离控制面板和电池仓。液体溅到电气部件上可能会造成损坏,并导致发生故障。 • 切勿尝试自行拆卸产品。 • 如果需要维修,请联系当地服务中心或当地经销商。 电池安全建议 • 如果更换的电池型号有误,可能有爆炸的危险。 • 仅使用相同或同等型号的电池进行更换。 • 警告!电池(电池板或内置电池)不得暴露于过热环境中,如阳光直射、火源或类似环境。 • 警告!切勿吞食电池,否则有化学烧伤的危险。 • 本产品包含电池。如果吞食电池,会导致内部烧伤,进而导致在 2 小时内死亡。 • 请将新的和废旧电池存放在儿童接触不到的地方。 • 如果电池仓不能正确关闭,请停止使用产品,并存放在儿童接触不到的地方。 • 如果您认为电池被吞食,或卡入身体的任何部位,请立即就医。 •...
- Page 98 环保 此标志指示在欧盟本产品不得与其它生活垃圾一同弃置。为防止擅自废物处理可能 会对环境或人体健康造成的损害,请对其进行回收利用,促进材料资源的可持续再 利用。为了回收您的旧设备,请使用回收和收集系统或联系购买产品时的经销商。 他们可回收此产品以进行环保回收再利用。 废旧电池不能当作生活垃圾处置,因为它们可能含有有毒元素和重金属,对环境和 人类的健康有害。 因此,消费者有义务将电池带至免费的零售处或地方收集站。废旧电池将回收利 用。 它们含有铁、锌、锰或镍等重要原料。 打叉的垃圾箱符号表示:电池和可充电电池不得当作生活垃圾处置。 垃圾箱下面的符号表示: 铅:电池中含铅 镉:电池中含镉 汞:电池中含汞 包装包含可回收利用的纸板和相应标记的塑料。这些材料可供回收利用。 BGY010C-AmazonBasics-IM-V03 (Multi).indb 98 9/8/16 3:49...
- Page 99 规格 B01BGY010C B01BGY043Q B01BGY6GPG 型号 电源 4 x 1.5 V , (AA) (不含) 180 毫米 x 428 毫米 226 毫米 x 430 毫米 270 毫米 x 430 毫米 尺寸 x 370 毫米 x 370 毫米 x 370 毫米 重量 9 公斤...
- Page 100 反馈 喜欢这款产品?不喜欢这款产品? 让我们通过客户评论了解您的想法和意见。 亚马逊倍思以客户为导向,致力于供应满足客户高标准的产品。我们邀请您填写评论,分享您使用 产品的体验。 请访问:amazon.cn/review/review-your-purchases 如需更多服务: 访问 amazon.cn/gp/help/customer/contact-us — 或 — 拨打 400-810-5666 联系客服人员 BGY010C-AmazonBasics-IM-V03 (Multi).indb 100 9/8/16 3:49...
- Page 101 amazon.com/AmazonBasics MADE IN CHINA BGY010C-AmazonBasics-IM-V03 (Multi).indb 101 9/8/16 3:49...