Publicité
Liens rapides
I
GB
F
D
MONTAGEANLEITUNGEN ZUR INSTALLATION DER ARMATUREN
E
MOD. ZP2258 / ZP2324
MOD. ZP2607 / ZP2605
Via Molini di Resiga, 29 - 28024 Gozzano (No) - Italy - Tel. +39 0322 954700 - Fax +39 0322 954823 - zucchettionline.it
ISTRUZIONI PER L'INSTALLAZIONE DELLA RUBINETTERIA
INSTRUCTIONS FOR THE INSTALLATION OF THE FAUCETS
INSTRUCTIONS POUR L'INSTALLATION DE LA ROBINETTERIE
INSTRUCCIONES PARA LA INSTALACION DE LA GRIFERIA
MOD. ZP2147
Zucchetti Rubinetteria S.p.A.
MOD. ZP2609
MOD. ZP2169
MOD. ZP2067
Publicité

Sommaire des Matières pour ZUCCHETTI isyfresh ZP2258
- Page 1 MOD. ZP2258 / ZP2324 MOD. ZP2609 MOD. ZP2607 / ZP2605 MOD. ZP2169 MOD. ZP2147 MOD. ZP2067 Zucchetti Rubinetteria S.p.A. Via Molini di Resiga, 29 - 28024 Gozzano (No) - Italy - Tel. +39 0322 954700 - Fax +39 0322 954823 - zucchettionline.it...
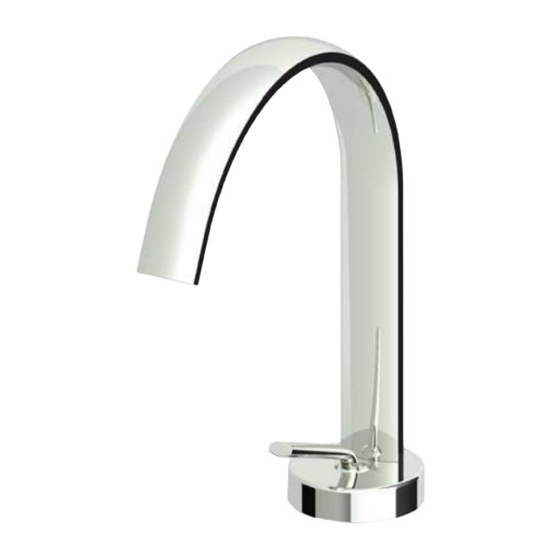
- Page 2 ZP2258 / ZP2324 INSTALLAZIONE LAVABO/BIDET - BASIN/BIDET INSTALLATION Infilare la guarnizione bianca 1 nel gambo cilindrico del monocomando. Avvitare il perno filettato 2 e i due flessibili 3 nelle rispettive sedi. Thread the white gasket 1 onto the cylindrical shank of the single lever mixer. Screw the threaded pin 2 and the two flexi- ble pipes 3 into the respective seats.
- Page 3 ZP2258 / ZP2324 SOSTITUZIONE CARTUCCIA - REPLACING THE CARTRIDGE Svitare con una chiave a brugola da 2mm (non in dotazione) il grano 1 collocato nella parte posteriore del tubo. Una volta svitato, sollevare il tubo verso l’alto, facendo attenzione a non rovinare gli o-rings di tenuta collocati sul raccordo 2. Use a 2 mm Allen key (not provided) to unscrew the dowel 1 located on the rear part of the spout.
- Page 4 ZP2258 / ZP2324 SOSTITUZIONE CARTUCCIA - REPLACING THE CARTRIDGE Inserire la cartuccia (1) nel corpo (2) seguendo il riferimento della cartuccia (3). Fit the cartridge (1) into the body (2) complying with the alignment mark on the cartridge (3). Introduire la cartouche 1 dans le corps 2 en suivant la référence de la cartouche 3. Die Kartusche (1) im Körper (2) einsetzen, dabei die Markierungen an der Kartusche (3) beachten.
- Page 5 ZP2609 INSTALLAZIONE MIX A PARETE - SINGLE LEVER WALL MIXER INSTALLATION E’ consigliato il posizionamento dell’incasso a un’altezza tale che permetta di avere il punto di erogazione dell’acqua da 6 a 11 cm dal piano della ceramica. It is advisable for the concealed fitting to be positioned at a height that allows delivery of water at 6 to 11 cm from the ceramic surface.
- Page 6 ZP2609 INSTALLAZIONE MIX A PARETE - SINGLE LEVER WALL MIXER INSTALLATION Inserire il corpo scorrevole 1 all’interno dell’incasso, facendo entrare i tubetti nelle apposite sedi. Spingere il medesimo fino a farlo andare in battuta sulle superficie delle piastrelle. Avvitare le due viti 2 con una chiave a brugola da 2.5 mm. Insert the sliding body 1 inside the concealed body, introducing the tubes in the seats provided.
- Page 7 ZP2607 / ZP2605 INSTALLAZIONE VASCA/DOC. INCASSO - BATH/SHOWER CONCEALED MIXER INSTALLATION Allacciare il corpo incasso alle tubazioni seguendo le indicazioni presenti sul pezzo (HOT caldo, COLD freddo). Incassare il corpo in modo che la superficie delle piastrelle venga a trovarsi tra i riferimenti MIN e MAX. Connect the concealed body to the pipes following the instructions on the part (HOT, COLD).
- Page 8 ZP2607 / ZP2605 MOD. 3 INSTALLAZIONE VASCA/DOC. INCASSO - BATH/SHOWER CONCEALED MIXER INSTALLATION Se le viti risultassero corte, occorrerà sostituirle con quelle più lunghe contenute nel sacchetto in dotazione. Dal medesi- mo, prelevare i tubetti più lunghi e sostituirli con l’aiuto di una chiave a brugola da 9 mm 5. If the screws are too short, they must be replaced with the longer ones contained in the bag provided.
- Page 9 ZP2607 / ZP2605 SOSTITUZIONE CARTUCCIA - REPLACING THE CARTRIDGE Svitare in senso antiorario il pomolo 1 fino a rimuoverlo del tutto. Unscrew the knob 1 anti-clockwise and remove it completely. Dévisser le pommeau 1 dans le sens contraire aux aiguilles d’une montre jusqu’à ce qu’il soit entièrement retiré. Den Knauf 1 gegen den Uhrzeiger drehen, bis er ganz gelöst ist.
- Page 10 ZP2169 INSTALLAZIONE BORDO VASCA - BATH MIXER INSTALLATION Per il corretto posizionamento degli elementi, attenersi alla figura sottostante. For correct positioning of the elements, comply with the figure below. Pour un placement correct des éléments, s’en tenir au dessin ci-dessous. Für die korrekte Positionierung der Elemente die untenstehende Abbildung befolgen.
- Page 11 ZP2169 INSTALLAZIONE BORDO VASCA - BATH MIXER INSTALLATION Avvitare i flessibili di alimentazione 1 al corpo del miscelatore 2 quindi inserirlo nell’apposito foro e fissarlo con il kit di fissaggio 3 già descritto in precedenza. Avvitare il rosone 4 facendo attenzione a non danneggiare la leva cromata 5. Screw the flexible water pipes 1 onto the mixer body 2 and then insert it into the hole provided and fasten with the fixing kit 3 described previously.
- Page 12 ZP2147 / ZP2067 INSTALLAZIONE VASCA DOCCIA - BATH SHOWER INSTALLATION Applicare il sigillante (1) (teflon, canapa, ecc.) sulla parte dell’eccentrico filettato da 1/2”. Avvitare l’eccentrico (2) alla tubazione (3) fino a farlo andare in battuta sulle piastrelle, in alternativa può rimanere staccato al massimo 3mm.
- Page 13 ZP2147 / ZP2067 INSTALLAZIONE VASCA DOCCIA - BATH SHOWER INSTALLATION Inserire il tubo (17) facendo attenzione a non rovinare gli orings, se secchi inumidirli con un po’ di grasso. Bloccare il tubo avvitando il grano (18) da 3 mm utilizzando una chiave a brugola non in dotazione.
- Page 14 MOD. ZP2258 / ZP2324 MOD. ZP2609 MOD. ZP2607 / ZP2605...
- Page 15 MOD. ZP2169 MOD. ZP2147 MOD. ZP2067...
- Page 16 Recommended temperat.: 60-65° C Zucchetti taps can be used with electric storage water heathers and instant gas types, centralised system, combi wall-mounted gas boilers and district heating systems. Before connecting the taps we recommend draining the system thoroughly; it is also advisable to install under basin stop valves with filter (art.


