Publicité
Liens rapides
QUICK START GUIDE
GUÍA DE INICIO RÁPIDO
GUIDE DE DÉMARRAGE RAPIDE
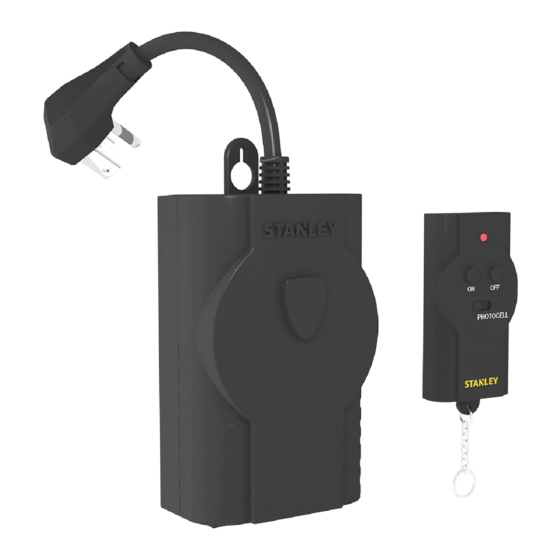
Outdoor Remote Control Twin
Customer Service / Servicio al Cliente / Service à la clientèle
1-800-730-3707 • 10AM - 6PM, EST
Monday to Friday / Lunes a Viernes / Lundi au Vendredi
Model/Modelo/Modèle# PK602/SK262
Control
Remoto
Doble para
Exteriores
Télécommande
double
exterieure
Publicité

Manuels Connexes pour Stanley PK602


Sommaire des Matières pour Stanley PK602
- Page 1 Outdoor Remote Control Twin Control Remoto Doble para Exteriores Télécommande double exterieure Customer Service / Servicio al Cliente / Service à la clientèle 1-800-730-3707 • 10AM - 6PM, EST Monday to Friday / Lunes a Viernes / Lundi au Vendredi Model/Modelo/Modèle# PK602/SK262...
- Page 2 Installation & Pairing / Instalación & Conexión / Installation & pairage Our Stanley remote control units include a unique pairing feature that allows you to control multiple receivers (indoor or outdoor) from the same transmitter. Nuestras unidades Stanley de control remoto incluyen una característica exclusiva...
- Page 3 Installation & Pairing / Instalación & Conexión / Installation & pairage Press and hold the power button on the receiver for 5 seconds. The LED indicator will begin to flash slowly indicating pairing mode has been activated. Presione y sostenga el botón de encendido en el receptor durante 5 segundos.
- Page 4 Installation & Pairing / Instalación & Conexión / Installation & pairage Press the ‘ON’ button followed by the ‘OFF’ button on your transmitter to complete the pairing process. Presione el botón ‘ENCENDER’ seguido por el botón ‘APAGAR’ en su transmisor para completar el proceso de emparejamiento.
- Page 5 To remove all paired transmitters from your receiver / Para eliminar todos los transmisores emparejados de su receptor / Pour enlever tous les transmetteurs couplés à votre récepteur Press and hold the power button for 5 seconds. The LED indicator located on the power button will begin to flash slowly.
- Page 6 To remove all paired transmitters from your receiver / Para eliminar todos los transmisores emparejados de su receptor / Pour enlever tous les transmetteurs couplés à votre récepteur While the indicator is flashing, press and hold the power button for an additional 5 seconds. The LED indicator will now begin to flash rapidly.
- Page 7 To remove all paired transmitters from your receiver / Para eliminar todos los transmisores emparejados de su receptor / Pour enlever tous les transmetteurs couplés à votre récepteur POWER While the indicator is flashing rapidly, press the power button once to confirm the reset.
- Page 8 INSTRUCTIONS Insert the Receiver Base’s 3-prong plug into a grounded outlet. If using outdoors, be sure to plug into a GFCI approved outlet. Plug your devices into the outlets located on bottom of Receiver Base. Using the Wireless Transmitter, press the ON button to activate device. OPERATING INSTRUCTIONS MANUAL OVERRIDE You can power the unit ON and OFF manually by...
- Page 9 BATTERY INFORMATION AND REPLACEMENT: The Transmitter uses a 3 volt CR2032 lithium battery. To replace, slide open the battery tray on the bottom of the transmitter. Insert a new CR2032 lithium battery, making sure to match up the + and - polarity markings. To test, press the ON or OFF buttons to make sure the LED lights up.
- Page 10 1. Asegúrese de que el interruptor deslizante en el transmisor esté en la posición de la fotocélula. 2. Pulse el botón ON para activar la alimentación. Todos los dispositivos conectados se encienden al instante y se apagan automáticamente al amanecer. 3.
- Page 11 bas de la base de distance. Branchez vos appareils sur les prises situées sur le fond du récepteur de base. Utilisation d’un transmetteur sans fil, appuyez sur le bouton ON pour activer dispositif. MODE D’EMPLOI Manuelle: Vous pouvez alimenter l’appareil en marche et éteindre manuellement en appuyant sur le bouton ON/OFF remplacer le bouton situé...
- Page 12 de fonction correspondante (ON / OFF) ne sera pas lancer ou annuler la fonction des cellules photoélectriques. INFORMATION ET REMPLACEMENT DES PILES: L’émetteur utilise une pile au lithium CR2032 de 3 volts. Pour remplacer, ouvrez le compartiment de la pile sur le bas de l’émetteur.
- Page 13 MADE IN CHINA / HECHO EN CHINA / FABRIQUÉ EN CHINE STANLEY® and the STANLEY® logo are registered trademarks of Stanley Black & Decker, Inc., or one of its affiliates, and are used under license. STANLEY® y el STANLEY® logo son marcas registradas de Stanley Black &...