
Sommaire des Matières pour MTC Bernina 1200MDA
- Page 1 Instruction Manual Bedienungsanleitung Manual de instrucciones Manuel d’instructions 1200MDA...
-
Page 3: Important Safety Instructions
IMPORTANT SAFETY INSTRUCTIONS When using an electrical appliance, basic safety precautions should always be followed, including the following: Read all instructions before using this overlock sewing machine. DANGER _____To reduce the risk of electric shock: 1. The appliance should never be left unattended when plugged in. 2. -
Page 4: Normas De Seguridad Importantes
NORMAS DE SEGURIDAD IMPORTANTES Cuando se usa un aparato eléctrico deben respetarse las siguientes normas de seguridad: PELIGRO _____para reducir el riesgo de electrochoque: 1. No dejar nunca la máquina de punto cadeneta y cobertura sin vigilancia si ella está enchufada. 2. -
Page 5: Wichtige Sicherheitshinweise
WICHTIGE SICHERHEITSHINWEISE Beim Gebrauch eines elektrischen Gerätes sind folgende Sicherheitsmassnahmen zu beachten: GEFAHR _____Zum Schutz vor elektrischem Schlag: 1. Die Overlockmaschine nie unbeaufsichtigt stehen lassen, solange sie am Stromnetz angeschlossen ist. 2. Nach Gebrauch und vor einer Reinigung die Maschine immer vom Stromnetz trennen. 3. -
Page 6: Prescriptions De Securite Importantes
PRESCRIPTIONS DE SECURITE IMPORTANTES L'emploi d'un appareil électrique exige d'observer les mesures de sécurité suivantes: DANGER _____Pour la protection contre tout choc électrique: 1. Ne pas laisser la surjeteuse sans surveillance tant qu'elle est raccordée au réseau. 2. Après usage et avant un nettoyage, séparer toujours la machine du réseau. 3. -
Page 7: Bienvenida
El Overlock BERNINA 1200MDA de 2/3/4 hilos es especialmente adecuado para sobrehilar tejidos elásticos. Deje a su vestuario y La surjeteuse BERNINA 1200MDA à 2/3/4 Þ ls s'adresse à tous les hogar aprovechar de las calidades fantásticas de esta máquina. La tissus élastiques. -
Page 8: Table Des Matières
Contents Safety regulations ............. 1 3. Serger / Overlock Stitch Formations Welcome ................5 3.1. Threading 4/3 Thread OL (Stitch No 1-8) Contents ................6 ▪ Upper Looper Thread, blue markings ....... 42 1. Machine Overview and Installation ▪ Lower Looper Thread, red markings ......43 1.1. -
Page 9: Indice
2.3. Regulación y manejo ▪ Largo del punto ............24 ▪ Posición de la cuchilla ..........24 ▪ mtc - Control Þ no del hilo .......... 25 ▪ Manejo del transporte diferencial ......26 ▪ Regulación del transporte diferencial ....... 27 ▪... - Page 10 ▪ Faden - Nadel Auswahltabelle ........23 2.3. Einstellen und Bedienen ▪ Stichlänge ..............24 ▪ Messerposition ............24 ▪ mtc Fadenkontrolle ........... 25 ▪ Differentialtransport Bedienen ........26 ▪ Anpassen des Differentialtransports ......27 ▪ Nähfussdruck ............27 ▪ LCD Anzeige ............30 2.4.
-
Page 11: Table Des Matieres
2.3. Réglage et utilisation ▪ Longueur de point ............. 24 ▪ Position du couteau ..........24 ▪ Microcontrôle du Þ l mtc ..........25 ▪ Commande du transport différentiel ......26 ▪ Adapter le transport différentiel ......... 27 ▪ Pression du pied-de-biche ........27 ▪... -
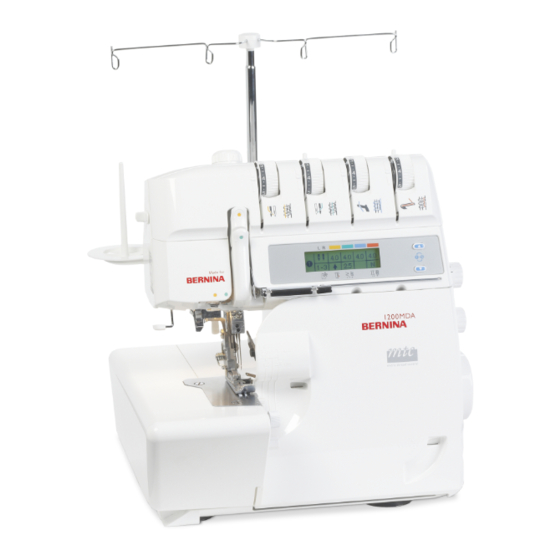
Page 12: Details Of The Machine
1.1. Details of the Machine / 1.1. Detalles de la máquina 1.1. Details der Maschine / 1.1. Détails de la machine Front View Vorderansicht 1. Looper cover with built in knife guard 1. Greiferdeckel mit integrierter 2. Looper cover opening indent Messerabdeckung 3. -
Page 13: Inside Looper Cover
4. Tornillo de Þ jación de la cuchilla 5. Microcontrôle du Þ l mtc inferior 6. EnÞ lage automatique du boucleur 5. mtc - Botón para control Þ no del hilo inférieur 6. Enhebrador automático de la 7. Arrière du couvercle du boucleur lanzadera inferior 8. -
Page 14: Machine Setup
1.2. Machine Setup / 1.2. Regulación de la máquina 1.2. Einrichten der Maschine / 1.2. Equipement de la machine Foot Controller Plug foot control into the machine socket (A) and then into main socket (B). The foot control regulates the sewing speed. The sewing speed can be adjusted by increasing or decreasing the pressure on the foot control. -
Page 15: Thread Guide
1.2. Machine Setup / 1.2. Regulación de la máquina 1.2. Einrichten der Maschine / 1.2. Equipement de la machine Thread Guide Push the support rod Þ rmly into the socket on the back of the machine. Raise the support rod (C) fully, turning slightly until the position catches engage. Position the thread guide (D) on the thread stand so that the arrow is to the front. -
Page 16: Placing The Thread Cones / Spools
1.2. Machine Setup / 1.2. Regulación de la máquina 1.2. Einrichten der Maschine / 1.2. Equipement de la machine Placing the thread cones / spools The anti-vibration cone should be used with the wider edge at the bottom on the spool holder pin when sewing with cones. -
Page 17: Basic Operating Procedures
2.1. Basic Operating Procedures / 2.1. Manejo 2.1. Bedienung / 2.1. Commandes Power/light switch Haupt- und Lichtschalter The power/light switch is conveniently placed Der Haupt- und Lichtschalter ist übersichtlich on the handwheel side of the machine in front auf der Handradseite vor der of the socket. -
Page 18: Raising / Lowering The Upper Knife
2.1. Basic Operating Procedures / 2.1. Manejo 2.1. Bedienung / 2.1. Commandes Raising / lowering the upper knife Obermesser hochstellen/senken • Maschine ausschalten, • Switch the machine off (power switch "0") Hauptschalter auf „О“ stellen. • Turn the handwheel towards you until the •... -
Page 19: Changing The Presser Foot
2.1. Basic Operating Procedures / 2.1. Manejo 2.1. Bedienung / 2.1. Commandes Changing the presser foot Nähfuss auswechseln • Switch the machine off (power • Maschine ausschalten, Hauptschalter switch "0") auf „О“ stellen. • Raise the presser foot. • Nähfuss hochstellen. •... -
Page 20: Looper Cover
2.1. Basic Operating Procedures / 2.1. Manejo 2.1. Bedienung / 2.1. Commandes Looper cover To open, press to the right with your thumb in the indent provided and tilt the cover towards you. To close push it up and press lightly to the right. The cover engages automatically. -
Page 21: Handwheel
2.1. Basic Operating Procedures / 2.1. Manejo 2.1. Bedienung / 2.1. Commandes Handwheel The handwheel turns anti-clockwise, in the direction as indicated by the arrow above the handwheel. Inside the looper cover there is an indicator window to show two important positions of the handwheel: A: red = threading position - needles at the highest point Volante El volante se gira en el sentido contrario a las agujas del reloj, como indicado en... -
Page 22: Inserting The Needles
2.1. Basic Operating Procedures / 2.1. Manejo 2.1. Bedienung / 2.1. Commandes Inserting the needles Needles can be inserted quickly and easily with the practical needle inserter (A). Switch the machine off ( Power switch to "0") Disconnect machine from electricity supply. Raise the needles. -
Page 23: Needle And Thread
2.2. Needle and Thread / 2.2. Aguja e hilo 2.2. Nadel und Faden / 2.2. Aiguille et Þ l Needles Nadeln Your BERNINA overlocker/serger is prepared to hold needles of the Ihr BERNINA Overlocker ist eingestellt, dass er mit normalen Haus- system 130/705H (household needles). -
Page 24: Thread Selection
2.2. Needle and Thread / 2.2. Aguja e hilo 2.2. Nadel und Faden / 2.2. Aiguille et Þ l Thread selection Sewing and special overlock threads are manufactured in a wide variety of types, weights and combination Þ bres. It is worth investing in good quality threads for perfect sewing results. -
Page 25: Thread - Needle Selection Table
2.2. Needle and Thread / 2.2. Aguja e hilo 2.2. Nadel und Faden / 2.2. Aiguille et Þ l Thread - needle selection table Thread Needles Where Application All purpose overlock thread 120/2 70-90 Needles and looper threads For all overlock- and cover stitch work. (polyester) Polyester-continuous Þ... -
Page 26: Adjustments And Settings
2.3. Adjustments and Settings / 2.3. Regulación y manejo 2.3. Einstellen und Bedienen / 2.3. Réglage et utilisation Stitch length Stichlänge It can be adjusted while sewing. Die S tichlänge kan n stufenlos und The stitch length is infinitely variable w äh rend des N äh ens eingestellt werden. -
Page 27: Micro Thread Control
(B) girar el botón mtc en dirección max. sie el lazo es demasiado corto o el tejido se enrolla en la costura. Indicación: el mtc control Þ no del hilo es más eÞ caz con un ancho del punto de 5 a 7 mm (regulación 1-3) Para anchuras de 7 a 9 mm está... -
Page 28: Differential Feed Setting
2.3. Adjustments and Settings / 2.3. Regulación y manejo 2.3. Einstellen und Bedienen / 2.3. Réglage et utilisation Differential Feed Setting There are two feed dogs one front (C) and one rear (D). The two feed dogs move independently and the distance each feed dog travels during one complete movement can be adjusted. -
Page 29: Differential Feed Adjustment
2.3. Adjustments and Settings / 2.3. Regulación y manejo 2.3. Einstellen und Bedienen / 2.3. Réglage et utilisation Differential Feed Adjustment Simply turn the dial in the direction desired for fully variable adjustment while sewing. Test sew. Effect Fabric Wave-free seams (G) Thick wool knits, hand knitted articles, very stretchy fabrics Wave-free seams (H) Cotton, silk, synthetic jersey, sweatshirt fabrics and Þ... -
Page 30: Lcd Indication
2.3. Adjustments and Settings / 2.3. Regulación y manejo 2.3. Einstellen und Bedienen / 2.3. Réglage et utilisation LCD indication Needle position Thread tension dial Stitch No. LCD indication button Differential feed Stitch length Cutting width Roll Hemm Upper looper converter Selection lever LCD Contrast Darker... -
Page 31: Indicación Lcd
2.3. Adjustments and Settings / 2.3. Regulación y manejo 2.3. Einstellen und Bedienen / 2.3. Réglage et utilisation Indicación LCD Tensión del hilo Aguja punto No. punto Tecla indicacón LCD Diferencial Positión de la cuchilla Largo del punto Palanca selectora Transformador lanzadera ciega superior para dobladillo enrollado... -
Page 32: Lcd-Anzeige
2.3. Adjustments and Settings / 2.3. Regulación y manejo 2.3. Einstellen und Bedienen / 2.3. Réglage et utilisation LCD Anzeige Fadenspannung Nadel position Stich No. LCD Anzeigetaste Differential Stichlänge Messerposition Rollsaum- Obergreiferabdeckung Wahlhebel LCD Kontrast einstellung Heller Dunkler Willkommen - und Stichbild Anzeige Funktion Anzeige Bemerkung... -
Page 33: Indication Lcd
2.3. Adjustments and Settings / 2.3. Regulación y manejo 2.3. Einstellen und Bedienen / 2.3. Réglage et utilisation Indication LCD Position de l’aiguille Tension du Þ l Touche l’indication LCD No. point Position du couteau Différentiel Longueur de point Levier de sélection Recouvrement du boucleur supérieur pour les ourlets roulés Contraste de l’... -
Page 34: Enþ Lage Du Premier Þ L
2.4. Threading - General Information / 2.4. Enhebrado - información general 2.4. Einfädeln - Allgemeine Informationen / 2.4. EnÞ lage - Informations générales Threading Preparation Vorbereitung zum Einfädeln • Switch the machine off (power switch "0") • Maschine ausschalten, Hauptschalter auf „O“ stellen. •... -
Page 35: Enhebrador Automático Para 2 Agujas
2.4. Threading - General Information / 2.4. Enhebrado - información general 2.4. Einfädeln - Allgemeine Informationen / 2.4. EnÞ lage - Informations générales Automatic needle threader for two Automatischer Nadeleinfädler für 2 needles Nadeln (1) Lower the presser foot. (1) Den Nähfuss senken. (2) Raise the needles to their highest position. -
Page 36: 2.5. Stitch Formation Overview
2.5. Stitch Formation Overview Needle Thread tension position & Colour Left needle Stitch Stitch type Stitch formation bottom yellow 4-thread overlock with integrated safety seam 3-thread super stretch — 3-thread overlock (left needle) — 3-thread overlock (right needle) — 3-thread ß atlock (left needle) —... - Page 37 Thread tension & Colour Roll Hemm Selection Differential Upper looper Cutting width Lever Stitch length feed release Right needle Upper looper Lower looper green blue 1 - 3 1 - 3 1 - 3 1 - 3 1 - 3 1 - 3 1 - 3 1 - 3...
-
Page 38: 2.5. Vista General De Los Puntos
2.5. Vista general de los puntos Posición Tensión del Aguja hilo y color Aguja izquierda Tipo de punto punto Punto arriba abajo Amarillo Overlock de 4 hilos con costura de seguridad integrada Punto super-stretch de 3 hilos Overlock de 3 hilos (aguja izquierda) —... - Page 39 Palanca Tensión del hilo y color selectora para Transformador Anchura de dobladillo Largo del Tranporte lanzadera Lanzadera Lanzadera corte enrollado punto diferecial ciega superior Aguja derecha superior inferior Verde Azul Rojo 1 - 3 1 - 3 1 - 3 1 - 3 1 - 3 1 - 3...
- Page 40 2.5. Stichübersicht Nadeln Fadenspan- position nung & Farbe Linke Nadel Stich Stich familie Stich oben unten Gelb 4-Faden Overlock mit integrierter Sicherheitsnaht 3-Faden Super Stretch 3-Faden Overlock (Linke Nadel) — 3-Faden Overlock (Rechte Nadel) — 3-Faden Flachnaht (Linke Nadel) — 3-Faden Flachnaht (Rechte Nadel) —...
- Page 41 Fadenspannung & Farbe Messer Rollsaum- Obergreifer- position Wahlhebel Stichlänge Differential abdeckung Rechte Nadel Obergreifer Unter Greifer Grün Blau 1 - 3 1 - 3 1 - 3 1 - 3 1 - 3 1 - 3 1 - 3 1 - 3 1 - 3 1 - 3 1 - 3...
-
Page 42: Aperçu Sur Les Points
2.5. Aperçu sur les points Position de Tension du Þ l Aiguille & Couleurs Aiguille gauche Famille Point Jaune points Point en haut en bas Surjet à 4 Þ ls avec point de sécurité intégré Superstretch à 3 Þ ls Surjet à... - Page 43 Levier de Tension du Þ l & Couleurs sélection pour Recouvrement Position de les ourlets Longeur de du boucleur Boucleur Boucleur couteau roulés point Différentiel supérieur Aiguille droite supérieur inférieur Vert Bleu Rouge 1 - 3 1 - 3 1 - 3 1 - 3 1 - 3 1 - 3...
-
Page 44: Threading 4/3 Thread Ol (Stitch No 1-8)
3.1. Threading 4/3 Thread OL (Stitch No 1-8) 3.1. Enhebrado de overlock de 4/3 hilos (punto N°.1-8) 3.1. Einfädeln 4/3 Faden OL (Stich No.1-8) 3.1. EnÞ lage du point de surjet à 4/3 Þ ls (point no.1-8) 1. Upper looper thread, blue markings Turn the handwheel in the normal direction (as indicated by the arrow) until the red stop mark is completely centered in the window. -
Page 45: Lower Looper Thread, Red Markings
3.1. Threading 4/3 Thread OL (Stitch No 1-8) 3.1. Enhebrado de overlock de 4/3 hilos (punto N°.1-8) 3.1. Einfädeln 4/3 Faden OL (Stich No.1-8) 3.1. EnÞ lage du point de surjet à 4/3 Þ ls (point no.1-8) 2. Lower looper thread, red markings Turn the handwheel in the normal direction (as indicated by the arrow) until the red stop mark is completely centered in the window. -
Page 46: Right-Hand Needle, Green Markings
3.1. Threading 4/3 Thread OL (Stitch No 1-8) 3.1. Enhebrado de overlock de 4/3 hilos (punto N°.1-8) 3.1. Einfädeln 4/3 Faden OL (Stich No.1-8) 3.1. EnÞ lage du point de surjet à 4/3 Þ ls (point no.1-8) 3. Right-hand needle, green markings Turn the handwheel in the normal direction (as indicated by the arrow) until the red stop mark is completely centered in the window. -
Page 47: Left-Hand Needle, Yellow Markings
3.1. Threading 4/3 Thread OL (Stitch No 1-8) 3.1. Enhebrado de overlock de 4/3 hilos (punto N°.1-8) 3.1. Einfädeln 4/3 Faden OL (Stich No.1-8) 3.1. EnÞ lage du point de surjet à 4/3 Þ ls (point no.1-8) 4. Left-hand needle, yellow markings Turn the handwheel in the normal direction (as indicated by the arrow) until the red stop mark is completely centered in the window. -
Page 48: Threading 2 Thread Ol (Stitch No 9-15)
3.2. Threading 2 Thread OL (Stitch No 9-15) 3.2. Enhebrado de overlock de 2 hilos (punto N° 9-15) 3.2. Einfädeln 2 Faden OL (Stich No. 9-15) 3.2. EnÞ lage du point de surjet à 2 Þ ls (point no. 9-15) Upper Looper Converter 2 Thread serger / OL stitch formations are achieved by following the threading instructions for the 3 / 4 thread conÞ... -
Page 49: Roll Hemming (Stitch No 7, 8 & 13)
3.3. Roll Hemming (Stitch No 7, 8 & 13) 3.3. Dobladillo enrollado (punto N° 7, 8 & 13) 3.3. Rollsäumen (Stich No. 7, 8 & 13) 3.3. Ourlets roulés (point no. 7, 8, 13) Roll hemming By disengaging the stitch tongue in the stitch plate (move the Rollhem Selection Lever towards you) and increasing the lower looper tension a roll hem is achieved. -
Page 50: 3.4. Trial Sewing - Serger / Overlock Mode
3.4. Trial Sewing - Serger / Overlock Mode 3.4. Costura de prueba - Overlock 3.4. Nähprobe - Overlock 3.4. Essai de couture - surjet Sewing test After threading make a trial run. Always use a double layer of fabric to check the stitch formation and thread tension properly. -
Page 51: 3.5. Regulación Þ Na De Las Tensiones De Los Hilos - Puntos Overlock
3.5. Adjusting Thread Tension - Serger / OL Mode 3.5. Regulación Þ na de las tensiones de los hilos - puntos Overlock 3.5. Feineinstellen Fadenspannungen - OL Stiche 3.5. Réglage Þ n de la tension du Þ l – points de surjet Check your trial run Nähprobe prüfen 4/3 Thread OL... -
Page 52: Adjusting The Thread Tension
3.5. Adjusting Thread Tension - Serger / OL Mode 3.5. Regulación Þ na de las tensiones de los hilos - puntos Overlock 3.5. Feineinstellen Fadenspannungen - OL Stiche 3.5. Réglage Þ n de la tension du Þ l – points de surjet Adjusting the thread tension Turn the tension dials by only half or one number, then test sew again and check the result. -
Page 53: Sewing In The Thread Chain - Seam Begin
3.6. Practical Sewing - Serger / OL Mode 3.6. Costura práctica - Overlock 3.6. Praktisches Nähen - Overlock 3.6. Couture - surjet Sewing in the thread chain - seam begin • Sew to form a 3-4 cm (2") chain. • Position fabric and sew one stitch. •... -
Page 54: Sewing In The Thread Chain - Seam End
3.6. Practical Sewing - Serger / OL Mode 3.6. Costura práctica - Overlock 3.6. Praktisches Nähen - Overlock 3.6. Couture - surjet Sewing in the thread chain - seam end • Sew to the end of the seam. • Raise the needles. •... -
Page 55: Gathering
3.6. Practical Sewing - Serger / OL Mode 3.6. Costura práctica - Overlock 3.6. Praktisches Nähen - Overlock 3.6. Couture - surjet Gathering Einreihen Using the differential feed, a single layer of fabric Der Differentialtransport ermöglicht das Einreihen einer can be gathered before sewing it to the garment. einzelnen feinen Stofflage. -
Page 56: Thread Breakage During Sewing
3.6. Practical Sewing - Serger / OL Mode 3.6. Costura práctica - Overlock 3.6. Praktisches Nähen - Overlock 3.6. Couture - surjet Thread breakage during sewing Sew off immediately at an angle and remove the work. Re-thread. If the lower looper thread has broken, cut off both needle threads at the needles and remove surplus thread from below. -
Page 57: Blind Stitch Foot
3.6. Practical Sewing - Serger / OL Mode 3.6. Costura práctica - Overlock 3.6. Praktisches Nähen - Overlock 3.6. Couture - surjet Blind stitch foot 1. Attach the blind stitch presser foot (A) (See page 17 changing the presser foot ). 2. -
Page 58: Elasticator Foot
3.6. Practical Sewing - Serger / OL Mode 3.6. Costura práctica - Overlock 3.6. Praktisches Nähen - Overlock 3.6. Couture - surjet Elasticator foot Use a 3- or 4-thread overlock. Use 3-thread overlock and the right-hand needle for 5-7 mm wide elastic. 4-thread for 5-12 mm elastics. 1. -
Page 59: Pied Pour La Couture D'élastiques
Gummibandeinnähfuss Es können Gummibänder von 5-12 mm eingegnäht werden. Für 5-7mm breite Gummibänder 3 Faden OL, rechte Nadel benützen und für breitere Bänder 4 Faden OL. 1. Blindstichfuss am Schaft befestigen (A). Siehe hierzu Seite 17, Nähfuss auswechseln. 2. Stichlänge auf Grundeinstellung 4 stellen (B). 3. -
Page 60: Changing The Upper Knife
4.1. Changing the Upper Knife / 4.1. Cambio de la cuchilla superior 4.1. Obermesser auswechseln / 4.1. Remplacer le couteau supérieur WARNING Please refer to the safety instructions. Changing the upper knife The upper knife (moving knife) is made from special hardened material. Should it get damaged, it can be replaced by your local BERNINA dealer. -
Page 61: Replacing The Bulb
4.2. Replacing the Bulb / 4.2. Cambio de la bombilla 4.2. Glühlampe wechseln / 4.2. Remplacer l’ampoule Replacing the bulb Main switch on "0" Disconnect machine from electricity supply. Let the bulb cool down. Using the special bulb holder provided in the accessory bag, press upwards against the bulb, turn to the left and remove the bulb. -
Page 62: 4.4. Troubleshooting Guide / Technical Data
4.4. Troubleshooting Guide / Technical Data Problem Cause Solution Page The machine does not • Looper or cloth plate cover is open. • Close the looper or the cloth plate cover. sew: • The main switch is not on. • Switch machine on. (Main switch to “I”) •... -
Page 63: Ayuda En Caso De Averías / Datos Téchnicos
4.4. Ayuda en caso de averías / Datos téchnicos Problema: Causa: Solución: Página La máquina no • La tapa de la lanzadera o la tapa de la mesa de • Cerrar la tapa de la lanzadera o la tapa de la cose: trabajo está... -
Page 64: Technische Daten
4.4. Hilfe bei Störungen / Technische Daten Problem: Ursache: Lösung: Seite Die Maschine näht • Der Greiferdeckel oder der Stoffauß agedeckel ist • Greiferdeckel oder Stoffauß agedeckel nicht: geöffnet. schliessen. • Der Hauptschalter ist nicht eingeschaltet. • Maschine einschalten, Hauptschalter auf „I“. •... -
Page 65: Comment Éliminer Soi-Même Les Pannes / Spéciþ Cations Techniques (Voir Additif)
4.4. Comment éliminer soi-même les pannes / SpéciÞ cations techniques (voir additif) Défaut: Cause: Remède: Page La machine ne coud • Le couvercle du boucleur ou celui du plateau de • Refermer le couvercle du boucleur ou celui du pas: travail est ouvert. -
Page 66: Optional Accessories
5. Optional Accessories / 5. Accesorio especial 5. Sonderzubehör / 5. Accessoires spéciaux Cording foot Gathering attachment Prensatelas para coser Guía de fruncimiento cordones Kräuselführung Schnureinnähfuss Dispositif de fronçage Pied à cordon Multi-Purpose foot for Seam guide piping, beads and pearls Regla guía para la costura-derecha Prensatelas para ribetear,... - Page 67 © Copyright 2006 by Fritz Gegauf AG CH-0000 Steckborn No. A915012M00A GB/E/D/F 2006.3 5020107024...