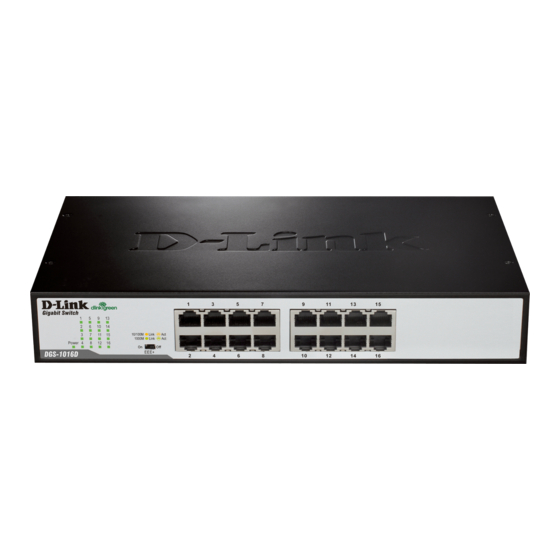
D-Link DGS-1016D Guide De Démarrage
Masquer les pouces
Voir aussi pour DGS-1016D:
- Manuel (74 pages) ,
- Guide d'installation (41 pages) ,
- Guide d'installation rapide (16 pages)
Table des Matières
Publicité
Les langues disponibles
Les langues disponibles
Liens rapides
Quick Installation Guide
Gigabit Desktop Switch
This document will guide you
through the basic installation
process for your new D-Link
Gigabit Desktop Switch.
DGS-1016D/DGS-1024D
Getting Started Guide
Erste Schritte
Guide de démarrage
Guida introduttiva
Guía de introducción
Documentation is also available on the D-Link website
Publicité
Table des Matières

Sommaire des Matières pour D-Link DGS-1016D
- Page 1 Gigabit Desktop Switch This document will guide you through the basic installation process for your new D-Link Gigabit Desktop Switch. DGS-1016D/DGS-1024D Getting Started Guide Erste Schritte Guide de démarrage Guida introduttiva Guía de introducción Documentation is also available on the D-Link website...
-
Page 3: Package Contents
D-Link reseller for replacement. Switch Installation Installing a Power Cord The DGS-1016D/1024D can easily be mounted in an EIA standard size 19-inch rack which can be placed Retainer in a wiring closet with other equipment or placed on a desktop or shelf. - Page 4 B. Connect the AC power cord into the AC power E. Fasten the retainer by pulling on it until secure. inlet of the switch. Connect the power cord to the switch Secure the power cord C. Attach the retainer to the tie wrap and slide it up to the end of the cord.
-
Page 5: Led Indicators
Transmission at Port Isolation: 10/100 Mbps DGS-1016D - When enabled, ports 1 to 15 will be isolated from each other, but will still be able to Cable Diagnostics (During Boot Only) communicate with port 16. Port 16 will be able to communicate with all the ports available on this switch. -
Page 6: Über Diese Anleitung
• Netzkabelhalterung • Kabelbinder Sollte einer der oben aufgeführten Artikel fehlen, wenden Sie sich für eine Ersatzlieferung an Ihren D-Link-Fachhändler. Switch-Installation Der DGS-1016D/1024D kann problemlos in einen dem EIA-Standard entsprechenden 19-Zoll-Rack Anbringen einer installiert werden. Netzkabelhalterung Aufstellen auf einem Schreibtisch oder Regal... - Page 7 B. Schließen Sie das Netzkabel am Stromanschluss des Switches an. Kabelhalterung um Netzkabel wickeln E. Befestigen Sie die Halterung, indem Sie daran ziehen, bis sie fest sitzt. Netzkabel an den Switch anschließen C. Befestigen Sie die Halterung am Kabelbinder und schieben Sie sie hoch bis zum Ende des Kabels.
-
Page 8: Led-Anzeigen
Licht Ausgeschaltet von 128 Kbit/s. Verbindung mit Portisolierung: 1000 Mbit/s DGS-1016D - Wenn aktiviert, werden die Ports 1 bis Grün Empfang oder 15 voneinander isoliert, können jedoch immer noch Blinkt Übertragung mit mit Port 16 kommunizieren. Port 16 kann mit allen auf... -
Page 9: Installation Du Commutateur
• Dispositif de retenue du cordon d'alimentation • Attache autobloquante S'il manque l'un des éléments ci-dessus, veuillez contacter votre revendeur D-Link pour obtenir un remplacement. Installation du commutateur Le DGS-1016D/1024D s'installe facilement dans un bâti EIA de taille standard(48,26 cm), qui peut être placé... - Page 10 A. Le côté rugueux orienté vers le bas, insérez D. Faites tourner le dispositif de retenue autour du l’attache autobloquante dans l’orifice situé au- cordon d'alimentation et placez l'extrémité libre dessous de la prise d’alimentation. dans l'attache. Insérez l'attache autobloquante Faites tourner le dispositif de retenue autour du cordon d'alimentation E.
-
Page 11: Voyants Lumineux
Connexion Allumé (ou liaison) à Isolement de port : 1000 Mbits/s Vert DGS-1016D : lorsque cette fonction est activée, les Réception ou ports 1 à 15 seront isolés les uns des autres, mais Clignote transmission à Liaison/ pourront toujours communiquer avec le port 16. Le 1000 Mbits/s Activité/... -
Page 12: Contenido De La Caja
Acerca de esta guía El conmutador de escritorio Gigabit de 16/24 puertos DGS-1016D/1024D de D-Link es un dispositivo plug-and-play autónomo. Esta Guía de instalación rápida proporciona instrucciones paso a paso para configurar el dispositivo. El modelo que ha adquirido puede tener un aspecto ligeramente diferente al de las imágenes mostradas en esta guía. - Page 13 A. de alimentación. D. Rodee el cable de alimentación con el retenedor e introduzca el extremo libre de este en el cierre. Inserte la brida Rodee el cable de alimentación con el retenedor E. Apriete el retenedor tirando hasta que quede bien asegurado.
-
Page 14: Indicadores Led
Recepción o Aislamiento de puertos: Parpadeante transmisión a 1.000 Mbps DGS-1016D - Cuando está habilitado, los puertos 1 Enlace/Act./ Velocidad a 15 se aislarán entre sí, pero podrán comunicarse Conexión con el puerto 16. El puerto 16 podrá comunicarse con... -
Page 15: Informazioni Sulla Guida
Contenuto della confezione Articoli inclusi nella confezione del dispositivo: • Switch Ethernet D-Link DGS-1016D 16 porte o DGS-1024D 24 porte 10/100/1000BASE-T Gigabit • Cavo di alimentazione CA •... - Page 16 A. Inserire una fascetta con il lato ruvido rivolto D. Avvolgere il fermo intorno al cavo di alimentazione verso il basso nel foro sotto la presa di corrente. e posizionare l'estremità libera nel dispositivo di fissaggio. Inserire una fascetta Avvolgere il fermo attorno al cavo di B.
-
Page 17: Indicatori Led
Connessione (o porte. collegamento) a 1000 Mbps Isolamento porta: Verde DGS-1016D - Quando sono abilitate, le porte da Ricezione o Lampeggiante trasmissione a 1 a 15 saranno isolate l'una dall'altra, ma saranno 1000 Mbps comunque in grado di comunicare con la porta 16. La... - Page 20 Ver.3.60(EU)_130x183 2020/03/09...


