Gutta BS Plus 160 Instructions De Montage
Masquer les pouces
Voir aussi pour BS Plus 160:
- Instructions de montage (12 pages) ,
- Instructions de montage (12 pages) ,
- Instructions de montage (7 pages)

Manuels Connexes pour Gutta BS Plus 160


Sommaire des Matières pour Gutta BS Plus 160
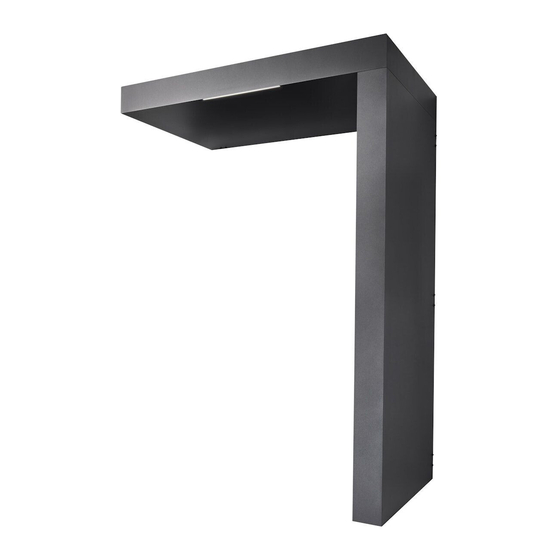
- Page 1 Montageanleitung Nr.: 9219119 Assembly instructions Instructions de montage Rechteckvordach mit Seitenblende BS Plus 160 - Art.-Nr.: 7500603 / 7500606 BS Plus 200 - Art.-Nr.: 7500609 / 7500612 Sonderanfertigung - Art.-Nr.: 7500623 - 7501372...
-
Page 2: Recommandations Importantes
Important Recommandations Wichtige Hinweise! Reccommendations! importantes ! • Vor der Montage bitte Montageanleitung • Prior to assembly please study the assem- • Avant le montage, veuillez lire exactement genauestens durchlesen und Produkt auf evtl. bly instructions in detail and check the con- les instructions de montage et vérifier s‘il n‘y Transportschäden bzw. - Page 3 Bezeichnung Stück Designation Pieces Désignation Piéces BS plus 160 BS plus 200 Dübel Ø 12 mm Plugs Ø 12 mm | Cheville Ø 12 mm U-Scheibe Washers | Laveuse Schraube 10 x 80 mm Screw 10 x 80 mm | Vis 10 x 80 mm Metallschraube 4,8 x 35 mm Metal srew 4,8 x 35 mm | Vis à...
- Page 4 Anbaumaße | Screw size | Taille de vis BS Plus 160 / 200 BS 160 = 1310 mm / BS 200 = 1710 mm 60 mm BS 200 = 825 mm Bei Verwendung eines Seitenteils den seitlichen Versatz berücksichtigen. When using a side part, consider side offset.
- Page 5 Montage | Montage | Instructions BS Plus 160 / 200 Stromanschluss für LED Panel vorbereiten / Preparing the power cable / Préparation du câble d‘alimentation Nehmen sie das LED Panel ab und ziehen Sie das Stromkabel durch das Vordach. Disconnect the LED panel and pull the power cable through the canopy.
- Page 6 Montage | Montage | Instructions BS Plus 160 / 200 Befestigung von unten / Fastening from below / Fixation par le bas BS 160 - 4 x BS 200 - 6 x 1. Bohren Sie die Löcher mit einen Bohrer 3,5mm vor. / Pre-drill the holes with a 3.5 mm drill bit / Pré-percer les trous avec une mèche de 3,5 mm...
- Page 7 Anbaumaße Seitenblende | Screw size side panel | Taille de vis panneau latéral 87 mm...
- Page 8 Montage Seitenblende | Montage side panel | TInstructions panneau latéral Zusammenfügen / Join together / Affilier 1. Setzen Sie die Seitenblende auf die Winkel 2. Schieben Sie die Seitenblende an das Vordach 1. Place the side panel on the brackets 2.
- Page 9 Montage Seitenblende | Montage side panel | TInstructions panneau latéral Befestigung / Fasting / Attachement 1. Bohren Sie die Löcher mit einen Bohrer 3,5mm vor / Pre-drill the holes with a BS 160 6x 3.5mm drill bit / Pré-percer les trous avec une mèche de 3,5 mm BS 200 6x 2.
- Page 10 Montage Seitenblende | Montage side panel | TInstructions panneau latéral Befestigung / Fasting / Attachement 1. Bohren Sie die Löcher mit einen Bohrer 3,5mm vor / Pre-drill the holes with a BS 160 6x 3.5mm drill bit / Pré-percer les trous avec une mèche de 3,5 mm BS 200 6x 2.
- Page 11 Montage Seitenblende | Montage side panel | TInstructions panneau latéral Silikonfuge / silicone joint / joint silicone Bringen Sie eine Silikonfuge zwischen Wand und Vordach an. Place a silicone joint between wall and canopy. Placer un joint en silicone entre le mur et la verrière.
- Page 12 Vordächer Terrassendächer Paneele Ebene Platten Bitumenwellplatten Noppenbahn Hobbyplatten Effektplatten Rasengitter Gartenprodukte www.gutta.com Gutta Werke GmbH Bau- und Heimwerkerprodukte Bahnhofstraße 51-57 D-77746 Schutterwald Telefon 0781 6090 Telefax 0781 6093200 info@gutta.com www.scobalit.de Scobalitwerk Wagner GmbH Scobalitwerk Wagner GmbH Scobalitwerk Wagner GmbH Scobalitwerk Wagner GmbH Scobalitwerk Wagner GmbH Zürnkamp 27...