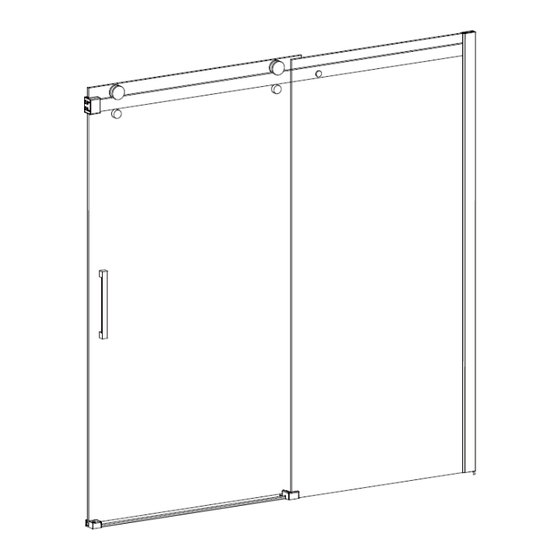
Sommaire des Matières pour Technoform ITD60CC
- Page 1 INSPIRATION & CELEBRATION Bathtub Doors MANUEL D'INSTALLATION INSTALLATION MANUAL MODÈLES | MODELS: ITD60CC ‐ CBD60CC FABRIQUÉE EN CHINE ET IMPORTÉE PAR | MADE IN CHINA AND IMPORTED BY ICBD201612‐01 INDUSTRIES TECHNOFORM LTÉE...
- Page 2 AVANT DE COMMENCER | BEFORE GETTING STARTED Ce manuel traite de l’installation et de l’entretien de votre nouvelle porte de bain Technoform. Veuillez en lire le contenu avant d’entamer l’installation. Par la suite, assurez‐vous de le conserver dans un lieu sûr pour référence future. Nous vous recommandons d'être deux personnes pour procéder à l'installation de la porte de bain. Retirez le produit de son emballage et assurez‐vous que toutes les pièces s'y trouvent et que le produit est en bon état. Si l’inspection révèle que le produit est endommagé ou qu’il y a un défaut de fabrication, veuillez communiquer avec le distributeur. La garantie ne couvre pas les dommages ou les défauts de finition une fois le produit installé. La responsabilité quant aux dommages survenus lors du transport cesse lorsque le produit est transféré au transporteur. Toute plainte liée à un dommage dû au transport doit être directement soulevée auprès du transporteur. Il faut prendre soin de protéger le produit, en particulier les panneaux de verre, durant la manutention et l’installation. Attendez 24 heures après l'installation avant d'utiliser la baignoire (jusqu'à ce que le silicone soit sec). Ne PAS utiliser de la force excessive pour ouvrir et fermer le panneau de verre. ...
- Page 3 Bouton de verrouillage | Locking knob 2 19 Vis ronde Robertson M4X8 round head screw 4 8 Pièce pour attache du rail | Track attachment part 1 20 Vis plate Robertson M4X35 flat head screw 6 Bloc d'extrémité pour gouttière (gauche et droit) | 9 2 21 Clef Allen | Allen key 2 Drip rail end block (left and right) Bloc coulissant pour gouttière (gauche et droit) | 10 2 22 Clef d'ajustement | Adjustment key 1 Drip rail sliding block (left and right) Joint d'étanchéité pour bas de porte | Bottom 11 Gouttière | Drip rail 1 23 1 door gasket 450.699.2424 – 1 877.377.4494 450.699.8484 info@technoform.ca www.technoform.ca ICBD201612‐01 3 ...
- Page 4 C. With a 3.2 mm (1/8'') drill bit, drill 4 holes in the drywall (into the marked drill holes). Insert the wall plugs (no. 17). We recommend that you put a drop of silicone prior to permanently fixing them in place. D. Secure the wall jamb (no. 1) using M4X35 screws (no. 18). 450.699.2424 – 1 877.377.4494 450.699.8484 info@technoform.ca www.technoform.ca ICBD201612‐01 4 ...
- Page 5 Insert the wall plugs (no. 17). We recommend that you put a drop of silicone prior to permanently fixing them in place. Panneau fixe (no. 2) Vis M4X35 (no. 20) D. Fix the track end blocks (no. 14) using Fixed panel (no. 2) M4X35 screws (no. 20) M4X35 screws (no. 20). 450.699.2424 – 1 877.377.4494 450.699.8484 info@technoform.ca www.technoform.ca ICBD201612‐01 5 ...
- Page 6 Roulette (no. 12) Roller (no. 12) Panneau fixe (no. 2) Fixed panel (no. 2) 450.699.2424 – 1 877.377.4494 450.699.8484 info@technoform.ca www.technoform.ca ICBD201612‐01 6 ...
- Page 7 B. Position the drip rail end block (no. 9) on the bathtub, then put the drip rail (no. 11) in place. ATTENTION: Following Step C, you will be able to determine if the drip rail is too long and therefore needs to be cut. C. Position the drip rail sliding block (no. 10) on the bathtub. D. Cut the drip rail (no. 11) if need be, then reposition the 3 parts (nos. 9, 10 and 11) on the bathtub. Mark drill holes of the end block (no. 9) and sliding block (no. 10), then remove the 3 parts (nos. 9, 10 and 11). E. With a 3.2 mm (1/8'') drill bit, drill 2 holes in the bathtub (into the marked drill holes), then insert the wall plugs (no. 17). We recommend that you put a drop of silicone prior to permanently fixing them in place. Reposition the end block (no. 9), then apply a bead of silicone under the drip rail (no. 11) before permanently putting it in place. F. Put the sliding block (no. 10) in place. Fix the end block (no. 9) and the sliding block (no. 10) using M4X35 screws (no. 20). We recommend that you put a drop of silicone prior to permanently fixing them in place. 450.699.2424 – 1 877.377.4494 450.699.8484 info@technoform.ca www.technoform.ca ICBD201612‐01 7 ...
- Page 8 B‐1 A Percez les trous à partir de l'intérieur de la baignoire. Drill holes from the inside of the bathtub. C A Intérieur de la baignoire. Inside the bathtub. 450.699.2424 – 1 877.377.4494 450.699.8484 info@technoform.ca www.technoform.ca ICBD201612‐01 8 ...
- Page 9 F. Wait 24 hours after the installation before using the bathtub (until silicone is dry). F IMPORTANT : Le silicone doit être appliqué à partir de l'extérieur de la baignoire seulement. IMPORTANT: The silicone must only be put from the outside of the bathtub. HEURES HOURS 450.699.2424 – 1 877.377.4494 450.699.8484 info@technoform.ca www.technoform.ca ICBD201612‐01 9 ...
-
Page 10: Nettoyage / Maintenance
GARANTIE | WARRANTY Nos produits sont garantis contre tout défaut de fabrication à partir de la date d’achat indiquée sur le coupon de caisse du consommateur. Industries Technoform Ltée offre une garantie limitée de trois (3) ans sur ses portes de bain. Cette garantie s’adresse au propriétaire original et n’est donc pas transférable à un autre consommateur. Elle porte sur le produit, mais n’inclut pas la main d’œuvre et ne comprend pas les frais de déplacement, les frais d’installation ou de désinstallation, ni les frais de transport. À sa discrétion, le manufacturier assurera à ses frais le remplacement ou la réparation de tout produit défectueux durant la période de garantie si l’installation est conforme (n’inclut pas les frais mentionnés ci‐dessus). La garantie ne s’applique pas aux taches causées par une eau ferreuse ou dure. Cette garantie ne couvre pas les ...

