
Sommaire des Matières pour Slackline-Tools SLACKTIVITY
- Page 1 BEDIENUNGSANLEITUNG / MANUAL OF USE / MODE D’EMPLOI / ISTRUZIONI PER L’USO / INSTRUCCIONES DE USO SLACKTIVITY & SOFT ’N SLACK Slackline Sets...
- Page 2 Alle Slackline Sets, Bänder und Einzelteile wie die Slack-Frames, das Slack-Pad oder die Verankerung Slack-Fix sind made in Germany. Unsere stylischen Tools Slack-Ring ST (pat. pend.), Slack-Biner (pat. pend.), und alle Slackline-Tools Bänder sind unser eigenes Design und garantieren beste Slackline- Performance sowie Sicherheit.
- Page 3 DEUTSCH BEDIENUNGSANLEITUNG ENGLISH MANUAL OF USE FRANÇAIS MODE D’EMPLOI ITALIANO ISTRUZIONI PER L’USO ESPAÑOL INSTRUCCIONES DE USO...
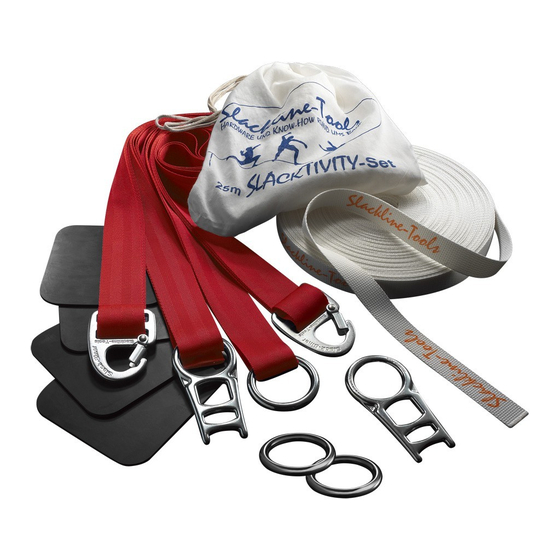
- Page 4 Beachten Sie vor allem die Warnhinweise und den Haftungsausschluss. I. INHALT 4 Tree-Friends 1 loser Slack-Ring 1 Slackline zusätzlich: 2 Express-Ringe beim 2 anpassbare 25/35/45 m SlackTivity Set Rundschlingen und 18 m Soft ’n Slack Set mit Slack-Biner und eingefasstem Slack-Ring bzw. 1 Zughilfe beim 1 Transportbeutel...
- Page 5 1. BEFESTIGEN DER RUNDSCHLINGE AN FIXPUNKT 1 • Rundschlinge um den Fixpunkt legen, einklinken und in Länge anpassen. • Auf mind. 5 cm Abstand zwischen Slack-Ring und Fixpunkt achten. Abb. 3 2. BEFESTIGEN DER SLACKLINE AN FIXPUNKT 1 MIT DEM SLACK-LOCKER PRINZIP •...
- Page 6 3. BEFESTIGEN DER RUNDSCHLINGE AN FIXPUNKT 2 • Hinweis für 25/35/45 m SlackTivity Set und 18 m Soft ’n Slack Set: Fädeln Sie den ersten Express-Ring in die Rundschlinge (s. IV.). • Rundschlinge um Fixpunkt 2 legen; verfahren Sie dabei wie unter II.1.
- Page 7 • Nun mit dem überstehenden Restband zwischen dem in der Slackline fixierten Slack-Ring und dem eingefassten Stahl-Ring am Fixpunkt 2 den Flaschenzug beginnen. Abb. 7 • Fädeln Sie zunächst das Restband von unten durch den eingefassten Stahl-Ring an Fixpunkt 2 (Abb. 8, 1). •...
- Page 8 Fixpunkt an der Stelle, an der die Rundschlinge vom Baum absteht (s. Abb. 2). • Die Slackline nach Belieben spannen. • Hinweis für 25/35/45 m SlackTivity Set und 18 m Soft ’n Slack Set: Zum Einbau des zweiten Express-Rings bzw. der Zughilfe (nur 35/45 m SlackTivity) siehe IV. und V.
- Page 9 III. ABBAU • Hinweis für 25/35/45 m SlackTivity Set und 18 m Soft ’n Slack Set: Entfernen Sie zunächst den zweiten Express-Ring und die Zughilfe (nur 35/45 m SlackTivity) aus der Slackline. • Zum Entspannen des Flaschenzugs das gespannte Restband im Halbkreis in Richtung Mitte der Slackline ziehen, bis sich die Klemmung löst.
- Page 10 • Befestigen Sie den zweiten Express-Ring mit Ankerstich im aus dem Flaschenzug laufenden Restband wie in Abb. 12, 5–7 dargestellt. Abb. 11 Abb. 12 * im 25/35/45 m SlackTivity Set und im 18 m Soft ’n Slack Set enthalten, für alle weiteren Sets optional erhältlich.
- Page 11 Abb. 13 • Fädeln Sie das Restband zunächst durch den in der Rundschlinge eingefädelten Express-Ring und lassen Sie es dann durch den zweiten Express-Ring laufen (Abb. 13, 8–9). • Ziehen Sie zum Spannen der Slackline wie gewohnt am Restband in Verlängerung der Slackline (Abb.
- Page 12 • Verfahren Sie weiter wie in Abb. 14, 2–4 dargestellt. • Spannen Sie die Slackline durch Ziehen an den Handschlaufen der Zughilfe in Verlängerung der Slackline. Abb. 14 ** im 35/45 m SlackTivity Set enthalten, für alle weiteren Sets optional erhältlich.
- Page 13 SlackTivity oder Soft ’n Slack Slackline Sets und insbesondere durch Missachtung nachfolgender Warnhinweise entstehen. Mit dem Kauf des SlackTivity oder Soft ’n Slack Slackline Sets bestätigen Sie, dass Sie diese Warnungen zur Kenntnis genommen und verstanden haben. Bitte geben Sie den jeder unserer Lieferungen beigefügten gedruckten Warnhinweis weiter, wenn Sie das SlackTivity...
- Page 14 • Die Fixpunkte, an denen die Slackline fixiert wird, sind nicht ausreichend stabil und rund, oder haben scharfe Kanten, Ecken oder ähnliches. • Es wird bei der Benutzung der Slackline an lebenden Bäumen als Befestigungsfixpunkte kein Rindenschutz verwendet (wie z.B. Tree-Friends). •...
-
Page 15: Entsorgung
PFLEGEHINWEIS Das Slackline-Band kann zur Reinigung bei 30° C in der Waschmaschine gewaschen werden. Das Slackline-Band ist zum Trocknen in einem sonnengeschützten Bereich aufzuhängen. ABLEGEREIFE Das Slackline Set ist auszusondern, wenn mind. eine der folgenden Beschädigungen eintritt: Band: Garnrisse oder Einschnitte von mehr als 10 % des Bandquerschnittes, Beschädigungen der Nähte, Verformung durch Wärmeeinfluss, Schäden durch Einwirkung von aggressiven Chemikalien am Band. - Page 16 I. CONTENT 4 Tree-Friends 1 single Slack-Ring 1 Slackline Additionally: 2 Express-Rings included in the 25/35/45 m SlackTivity Kits 2 adjustable and 18 m Soft ’n Slack Kits tree slings with Slack-Biner and 1 pulling aid included in the affixed Slack-...
- Page 17 1. AFFIXING THE TREE SLING AT FIXED-POINT 1 minimum distance • Wrap the tree sling around the fixed-point, 5 cm click! engage and adjust it in length. • Make sure that you allow at least 5 cm between Slack-Ring and fixed-point. Fig.
- Page 18 3. AFFIXING THE TREE SLING AT FIXED-POINT 2 • Note for the 25/35/45 m SlackTivity Kits and 18 m Soft ’n Slack click! Kits: Thread the first Express-Ring in the tree sling (see IV.). • Wrap the tree sling around fixed-point 2; do so as described in II.1.
- Page 19 • Now start the pulley system with the remaining line between the Slack-Ring just attached and the single Slack-Ring Steel-Ring adjoined to the tree sling at fixed-point 2. about 1–2 m for the pulley system fixpoint 2 remaining line Fig. 7 •...
- Page 20 • Now further adjust the Slackline tension by pulling. • Note for the 25/35/45 m SlackTivity Kits and 18 m Soft ’n Slack Kits: For instructions on how to install the second Express-Ring and the pulling aid (only 35/45 m SlackTivity Kits) see IV. and V.
- Page 21 III. TAKING DOWN THE SLACKLINE • Note for the 25/35/45 m SlackTivity Kits and 18 m Soft ’n Slack Kits: First of all make sure to remove the second Express-Ring and the pulling-aid (only 35/45 m SlackTivity Kits) from the line.
- Page 22 • Affix the second Express-Ring in the remaining line running out of the pulley as shown in Fig. 12, 5–7. Fig. 11 Fig. 12 Kits * included in the 25/35/45 m SlackTivity and the 18 m Soft ’n Slack Kits; for all others available optionally.
- Page 23 Fig. 13 • Run the remaining line through the Express-Ring in the tree sling and then through the second Express-Ring (Fig. 13, 8–9). • To tighten the Slackline simply pull away from the Slackline as usual (Fig. 13, 10). Caution: The combination of our 5:1 pulley with the express pulley is highly efficient and therefore very potent.
- Page 24 (Fig. 14, 1). • Continue as shown in Fig. 14, 2–4. • Now tighten the Slackline by using the sewn handloops when pulling away from the Slackline. Fig. 14 ** included in the 35/45 m SlackTivity Kits; for all others available optionally.
- Page 25 SlackTivity or Soft ’n Slack Slackline kits and particularly by non-compliance with the following warnings. By buying the SlackTivity or Soft ’n Slack Slackline kit, you confirm that you have read and understood these warnings. Please pass on the warnings enclosed with every delivery when passing our products on to third parties, e.g.
- Page 26 • Do not affix a Slackline around living trees without using bark protection (e.g. Tree-Friends). • Do not use a Slackline above uneven surface or hard ground (we recommend soft ground like grass or sand). • Do not exceed a rigging height of 0,6 m above hard ground like stone or concrete. •...
-
Page 27: Instructions For Care
INSTRUCTIONS FOR CARE For cleaning the Slackline webbing can be machine washed (30° C). For drying simply hang it up in the shade. DISCARDING TIME AND STORAGE The Slackline kit has to be discarded when one of the follwing damages occurs: Webbing: major breaks or cuts of more than 10 % of the webbing diameter, damages of the stitching, deformation caused by heat, damages caused by aggressive chemicals. -
Page 28: Montage
4 Tree-Friends 1 anneau de sangle 1 Slackline en vrac en supplément : 2 Express-Rings inclus dans les sets SlackTivity 25/35/45 m 2 sangles et dans le set Soft ’n Slack 18 m ajustables avec Mousqueton- Slack et anneau 1 aide de traction incluse dans de sangle resp. - Page 29 1. FIXATION DE LA SANGLE AU POINT D’AMARRAGE N° 1 environ 5 cm • Poser la sangle autour du point d’amarrage d’espace et enclencher le Mousqueton-Slack dans clic! l’anneau de sangle puis ajuster la longueur de la sangle. • Veiller à garder au minimum 5 cm d’espace Fig.
-
Page 30: Installation Du Système De Tension: Le Mouflage
3. FIXATION DE LA SANGLE AU POINT D’AMARRAGE N° 2 • Remarque pour les sets SlackTivity 25/35/45 m et le set Soft ’n Slack clic! 18 m: Insérez le premier Express-Ring dans la boucle autour de l’arbre (voir IV.). • Placez la boucle autour du point d’amarrage n° 2;... - Page 31 • Maintenant commencer le mouflage avec le reste de sangle. Le mouflage se fait entre l’anneau de sangle en anneau de sangle en vrac vrac accroché à la Slackline et l’anneau en acier au point 1–2 m d’espace pour le d’amarrage n°...
- Page 32 • Maintenant donner la tension voulue à la Slackline. • Remarque pour les sets SlackTivity 25/35/45 m et le set Soft ’n Slack 18 m: Pour ajouter le deuxième Express-Ring ou l’aide de traction (uniquement pour SlackTivity 35/45 m), voir IV. et V.
- Page 33 III. DEMONTAGE • Remarque pour les sets SlackTivity 25/35/45 m et le set Soft ’n Slack 18 m: Retirez tout d’abord le deuxième Express-Ring et l’aide de traction (uni- quement pour SlackTivity 35/45 m) de la Slackline. • Pour détendre le mouflage tirer sur la sangle tendue en demi-cercle vers le milieu de la Slackline jusqu’à...
-
Page 34: Mouflage Supplementaire
Fig. 12, 5–7. Fig. 11 Fig. 12 * inclus dans les sets SlackTivity 25/35/45 m et le set Soft ’n Slack 18 m, disponible en option pour tous les autres sets. - Page 35 Fig. 13 • Insérez tout d’abord la bande restante à travers l’Express-Ring inséré dans la boucle et passez-le ensuite à travers le deuxième Express-Ring (Fig. 13, 8–9). • Pour tendre la Slackline, tirez comme d’habitude sur la bande restante dans le prolongement de la Slackline (Fig.
- Page 36 • Procédez ensuite comme indiqué sur la Fig. 14, 2–4. • Tendez la Slackline en tirant sur les sangles manuelles de l’aide de traction dans le prolongement de la Slackline. Fig. 14 ** inclus dans les sets SlackTivity 35/45 m, disponible en option pour tous les autres sets...
-
Page 37: Avertissements Et Exclusion De Responsabilité
Slack, vous confirmez avoir pris connaissance de ces avertissements et les avoir compris. Veuillez transmettre l’avertissement imprimé joint à toute livraison de notre part lorsque vous transmettez le set de Slackline SlackTivity resp. Soft ’n Slack à des tiers, par exemple en tant que cadeau. AVERTISSEMENTS ET EXCLUSION DE RESPONSABILITÉ... - Page 38 • Les points fixes auxquels la Slackline est fixée ne sont pas suffisamment stables et ronds ou présentent des arêtes vives ou des coins. • Lors de l’utilisation d’arbres vivants en tant que points fixes, aucune protection d’écorce n’est utilisée (comme les Tree-Friends par exemple). •...
-
Page 39: Consignes D'entretien
CONSIGNES D’ENTRETIEN La sangle de Slackline peut être lavée à 30° C dans la machine à laver. Pour le séchage, pendre la sangle de Slackline à un endroit protégé du soleil. MOMENT DE MISE HORS SERVICE Il est impératif d’arrêter d’utiliser le set de Slackline lorsqu’au moins un des dommages suivants a lieu: sangle: ruptures de fil ou entailles de plus de 10%, coutures endommagées, déformation suite à... - Page 40 Soft ’n Slack 18 m set moschettone e un anello separato ed un 1 assistenza per la trazione 1 sacchetto per il anello in acciaio nel set SlackTivity 35/45 m trasporto Fig. 1 II. MONTAGGIO fettuccia con Slack-Biner, carrucola Slack-Ring e Tree-Friend...
- Page 41 1. FISSARE LA FETTUCCIA AL PUNTO DI FISSAGGIO 1 • Mettere la fettuccia attorno al punto di almeno 5 cm di distanza fissaggio, attaccare ed aggiustare la clic! lunghezza. • Fare attenzione che ci siano almeno 5 cm di distanza tra l’anello e il punto di fissaggio. Fig.
- Page 42 3. FISSARE LA FETTUCCIA AL PUNTO DI FISSAGGIO 2 • Avvertenza per SlackTivity 25/35/45 m e Soft ’n Slack 18 m: clic! Infilare il primo anello Express nella fettuccia (vedi IV.). • Mettere la fettuccia intorno al punto di fissaggio 2;...
- Page 43 • Ora iniziare ad utilizzare la carrucola con il nastro rimanente sporgente tra l’anello Slack fissato nella Slackline e Slack-Ring sciolto l’anello in acciaio sul punto di fissaggio 2. per carrucola distanza ca. 1–2 m punto di fissaggio 2 nastro rimanente Fig.
- Page 44 • Ora tendere la Slackline a piacimento. • Avvertenza per i set SlackTivity 25/35/45 m e set Soft ’n Slack 18 m: Per il montaggio del secondo anello Express e dell’assistenza per la trazione (solo SlackTivity 35/45 m) vedi IV. e V.
- Page 45 III. SMONTAGGIO • Avvertenza per i set SlackTivity 25/35/45 m e Soft ’n Slack 18 m: rimuovere innanzitutto il secondo anello Express e l’assistenza per la trazione (solo SlackTivity 35/45 m) dalla Slackline. • Per allentare la carrucola tirare il nastro...
- Page 46 • Fissare il secondo anello Express con un nodo strozzato nel continuo nastro rimanente dalla carrucola come mostrato sotto in Fig. 12, 5–7. Fig. 11 Fig. 12 * contenuto nei set SlackTivity 25/35/45 m e Soft ’n Slack 18 m, per tutti gli altri set disponibile extra.
- Page 47 Fig. 13 • Infilare innanzitutto il nastro rimanente attraverso l’anello Express infilato nella fettuccia e poi lasciare andare attraverso il secondo anello Express (Fig. 13, 8–9). • Portare la Slackline in tensione come solito sul nastro rimanente in allungamento della Slackline (Fig.
- Page 48 (Fig. 14, 1). • Procedere con raffigurato in Fig. 14, 2–4. • Tendere ora la Slackline tirando i lacci dell’assistenza per la trazione in allungamento della Slackline. Fig. 14 ** contenuto nella SlackTivity 35/45 m, per tutti gli altri set disponibile extra.
- Page 49 La società semplice Slackline-Tools non si assume alcuna responsabilità per danni che risultano da un utilizzo inappropriato del set Slackline SlackTivity e Soft ’n Slack e in particolare dal mancato rispetto delle seguenti avvertenze. Con l’acquisto del set Slackline SlackTivity oder Soft ’n Slack si conferma che si è...
- Page 50 • I punti di fissaggio sui quali la Slackline viene fissata non sono sufficientemente stabili e rotondi o hanno spigoli vivi, angoli o simili. • Quando si utilizza la Slackline su alberi vivi come punti di fissaggio di attacco non viene utilizzata una protezione per corteccia (per es.
-
Page 51: Smaltimento
CONSIGLI PER IL MANTENIMENTO Il nastro Slackline può essere lavato a 30° C in lavatrice. Il nastro Slackline deve essere steso ad asciugare in un’area protetta dal sole. FINE DELL’IMPIEGO Il set Slackline non deve più essere impiegato, se è presente almeno uno dei seguenti danni visibili: Nastro: rotture del filo o tagli superiori al 10%, danni alla cucitura, deformazione dovuta ad influenze termiche, danni al nastro dovuti all’azione di sostanze chimiche aggressive. - Page 52 I. CONTENIDO 4 Tree-Friends 1 Slack-Ring suelto 1 Slackline Además: 2 Express-Rings en el SlackTivity 2 cinturones Set de 25/35/45 m y el Soft ´n Slack ajustables con Set de 18 m Slack-Biner y...
- Page 53 1. ANCLAJE DEL CINTURÓN AJUSTABLE AL PUNTO DE FIJACIÓN 1 • Poner el cinturón ajustable al rededor del espacio 5 cm mínimo punto de fijación cerrarlo y ajustar el largo. clic! • Dejar un espacio mínimo de 5 cm entre el Slack-Ring y el punto de fijación.
- Page 54 3. ANCLAJE DEL CINTURÓN AJUSTABLE AL PUNTO DE FIJACIÓN 2 • Consejo para el SlackTivity Set de 25/35/45 m y el Soft ´n Slack Set de 18 m: ensartar el primer Express-Ring en el cinturón (véase clic! el punto IV.).
- Page 55 • Ahora comenzar con el polipasto con el resto de la cinta en la parte superior entre el Slack-Ring que se Slack-Ring suelto fijó a la Slackline y el anillo de acero revestido en el punto de fijación 2. aprox. 1–2 m distancia para el polipasto punto di fijación 2 resto de cinta...
- Page 56 • Ahora tensar la cinta Slackline como se requiera. • Consejo para el SlackTivity Set de 25/35/45 m y el Soft ´n Slack Set de 18 m: para montar el segundo Express-Ring o la ayuda para el tirador (solo en el SlackTivity de 35/45 m), véase los puntos IV.
- Page 57 III. DESMONTAJE • Consejo para el SlackTivity Set de 25/35/45 m y el Soft ´n Slack Set de 18 m: para comenzar, quitar el segundo Express-Ring y la ayuda para el tirador (solo en el SlackTivity de 35/45 m) de la Slackline.
- Page 58 Fig. 12, 5–7. Fig. 11 Fig. 12 * incluidos en el SlackTivity Set de 25/35/45 m y el Soft ´n Slack Set de 18 m, adquiribles para los demás equipos de manera opcional.
- Page 59 Fig. 13 • Para empezar, ensartar la cinta restante en el Express-Ring ensartado en el cinturón y dejarla pasar por el segundo Express-Ring (Fig. 13, 8–9). • Para tensar la Slackline, tirar de modo habitual de la cinta restante en la prolongación de la Slackline (Fig.
- Page 60 • Continuar como se representa en Fig. 14, 2–4. • Tensar la Slackline tirando de las asas de la ayuda para el tirador en la prolongación de la Slackline. Fig. 14 ** incluida en el SlackTivity Set de 35/45 m, adquirible para los demás equipos de manera opcional.
- Page 61 En caso de que transmita el equipo de Slackline SlackTivity y Soft ’n Slack a una tercera persona, por ejemplo como regalo, le rogamos que le entregue también las advertencias en formato impreso que se adjuntan en todos nuestros suministros.
- Page 62 • El equipo permanece tensado durante largos períodos de tiempo y, con ello, expuesto varios días a las influencias atmosféricas exteriores. • Los puntos de fijación a los que va a fijarse la Slackline no son suficientemente estables y redondos o tienen cantos o esquinas afiladas. •...
-
Page 63: Indicaciones De Mantenimiento
INDICACIONES DE MANTENIMIENTO La cinta de Slackline puede ser lavada a 30° C en la lavadora. La cinta de Slackline debe colgarse en una zona protegida del sol para que seque. ESTADO DE RECAMBIO El equipo de Slackline debe dejar de utilizarse cuando tenga al menos uno de los siguientes daños: Cinta: fisuras del hilo o cortes de más del 10%, daños en las costuras, deformación debido a la influencia térmica, daños por la acción de productos químicos agresivos en la cinta. - Page 64 Este equipo de slackline fue construido por el taller para info@slackline-tools.de personas discapacitadas „Maximilian Kolbe” de Caritas www.slackline-tools.de Konstanz o por el taller de la Asociación Lebenshilfe para personas con discapacidad mental de Stuttgart. © Slackline-Tools 12/12 Herstellung: polyma, Konstanz...