Table des Matières
Publicité
Les langues disponibles
Les langues disponibles
Liens rapides
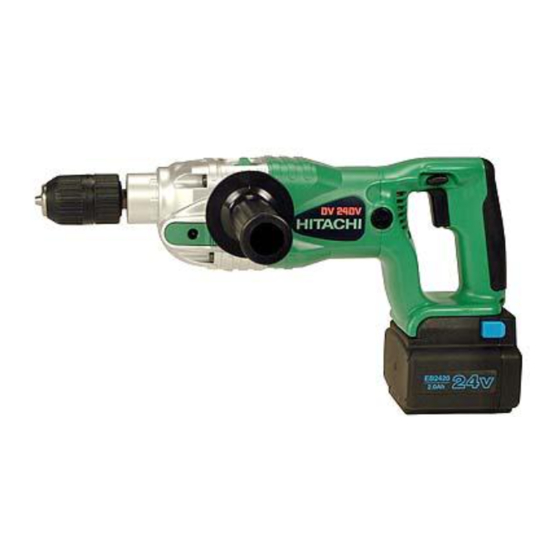
MODEL
Variable speed
MODÈLE
MODELO
SAFETY INSTRUCTIONS AND INSTRUCTION MANUAL
IMPROPER OR UNSAFE use of this power tool can result in death or serious bodily
injury!
This manual contains important information about product safety. Please read
and understand this manual BEFORE operating the power tool. Please keep this
manual available for other users and owners before they use the power tool. This
manual should be stored in safe place.
INSTRUCTIONS DE SECURITE ET MODE D'EMPLOI
Une utilisation INCORRECTE OU DANGEREUSE de cet outil motorisé peut entraîner
la mort ou de sérieuses blessures corporelles!
Ce mode d'emploi contient d'importantes informations à propos de la sécurité de
ce produit. Prière de lire et de comprendre ce mode d'emploi AVANT d'utiliser
l'outil motorisé. Garder ce mode d'emploi à la disponibilité des autres utilisateurs
et propriétaires avant qu'ils utilisent l'outil motorisé. Ce mode d'emploi doit être
conservé dans un endroit sûr.
INSTRUCCIONES DE SEGURIDAD Y MANUAL DE INSTRUCCIONES
¡La utilización INAPROPIADA O PELIGROSA de esta herramienta eléctrica puede
resultar en lesiones de gravedad o la muerte!
Este manual contiene información importante sobre la seguridad del producto.
Lea y comprenda este manual ANTES de utilizar la herramienta eléctrica. Guarde
este manual para que puedan leerlo otras personas antes de utilizar la herramienta
eléctrica. Este manual debe ser guardado en un lugar seguro.
DV 24DV
AVERTISSEMENT
ADVERTENCIA
CORDLESS HAMMER DRILL
MARTEAU PERFORATEUR À BATTERIE
MARTILLO ROTO-PERCUTOR A BATERÍA
WARNING
Publicité
Table des Matières

Manuels Connexes pour Hitachi DV 24DV


Sommaire des Matières pour Hitachi DV 24DV
- Page 1 MODEL Variable speed CORDLESS HAMMER DRILL MODÈLE MARTEAU PERFORATEUR À BATTERIE DV 24DV MODELO MARTILLO ROTO-PERCUTOR A BATERÍA SAFETY INSTRUCTIONS AND INSTRUCTION MANUAL WARNING IMPROPER OR UNSAFE use of this power tool can result in death or serious bodily injury! This manual contains important information about product safety.
-
Page 2: Table Des Matières
English CONTENTS English Page Page IMPORTANT SAFETY INFORMATION ......3 ASSEMBLY AND OPERATION ........14 MEANINGS OF SIGNAL WORDS ........3 APPLICATIONS ............14 REMOVAL AND INSTALLATION METHOD SAFETY ................4 OF BATTERY ............14 GENERAL SAFETY RULES – FOR ALL BATTERY CHARGING METHOD .......... -
Page 3: Important Safety Information
WARNINGS on the power tool and in this Instruction Manual. NEVER use this power tool in a manner that has not been specifically recommended by HITACHI. MEANINGS OF SIGNAL WORDS WARNING indicates a potentially hazardous situations which, if ignored, could result in death or serious injury. -
Page 4: Safety
English SAFETY GENERAL SAFETY RULES – FOR ALL BATTERY OPERATED TOOLS WARNING: Read and understand all instructions. Failure to follow all instructions listed below, may result in electric shock, fire and/or serious personal injury. SAVE THESE INSTRUCTIONS 1. Work Area (1) Keep your work area clean and well lit. - Page 5 English (2) Do not force tool. Use the correct tool for your application. The correct tool will do the job better and safer at the rate for which it is designed. (3) Do not use tool if switch does not turn it on or off. Any tool that cannot be controlled with the switch is dangerous and must be repaired.
-
Page 6: Specific Safety Rules And Symbols
English SPECIFIC SAFETY RULES AND SYMBOLS 1. Hold tools by insulated gripping surfaces when performing an operation where the cutting tool may contact hidden wiring. Contact with a “live” wire will make exposed metal parts of the tool “live” and shock the operator. 2. - Page 7 15. NEVER use a tool which is defective or operating abnormally. If the tool appears to be operating unusually, making strange noises, or otherwise appears defective, stop using it immediately and arrange for repairs by a Hitachi authorized service center.
-
Page 8: Important Safety Instructions For Battery Charger
2. Before using battery charger, read all instructions and cautionary markings on (1) battery charger, (2) battery, and (3) product using battery. 3. To reduce risk of injury, charge HITACHI rechargeable battery type EB2420. Other type of batteries may burst causing personal injury and damage. -
Page 9: Important Safety Instructions For Use Of The Battery And Battery Charger
12. To reduce risk of electric shock, unplug charger from receptacle before attempting any maintenance or cleaning. Removing the battery will not reduce this risk. 13. This battery charger might be attached to HITACHI battery operated tools as a standard accessory. In this case, please confirm instruction Manual of the HITACHI battery operated tools before using the battery charger. - Page 10 English SAVE THESE INSTRUCTIONS MAKE THEM AVAILABLE TO OTHER USERS OWNERS OF THIS TOOL!
-
Page 11: Functional Description
English FUNCTIONAL DESCRIPTION NOTE: The information contained in this Instruction Manual is designed to assist you in the safe operation and maintenance of the power tool. NEVER operate, or attempt any maintenance on the tool unless you have first read and understood all safety instructions contained in this manual. -
Page 12: Specifications
English 2. Battery Charger (UC24YFB) Pilot Lamp Guide Rail Caution Plate Nameplate Fig. 2 SPECIFICATIONS 1. Cordless Hammer Drill (DV24DV) Motor DC motor 1:Low 2:High Speed change 0–400/min 0–1750/min No-load speed Capacity 3/4" (20 mm) 3/8" (10 mm) Concrete Auger Bit 1-1/2"... - Page 13 English <Capacity with Angle Unit (Optional accessory)> 1:Low 2:High Speed of DV24DV Low (270/min) High (580/min) Low (1200/min) High (2560/min) Speed of angle Unit Wood Auger Bit 1-1/2" (38mm) 1" (25mm) 3/4" (20mm) Flat Spade Bit 1-1/2" (38mm) 1-1/4" (32mm) 3/4"...
-
Page 14: Assembly And Operation
English ASSEMBLY AND OPERATION APPLICATIONS By combined actions of ROTATION and HAMMER Boring holes in hard materials (concrete, brick, tiles, etc.) By ROTATIONAL action: Boring holes in steel, wood and plastic. REMOVAL AND INSTALLATION METHOD OF BATTERY 1. Battery removal Hold the handle tightly and push the battery latches to remove the battery (see Figs. - Page 15 English WARNING: Do not use the electrical cord if damaged. Have it repaired immediately. 2. Insert the battery to the battery charger. Insert the battery into the battery charger as shown in Fig. 5. Make sure the battery is fully seated in the battery charger.
- Page 16 English Regarding the temperature of the rechargeable battery. The temperatures for rechargeable batteries are as shown in the table below, and batteries that have become hot should be cooled for a while before being recharged. Table 3 Temperatures at which the battery can be recharged Rechargeable batteries 23°F —...
-
Page 17: Before Use
English Avoid recharging at high temperatures. A rechargeable battery will be hot immediately after use. If such a battery is recharged immediately after use, its internal chemical substance will deteriorate, and the battery life will be shortened. Leave the battery and recharge it after it has cooled for a while. CAUTION: When the battery charger has been continuosly used, the battery charger will heated, thus constituting the cause of the failures. - Page 18 English 2. Selecting the appropriate drill bit When boring concrete or brick Use the drill bits specified in the Optional Accessories. When boring metal or plastic Use an ordinary metalworking drill bit. When boring wood Use an ordinary woodworking drill bit. However, when drilling 1/4"...
- Page 19 English 6. HAMMER to ROTATION changeover (Fig. 9) The Hammer Drill can be switched from HAMMER (hammer plus rotation) to ROTA- Change TION (rotation only) by turning the change lever lever. When boring concrete, stone, tile or similar hard materials, turning the change lever to HAMMER side.
- Page 20 CAUTION: If the keyless chuck cannot be removed by striking the wrench, don’t strike the wrench forcibly and send the hammer drill to a HITACHI AUTHORIZED SERVICE CENTER. (2) Attaching the angle unit. Angle Joint...
-
Page 21: How To Use
CAUTION: If the keyless chuck cannot be removed by striking the wrench, don’t strike the wrench forcibly and send the hammer drill to a HITACHI AUTHORIZED SERVICE CENTER. HOW TO USE 1. Switch operation When the switch trigger is depressed, the tool rotates. When the switch trigger is released, the tool stops. - Page 22 English WARNING The hammer drill operates with high torque. The larger the drill bit diameter, the larger the reactive force on your arm. Be careful not to lose control of the hammer drill because of this reactive force. To maintain firm control, establish a good foothold, use the side handle and handle joint, hold the hammer drill tightly with both hands, and ensure that the hammer drill is vertical to the material being drilled.
-
Page 23: Maintenance And Inspection
NOTE: Fig. 15 When replacing the carbon brush with a new one, be sure to use the Hitachi Carbon Brush Code No. 999058. 5. Replacing carbon brushes Nail of Take out the carbon brush by first removing... - Page 24 CAUTION: Repair, modification and inspection of Hitachi Power Tools must be carried out by an Hitachi Authorized Service Center. This Parts List will be helpful if presented with the tool to the Hitachi Authorized Service Center when requesting repair or other maintenance. In the operation and maintenance of power tools, the safety regulations and standards prescribed in each country must be observed.
- Page 25 English MODIFICATIONS: Hitachi Power Tools are constantly being improved and modified to incorporate the latest technological advancements. Accordingly, some parts (i.e. code numbers and/or design) may be changed without prior notice.
-
Page 26: Accessories
The use of any other attachment or accessory can be dangerous and could cause injury or mechanical damage. NOTE: Accessories are subject to change without any obligation on the part of the HITACHI. STANDARD ACCESSORIES DV24DV 1 Charger (UC24YFB) ............1 2 Plastic case (Code No. - Page 27 7/32" 4" 939882 15/32" 4-3/4" 971704 3/4" 6-5/8" 959615 (5.5mm) (100mm) (12mm) (120mm) (20mm) (170mm) 1/4" 4" 939884 1/2" 6-5/16" 931855 (6.4mm) (100mm) (13mm) (160mm) NOTE Specifications are subject to change without any obligaiton on the part of the HITACHI.
- Page 28 AVERTISSEMENTS sur l’outil motorisé et dans ce mode d’emploi. NE JAMAIS utiliser cet outil motorisé d’une manière qui n’est pas spécifiquement recommandée par HITACHI. SIGNIFICATION DES MOTS D’AVERTISSEMENT AVERTISSEMENT indique des situations potentiellement dangereuses qui, si elles sont ignorées, pourraient entraîner la mort ou de sérieuses blessures.
- Page 29 Français SECURITE REGLES GENERALE DE SECURITE – POUR TOUS LES OUTILS FONCTIONNANT SUR BATTERIE AVERTISSEMENT: Lire et coxmprendre toutes les instructions. Un non respect de toutes les instructions ci-dessous peut entraîner une électrocution, un incendie et/ou de sérieuses blessures personnelles. CONSERVER CES INSTRUCTIONS 1.
- Page 30 Français 4. Utilisation de l’outil et entretien (1) Utiliser un étau ou toutes autres façons de fixer et maintenir la pièce à usiner sur une plate-forme stable. Tenir la pièce avec la main ou contre son corps est instable et peut conduire à...
- Page 31 Français REGLES DE SECURITE SPECIFIQUES ET SYMBOLES 1. Tenir les outils par les surfaces de grippage lors de la réalisation d’opération où l’outil de coupe risque d’entrer en contact avec des câbles cachés. Un contact avec un fil “sous tension” mettra les parties métalliques de l’outil “sous tension” et électrocutera l’utilisateur.
- Page 32 Si l’outil n’a pas l’air de fonctionner normalement, fait des bruits étranges ou sans cela paraît défectueux, arrêter de l’utiliser immédiatement et le faire réparer par un centre de service Hitachi autorisé. 16. NE JAMAIS laisser fonctionner l’outil sans surveillance. Le mettre hors tension.
- Page 33 3. Pour réduire tout risque de blessure, NE recharger QUE les batteries rechargeables HITACHI utilisées dans le modèle EB2420. Les autres types de batterie pourraient exploser et provoquer des blessures ou des dommages. 4. Ne pas exposer le chargeur à la pluie ni à la neige.
- Page 34 Il ne suffit pas de sortir la batterie. 13. Ce chargeur de batterie pourra être fixé comme accessoire standard sur les outils HITACHI alimentés sur batterie. Dans ce cas, vérifier le mode d'emploi de l'outil HITACHI alimenté sur batterie avant d'utiliser le chargeur de batterie.
- Page 35 Français 10. NE JAMAIS utiliser de générateur de moteur ni d’alimentation CC pour la recharge. 11. NE JAMAIS ranger la batterie ni le chargeur de batterie dans un lieu où la température peut atteindre ou dépasser 40°C (104°F). 12. TOUJOURS alimenter le chargeur sur une prise secteur domestique standard (120 volts).
- Page 36 Français DESCRIPTION FONCTIONNELLE REMARQUE: Les informations contenues dans ce mode d’emploi sont conçues pour assister l’utilisateur dans une utilisation sans danger et un entretien de l’outil motorisé. NE JAMAIS utiliser ni entreprendre une révision de l’outil sans avoir d’abord lu et compris toutes les instructions de sécurité...
- Page 37 Français 2. Chargeur de batterie (UC24YFB) Lampe témoin Rail de guidage Plaque de précaution Plaque signalétique Fig. 2 SPECIFICATIONS 1. Marteau perforateur à batterie (DV24DV) Moteur Moteur CC 1:Faible 2:Grande Changement de vitesse 0–400/min 0–1750/min Vitesse à vide Capacité 3/4" (20 mm) 3/8"...
- Page 38 Français <Capacité avec angle (accessoire en option)> 1:Faible 2:Grande Vitesse de DV24DV Vitesse de l’angle Faible (270/min) Grande (580/min) Faible (1200/min) Grande (2560/min) Bois Mèche creuse 1/1/2" (38mm) 1" (25mm) 3/4" (20mm) Foret à lame plate 1-1/2" (38mm) 1-1/4" (32mm) 3/4"...
-
Page 39: Assemblage Et Fonctionnement
Français ASSEMBLAGE ET FONCTIONNEMENT UTILISATIONS Action combinée de ROTATION et MARTEAU: Perçage de trous dans surfaces dures (béton, briques, granìte, etc.). Par action de ROTATION: Perçage de trous dans acier, bois et matières plastiques. MÉTHODE DE RETRAIT ET D’INSTALLATION DE LA BATTERIE 1. - Page 40 Français 2. Insérer la batterie dans le chargeur de batterie. Insérer la batterie dans le chargeur de batterie comme indiqué à la Fig. 5. S’assurer que la batterie repose bien dans le chargeur de batterie. Avant l’insertion Après l’insertion Fig. 5 3.
- Page 41 Français Température admissible d’une batterie rechargeable La température admissible des batteries rechargeables est indiquée dans le tableau ci- dessous, et les batteries qui ont chauffé devront être laissées à refroidir pendant quelque temps avant de pouvoir être rechargées. Tableau 3 Température à...
-
Page 42: Avant L'utilisation
Français Eviter d’effectuer la recharge sous des températures élevées. Une batterie est toujours chaude immédiatement après son utilisation. Si la batterie est rechargée immédiatement après utilisation, les substances chimiques internes risquent de se détériorer et la durée de vie de la batterie se raccourcira. Laisser la batterie refroidir un moment avant de l’utiliser. - Page 43 Français (2) Dépose du foret Saisir fermement la bague et desserrer le manchon en le tournant vers la gauche (sens inverse des aiguilles d’une montre vu de face). (Voir Fig. 6) PRECAUTION: Lorsqu’on monte un foret dans un mandrin sans clavette, bien serrer à fond. Si le manchon n’est pas serré, le foret risque de glisser ou de tomber et de provoquer des blessures.
- Page 44 Français 5. Installation de la poignée latérale et du joint de poignée (Fig. 8) Une poignée latérale et un joint de poignée sont fournis avec le marteau perforateur. Serrer Poignée Ils se montent sur le côté gauche ou sur le Desserrer latérale côté...
- Page 45 PRECAUTION: Si l’on ne réussit pas à retirer le mandrin en le frappant avec la clé, ne pas frapper trop fort avec la clé et envoyer le marteau à un SERVICE APRES-VENTE HITACHI AGREE. (2) Fixation de l’angle Unité de Après avoir retiré...
- Page 46 PRECAUTION: Si l’on ne réussit pas à retirer le mandrin en le frappant avec la clé, ne pas frapper trop fort avec la clé et envoyer le marteau à un SERVICE APRES-VENTE HITACHI AGREE.
-
Page 47: Utilisation
Français UTILISATION 1. Fonctionnement de l'interrupteur: Quand la gâchette est tirée, l’outil tourne. Quand la gâchette est relâchée, l’outil s’arrête. La vitesse de rotation du marteau perforateur peut être contrôlée en faisant varier la force avec laquelle on appuie sur la gâchette. En appuyant légèrement sur la gâchette, la vitesse est faible, et elle augmente lorsqu’on appuie plus fort. -
Page 48: Entretien Et Inspection
Clou de balai en carbone Lors du remplacement des balais en carbone par des neufs, bien utiliser des balais en carbone Hitachi, No. de code 999058. Saillie de balai en carbone 5. Remplacement d’un balai en carbone Pour sortir le balai en carbone, commencer par retirer le capuchon du balai, puis décrocher la saillie du balai en carbone avec... - Page 49 Tous les outils motorisés de qualité auront éventuellement besoin d’une réparation ou du remplacement d’une pièce à cause de l’usure normale de l’outil. Pour assurer que seules des pièces de rechange autorisées seront utilisées, tous les entretiens et les réparations doivent être effectués uniquement par UN CENTRE DE SERVICE HITACHI AUTORISE.
- Page 50 MODIFICATIONS: Les outils électriques Hitachi sont constamment améliorés et modifiés afin d’incorporer les tous derniers progrès technologiques. En conséquence, il est possible que certaines pièces (c.-à-d. no. de code et/ou dessin) soient...
-
Page 51: Accesoires
L’utilisation de tout autre attachement ou accessoire peut être dangereux et peut causer des blessures ou des dommages mécaniques. REMARQUE: Les accessoires sont sujets à changement sans obligation de la part de HITACHI. ACCESSOIRES STANDARD DV24DV 1 Chargeur (UC24YFB) ............1 2 Boîtier en plastique (No. - Page 52 7/32" 4" 939882 15/32" 4-3/4" 971704 3/4" 6-5/8" 959615 (5,5mm) (100mm) (12mm) (120mm) (20mm) (170mm) 1/4" 4" 939884 1/2" 6-5/16" 931855 (6,4mm) (100mm) (13mm) (160mm) REMARQUE: Les spécifications sont sujettes à modification sans aucune obligation de la part de HITACHI.
- Page 53 ADVERTENCIAS en dicha herramienta y en este Manual de instrucciones. No utilice NUNCA esta herramienta eléctrica de ninguna forma que no esté específicamente recomendada por HITACHI. SIGNIFICADO DE LAS PALABRAS DE SEÑALIZACIÓN ADVERTENCIA indica situaciones potencialmente peligrosas que, si se ignoran, pueden resultar en la muerte o en lesiones de gravedad.
- Page 54 Español SEGURIDAD NORMAS GENERALES DE SEGURIDAD – PARA TODAS LAS HERRAMIENTAS ALIMENTADAS CON BATERÍA ADVERTENCIA: Lea y entienda todas las instrucciones. Si no sigue las instrucciones indicadas a continuación, pueden producirse descargas eléctricas, incendios, y/o lesiones serias. GUARDE ESTAS INSTRUCCIONES. 1.
- Page 55 Español (2) No fuerce la herramienta. Utilice la herramienta correcta para su aplicación. Con la herramienta correcta realizará mejor el trabajo y ésta será más segura para la velocidad para la que ha sido diseñada. (3) No utilice la herramienta si el interruptor de alimentación de la misma no funciona. Cualquier herramienta que no pueda controlarse con el interruptor de alimentación puede resultar peligrosa, y deberá...
- Page 56 Español NORMAS Y SÍMBOLOS ESPECÍFICOS DE SEGURIDAD 1. Sujete las herramientas por las superficies de empuñadura aisladas cuando realice una operación en la que la herramienta de corte pueda entrar en contacto con cables ocultos. El contacto con un conductor “activo” “activará” las partes metálicas de la herramienta y el operador recibirá...
- Page 57 15. NO utilice NUNCA una herramienta defectuosa o que funcione anormalmente. Si la herramienta parece que funciona anormalmente, produciendo ruidos extraños, etc., deje inmediatamente de utilizarla y solicite su arreglo a un centro de reparaciones autorizado por Hitachi. 16. NO deje NUNCA la herramienta en funcionamiento desatendida. Desconecte su alimentación.
- Page 58 (1) el cargador de baterías, (2) la batería, y (3) el producto que utiliza la batería. 3. Para reducir el riesgo de lesiones, cargue la batería HITACHI de tipo de EB2420. Otros tipos de baterías podrían explotar causando lesiones y daños.
- Page 59 13. Este cargador de baterías puede utlizarse con herramientas alimendadas con batería HITACHI como acccesorio estándar. En este caso, antes de utilizarlo, lea los manuales de instrucciones de las herramientas alimentadas con baterías HITACHI.
- Page 60 Español 13. SIEMPRE espere 15 minutos por lo menos entre las cargas para evitar que el cargador se recaliente. 14. SIEMPRE desconecte el cable de alimentación del tomacorriente cuando no vaya a utilizar el cargador. ¡GUARDE ESTAS INSTRUCCIONES PÓNGALAS A DISPOSICIÓN DE OTROS USUARIOS PROPIETARIOS DE ESTA HERRAMIENTA!
- Page 61 Español DESCRIPCIÓN FUNCIONAL NOTA: La información contenida en este Manual de instrucciones ha sido diseñada para ayudarle a utilizar con seguridad y mantener esta herramienta eléctrica. NUNCA haga funcionar ni efectúe el mantenimiento de la herramienta antes de leer y comprender todas las instrucciones de seguridad contenidas en este manual.
- Page 62 Español 2. Cargador de baterías (UC24YFB) Lámpara piloto Riel de guía Placa de precaución Place de características Fig. 2 ESPECIFICACIONES 1. Martillo roto-percutor a batería (DV24DV) Motor Motor de CC 1:Baja 2:Alta Cambio de velocidad Velocidad sin carga 0–400/min 0–1750/min 3/4"...
- Page 63 Español <Capacidad con unidad angular (accesorio opcional)> 1:Baja 2:Alta Velocidad de DV24DV Baja (270/min) Alta (580/min) Baja (1200/min) Alta (2560/min) Velocidad de la unidad angular Madera Broca de berbiqui 1/1/2" (38mm) 1" (25mm) 3/4" (20mm) Broca de horquilla plana 1-1/2" (38mm) 1-1/4"...
-
Page 64: Montaje Y Operación
Español MONTAJE Y OPERACIÓN APLICACIONES Acciones combinadas de ROTACION e MARTILLEO: Perforación de orificios en materiales duros (concreto, ladrillo, baldosas, etc.) Acción de ROTACION: Taladrado de orificios en acero, madera y plástico. MÉTODO DE EXTRACCIÓN E INSTALACIÓN DE LA BATERÍA 1. - Page 65 Español ADVERTENCIA: No utilice el cargador si su cable está dañado. Haga que se lo reparen inmediatamente. 2. Inserte la batería en el cargador de baterías. Inserte la batería en el cargador de baterías como se muestra en la Fig. 5. Asegúrese de que la batería quede completamente apoyada en el cargador de baterías.
- Page 66 Español Temperatura de la batería La temperatura de la batería se muestra en la tabla siguiente, y si la batería se calentado, habrá que dejar que se enfríe durante cierto tiempo antes de recargarla. Tabla 3 Temperatura a la que podrá recargarse la batería Batería 23°F—140°F EB 2420...
-
Page 67: Antes De La Utilización
Español Evite realizar la recarga a altas temperaturas Una batería se calentará inmediatamente después de haberla utilizado. Si recargase tal batería inmediatamente después de haberla utilizado, su substancia química interna se deterioraría, y la duración útil de la batería se acortaría. Deje la batería y recárguela después de que se haya enfriado durante cierto tiempo. - Page 68 Español 2. Seleccionar la broca de taladro apropiada Caso de perforar hormigón o ladrillo Usar las brocas de taladro especificadas en los accesorios facultativos. Perforando metal o plástico Usar una broca de taladro ordinaria para trabajos en metal. Perfornado madera Usar una broca de taladro ordinaria para trabajos en madera.
- Page 69 Español 6. Cambio de PERCUSION a ROTACION (Fig. 9) Palanca de El taladro de percusión puede ser conmutado cambio de PERCUSION (percusión y rotación) a ROTACION (sólo rotación) girando la palanca de cambio. Para taladrar hormigón, piedra, baldosa o meteriales de dureza similar, gire la palanca de cambio hasta HAMMER.
- Page 70 PRECAUCIÓN Si no es posible desmontar el portabrocas sin llave golpeando la llave, no fuerce la llave. Envíe el taladro de percusión al CENTRO DE SERVICIO AUTORIZADO HITACHI. (2) Fijación de la unidad angular Después de desmontar el portabrocas sin...
- Page 71 Antes de aflojar el portabrocas sin llave, sujete el husillo de la unidad angular utilizando la llave fija suministrada. PRECAUCIÓN Si no es posible desmontar el portabrocas sin llave golpeando la llave, no fuerce la llave. Envíe el taladro de percusión al CENTRO DE SERVICIO AUTORIZADO HITACHI.
-
Page 72: Como Se Usa
Español COMO SE USA 1. Operación del interruptor: Cuando se aprieta el gatillo del interruptor, la herramienta gira. Cuando se suelta el gatillo del interruptor, la herramienta se detiene. La velocidad rotacional del taladro de percusión podrá controlarse variando la presión con la que se aprieta el gatillo del interruptor. -
Page 73: Mantenimiento E Inspección
NOTA Uña de escobilla Cuando reemplace las escobillas de carbón de carbón por otras nuevas, utilice escobillas Hitachi con número de código 999058. Seliente de escobilla de 5. Reemplazar el carbón de contacto carbón Extraiga la escobilla de carbón quitando... - Page 74 Para asegurarse de que solamente se utilicen piezas de reemplazo autorizadas, todos los servicios de mantenimiento y reparación deberán realizarse SOLAMENTE EN UN CENTRO DE REPARACIONES AUTORIZADO POR HITACHI.
- Page 75 Español 10.Lista de repuestos PRECAUTION: La reparación, modificación e inspección de las herramientas eléctricas Hitachi deben ser realizadas por un Centro de Servicio Autorizado de Hitachi. Esta lista de repuestos será de utilidad si es presentada junto con la heramienta al Centro de Servicio Autorizado de Hitachi para solicitar la reparación o cualquier otro tipo de mantenimiento.
-
Page 76: Accesorios Estándar
HITACHI. La utilización de otros accesorios puede resultar peligrosa y causar lesiones o daños mecánicos. NOTA: Las especificaciones están sujetas a cambio sin ninguna obligación por parte de HITACHI. ACCESORIOS ESTÁNDAR DV24DV 1 Cargador (UC24YFB) ............1 2 Caja de plástico (Núm. - Page 77 (160mm) 7/32" 4" 939882 15/32" 4-3/4" 971704 3/4" 6-5/8" 959615 (5,5mm) (100mm) (12mm) (120mm) (20mm) (170mm) 1/4" 4" 939884 1/2" 6-5/16" 931855 (6,4mm) (100mm) (13mm) (160mm) NOTA: Las especificationes están sujetas a cambio sin ninguna obligación por parte de HITACHI.
- Page 78 Español...
- Page 79 Español...
- Page 80 Please contact HITACHI KOKI U.S.A. LTD. at 1-800-59-TOOLS (toll free), or HITACHI AUTHORIZED POWER TOOL SERVICE CENTER recarding COLLECTION. Pour le RAMASSAGE, contacter HITACHI KOKI U.S.A. LTD. au 1-800-59-TOOLS (appel gratuit), ou UN SERVICE APRES-VENTE D’OUTILS ELECTRIQUE AGREE PAR HITACHI.