Jeulin REDY Mode D'emploi
Masquer les pouces
Voir aussi pour REDY:
- Mode d'emploi (24 pages) ,
- Mode d'emploi (46 pages) ,
- Mode d'emploi (43 pages)

Manuels Connexes pour Jeulin REDY


Sommaire des Matières pour Jeulin REDY
- Page 1 Ex.A.O Capteur sans fil REDY Data logging REDY Wireless Sensor Réf : 488 026 Capteur Ethanol REDY Français – p 1 REDY Ethanol Sensor English – P 23 Version : 0209...
- Page 2 Première utilisation ......................3 Mise en route ........................3 Utilisation du capteur en mode connecté à un ordinateur Windows ........ 3 Installation du logiciel Redy pour Windows .............. 3 Connexion du capteur au logiciel ................3 Etalonnage de la sonde éthanol ................4 Réaliser une acquisition en fonction du temps ............
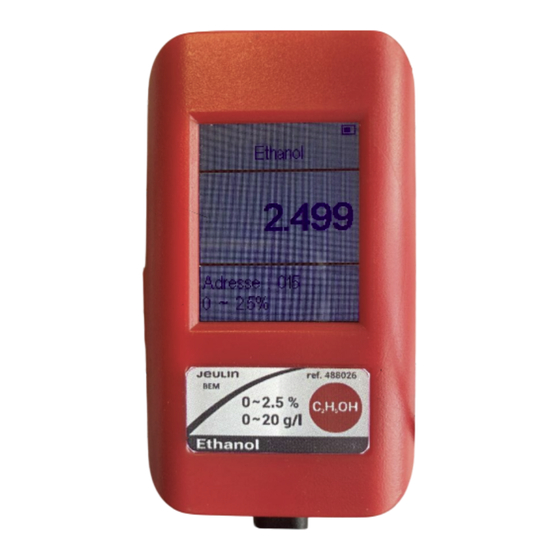
- Page 3 Ex.A.O Capteur Ethanol REDY Réf : 488 026 Contenu 1 capteur Ethanol REDY 1 câble USB Type C 1 housse de protection Description Connexion de la sonde Ethanol Indicateur de connexion en Bluetooth Grandeur mesurée Indicateur de niveau de charge de la batterie Valeur mesurée...
- Page 4 Votre appareil est prêt à l’emploi. Utilisation du capteur en mode connecté à un ordinateur Windows Installation du logiciel Redy pour Windows Le logiciel Redy pour Windows est téléchargeable sur le site internet de Jeulin. Connexion du capteur au logiciel •...
- Page 5 Ex.A.O Capteur Ethanol REDY Réf : 488 026 Etalonnage de la sonde éthanol Vérifier que la tête de sonde est correctement vissée et n’est pas endommagée. Glisser- déposer l’icône du capteur, en ordonnée à l’aide de la souris comme décrit en 5.4.
- Page 6 Ex.A.O Capteur Ethanol REDY Réf : 488 026 Cliquer dans régler pour valider l’étalonnage Réaliser une acquisition en fonction du temps Pour réaliser une acquisition avec le capteur, glisser- déposer l’icône du capteur, en ordonnée à l’aide de la souris :...
- Page 7 Ex.A.O Capteur Ethanol REDY Réf : 488 026 L’ensemble des indications relatives au capteur apparaissent alors sous le graphique : Il reste à paramétrer le temps, en glissant-déposant l’icône du chronomètre en abscisse dans le graphique, comme ci-dessous : FRANÇAIS...
- Page 8 « Lancer » (voir ci-dessus). Utilisation du capteur en mode Bluetooth sur Tablette Installation de l’application Redy pour Tablette L’application Redy est gratuite et disponible sur Google Play ou l’App Store. Connexion du capteur à la tablette en Bluetooth •...
- Page 9 Ex.A.O Capteur Ethanol REDY Réf : 488 026 • L’application se lance et vous invite à connecter un capteur : • Appuyer sur oui. L’espace de gestion des capteurs s’ouvre alors automatiquement dans l’application. FRANÇAIS...
- Page 10 Ex.A.O Capteur Ethanol REDY Réf : 488 026 Le capteur apparaît alors dans la liste des capteurs. Afin de vous assurer que le capteur souhaité est reconnu, vous pouvez vérifier que le numéro d’adresse, noté sur l’écran du capteur et celui apparaissant dans la liste des capteurs de l’application, correspondent.
- Page 11 Ex.A.O Capteur Ethanol REDY Réf : 488 026 Puis appuyer sur Etalonnage : Suivre alors les étapes de la procédure apparaissant à l’écran : Appuyer sur Etalonner, pour passer à la deuxième étape. Suivre les indications de la deuxième étape permettant de valider le deuxième point d’étalonnage en trempant la sonde dans la solution étalon.
- Page 12 Ex.A.O Capteur Ethanol REDY Réf : 488 026 Appuyer sur Etalonner, un écran de confirmation apparaît Revenir à l’écran principal en appuyant 2 fois sur la flèche de retour : La valeur, lue par le capteur, apparaît dans l’écran multimètre, placé par défaut dans la partie en bas à...
- Page 13 Ex.A.O Capteur Ethanol REDY Réf : 488 026 Paramétrage de l’acquisition en fonction du temps 6.4.1 Paramétrage de la mesure d’éthanol L’activation du capteur, détaillée dans le chapitre précédent, sélectionne automatiquement celui-ci pour une acquisition. Aucune autre action de paramétrage supplémentaire n’est donc nécessaire.
- Page 14 Ex.A.O Capteur Ethanol REDY Réf : 488 026 L’utilisateur peut alors à sa guise, modifier la durée et l’unité de temps. Revenir à l’écran principal en appuyant sur la flèche de retour : Puis, lancer l’acquisition en appuyant sur le bouton de Lancement :...
- Page 15 être transférés sur un ordinateur ou une tablette pour analyse. Paramétrage du mode enregistreur à l’aide d’un ordinateur Connecter le capteur à l’ordinateur et au logiciel Redy. Voir détails chapitre 5.2 Dans la barre d’outils, cliquer sur Mode Autonome, puis sur Configurer : Dans la fenêtre de configuration, sélectionner le ou les capteurs que vous souhaitez...
- Page 16 Ex.A.O Capteur Ethanol REDY Réf : 488 026 Puis, choisir une durée d’acquisition à l’aide du menu déroulant : Cliquer sur OK pour lancer l’acquisition. Le logiciel vous confirme que l’acquisition a été lancée. Le capteur peut alors être déconnecté...
- Page 17 Réf : 488 026 Récupérer les points enregistrés sur l’ordinateur Connecter le capteur à l’ordinateur et au logiciel Redy. Voir détails chapitre 5.2 Dans la barre d’outils, cliquer sur Mode Autonome, puis sur Récupérer : Dans la fenêtre de récupération, sélectionner votre capteur d’intérêt, puis cliquer sur OK.
- Page 18 Les points sont également visualisables dans la fenêtre Tableau. Paramétrage du mode enregistreur à l’aide d’une tablette Connecter le capteur à la tablette et au logiciel Redy. Voir détails chapitre 6.2 Dans l’appli Redy, appuyer sur l’icône de paramétrage :...
- Page 19 Ex.A.O Capteur Ethanol REDY Réf : 488 026 Puis sélectionner Autonome dans la fenêtre d’Acquisition : Dans l’onglet Configuration, sélectionner la durée de l’acquisition à l’aide du menu déroulant : Puis appuyer sur OK, pour valider cette durée. Appuyer sur Démarrer pour lancer l’acquisition...
- Page 20 L’appli vous confirme que l’acquisition a été lancée. Le capteur peut alors être déconnecté de l’ordinateur, mais doit rester allumer. Récupérer les points enregistrés sur la tablette Connecter le capteur à la tablette et au logiciel Redy. Voir détails chapitre 6.2 Dans l’appli Redy, appuyer sur l’icône de paramétrage : FRANÇAIS...
- Page 21 Ex.A.O Capteur Ethanol REDY Réf : 488 026 Puis sélectionner Autonome dans la fenêtre d’Acquisition : Appuyer sur l’onglet Récupération. Dans la fenêtre de récupération, sélectionner votre capteur d’intérêt, puis appuyer sur IMPORTER Une icône vous informe du niveau d’avancement du téléchargement des points.
- Page 22 Ex.A.O Capteur Ethanol REDY Réf : 488 026 L’application vous informe une fois l’ensemble des points rapatriés. En appuyant sur OK, les points sont visibles dans la fenêtre graphique ainsi que dans le tableau. Caractéristiques techniques • Gamme de mesure : Dans l’air : 0 à...
- Page 23 First Use ........................24 Starting Up ......................... 24 Using the Sensor in Connected Mode to a Windows Computer ....... 24 Installing the software Redy for Windows ............24 Connecting the Sensor to the Software ............. 24 Ethanol probe calibration ................... 26 Carrying Out an Acquisition Depending on Time ..........
- Page 24 Data logging REDY Optical oximeter Sensor Ref : 488 015 Content 1 Ethanol Sensor REDY 1 type C USB cable 1 protective Cover Description Connection of the Ethanol sensor Bluetooth connection indicator Quantity measured Battery charge level indicator Value measured...
- Page 25 Your device is ready for use. 5. Using the Sensor in Connected Mode to a Windows Computer Installing the software Redy for Windows The software Redy for windows is available for downloading on the Jeulin website. Connecting the Sensor to the Software •...
- Page 26 Data logging REDY Optical oximeter Sensor Ref : 488 015 Ethanol probe calibration Check that the probe head is screwed in correctly and is not damaged. Drag and drop the sensor icon along the ordinate using the mouse as described in 5.4.
- Page 27 Data logging REDY Optical oximeter Sensor Ref : 488 015 Click set to validate the calibration. Carrying Out an Acquisition Depending on Time To carry out an acquisition with the sensor, drag and drop the sensor icon, in ordinate using the mouse :...
- Page 28 Data logging REDY Optical oximeter Sensor Ref : 488 015 All the sensor relative indications then appear under the graph: It remains to set the time, by dragging and dropping the timer icon in abscissa in the graph, as shown below :...
- Page 29 Data logging REDY Optical oximeter Sensor Ref : 488 015 All the indications relative to setting the time acquisition then appear under the graph : Hence, the user can, if he likes, modify the acquisition duration and/or the number of points.
- Page 30 Ref : 488 015 6. Using the Sensor in Bluetooth Mode on Tablet Installing the application Redy for Tablet The application Redy is free and available on Google Play or the App Store. Connecting the Sensor to the Tablet via Bluetooth •...
- Page 31 Data logging REDY Optical oximeter Sensor Ref : 488 015 • Press on yes. The sensors management space opens automatically in the application. The sensor appears in the sensors list. In order to make sure that the desired sensor is detected, you can verify that the address number written on the sensor screen, and that appearing in the application sensors list, match.
- Page 32 Data logging REDY Optical oximeter Sensor Ref : 488 015 Oxygen probe calibration Check that the probe head is screwed in correctly and is not damaged. Click on the sensor settings button in the window below Then press Calibration :...
- Page 33 Data logging REDY Optical oximeter Sensor Ref : 488 015 Then follow the steps of the procedure appearing on the screen: After pressing Calibrate, a confirmation screen appears. Follow the instructions in the second step to validate the second calibration point by dipping the probe in the standard solution.
- Page 34 Data logging REDY Optical oximeter Sensor Ref : 488 015 Return to the main screen by pressing the back arrow twice : The value read by the sensor appears in the multimeter screen, placed by default in the bottom right portion of the screen :...
- Page 35 Data logging REDY Optical oximeter Sensor Ref : 488 015 Setting the Acquisition Depending on Time 6.4.1 Parameterization of the oxygen measurement The sensor activation, detailed in the previous chapter, selects the sensor automatically for an acquisition. Therefore, no further additional configuration action needs to be taken.
- Page 36 Data logging REDY Optical oximeter Sensor Ref : 488 015 The user can, if he likes, modify the duration and the time unit. Go back to the main screen by pressing on the back arrow : Then, start the acquisition by pressing on the Start button :...
- Page 37 Ref : 488 015 7. Sensor Use in Recorder Mode Redy sensors have a data recording function. When it is activated, your sensor records automatically in its internal memory measurement points in relation to time. Once the points collection is finished, they can be transferred to a computer or a tablet for analysis.
- Page 38 Data logging REDY Optical oximeter Sensor Ref : 488 015 Then chose an acquisition duration using the drop-down menu: Click on OK to start the acquisition. The software confirms that the acquisition has started. The sensor can then be disconnected from the computer, but must remain turned on.
- Page 39 Ref : 488 015 Recovering the Points Recorded on the Computer Connect the sensor to the computer and the software Redy. See details chapter 5.2 In the toolbar, click on Standalone mode and then Get : In the recovery window, select you desired sensor and then click on OK.
- Page 40 The points can also be visualized in the Table window. Setting the Recorder Mode using a Tablet Connect the sensor to the tablet and the software Redy. See details chapter 6.2 In the application Redy, click on the configuration icon:...
- Page 41 Data logging REDY Optical oximeter Sensor Ref : 488 015 In the tab Configuration, select the acquisition duration using the drop-down menu: Then click on OK to validate this duration. Click on Start to start the acquisition The application confirms that the acquisition has started. The sensor can then be disconnected from the computer but should remain turned on.
- Page 42 Ref : 488 015 Recovering the Points Recorded on the Tablet Connect the sensor to the tablet and the software Redy. See details chapter 6.2 In the application Redy, click on the configuration icon: Then select Autonomous in the Acquisition window:...
- Page 43 Data logging REDY Optical oximeter Sensor Ref : 488 015 Click on the Recovery tab. In the recovery window, select your desired sensor then click on IMPORT An icon shows the points download progress. The application notifies you once all the points are recovered.
- Page 44 Data logging REDY Optical oximeter Sensor Ref : 488 015 By clicking on OK, the points become visible in the graph window as well as in the table. 8. Technical Specifications • Measuring range: : 0 à 2.5% - in the air : o –...
- Page 45 Data logging Capteur Ethanol REDY Réf : 488 015 ENGLISH...