Publicité
Les langues disponibles
Les langues disponibles
Liens rapides
Model#
SKU#
HD67211W-6A01
1001651192
INSTALLATION AND CARE GUIDE
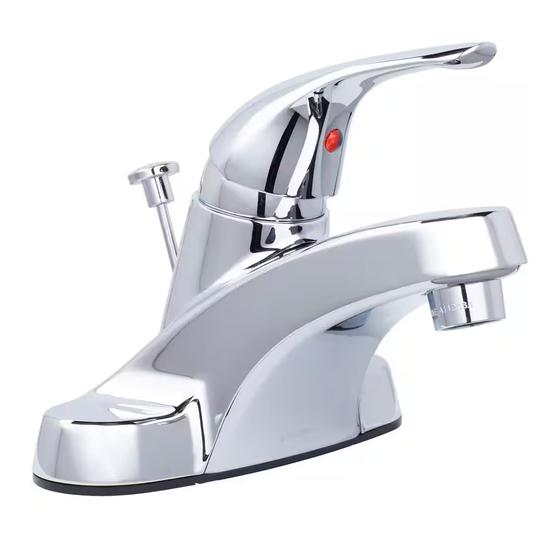
ARAGON 4 IN. CENTERSET SINGLE-HANDLE
LOW-ARC BATHROOM FAUCET
Questions, problems, missing parts?
Before returning to the store, call Glacier Bay Customer Service
8 a.m. - 7 p.m., EST, Monday - Friday
9 a.m. - 6 p.m., EST, Saturday
1-855-HD-GLACIER (1-855-434-5224)
HOMEDEPOT.CA
THANK YOU
We appreciate the trust and confidence you have placed in Glacier Bay through the purchase of this lavatory
faucet. We strive to continually create quality products designed to enhance your home. Visit us online to see
our full line of products available for your home improvement needs. Thank you for choosing Glacier Bay!
HDC
7/2021 REV.01
Publicité

Manuels Connexes pour Glacier bay HD67211W-6A01


Sommaire des Matières pour Glacier bay HD67211W-6A01
- Page 1 HOMEDEPOT.CA THANK YOU We appreciate the trust and confidence you have placed in Glacier Bay through the purchase of this lavatory faucet. We strive to continually create quality products designed to enhance your home. Visit us online to see our full line of products available for your home improvement needs. Thank you for choosing Glacier Bay!
- Page 2 Glacier Bay products are manufactured with superior quality standards and workmanship and are backed by our limited lifetime warranty. Glacier Bay products are warranted to the original consumer purchaser to be free of defects in materials or workmanship. We will replace FREE OF CHARGE any product or parts that proves defective.
- Page 3 Pre-Installation (continued) PACKAGE CONTENTS Faucet Assembly ClickInstall Drain Assembly NOTE: *Items E - I come pre-assembled. Part Description Quantity Part Description Quantity Lock nut Faucet Gasket Drain body Washer Joint Lock nut Horizontal rod Pop up stopper Lift rod strap Pop-up flange Clip Rubber washer...
- Page 4 Installation Installing the faucet assembly Preparing the pop-up assembly □ Remove the pop-up stopper (E) and drain CAUTION: Always shut off the water supply before flange (F) from the drain body (I). removing an existing faucet or replacing any part of a faucet.
- Page 5 Installation (continued) Installing the stopper and Installing the drain body horizontal rod □ □ Apply silicone sealant (not included) under the Before installation, unscrew the protective cap (1) drain flange (F) and place the drain flange (F) from the horizontal rod (K). into the drain hole of the sink.
- Page 6 Slide the lift rod (N) down into the lift rod strap (L) through the faucet (A) until it clicks into the lift rod strap (L). NOTE: If a shorter lift rod (N) is required for your installation, you may call Glacier Bay Customer Service for assistance. Attaching the horizontal rod and strap □...
- Page 7 Installation (continued) Adjusting the length of lift rod strap (optional) □ If the pop up lift rod strap (L) is interfering with your installation, as shown in Fig. 1, the lift rod strap (L) can be cut shorter. □ Once you have identified the proper hole in the lift rod strap (L) that is necessary for your installation, you may cut off the bottom portion (1) of the lift rod strap (L) by snapping it off with pliers or cutting it off with a saw at the cutting point (2), as shown in Fig.
- Page 8 Installation (continued) Making the water supply connections NOTE: The hot side inlet tube is indicated by a label. □ Use 1/2 in. I.P.S. faucet connections (2), or use supply line coupling nuts (3) (not included) with a 3/8 in. O.D. ball-nose riser (1). □...
- Page 9 Care and Cleaning □ To clean, wipe down with a damp cloth and dry with a towel. □ Do not use abrasive cleaners, steel wool, or harsh chemicals when cleaning this faucet, or the warranty will be voided. Troubleshooting NOTE: Refer to the service parts section in this manual for a detailed drawing showing the location of the parts listed below.
- Page 10 Service Parts Faucet ID tags can be found on the hot water inlet Part Description Part Number Part Description Part Number Handle assembly RP13531* Aerator RP30190* Bonnet nut RP70138 Gasket RP80082 RP80108* Washer RP64083 RP70107 Lock nut RP56033 Cam washer RP70108 ClickInstall™...
- Page 11 Questions, problems, missing parts? Before returning to the store, call Glacier Bay Customer Service 8 a.m. - 7 p.m., EST, Monday - Friday 9 a.m. - 6 p.m., EST, Saturday 1-855-HD-GLACIER (1-855-434-5224) HOMEDEPOT.CA Retain this manual for future use.
- Page 12 HOMEDEPOT.CA MERCI Nous vous remercions d'avoir fait confiance à Glacier Bay en achetant ce robinet de salle de bains. Nous efforçons en permanence de créer des produits de qualité conçus pour perfectionner votre maison. Vous pouvez visiter notre site en ligne pour consulter notre gamme complète de produits pour vos besoins de rénovation résidentielle.
- Page 13 GARANTIE À VIE LIMITÉE Les produits Glacier Bay sont fabriqués dans le respect de normes de qualité supérieure et sont protégés par notre garantie à vie limitée. Les produits Glacier Bay sont garantis contre les défauts de fabrication et de matériaux, pourvu que l’acheteur original soit le propriétaire.
- Page 14 Pré-installation (suite) CONTENU DE L'EMBALLAGE Robinet Évacuation ClickInstall REMARQUE : *Les articles E à I sont fournis pré-assemblés. Pièce Description Quantité Pièce Description Quantité Robinet Contre-écrou Joint d'étanchéité Corps d'évacuation Rondelle Joint Contre-écrou Tige horizontale Bonde d’évacuation Sangle de tige mécanique de levage Attache...
- Page 15 Installation Installation de l'ensemble de Préparation de l'évacuation robinetterie mécanique □ Retirez la bonde de l’évacuation mécanique (E) ATTENTION : Fermez toujours l’alimentation en eau CAUTION: Always turn off the water supply before et la bride d’évacuation (F) du corps avant de retirer un robinet existant ou d’en remplacer une removing an existing faucet or replacing any part of a d’évacuation (I).
- Page 16 Installation (suite) Installation du corps Installation de la bonde et de d'évacuation la tige horizontale □ □ Appliquez du mastic à la silicone (non compris) Avant l’installation, dévissez le capuchon de sous la bride d’évacuation (F) et placez la bride protection (1) de la tige horizontale (K).
- Page 17 (A), jusqu’à ce qu’elle s’enclenche dans la courroie de la tige de levage (L). REMARQUE : Si une tige de levage (N) plus courte est requise pour votre installation, vous pouvez contacter le service à la clientèle de Glacier Bay pour une assistance. Fixation de la tige horizontale et la courroie □...
- Page 18 Installation (suite) Régler la longueur de la sangle de la tige de levage (facultatif) □ Si la sangle de la tige de levage de l’évacuation mécanique (L) gêne votre installation, comme illustré sur la Fig. 1, la sangle de la tige de levage (L) peut être raccourcie. □...
- Page 19 Installation (suite) Raccordement des conduites d’alimentation en eau REMARQUE : Le tuyau d'arrivée de l'eau chaude est indiqué par une étiquette. □ Utilisez des raccords de robinet IPS de 1,27 cm (½ po) (2), ou utilisez des écrous d'accouplement pour conduite d'alimentation (3) (non compris) avec une colonne montante à...
- Page 20 Entretien et nettoyage □ Pour nettoyer, essuyez avec un linge humide et séchez avec une serviette. □ N'utilisez pas de nettoyants abrasifs, de la laine d’acier ou de produits chimiques abrasifs pour nettoyer ce robinet, sinon la garantie sera annulée. Dépannage REMARQUE : Consultez la section pièces de rechange de ce guide pour une illustration détaillée de l’emplacement...
- Page 21 Pièces de rechange Les étiquettes d’identité du robinet se trouvent sur l’arrivée d’eau chaude Pièce Description Numéro de pièce Pièce Description Numéro de pièce Manette RP13531* Aérateur RP30190* Écrou de chapeau RP70138 Joint d'étanchéité RP80082 Capuchon RP80108* Rondelle RP64083 Came RP70107 Contre-écrou RP56033...
- Page 22 Questions, problèmes, pièces manquantes? Avant de retourner au magasin, appelez le service à la clientèle Glacier Bay entre 8 h et 19 h, HNE, du lundi au vendredi au entre 9 h et 18 h, HNE, le samedi au 1-855-HD-GLACIER (1-855-434-5224) HOMEDEPOT.CA...