Publicité
Liens rapides
by
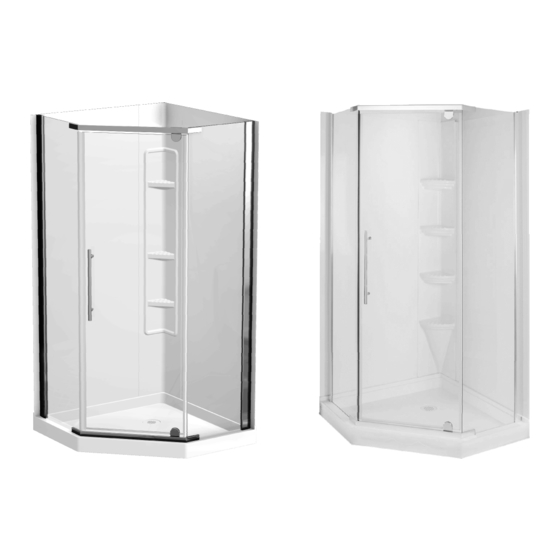
MANUEL D'INSTALLATION POUR DOUCHES
CONTENU
Base de douche x 1
Drain x 1
Porte de douche x 1
Panneau de côté x 2
Étagère en coin x 1
450.699.2424 – 1 877.377.4494 450.699.8484 info@technoform.ca www.technoform.ca
38" NEO‐ANGLE
SHOWERS INSTALLATION MANUAL
par
CONTENT
Shower base x 1
Drain x 1
Shower door x 1
Side panel x 2
Corner caddy x 1
TSSK38202003‐08
Publicité

Sommaire des Matières pour Technoform Techno Design 38 NEO-ANGLE
- Page 1 CONTENU CONTENT Base de douche x 1 Shower base x 1 Drain x 1 Drain x 1 Porte de douche x 1 Shower door x 1 Panneau de côté x 2 Side panel x 2 Étagère en coin x 1 Corner caddy x 1 450.699.2424 – 1 877.377.4494 450.699.8484 info@technoform.ca www.technoform.ca TSSK38202003‐08 ...
-
Page 2: Outils & Matériaux Requis
à l'aide d'une truelle. Nous vous recommandons d'utiliser un adhésif de couleur blanche ou claire puisque l'adhésif de couleur brunâtre sera possiblement visible à travers les panneaux. Veuillez suivre les instructions du fabricant de l'adhésif pour les mises en garde et le mode d'emploi. Technoform ne se tiendra aucunement responsable si le consommateur avisé pose le produit à l'aide d'un adhésif 1) qui n'est pas recommandé pour le polystyrène 45 millièmes d'épaisseur maximum (et qui pourrait donc potentiellement contenir trop de solvant, endommageant ainsi le produit) ; 2) qui ne peut ... - Page 3 AVANT DE COMMENCER | PRIOR TO STARTING Ce manuel traite de l’installation et de l’entretien de votre nouvelle douche Techno Design® par Industries Technoform Ltée. Veuillez en lire le contenu avant d’entamer l’installation. Par la suite, assurez‐vous de le conserver dans un lieu sûr pour référence future. Retirez le produit de son emballage, vérifiez que toutes les composantes s’y trouvent, enlevez la ...
- Page 4 4. Coupez le tuyau du drain à 1 3/4'' à partir du dessous du plancher (ou à 2 1/2'' à partir du dessus du plancher) (Fig. 3). Repositionnez la base de douche dans son alcôve par‐dessus le drain. 5. Percez des trous dans la bride de carrelage (3 de chaque côté) à l'aide d'une mèche à fraiser, puis vissez dans les montants muraux à l'aide de vis no. 8 X 1 1/4 (Fig. 1 + 4). 6. Terminez l'installation du drain selon les instructions du manufacturier. 1. Place the shower base into the alcove and make sure that it is levelled. Trace a pencil line for the cutting of the drywall. Remove the shower base. 2. Cut a drywall section of 38" X 4 1/2" along the shower base, on each side, as per your pencil line. 3. Install the drain on the shower base (Fig. 3). If additional sealant is required, acrylic caulk or plumbers putty should be used. 4. Cut the drain pipe at 1 3/4'' from underneath the floor (or at 2 1/2'' from above the floor) (Fig. 3). Place the shower base into the alcove over the drain pipe. 5. Drill countersink holes through the tiling flange (3 screws on each side), then secure with no. 8 X 1 ¼ screws on the studs (Fig. 1 + 4). 6. Finish the drain installation as per the manufacturer's instructions. 450.699.2424 – 1 877.377.4494 450.699.8484 info@technoform.ca www.technoform.ca TSSK38202003‐08 ...
- Page 5 L'utilisation de grattoir, brosse ou tout autre objet pouvant endommager la surface du produit est à proscrire. L'application régulière d'une cire pour auto de qualité contribuera à maintenir le lustre du produit et en facilitera l'entretient. Clean with gentle soap (dishwashing liquid). DO NOT use any abrasive or corrosive cleaning products. Using these products may damage the components and void the warranty. The use of gritting, scraper, brushes or any other object which can damage the surface of the product is proscribed. A regular application of a quality wax will help maintain the surface finish and facilitate the maintenance. 450.699.2424 – 1 877.377.4494 450.699.8484 info@technoform.ca www.technoform.ca TSSK38202003‐08 ...
- Page 6 This product is warranted against any manufacturing defect from the date of purchase indicated on the consumer sales receipt. Technoform Industries Ltd offers a limited warranty of three (3) years on its showers. This warranty is limited to the original consumer purchaser and is applicable for the product only. Labor charges, traveling expenses, installation /uninstallation fees, as well as carrier fees are not covered. At its discretion, the manufacturer will, at its own expense, replace or repair any defective product during the warranty period if the installation is compliant (does not include the aforementioned costs). The ...
- Page 7 FIGURE 7 FIGURE 8 FIGURE 9 FIGURE 10 FIGURE 11 450.699.2424 – 1 877.377.4494 450.699.8484 info@technoform.ca www.technoform.ca TSSK38202003‐08 ...


