
Manuels Connexes pour Brandt CPN-806

Sommaire des Matières pour Brandt CPN-806
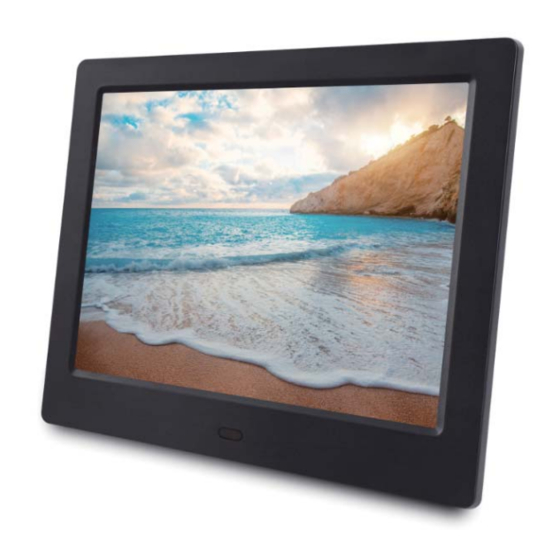
- Page 1 CPN-806 CADRE PHOTO NUMÉRIQUE DIGITAAL FOTOKADER MARCO DE FOTOS DIGITAL MOLDURA DE FOTOS DIGITAL DIGITAL PHOTO FRAME...
- Page 4 AVERTISEMENT • Cet appareil est destiné à un usage domestique uniquement. Toute utilisation autre que celle prévue pour cet appareil, ou pour une autre application que celle prévue, par exemple une application commerciale, est interdite. • Aération Prévoyez un espace libre d'au moins 10 cm tout autour du produit. •...
- Page 5 CONTENU DE L'EMBALLAGE • Cadre photo numérique (1) • Adaptateur secteur (1) • Manuel d'instructions (1) • Attache (1) • Télécommande(1) DESCRIPTION DES PIÈCES 1. Bouton marche/arrêt 2. Touches 3. Touche Menu 4. Fente de carte 5. Port 6. Port 7.
- Page 6 UTILISATION DE LA TÉLÉCOMMANDE Les illustrations ci-dessous ne sont fournies qu’à titre indicatif. Film isolant La pile est déjà installée et un f ilm isolant est intercalé dans le compartiment de la pile de la télécommande. Enlevez ce f ilm isolant avant d'utiliser la télécommande. La télécommande cesse de fonctionner lorsque la pile est épuisée.
- Page 7 ALLUMER/ÉTEINDRE LE CADRE PHOTO Pour allumer le cadre photo, reliez le connecteur de l'adaptateur secteur fourni à la prise du cadre, puis branchez l'adaptateur sur une prise de courant. L'écran affiche brièvement l'image d'accueil. Pour éteindre le cadre photo, appuyez sur .
- Page 8 AFFICHAGE DES PHOTOS 1. Insérez fermement une carte mémoire ou un périphérique USB dans le logement ou le port correspondant du cadre photo. • La lecture commence automatiquement et les images de la carte mémoire ou du périphérique USB s’affichent l’une après l’autre sous forme de diaporama.
- Page 9 4. Par appuis répétés sur les touches , sélectionnez l'un des statuts suivants : Une fois, Chaque fois ou Off. Appuyez sur pour confirmer. SPÉCIFICATIONS Modèle CPN-806 Adaptateur secteur Entrée : AC100-240V~, 50/60Hz, 0.2A Max. Sortie : 5,0 V 1,0 A Résolution du panneau 800 x 600 pixels Format d'écran...
- Page 10 GUIDE DE DÉPANNAGE Problème Cause possible / Solution Pas d’alimentation. Vérifiez si le câble d’alimentation est correctement relié à l'unité et branché sur une prise de courant. L'écran se f ige et ne répond Dysfonctionnement possible de l'appareil. Éteignez l'appareil et pas aux commandes.
- Page 11 WAARSCHUWINGEN: • Dit apparaat is alleen bestemd voor huishoudelijk gebruik en mag niet voor andere doeleinden of toepassingen worden gebruikt, zoals niet-huishoudelijk gebruik of in een commerciële omgeving. • Ventilatie Laat minstens een vrije ruimte van 10cm rond het product. •...
- Page 12 INHOUD VAN DE VERPAKKING • Digitaal fotoframe (1) • Netadapter (1) • Gebruikershandleiding (1) • Beugel (1) • Afstandsbediening(1) BESCHRIJVING VAN DE ONDERDELEN aan/uit knop knoppen menu knop kaartsleuf poort poort aansluiting NL-9...
- Page 13 WERKING VAN DE AFSTANDSBEDIENING Onderstaande tekeningen dienen alleen ter referentie. Isolatiestrookje De batterij is reeds geïnstalleerd en een isolatiestrookje is in het batterijvak van de afstandsbediening aangebracht. Verwijder het isolatiestrookje voordat u de afstandsbediening in gebruik neemt. De afstandsbediening stopt met werken wanneer de batterij leeg raakt. In dit geval, volg de i nstructies om de batterij te vervangen.
- Page 14 HET FOTOFRAME IN- /UITSCHAKELEN Om het fotoframe in te schakelen, sluit één uiteinde van de meegeleverde netadapter aan op de aansluiting van het fotoframe en steek de stekker vervolgens in een stopcontact. Een welkomstafbeelding wordt kort op het scherm weergegeven. Om het fotoframe uit te schakelen, druk op en het fotoframe wordt uitgeschakeld.
- Page 15 FOTO'S WEERGEVEN 1. Stop een geheugenkaart of een USB-geheugenapparaat in de overeenkomstige sleuf of poort van het fotoframe. • Het afspelen start automatisch en de afbeeldingen op de geheugenkaart of het USB-geheugenapparaat worden opeenvolgend als een diashow weergegeven. 2. Druk op om het afspelen te onderbreken.
- Page 16 4. Druk herhaaldelijk op om de status in te stellen – Eenmaal, Telkens of Uit. Druk op om te bevestigen. TECHNISCHE GEGEVENS Model CPN-806 Netadapter Invoer: AC100-240V~, 50/60Hz, 0.2A Max. Uitvoer: 5,0V 1,0A Schermresolutie 800 x 600 pixels...
- Page 17 PROBLEEMOPLOSSING Probleem Mogelijke oorzaak / Oplossing Geen vermogen De netadapter is niet goed op het apparaat en het stopcontact aangesloten. Het scherm loopt vast en Het apparaat functioneert niet goed. Schakel het apparaat uit, reageert niet. wacht enkele minuten en schakel het opnieuw in. Onmogelijk om de De geheugenkaart of het USB-apparaat is niet goed aangebracht.
- Page 18 ADVERTENCIAS • Este aparato ha sido diseñado solamente para uso doméstico y no deberá utilizarse para ningún otro propósito o aplicación, como puedan ser fines no domésticos o comerciales. • Ventilación Deje un espacio mínimo de 10 cm alrededor del producto. •...
- Page 19 CONTENIDO • Marco de fotos digital (1) • Adaptador de alimentación (1) • Manual de instrucciones (1) • Soporte (1) • Control remoto(1) IDENTIFICACIÓN DE PARTES 1. Botón de encendido/apagado 2. Botones 3. Botón del menú 4. Lector de tarjetas 5.
- Page 20 OPERACIONES CON EL MANDO A DISTANCIA Las ilustraciones siguientes solo se muestran a modo de referencia. Lámina aislante La pila ya viene instalada junto con una lámina aislante en el compartimento de la pila del mando a distancia. Retire la lámina aislante antes de usar el mando a distancia. El mando a distancia dejará...
- Page 21 CÓMO ENCENDER O APAGAR EL MARCO DE FOTOS Para encender el marco de fotos, conecte un extremo del adaptador de alimentación a la toma de alimentación del marco de fotos y enchufe el adaptador a la toma de corriente. La pantalla mostrará una imagen de inicio. Para apagar el marco de fotos, pulse .
- Page 22 VISUALIZACIÓN DE FOTOS 1. Inserte una tarjeta de memoria o un dispositivo de memoria USB en la ranura o puerto correspondiente del marco de fotos. • La reproducción se iniciará automáticamente y las imágenes de la tarjeta de memoria o el dispositivo de memoria USB se mostrarán una tras otra a modo de presentación.
- Page 23 Una vez, Siempre o Desactivado. Pulse para confirmar. ESPECIFICACIONES Modelo CPN-806 Adaptador de alimentación Corriente de entrada: AC 100-240 V~ , 50/60 Hz, 0.2A Max. Corriente de salida: 5,0 V 1,0 A Resolución de la pantalla 800 x 600 píxeles...
- Page 24 SOLUCIÓN DE PROBLEMAS Problema Posible causa / Solución No se pone en El adaptador de alimentación no está bien conectado a la unidad funcionamiento o la toma de corriente. Het scherm loopt vast en La unidad podría haber sufrido un fallo en su funcionamiento. reageert niet.
- Page 25 AVISOS • Este aparelho destina-se apenas a uma utilização doméstica e não deve ser utilizado para qualquer outro fim ou em qualquer outra aplicação, tal como a utilização não doméstica ou num ambiente comercial. • Ventilação Permita uma folga mínima de 10 cm em redor do produto. •...
- Page 26 CONTEÚDO DA EMBALAGEM • Moldura de fotos digitais (1) • Adaptador da alimentação (1) • Manual de instruções (1) • Suporte (1) • Controle remoto(1) IDENTIFICAR AS PARTES 1. Botão da alimentação 2. Botões 3. Botão do menu 4. Ranhura para o cartão 5.
- Page 27 FUNCIONAMENTO COM TELECOMANDO As imagens em baixo servem apenas de referência. Película de isolamento A pilha já vem instalada e está inserida uma película de isolamento no compartimento da pilha do telecomando. Retire a película de isolamento antes de usar o telecomando. O telecomando pára de funcionar quando a pilha ficar gasta.
- Page 28 LIGAR E DESLIGAR A MOLDURA Para ligar a moldura, ligue uma extremidade do adaptador fornecido na entrada na moldura, e ligue o adaptador na tomada. O visor apresenta brevemente uma imagem de abertura. Para desligar a moldura, prima e a moldura desliga-se. Desligue o adaptador da alimentação da moldura e da tomada.
- Page 29 EXIBIR FOTOS 1. Insira um cartão de memória ou uma memória USB firmemente na ranhura ou porta correspondente da moldura de fotos. • A reprodução começará automaticamente e as imagens no cartão de memória ou memória USB serão exibidas uma após a outra como uma apresentação de diapositivos.
- Page 30 4. Prima repetidamente para definir o estado: Uma vez, Sempre ou Desligado. Prima para conf irmar. CARACTERÍSTICAS TÉCNICAS Modelo CPN-806 Adaptador da alimentação Entrada: AC100-240V~, 50/60Hz, 0.2A Max. Saída: 5,0V 1,0A Resolução do painel 800 x 600 pixéis Formato do ecrã...
- Page 31 RESOLUÇÃO DE PROBLEMAS Problema Causa possível/solução Não há energia. O adaptador da alimentação não está devidamente ligado ao aparelho e à tomada elétrica. O ecrã bloqueia e não O aparelho pode ter avariado. Desligue-o e aguarde alguns responde aos controlos. minutos até...
- Page 32 WARNINGS • This appliance is intended for domestic household use only and should not be used for any other purpose or in any other application, such as for non domestic use or in a commercial environment. • Ventilation Allow at least a 10 cm gap all around the product. •...
- Page 33 PACKAGE CONTENT • Digital photo frame (1) • Power adapter (1) • Instruction manual (1) • Bracket (1) • Remote control(1) IDENTIFYING THE PARTS Power button Buttons Menu button Card slot Port Port Socket EN-30...
- Page 34 REMOTE CONTROL OPERATION The illustrative drawings below are only for reference. Insulation sheet The battery is already installed and an insulation sheet is inserted into the remote control battery compartment. Remove the insulation sheet before using the remote control. The remote control will stop functioning when the battery is run down. In this case, follow the instructions below to replace the battery.
- Page 35 TURNING ON OR OFF THE PHOTO FRAME To turn on the photo frame, connect one end of the supplied power adapter to the jack on the photo frame, and plug the power adapter into the mains socket. The display will briefly show the opening image. To turn off the photo frame, press and the photo frame will be turned off.
- Page 36 DISPLAYING PHOTOS 1. Insert a memory card or USB memory firmly into the corresponding slot or port of the photo frame. • Playback will automatically begin and images on the memory card or USB memory will be displayed one after another as a slideshow. 2.
- Page 37 Auto Power Off 4. Repeatedly press to set the status – Once, Every time or Off. Press to confirm. SPECIFICATIONS Model CPN-806 Power adapter Input: AC100-240V~, 50/60Hz, 0.2A Max. Output: 5.0V 1.0A Panel resolution 800 x 600 pixels Screen format...
- Page 38 TROUBLESHOOTING Problem Possible Cause / Solution No power The power adapter is not properly connected to the unit and the mains socket. Screen freezes and does The unit may have malfunctioned. Switch it off and wait for a few not respond to control. minutes before turning it on again.