Table des Matières
Publicité
Les langues disponibles
Les langues disponibles
Liens rapides
Publicité
Table des Matières
Dépannage

Manuels Connexes pour Danby DIPLOMAT DAR163BLDP

Sommaire des Matières pour Danby DIPLOMAT DAR163BLDP
- Page 1 ALL REFRIGERATOR TOUT RÉFRIGÉRATEUR TODA REFRIGERADOR • Owner’s Use and Care Guide • Guide d’utilisation et soins de Propriètaire • Manual de Instructions pare el Uso y Cuidado de su Unidad Model • Modèle • Modelo DAR163BLDP/DAR163SLDP V2.05.10.DM...
-
Page 2: Table Des Matières
• Dépannage • Garantie TODA REFRIGERADOR 19-27 Guía para utilizar y cuidar del Proprietario • Instruciónes de Seguridad Importantes • Instrucciones d’instalación • Instruciónes Operadoras • Instrucciones de montaje • Limpieza y Mantenimiento • Solución Sugeridad • Garantia DAR163BLDP DAR163SLDP... -
Page 3: Important Safety Information
IMPORTANT SAFETY INFORMATION READ ALL SAFETY INFORMATION BEFORE USING ELECTRICAL DO NOT USE AN EXTENSION CORD Use an exclusive wall outlet. Do not connect your REQUIREMENTS freezer to extension cords or together with any other appliance in the same wall outlet. Do not splice the cord. -
Page 4: Installation Instructions
INSTALLATION INSTRUCTIONS LOCATION NOTES: Remove exterior and interior packings, wipe the • This appliance is intended for FREE-STANDING outside thoroughly with a soft dry cloth and the inside INSTALLATION ONLY, and is NOT intended to be with a wet, lukewarm cloth. Avoid placing the unit in a built-in. -
Page 5: Door Reversal Instructions
INSTALLATION INSTRUCTIONS DOOR REVERSAL INSTRUCTIONS 7. Position the main door back on the cabinet and 1. Lay the unit on it’s back. push up until the top hinge pin is inserted into the top of the door. 2. Remove the kickplate by removing the three retaining screws. -
Page 6: Operating Instructions
INSTALLATION INSTRUCTIONS CASTOR INSTALLATION The locking swivel castors should be installed in the front of the unit for easy access. 1. Lay the unit on it’s back. 2. Remove the four(4) adjustable feet. 3. Casor Installation as shown in Fig A Fig. - Page 7 OPERATING INSTRUCTIONS ELECTRONIC CONTROLS To turn “off” the refrigerator permanently, you must dis- DEFAULT SETTINGS (con’t) connect the power cord from the electrical outlet. There is no “off” position (setting) available on the electronic The LED default setting for the internal temperature is control panel.
-
Page 8: Assembly Instructions
ASSEMBLY INSTRUCTIONS ASSEMBLY INSTRUCTIONS 1. Installation of top rail (as shown in Fig.1.) 2. Installation of CO2 Cylinder Support: Install the cylinder support onto the four studs located on the exterior back wall of the cabinet. (no tools required) Align the holes in the cylinder support with the studs and push down firmly. -
Page 9: Care And Maintenance
CARE AND MAINTENANCE CLEANING VACATION TIME For short vacation periods, leave the control knob at its To clean the inside, use a soft cloth and a mixture of normal setting. During longer absences: one tablespoon of baking soda to one quart of water. (a) remove all foods. -
Page 10: Troubleshooting
TROUBLESHOOTING Occasionally, a problem is minor and a service call may not be necessary- use this troubleshooting guide for a possible solution. If the unit continues to operate improperly, call an authorized service depot or Danby’s Toll Free Number 1-800-263-2629 for assistance. PROBLEM POSSIBLE CAUSE SOLUTION... -
Page 11: Terms Of Warranty
LIMITED APPLIANCE WARRANTY This quality product is warranted to be free from manufacturer’s defects in material and workmanship, provided that the unit is used under the normal operating conditions intended by the manufacturer. This warranty is available only to the person to whom the unit was originally sold by Danby Products Limited (Canada) or Danby Products Inc. -
Page 12: Consignes De Sécurité
CONSIGNES DE SÉCURITÉ IMPORTANT LISEZ TOUTES LES INFORMATIONS DE SÉCURITÉ AVANT DE FAIRE FONCTIONNER L’APPAREIL CONDITIONS ÉLECTRIQUES N’UTILISER JAMAIS DE FIL DE RALLONGE: S’il est possible, brancher le réfrigérateur à son propre circuit. Ainsi, les autres appareils ou la surcharge des lampes Cet appareil doit être mis à... -
Page 13: Élimination Des Appareils Usés (Suite)
CONSIGNES DE SÉCURITÉ IMPORTANT ÉLIMINATION DES APPAREILS USÉS (suite) Le système frigorifique de l'appareil contient un fluide frigorigène et des substances isolantes qui doivent être transformés et traités séparément. Appelez votre réparateur autorisé ou centre de réparations spécialisé le plus proche. Si vous êtes dans l'impossibilité d'en trouver un, contactez les autorités ou le distributeur de votre localité. -
Page 14: Caractéristiques
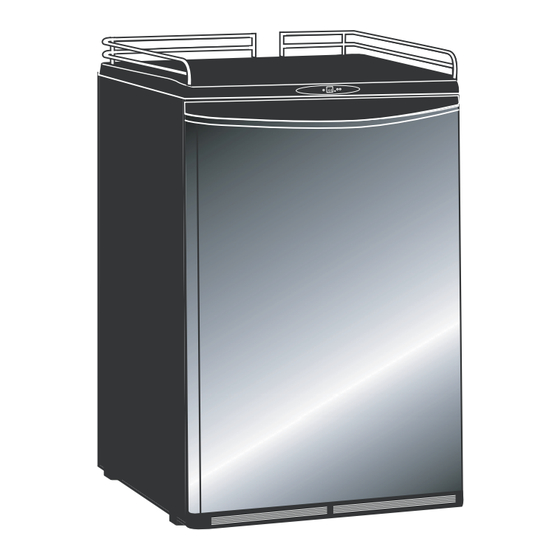
CONSIGNES DE INSTALLATION CARACTÉRISTIQUES 3. Porte d’acier inoxydable/porte noire 1. Surface de travail et rail chromés 4. Pieds de mise à niveau ou roulettes pivotantes facultatives (comprises) 2. Commandes et affichage électroniques INSTRUCTIONS DE PORTE REVERSIBLE 7. Placez la porte principale sur le boîtier et poussez-la vers 1. -
Page 15: Instructions De Porte Reversible(Suite)
CONSIGNES DE INSTALLATION INSTRUCTIONS DE PORTE REVERSIBLE(suite) INSTALLATION DES ROULETTES Les roulettes pivotantes verrouillables doivent être installées à l’avant de l’appareil pour un accès facile. 1. Couchez l’appareil sur son dos. 2. Retirez les quatre (4) pieds réglables. 3. Installation des roulettes (comme illustré dans la Fig A) Fig. -
Page 16: Consignes D'utilisation
CONSIGNES D’UTILISATION RÉGLAGE DE LA TEMPÉRATURE DE FONCTION- COMMANDES NEMENT : pour régler ou modifier la température de fonctionnement :1) Appuyez sur l’une des touches de ÉLECTRONIQUES réglage de la température, puis relâchez. L’écran à DEL affiche temporairement (en clignotant) la température réglée pendant environ 5 secondes (si vous ne réglez ou ne modifiez pas la température de fonctionnement dans cette période de 5 secondes,... -
Page 17: Instructions De Montage
INSTRUCTIONS DE MONTAGE INSTRUCTIONS DE MONTAGE 1. Installation du rail supérieur (Fig 1) 2.Installez le soutien de bouteille de gaz carbonique : Installez le soutien de bouteille sur les goujons situés sur la paroi extérieure arrière du boîtier (aucun outil n’est requis). -
Page 18: Soins Et Entretien
SOINS ET ENTRETIEN PENDANT LES VACANCES ENTRETIEN Si vous prenez une vacance de courte durée, laissez le Pour nettoyer l'intérieur, utilisez un chiffon doux et une bouton de commande à son réglage normal. Si l'ab- solution composée d'une pinte d'eau et d'une cuillerée à sence doit durer longtemps, savon de poudre à... -
Page 19: Dépannage
DÉPANNAGE De temps en temps, un problème est mineur et un appel de service peut ne pas être nécessaire. Utilisez ce guide de dépannage pour trouver une solution possible. Si l’unité continue de fonctionner incorrectement, appelez un dépôt de service autorisé ou le numéro sans frais pour obtenir de l’assistance. Tel: 1-800-263-2629 CAUSE PROBABLE PROBLEME PROBLEME... -
Page 20: Garantie Limitée Sur Appareil Électroménager
GARANTIE LIMITÉE SUR APPAREIL ÉLECTROMÉNAGER Cet appareil de qualité est garantie exempt de tout vice de matière première et de fabrication, s’il est utilisé dans les conditions normales recommandées par le fabricant. Cette garantie n’est offerte qu’à l’acheteur initial de l’appareil vendu par Danby Products Limited (Canada) ou Danby Products Inc. -
Page 21: Instruciónes De Seguridad Importantes
INSTRUCCIONES DE SEGURIDAD IMPORTANTES LEA TODAS LAS INSTRUCCIONES DE SEGURIDAD ANTES DE UTILIZARLA INSTALLATION RÉGLABLE NO USE UN CORDÓN DE PROLONGACIÓN ELÉCTRICA: Use un tomacorriente de pared exclusi- vo. No conecte su refrigerador a cordones de prolon- Este artefacto debe ser conectado a tierra. En caso de gación eléctrica o junto a cualquier otro electrodomés- un corto circuito eléctrico, la conexión a tierra reduce el tico en el mismo tomacorriente de pared. -
Page 22: Instrucciones D'instalación
INSTRUCCIONES DE SEGURIDAD IMPORTANTES CÓMO DESECHAR LOS APARATOS USADOS Cuando su aparato quede inutilizable definitivamente, deséchelo en forma segura. Si el aparato está equipado con un mecanismo de bloqueo de puerta que no pueda abrirse desde el interior (pestillo, perno), asegúrese de retirar dicho mecanismo, deshabilitarlo o destruirlo antes de desechar el producto. -
Page 23: Características
INSTRUCCIONES D’INSTALACIÓN CARACTERÍSTICAS 3. Puerta de acero inoxidable/puerta 1. Mesada y barandilla negro cromada 4. Patas niveladoras o rueditas 2. Controles/indicadores opcionales (incluidas) electrónicos LAS INSTRUCCIONES DE INVERSIÓN DE LA PUERTA 7. Coloque la puerta principal nueva mente en el gabinete 1. - Page 24 INSTRUCCIONES D’INSTALACIÓN LAS INSTRUCCIONES DE INVERSIÓN DE LA PUERTA (continuado) INSTALACION DE LAS RUEDAS Las rueditas con traba deben instalarse en el frente de la unidad para facilitar el acceso. 1. Acueste la unidad sobre su parte posterior. 2. Quite las cuatro (4) patas ajustables. 3.
-
Page 25: Instruciónes Operadoras
INSTRUCIÓNES OPERADORAS CÓMO ESTABLECER LA TEMPERATURA DE FUN- CONTROLES CIONAMIENTO:Para establecer o cambiar la temper- atura de funcionamiento: 1) Pulse y suelte cualquiera de ELECTRÓNICOS los botones (de control de temperatura). La pantalla LED mostrará temporalmente (en modo parpadeante) la temperatura establecida durante aproxi- madamente 5 segundos (si usted no establece/cambia la temperatura de funcionamiento durante esos 5 segundos, la pantalla volverá... -
Page 26: Instrucciones De Montaje
INSTRUCCIONES DE MONTAJE INSTRUCCIONES DE MONTAJE 1. Instalación del riel superior (como se muestra en la Fig. 1.) 2. Instalación del soporte de cilindro de CO2: Coloque el soporte del cilindro sobre los cuatro tachones ubicados en la pared exterior trasera del gabinete. (No necesita herramientas). -
Page 27: Limpieza Y Mantenimiento
LIMPIEZA Y MANTENIMIENTO LIMPIEZA PERÍODO DE VACACIONES Para limpiar el interior, utilice un trapo suave y una mez- Para los periodos cortos de vacaciones, deje el control cla de una cucharada de bicarbonato de sosa disuelta en su configuración normal.Durante los largos periodos en un cuarto de agua. -
Page 28: Solución Sugeridad
SOLUCIÓN SUGERIDAD Amenudo, los problemas son sencillos y no es necesario hacer una llamada de reparación, use esta guía de resolución de problemas para encontrar una posible solución. Si la unidad sigue funcionando mal, llame a los números gratuitos de un centro Danby de servicio autorizado. -
Page 29: Condiciones De La Garantía
GARANTÍA LIMITADA PARA ELECTRODOMÉSTICOS Este producto de calidad está garantizado contra defectos de fabricación, incluyendo partes y mano de obra, siempre y cuando la unidad se utilice bajo las condiciones normales de funcionamiento para las que fue diseñado. Esta garantía está solamente disponible para la persona que haya comprado originalmente esta unidad directamente de DanbyProducts Limited (Canada) o Danby Products Inc. - Page 30 Model • Modèle • Modelo DAR163BLDP/DAR163SLDP TOUT RÉFRIGÉRATEUR Le numéro de modèle se trouve sur la plaque d’information sur la paroi arriere de l’appareil. Toutes les pieces de rechange ou commandes spe- ciales sont disponsibles de votre centre regional de TODA REFRIGERADOR El número de modelo se puede encontrar en la placa...