Publicité
Les langues disponibles
Les langues disponibles
Liens rapides
Publicité

Manuels Connexes pour Mastrad meat'it

Sommaire des Matières pour Mastrad meat'it
- Page 1 All manuals and user guides at all-guides.com USER GUIDE...
- Page 2 All manuals and user guides at all-guides.com Table of content Français ................................. 1 English ................................. 21...
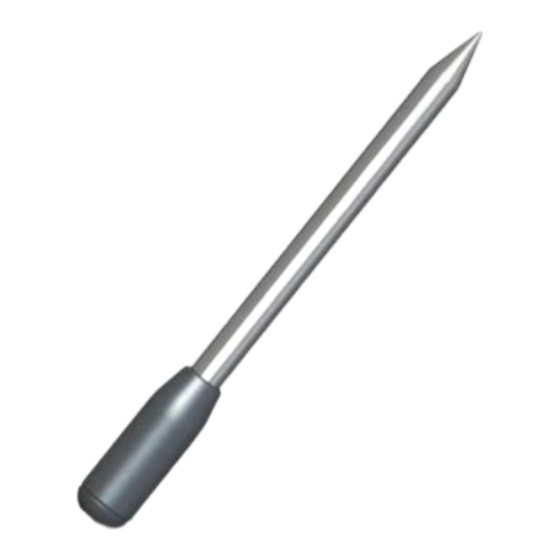
- Page 3 All manuals and user guides at all-guides.com Français Préambule La sonde meat°it est composée d’une sonde sans fil , d’une station de chargement (C), d’une clé qui sert d’extracteur de sonde et d’un câble d’alimentation. Cette sonde sans fil est compatible tous feux, y compris induction. Elle peut également être utilisée dans un barbecue, qu’il soit ouvert ou fermé, ou dans un four.
- Page 4 All manuals and user guides at all-guides.com Français ..................................1 Avant de démarrer ..............................3 Activer le Bluetooth .............................. 3 Installer l’application meat°it ..........................3 Démarrer la sonde ..............................3 Comment utiliser l’application meat°it ?......................... 4 Inscription et connexion ............................5 Connexion à...
- Page 5 All manuals and user guides at all-guides.com 1. Avant de démarrer Activer le Bluetooth 1. Veillez à ce que le téléphone / la tablette et la sonde soient suffisamment chargés pour procéder à l’appairage Le chargement complet n’est pas obligatoire mais il est nécessaire que les deux appareils soient suffisamment chargés pour ne pas s’éteindre durant la procédure.
- Page 6 All manuals and user guides at all-guides.com 2. Comment utiliser l’application meat°it ? Au démarrage de l’application, un tutoriel de « Démarrage rapide » vous indique comment installer et utiliser l’application ainsi que la sonde.
- Page 7 Lors de votre première utilisation, il est nécessaire de créer un compte qui vous permettra, par la suite, de vous identifier (une connexion internet est nécessaire). Si vous disposez déjà d’un compte sur le site www.mastrad-paris.fr, vous avez la possibilité de renseigner l’adresse e-mail liée à votre compte afin de vous connecter. Veillez à lire et accepter les conditions générales d’utilisation.
- Page 8 All manuals and user guides at all-guides.com IOS : Reconnectez votre Bluetooth et reprenez le contrôle de votre cuisson. La programmation est sauvegardée. Android : une fenêtre « pop up » vous informera de la perte du signal Bluetooth. Il faudra alors reconnecter votre Bluetooth et reprogrammez votre cuisson.
- Page 9 All manuals and user guides at all-guides.com Puis il est nécessaire de choisir le niveau de cuisson et de valider. Par ailleurs, vous avez également la possibilité de renommer votre sonde. Pour ce faire cliquez sur le nom de la sonde (ici : MastradX1_2ADE) dans le récapitulatif et remplacez par le nom que vous souhaitez donner.
- Page 10 All manuals and user guides at all-guides.com Lorsque vous faites défiler les différents choix d’aliment, la dernière icône ( ) est celle de la cuisson personnalisée. Ce programme vous permet d’indiquer un “Nom” spécifique pour votre cuisson et de définir une température au degré...
- Page 11 All manuals and user guides at all-guides.com...
- Page 12 All manuals and user guides at all-guides.com Ecran de contrôle de cuisson Un pictogramme vert indique que la sonde que vous contrôlez est bien appairée. Un pictogramme grisé vous prévient lorsque votre sonde n’est plus à portée de signal.
- Page 13 All manuals and user guides at all-guides.com Programmer une alarme Appuyer sur la cloche pour programmer une alarme Configurer le temps souhaité. Les alarmes s’affichent sur l’écran Appuyer sur « ok » et rappuyer Choisir l’alarme souhaitée cooking control sur la cloche...
- Page 14 All manuals and user guides at all-guides.com Changer le choix de cuisson Cliquer sur la température cible Choisir la nouvelle température Relancer le cooking control souhaitée normalement...
- Page 15 All manuals and user guides at all-guides.com Accéder au graphe d’évolution de la montée en température Faîtes glisser l’écran vers la gauche Graphique d’évolution de la montée pour accéder au graphique en température. d’évolution de la montée en Faîtes glisser l’écran vers la droite température pour revenir au cooking control.
- Page 16 All manuals and user guides at all-guides.com 2.10 Fin de cuisson Une fois la température atteinte, une fenêtre vous prévient de la fin de la cuisson.
- Page 17 All manuals and user guides at all-guides.com En cas de sur-cuisson un chronomètre indique en rouge l’excès de temps de cuisson. Une alerte sonore vous prévient également en cas de dépassement de la température cible. Pour terminer votre cuisson, cliquez sur .
- Page 18 All manuals and user guides at all-guides.com 2.11 Partage de résultat Vous avez la possibilité de partager une page synthétique de vos performances de cuisson, à savoir : - une photo de votre plat - le type de viande - le niveau de cuisson. Une barre de performance vous indique dans quelle mesure vous avez cuit, trop lentement, trop vite ou à...
- Page 19 All manuals and user guides at all-guides.com 2.13 Mes cuissons Mes favoris Cliquez sur l’une de vos cuissons favorites vous permet d’accéder automatiquement à vos paramètres de cuisson préférés. Vous n’aurez plus qu’à lancer la cuisson. Mon historique Toutes les cuissons réalisées s’enregistrent automatiquement dans “Mon historique”. Cliquez sur une des cuissons passées pour accéder aux détails (1.7).
- Page 20 All manuals and user guides at all-guides.com 2.14 Démarrer un chronomètre / minuteur Chronomètre Cliquez sur pour lancer le chronomètre. Si vous souhaitez le mettre en pause, cliquez sur Si vous souhaitez remettre le chronomètre à zéro, cliquez sur « Réinitialiser ». Minuteur Afin de programmer un minuteur, cliquez sur la zone de chiffres.
- Page 21 Masquer tous les tutoriels (ON/OFF) Connection wifi Pop up et notifications A propos Déconnexion – pour vous déconnecter de l’application. A propos Vous permet d’accéder à la version du logiciel et de l’application. Cliquez sur “Site internet” pour vous rendre sur : https://www.mastrad-paris.fr/...
- Page 22 All manuals and user guides at all-guides.com 2.16 Aide Vous pouvez à tout moment consulter la rubrique Aide pour consulter le tutoriel de démarrage rapide, la notice d’utilisation, la FAQ, nous faire part d’une remarque ou contacter notre service client. 3.
- Page 23 All manuals and user guides at all-guides.com USER GUIDE...
- Page 24 All manuals and user guides at all-guides.com II. English Introduction The meat°it thermometer consists of a wireless probe , a docking station , a key , to remove the probe and a power cable. This wireless thermometer is compatible with all hobs, including induction hobs. It can also be used on barbecues, whether open or closed, and in ovens.
- Page 25 All manuals and user guides at all-guides.com Contents English ................................2 Before starting ................................4 1.1. Activate Bluetooth ..............................4 1.2. Install the meat°it app ............................4 1.3. Activate the probe ..............................4 Using the meat°it app ..............................5 2.1. Registration and connection ..........................
- Page 26 All manuals and user guides at all-guides.com 1. Before starting 1.1. Activate Bluetooth 1. Make sure your phone/tablet and the thermometer are sufficiently charged to proceed with the pairing process . They do not need to be fully charged but both devices must have sufficient charge not to run out of power during the process.
- Page 27 All manuals and user guides at all-guides.com 2. Using the meat°it app When the app starts up, a “Quick start” guide will show you how to install and use the app and the thermometer.
- Page 28 When you use it for the first time, you will need to create an account so that you can log in. If you already have an account with the website www.mastrad-paris.fr, you can enter the email address linked to your account in order to log in. Please read and accept the terms and conditions of use.
- Page 29 All manuals and user guides at all-guides.com If the Bluetooth stops when the application is working : IOS: reconnect your probe and take back the control of your probe. The programmation is saved. Android: A pop up window inform you if the Bluetooth signal is lost. You will need to reconnect your Bluethooth and reprogram your probe.
- Page 30 You can also rename your probe in the summary screen with the new name that you wish to give it. You just need to click on the probe name (here is “Mastrad WX1_DCAE”) Once you have made your selections, click on...
- Page 31 All manuals and user guides at all-guides.com When you scroll through the different types of food, the final icon is for a personalized cooking program. You can enter a specific “Name” for your cooking program and define a temperature to the nearest degree (up to 212°F (100°C)).
- Page 32 All manuals and user guides at all-guides.com...
- Page 33 All manuals and user guides at all-guides.com 2.6. Cooking program control screen A green symbol indicates that the probe you are controlling is properly paired. A grayed-out symbol alert warn you when your probe is no longer within range.
- Page 34 All manuals and user guides at all-guides.com 2.7. Program an alarm Click on the bell to program an alarm The alarm are on the Set up the timer, click on Ok Choose the alarm you want cooking control screen and then on the bell...
- Page 35 All manuals and user guides at all-guides.com 2.8. Change the cooking mode Click on the target temperature Choose the new temperature Relaunch your cooking control as usual...
- Page 36 All manuals and user guides at all-guides.com 2.9. Check the graph of the evolution of the temperature Swipe to the left to see the graph Graph of the evolution of the of the evolution of the temperature. Swipe the the right temperature.
- Page 37 All manuals and user guides at all-guides.com 2.10. End of cooking program Once the temperature has been reached a pop-up window warn you that the cook is done.
- Page 38 All manuals and user guides at all-guides.com If the meat if over cooked, a red timer shows the excess cooking time. An audible alert also warns you if the target temperature is exceeded. To end the cooking program, click on .
- Page 39 All manuals and user guides at all-guides.com 2.11. Share result You can share an overview of your cooking performance containing: - A photo of your dish - The type of meat - The cooking level. A performance bar shows how much of your cooking was done too slowly, too fast or at the correct speed - The internal temperature...
- Page 40 All manuals and user guides at all-guides.com 2.13. Cooking list My favorites Click on one of your favorite cooking programs to access your preferred cooking settings automatically. Then you simply have to start the cooking program. My history All the cooking programs you complete are automatically recorded in “My history”. Click on one of your previous cooking programs to see the details (1.7).
- Page 41 All manuals and user guides at all-guides.com 2.14. Setting a timer/stopwatch Stopwatch Click to start the stopwatch. To pause it, click To reset the stopwatch to zero, click on “Restart”. Timer To set a timer, click on the number zone. Use the drop-down list to set the number of hours and minutes. Confirm the time selected by clicking on the icon at the top right.
- Page 42 Vibrate mode (ON/OFF) Ringtone (ON/OFF) Pre-alert (ON/OFF) Unit (Celsius/Fahrenheit) About – to go to page 2.12 Logout – to log out of the app. About To see information about the version of the software and application. Click on “Website” to visit: https://www.mastrad-paris.fr/...
- Page 43 All manuals and user guides at all-guides.com 2.16. Help You can access the Help section at any time to view the quick start guide or instructions for use. 3. Cleaning the probe Extract the probe using the key located under the docking station. Place the steel part of the probe under running water with a bit of soap, rinse, and dry using a soft cloth.