Publicité
Liens rapides
EN_IMPORTANT, RETAIN FOR FUTURE REFERENCE: READ CAREFULLY.
FR_IMPORTANT:A LIRE ATTENTIVEMENT ET À CONSERVER POUR CONSULTATION
ULTÉRIEURE.
ES_IMPORTANTE, LEA Y GUARDE PARA FUTURAS REFERENCIAS.
PT_IMPORTANTE, RETER PARA REFERÊNCIA FUTURA: LEIA ATENTAMENTE.
DE_WICHTIG! SORGFÄLTIG LESEN UND FÜR SPÄTER NACHSCHLAGEN AUFBEWAHREN.
IT _ IMPORTANTE! CONSERVARE IL PRESENTE MANUALE PER FUTURO RIFERIMENTO E
LEGGERLO ATTENTAMENTE.
IN221100552V01_UK_FR
150
US_CA
Publicité

Sommaire des Matières pour Outsunny 84G-057V00
- Page 1 IN221100552V01_UK_FR 100552V01_UK_FR_84G-057V00_84G-057V71 EN_IMPORTANT, RETAIN FOR FUTURE REFERENCE: READ CAREFULLY. FR_IMPORTANT:A LIRE ATTENTIVEMENT ET À CONSERVER POUR CONSULTATION ULTÉRIEURE. ES_IMPORTANTE, LEA Y GUARDE PARA FUTURAS REFERENCIAS. PT_IMPORTANTE, RETER PARA REFERÊNCIA FUTURA: LEIA ATENTAMENTE. DE_WICHTIG! SORGFÄLTIG LESEN UND FÜR SPÄTER NACHSCHLAGEN AUFBEWAHREN. IT _ IMPORTANTE! CONSERVARE IL PRESENTE MANUALE PER FUTURO RIFERIMENTO E LEGGERLO ATTENTAMENTE.
- Page 5 EN_Left Rail*1 EN_Right Rail*1 FR_Rail gauche*1 FR_Rail droit*1 EN_Back Rail*1 EN_Pilow*1 FR_Rail arrière*1 FR_Pilow*1 EN_Canopy*1 FR_Canopée*1 EN_Base Pad*1 EN_Front Rail*1 FR_Tampon de base*1 FR_Rail avant*1 EN_Clip*2 FR_Clip*2 EN_Small Bolt*2 FR_Petit boulon*2 EN_Flat Head Bolt*2 FR_Boulon à tête plate*2 EN_Round Head Bolt*8 FR_Boulon à...
- Page 6 EN_Use the crescent wrench to hold the nuts and the hex wrench to turn the bolts. FR_Utilisez la clé à molette pour maintenir les écrous et la clé hexagonale pour tourner les boulons. EN_Insert Round Bolts. FR_Insertion de boulons ronds. EN_Front Rail*1 FR_Rail avant*1 EN_Right Rail*1...
- Page 7 EN_Cont. FR_Cont. EN_Place Front RAIL on the floor,Insert Round Bolts. FR_Placez le RAIL avant sur le sol, insérez les boulons ronds. EN_Rear Rail FR_Rail arrière EN_Right Rail*1 FR_Rail droit*1 EN_Left Rail*1 FR_Rail gauche*1 EN_Front Rail*1 FR_Rail avant*1...
- Page 8 EN_Canopy Roof FR_Toit de la canopée EN_Expand the Canopy FR_Élargir la canopée EN_Front rib FR_Côte avant EN_Canopy Floor FR_Plancher de la canopée EN_Plate FR_Plaque EN_Canopy Roof FR_Toit de la canopée EN_Attach the Front Ribs to Plate with Round Bolts and Nuts. FR_Fixez les nervures avant à...
- Page 9 EN_Canopy Roof FR_Toit de la canopée EN_Front rib FR_Côte avant EN_Canopy Floor FR_Plancher de la canopée EN_Plate FR_Plaque EN_Lever Tool FR_Outil à levier EN_Canopy Roof EN_INsert Lever Tool into FR_Toit de la canopée center of Plate FR_INsérer l'outil à levier au centre de la plaqueINsérer l'outil à...
- Page 10 EN_Grasp Lever Tool and First Rib FR_Outil de levier de préhension et première côte EN_Above Canopy Roof FR_Au-dessus du toit de l'auvent EN_Lever Tool FR_Outil à levier EN_Insert Short Flat Head FR_Insert tête plate courte EN_Front rib FR_Côte avant EN_Above Canopy Roof FR_Au-dessus du toit EN_Lever Tool de l'auvent...
- Page 11 EN_Grasp Lever Tool and First Rib FR_Outil de levier de préhension et première côte EN_Front rib FR_Côte avant EN_Lever Tool FR_Outil à levier EN_Under Canopy Roof FR_Sous le toit de l'auvent EN_Squeeze Lever Tool and Front Rib together until hole is clear. FR_Serrez l'outil à...
- Page 12 EN_Insert Shim between First Rib and Long Bolt(optional) FR_Insérez la cale entre la première côte et le boulon long (facultatif). EN_Important:Be sure shim teeth are against plastic sleeve on first rib. FR_Important : Veillez à ce que les dents de la cale soient contre le manchon en plastique de la première nervure.
- Page 13 EN_Position Canopy on top of Base with Ribs over Tabs. FR_Placez le Canopy au sommet de la base avec les nervures sur les languettes. EN_Rib FR_Côtes EN_U-Bolts FR_Boulons en U EN_Secure Canopy to base with U-bolts and nuts into the tabs. FR_Fixez le Canopy à...
- Page 14 EN_Position front ribs on front rails,insert small bolts into clips and screw into tabs. FR_Positionnez les nervures avant sur les rails avant, insérez les petits boulons dans les clips et vissez dans les languettes.
- Page 15 EN_Fold floor flap inside canopy and attach to velcro on rib sleeves. FR_Repliez le rabat de plancher à l'intérieur de la voilure et attachez-le aux velcros des manches de côtes.
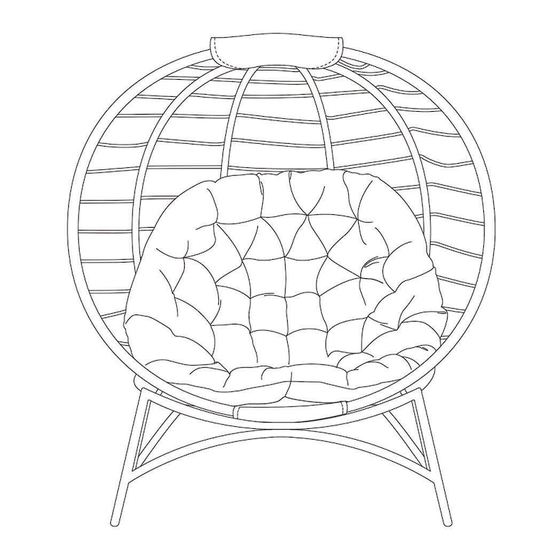
- Page 16 EN_Insert pad inside canopy and insert pillow. FR_Insérez un coussin à l'intérieur de l'auvent et insérez un oreiller. EN_ROUTINE MAINTENANCE Check to see that all nuts and bolts are tight - tighten if loose. FR_ENTRETIEN DE ROUTINE Vérifiez que tous les écrous et boulons sont bien serrés - resserrez-les s'ils sont desserrés.


