Publicité
Les langues disponibles
Les langues disponibles
Liens rapides
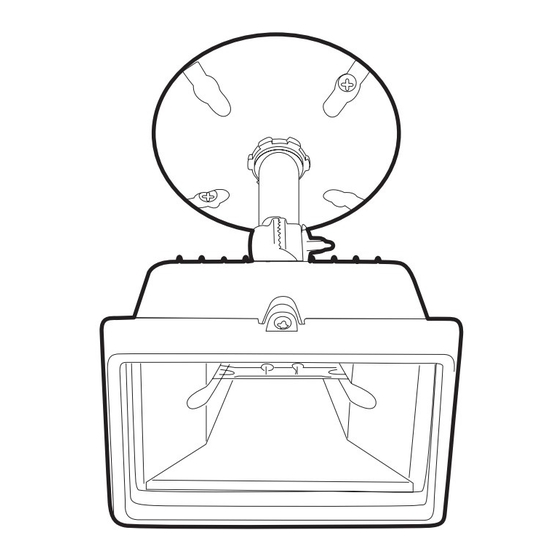
SECURITY FLOOD LIGHT
model no. 052-7807-6 | contact us: 1-866-827-4985.
3) Install the new bulb by inserting one end of the bulb against the contact of the socket. Be sure that both ends of the
bulb are securely positioned against the socket contacts. (Remember to wear clean gloves or use a soft cloth when
handling the bulb. Clean the bulb with alcohol if oil from skin comes into contact with the bulb.)
4) Replace the glass lens, and tighten the screws or replace the latches.
ELECTRICAL INSTALLATION:
1) Place the wall switch to the"OFF" position.
NOTE:
Shutting off a wall switch that controls the light is not
sufficient to prevent electrical shock.
WARNING:
This product must be installed in accordance with
the applicable installation code by a person familiar with the
construction and operation of the product and the hazards
involved.
!
CAUTION:
1. Fixture should be mounted to a grounded junction box certified for wet locations.
2. Keep away from any source of flame or heat.
3. The lamp and fixture get extremely hot during use. Mount fixture at least 1" (2.5 cm) from any combustible material.
4. When replacing bulb, never exceed the wattage of original bulb supplied with the fixture. When replacing bulb use
glove or soft cloth, as oil from skin can cause premature bulb failure.
5. Seal gaps and holes (mounting, plugs, conduit, etc.) with weatherproof silicone sealant to ensure fixture is
weatherproof.
MADE IN CHINA
Imported by Noma Canada
Toronto, Canada M4S 2B8
All manuals and user guides at all-guides.com
IMPORTANT:
Please read this manual carefully before assembly and save it for reference.
Wiring the unit incorrectly may damage the electronic components inside this control module
and can cause a fire hazard. Doing so will void all warranty claims.
MOUNTING
1) Loosen the swivel bolt located at the back of the fixture.
2) Thread the junction box cover plate onto the mounting arm.
3) Secure the locknut to the cover plate.
4) Adjust the fixture vertically to desired position and tighten
the swivel bolt securely.
NOTE: For optimum performance, quartz halogen fixtures must be
mounted so that the bulb is within 4° (degrees) of horizontal.
WIRING
1) Using wire connectors connect the black fixture wire to the black power supply wire and the
white fixture wire to the white power supply wire.
2) Fasten the ground wire from the power supply to the green ground screw on the fixture.
3) Cap and insulate all unused wires.
BULB INSTALLATION
1) Remove the glass lens by either undoing the latches holding the glass
on the fixture, or by loosening the screws on the lens retaining clips and
rotating the clips away from the fixture.
2) If replacing the bulb, remove the old bulb by pushing the bulb gently to
one side until the other side easily slides out of the socket.
Retain carton for storage purposes
2) Depending on which type of fuse box you
have in your home: Place either the main
(Master) switch to the "OFF" position,
cutting off power to your entire home,
OR turn off the individual switch that
provides power to where the fixture
will be installed.
OR
3) Place either the main (Master) switch
to the "OFF" position, cutting off power
to the entire home, OR unscrew the fuse
that provides power to where the fixture
will be installed.
Instruction Manual
For outdoor use
Publicité

Sommaire des Matières pour NOMA 052-7807-6
- Page 1 For outdoor use Retain carton for storage purposes SECURITY FLOOD LIGHT model no. 052-7807-6 | contact us: 1-866-827-4985. IMPORTANT: Please read this manual carefully before assembly and save it for reference. Wiring the unit incorrectly may damage the electronic components inside this control module and can cause a fire hazard.
- Page 2 Pour usage extérieur Conservez l'emballage à des fins d'entreposage LAMPE DE SÉCURITÉ À FAISCEAU LARGE de modèle 052-7807-6 | contactez-nous : 1 866 827-4985 IMPORTANT : Veuillez lire attentivement le présent guide avant tout assemblage et conservez-le pour consultation ultérieure. Une mauvaise connexion peut endommager les composantes électroniques à...


