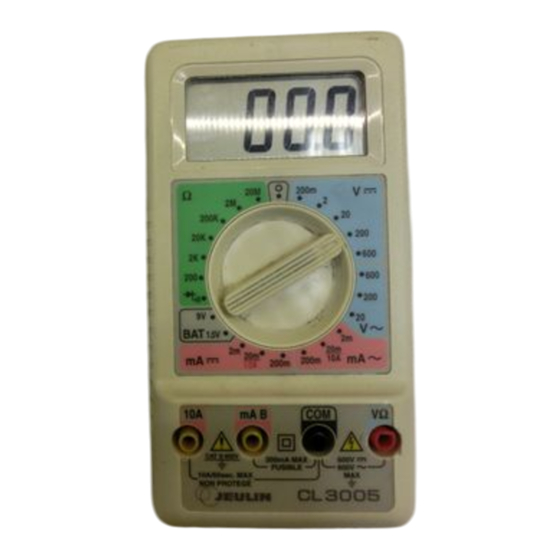
Sommaire des Matières pour Jeulin CL 3005
- Page 1 Mesures et instrumentation Measurement and instrumentation Ref : 291 156 Multimètre CL 3005 Français – p 1 CL 3005 multimeter English – p 8 Version : 9001...
- Page 2 Mesures et instrumentation Multimètre CL 3005 Ref : 291 156 1 Spécifications Affichage • Affichage à cristaux liquides (LCD) 31/2 digits – Capacité d'affichage maximum : 1999 Polarité • Indication de polarité négative (–) automatique Réglage du zéro • Automatique Indication de •...
- Page 3 Mesures et instrumentation Multimètre CL 3005 Ref : 291 156 TENSION CONTINUE Gammes 200 mV, 2 V, 20 V, 200 V, 1000 V Précision Toutes gammes : ± 0,5 % de la valeur aff. + 1 digit Résolution 100 µV Impédance d'entrée...
- Page 4 Mesures et instrumentation Multimètre CL 3005 Ref : 291 156 TEST DE DIODES Courant de test 1,0 ± 0,6 mA Tension de test 3,2 V maxi TEST DE PILES Gamme 1,5 V, 9 V Précision ± 3 % de la valeur affichée + 1 digit...
- Page 5 Mesures et instrumentation Multimètre CL 3005 Ref : 291 156 2. Positionner le sélecteur Fonction/Gamme sur la gamme c.c. et A voulue. Si la grandeur du courant est inconnue, positionner le sélecteur sur la gamme la plus élevée et revenir en arrière jusqu'à obtenir une lecture satisfaisante.
- Page 6 Mesures et instrumentation Multimètre CL 3005 Ref : 291 156 2. Positionner le sélecteur Fonction/Gamme sur la gamme Ω voulue. Si la grandeur de la résistance est inconnue, positionner le sélecteur sur la gamme la plus élevée et revenir en arrière jusqu'à obtenir une lecture satisfaisante.
- Page 7 Mesures et instrumentation Multimètre CL 3005 Ref : 291 156 2.6.2 Test de jonction de transistors On peut tester les transistors bipolaires comme des jonctions de diode formées entre la base et l'émetteur et entre la base et le collecteur du transistor.
- Page 8 Mesures et instrumentation Multimètre CL 3005 Ref : 291 156 2. Ôter et déconnecter l'ancienne pile de l'appareil et la remplacer par une neuve. Enrouler la longueur de fil en excédent autour de la cosse de la pile. Mettre la pile en place et replacer le couvercle.
- Page 9 Measurement and instrumentation CL 3005 multimeter Ref : 291 156 1 Specifications 1.1 General characteristics Display • Liquid crystal display (LCD) 31/2 digits – Maximum display capacity: 1999 Polarity • Automatic negative polarity (–) indication Zero adjustment • Automatic Capacity exceeded •...
- Page 10 Measurement and instrumentation CL 3005 multimeter Ref : 291 156 AC VOLTAGE Ranges 20 V, 200 V, 750 V Accuracy Range 20 V: ± 1 % + 4 digits Range 750 V: ± 1.5 % + 4 digits Resolution 100 mV Input impedance 4.5 MΩ...
- Page 11 Measurement and instrumentation CL 3005 multimeter Ref : 291 156 BATTERY TEST Range 1.5 V, 9 V Accuracy ± 3 % of the displayed value + 1 digit Charging current 1.5 V: 200 mA / 9 V: 6 mA 2 Operation 2.1 Measuring DC voltages...
- Page 12 Measurement and instrumentation CL 3005 multimeter Ref : 291 156 4. Open the circuit where the current needs to be measured. Carefully connect the test cords in series with the load where the current needs to be measured. 5. Power on the circuit to be measured.
- Page 13 Measurement and instrumentation CL 3005 multimeter Ref : 291 156 5. Read the value of the resistance on the digital display. If a high value resistance is shunted by a high value capacitor, let the display stabilize. NOTE: In the 200 Ω range, the value displayed is increased by a fixed value of 10.
- Page 14 Measurement and instrumentation CL 3005 multimeter Ref : 291 156 2.8 Continuity test 1. Place the selector in the position. 2. The continuity between the test points is indicated by an audible signal when the resistance is less than 100 Ω.
- Page 15 Measurement and instrumentation CL 3005 multimeter Ref : 291 156 3.2.2 Replacing the fuses 1. Remove the screws from the rear compartment and open it carefully. 2. Remove the old fuse and replace it with a new one of the same range (0.8 A / 250 V).


