Publicité
Liens rapides
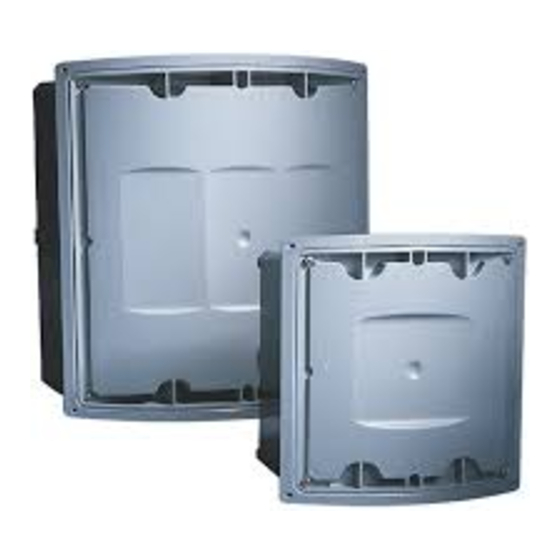
The Carlon
Curved Lid J-Box installed in 24" diameter
®
concrete piers at lighting pole bases has a ush, aesthetic
appearance and provides a large junction box to facilitate
wiring, circuit management and post-installation maintenance.
The J-Box lid allows the mounting of additional receptacles
and weatherproof covers. The J-Box is also suitable for 18",
30" and 36" installations.
Features
•
NEMA 1, 2, 3, 3R, 6, 6P, 12, 13, 4, 4X Ratings.
•
UL List per UL 50 Speci cations for Electrical Enclosures.
•
PVC lid is paintable to "blend in" with concrete pier.
•
Lids provide locations to mount weatherproof xtures. The
12 x 12 provides 3 locations and the 8 x 8 provides 1
location.
•
PVC will not be affected by most release agents. Refer to
release agent supplier for speci c details on compatibility.
•
Both the E88C24 and E1212C24 can be used in 18", 24",
30", and 36" forms. If using re-bar, the E88C24 is recom-
mended for 18" forms.
(4) SCREWS
IS59 B
Page 1 of 4
®
Curved Lid J-Box
Installation Instructions
Cat. Nos. E88C24 (8x8) and E1212C24 (12x12)
Form
Fig.1
To Install J-Box
1. Remove lid from box base as-supplied.
2. Drill or punch holes in the base and attach conduit ttings in
desired locations.
3. Install the gasket into gasket groove in the Lid. If the J-Box
will be installed deeper than 3 feet, do not install the gasket
until Step 5.
4. Assemble the lid to the base using the captive screws in the
four corners.
5. If J-Box is to be installed deeper than 3 feet, assemble per
the following submersible rating (NEMA 6P) instruction:
•
Using a 1/8" drill, drill holes from the inside of the gasket
grooves at the four marked locations.
•
Install gasket into gasket groove in lid.
•
Use four 3/4" sheet metal screws (not supplied) in the four
holes just drilled along with the four captive screws to
assemble the lid.
6. Using the four supplied sheet metal screws (Fig.1), attach the
assembled lid and base to the form. Place tape around the lid
to the form in addition to using the screws, to allow for easier
removal from concrete. Using four #8 screws, attach the lid
and base to the form as shown in Fig.1. Using duct tape, tape
completely around the perimeter of the lid to seal against the
form. For 30" and 36" forms it is recommended that a spacer
is placed along the sides to ensure the box is even in the form.
7. Before pouring concrete, orient the form so the exposed lid
will not face parking lot traf c.
Parking
Spaces
Parking
Spaces
8. After concrete has completely cured, loosen or remove the
four corner captive screws from the lid. Grab the grip points
on opposite corners and pull straight out.
9. Remove the four mounting screws used to mount the lid
and base to the form.
10. Complete desired wiring.
11. Re-install lid to complete installation. If desired, replace
captive screws with tamper-resistant screws.
English
Parking
Parking
Spaces
Spaces
Parking
Parking
Spaces
Spaces
Publicité

Manuels Connexes pour Thomas & Betts Carlon E88C24

Sommaire des Matières pour Thomas & Betts Carlon E88C24
- Page 1 English ® Curved Lid J-Box Installation Instructions Cat. Nos. E88C24 (8x8) and E1212C24 (12x12) To Install J-Box The Carlon Curved Lid J-Box installed in 24" diameter ® concrete piers at lighting pole bases has a ush, aesthetic 1. Remove lid from box base as-supplied. appearance and provides a large junction box to facilitate 2.
- Page 2 Français ® Boîte de jonction à couvercle courbe Instructions d'installation Cat. N° E88C24 (8x8) et N° E1212C24 (12x12) Pour installer la boîte de jonction La boîte de jonction à couvercle courbe Carlon , installée ® dans des piliers de béton de 24 po de diamètre à la base de 1.
- Page 3 Español ® Caja de conexión de tapa curvada Instrucciones de instalación Cat. No. E88C24 (8x8) y E1212C24 (12x12) Para instalar la caja de conexión La caja de conexión de tapa curvada Carlon instalada en pilares ® de concreto de 24" de diámetro en bases de postes de alumbrado 1.
- Page 4 ENGLISH WARRANTY: Thomas & Betts sells this product with the understanding that the user will perform all necessary tests to determine the suitability of this product for the user's intended application. Thomas & Betts warrants that this product will be free from defects in materials and workmanship for a period of two (2) years following the date of purchase.