
Manuels Connexes pour Asko CC4527S/4000

Sommaire des Matières pour Asko CC4527S/4000
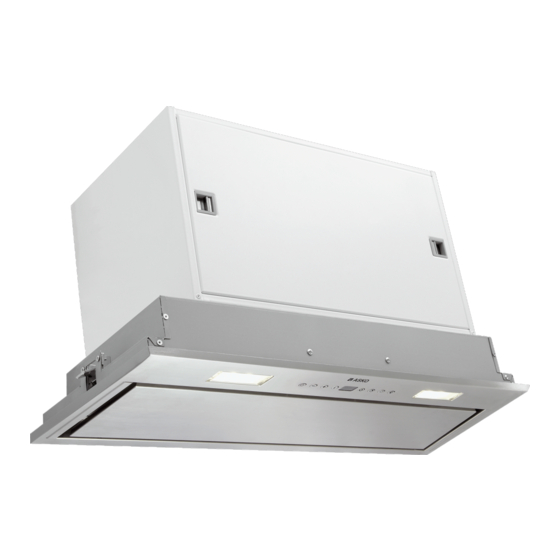
- Page 1 Instructions for use Mode d’emploi Built-in unit Unité encastrée CC4527S / 4000 CC4727S / 4000 CC4927S / 4000 CC41227S / 4000...
- Page 2 Manual EN 3 - EN 13 Notice dútilisation FR 3 - FR 13 Pictograms used - Pictogrammes utilisés: Important information - Important à savoir Tip - Conseil...
-
Page 3: Table Des Matières
CONTENT Your built in unit Description Introduction Controls Maintenance Cleaning Removing the grease filters Replacing the carbon filter Changing the light bulbs Installation General Electrical connection Installing the built in unit Technical specifications Appendix Disposal of appliance and packaging EN 3... -
Page 4: Your Built In Unit
YOUR BUILT IN UNIT Description Switch fan on/off Reduce extractor capacity Increase extractor capacity Engage intensive mode Clean air function/filter indication Timer function Switch lighting on/off Dim lighting Display Introduction This user manual gives you a quick overview of all the possibilities offered by the appliance. -
Page 5: Use
Controls Switching the fan on and off • Switch the fan on with the on/off button (A) and select the desired extractor setting with buttons ‘B’ and ‘C’. The ‘I’ display indicates which setting has been selected. • Use button ‘D’ to switch on the intensive setting. “HI”... - Page 6 Switching on the timer • Switch on the extractor cap with button ‘A’. • Set the extraction strength with buttons ‘B’ and ‘C’. • Press the Timer button ‘F’. The extractor cap switches off automatically after 30 minutes. Switch off the Timer function by pressing button ‘F’ again, or by switching off the extractor cap with button ‘A’.
-
Page 7: Maintenance
MAINTENANCE Cleaning Attention! Before performing any maintenance operation, isolate the hood from the electrical supply by switching off at the connector and removing the connector fuse. Or if the appliance has been connected through a plug and socket, then the plug must be removed from the socket. -
Page 8: Removing The Grease Filters
MAINTENANCE Grease filters Removing the grease filters Switch off the electricity! Remove the plug from the socket or switch the electricity off at the mains. Open the panel and pull the special handle to remove the filter. Replacing the carbon filter The carbon filter must always be used if the built in unit is not ducted. -
Page 9: Installation
INSTALLATION General This appliance should be connected to the power supply by a recognized fitter who is familiar with, and works according to the correct safety regulations. This appliance meets the European requirements. Important that you know: • The minimum distance between the supporting surface for the cooking vessels on the gashob and the lowest part of the range hood must be not less than 65 cm. -
Page 10: Electrical Connection
INSTALLATION Electrical connection This appliance is manufactured in class I, it must therefore be connected to the earth system. Make sure the supply voltage ratings correspond with those stated on the appliance data plate. The connection to the mains is carried out as follows: BROWN = phase L BLUE = phase N... - Page 11 INSTALLATION Installation • Open the panel. • Remove the grease filter. • Interrupt the plug connection of the controls. • • First remove the 6 screws (2 on the left, 2 on the right, 2 on the front), followed by the frame. •...
-
Page 12: Technical Specifications
TECHNICAL SPECIFICATIONS Hood type CC4527S CC4727S CC4927S CC41227S Built-in unit Built-in unit Built-in unit Built-in unit Type / Approval 4000 4000 4000 4000 Control type Electronic push buttons Electronic push buttons Electronic push buttons Electronic push buttons Width Supply (Voltage, frequency) 220~240 V / 50 Hz 220~240 V / 50 Hz 220~240 V / 50 Hz... -
Page 13: Appendix
APPENDIX Disposal Disposal of appliance and packaging By ensuring this product is disposed of correctly, you will help prevent potential negative consequences for the environment and human health, which could otherwise be caused by inappropriate waste handling of this product. The local authorities can provide you with the relevant information. - Page 14 EN 14...
- Page 15 CONTENU Votre hotte cheminée Description Introduction Utilisation Commande Entretien Nettoyage Elimination des filtres Remplacement des filtres à charbon Changement d’ampoules Installation Généralités Connexion électrique Montage de la hotte cheminée Spécifications techniques Annexe Mise au rebut de l’appareil et de l’emballage FR 3...
-
Page 16: Votre Hotte Cheminée
VOTRE HOTTE CHEMINÉE Description Allumage/extinction du ventilateur Diminution de la capacité d’aspiration Augmentation de la capacité d’aspiration Position de débit maximal Fonction Air propre/témoins des filtres Fonction Minuterie Allumage/extinction de l’éclairage Baisser l’éclairage Affichage à l’écran Introduction Ce mode d’emploi offre une vue d’ensemble rapide de toutes les fonctions de l’appareil. -
Page 17: Utilisation
UTILISATION Commande Mise en marche/arrêt du ventilateur • Mettez le ventilateur en marche à l’aide de l’interrupteur (A) et choisissez le débit d’aspiration souhaité avec les touches « B » et « C ». L’écran « I » indique la position choisie. •... - Page 18 UTILISATION Activer la minuterie • Mettez en marche la hotte grâce à la touche « A ». • Réglez la puissance d’aspiration grâce aux touches « B » et « C ». • Appuyez sur la touche de la minuterie « F ». La hotte se coupe automatiquement après 30 minutes.
-
Page 19: Entretien
ENTRETIEN Nettoyage Attention! Avant toute opération de nettoyage ou d’entretien, débrancher la hotte du circuit électrique en enlevant la prise ou en coupant l’interrupteur général de l’habitation. La hotte doit être régulièrement nettoyée à l’intérieur et à l’extérieur (au moins à la même fréquence que pour l’entretien des filtres à graisse). Ne pas utiliser de produit contenant des abrasifs. -
Page 20: Elimination Des Filtres
ENTRETIEN Filtres Elimination des filtres Coupt ! Débrancher la fiche de prise de courant ou mettre le disjoncteur en position d’interruption du courant. Ouvrez le panneau et enlevez le filtre, en tirant sur la poignée prévue à cet effet. Filtres à charbon Remplacement des filtres à... -
Page 21: Installation
INSTALLATION Généralités Le raccordement électrique de cet appareil doit être effectué par un installateur agréé, qui connaît et applique les normes de sécurité en vigueur. Cet appareil est conformément aux directives Européens. Important: • La distance entre le point le plus bas de la hotte aspirante et la plaque de cuisson doit être d’au moins 65 cm. -
Page 22: Raccordement Électrique
INSTALLATION Raccordement électrique Cet appareil est construit en classe I, par conséquent, il doit être raccordé à la prise de terre. Il faut s’assurer que la tension du réseau correspond à la valeur indiquée à la plaque signalétique de la hotte. La connection avec le réseau électrique doit être éxécutée comme suit: BRUN = Phase L BLEU = Phase N... -
Page 23: Montage
INSTALLATION Montage • Ouvrez le panneau. • Enlevez le filtre à graisses. • Détachez le connecteur de la commande. • Déposez le châssis en enlevant les 6 vis (2 à gauche, 2 à droite, 2 à avant). • Découpez une ouverture dans la partie inférieure de l’armoire (à au moins 650 mm d’une plaque de cuisson). -
Page 24: Spécifications Techniques
SPÉCIFICATIONS TECHNIQUES Modèle CC4527S CC4727S CC4927S CC41227S Intégrée à votre appareil Intégrée à votre appareil Intégrée à votre appareil Intégrée à votre appareil Type / Approbation 4000 4000 4000 4000 Boutons poussoirs Boutons poussoirs Commande Boutons poussoirs électroniques Boutons poussoirs électroniques électroniques électroniques Largeur (cm) -
Page 25: Annexe
ANNEXE Mise au rebut Mise au rebut de l’appareil et de l’emballage Des matériaux solides ont été utilisés pour fabriquer cet appareil. Evacuez ces matériaux correctement et conformément aux dispositions administratives. Les autorités de votre pays pourront vous fournir des informations à... - Page 26 FR 14...
- Page 27 FR 15...
- Page 28 562270 562270...