Table des Matières

Sommaire des Matières pour May Way SP - 30GL
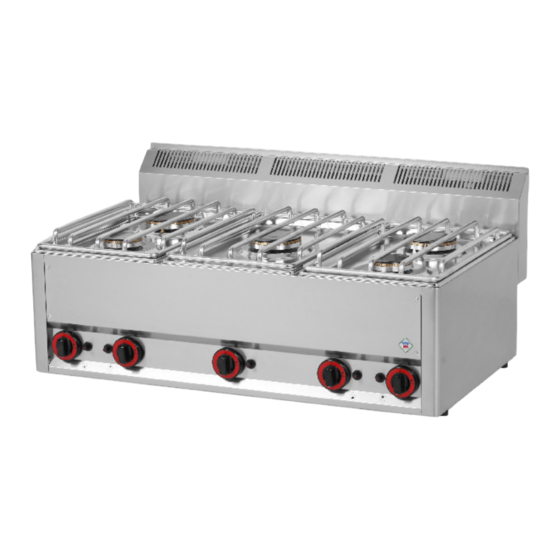
- Page 1 INSTRUCTIONS FOR INSTALLATION AND USE DIE GEBRAUCHS-, UND INSTALLATIONSANWEISUNG NOTICE D’INSTALLATION ET D’EMPLOI GAS COOKERS SP - 30GL / SP - 60GL / SP - 90GL / SP - 90/5GL Date: 05 / 2009...
-
Page 2: Table Des Matières
CONTENT DECLARATION OF A STANDARDS CONFORMITY INSTRUCTION FOR USE CLEANING AND MAINTENANCE DIE NORMENÜBEREINSTIMMUNGSDEKLARATION REINIGUNG UND WARTUNG DÉCLARATION DE CONFORMITÉ MODE D´EMPLOI NETTOYAGEET ENTRETIEN... -
Page 3: Declaration Of A Standards Conformity
DECLARATION OF A STANDARDS CONFORMITY The producer confi rms that the devices agree with 2009/142/ES standards, rule nr. 22/1997 sb., nr. 258/2000 sb.. nr. 258/200 sb. and with relevant goverment orders. Instalation must be done with respect to valid standards. Attention, the producer refuses any responsibility in case of direct or indirect damages which are caused due to wrong instalation, incorrect intervention or modifi... -
Page 4: Pipe For Gas Connection
SAFETY MEASURES FROM THE STANDPOINT OF THE FIRE PROTECTION ACCORDING TO ČSN 061008ČL. 12-2: • only adults can operate the device • device must be safely used in common surroundings according to ČSN 332000-3. You must switch the gas device off under the circumstances leading: to the danger of the temporary rise of the combustion gas or steam or during works when there is a big possibilityof rise ot the temporary fire danger or explosion (for example: to stick linoleum, PVC etc.). -
Page 5: Important
Process of rebuilding the device for another gas type The device is set and checked for liquefied gas (see the label). Rebuilding for another gas type must be done by qualified person. Nozzles are included in the packet with instructions for use. Exchange of the main burner´s nozzle: picture D Remove upper parts of the burner (A), screw up the nozzle (D) and screw in the new one for required gas type - see technical chart.You need not to regulate air feeder. -
Page 6: Cleaning And Maintenance
Piezzo knob Regulation knob Switch off Switch on the main burner Sporo (lower performance) Comments and recommendations Use the device only under supervision. CLEANING AND MAINTENANCE Clean the device daily. Remove stainless grid, you can wash the grid in the dishwasher. Stainless parts wash with moist cleaning cloth and detergent without groove parts then splash it with clean water and dry it by the cloth. -
Page 7: Die Normenübereinstimmungsdeklaration
DIE NORMENÜBEREINSTIMMUNGSDEKLARATION Der Produzent erklärt, daß die Geräte in einer Übereinstimmung mit den Vorschriften der 2009/142/ ES, dem Gesetz Nr. 22/1997 sb., nr. 258/2000 sb., nr. 38/2001 sb. der Sammlung und zugehörigen Regierungsverordnungen stehen. Die Installation muss mit der Absicht auf geltende Normen durchgeführt werden. - Page 8 SICHERHEITSMASSNAHME VON GESICHTSPUNKT DES FEURSCHUTZES NACH NORME ČSN 061008 PARAGR. 12-2 • Das Gerät können nur Erwachsene bedienen. • Gasbedarfsartikel kann man sicher in normalen Milieu nach Norme ČSN 332000-3 benützen. Im Fall, dass man in der Nähe von Gerärt mit gefährligen Stoffen arbeitet (z.B. klebert Linoleum, PVC usw.), muss man das Gerät in Zeit aus Betrieb ausschalten.
- Page 9 Anweisunge für Umbau auf andere Gastypen Die Geräte sind auf Fliessiggas angesetzt und kontrolliert (sehe Schild). Die Umbau auf anderen Gastyp muss qualifizierte Person machen. Die Düsen befinden sich in der Packung mit der Anweisung. Austausch von Hauptbrennerdüse. Bild D Nehmen Sie den oberer Teil des Brenners ab (A), schrauben Sie die Düse ab(D).Schrauben Sie neue Düse zu (sehe Tabelle mit technischen Daten).
-
Page 10: Reinigung Und Wartung
Der Piezzoanzünder Der Knopf Ausschaltet Hauptbrenneranzündung Öko(niedrigere Leistung) REINIGUNG UND WARTUNG Reinigen Sie das Gerät täglich nach der Benützung.Nehmen Sie das Rostfreigitter ab,welches können Sie in der Geschirrwaschmaschine oder in der Spüle waschen. Rostfreie Teilen putzen Sie mit feuchtem Lappen und mit Waschmittel ohne groben Teilen. -
Page 11: Déclaration De Conformité
DÉCLARATION DE CONFORMITÉ Le fabricant certifi e la conformité des appareils aux normes 2009/142/ES à la loi n° 22/1997 sb., 258/2000 sb., 258/2000 sb. et aux décrets applicables. L‘installation doit être effectuée dans le respect des normes en vigueur. Attention: le fabricant décline toute responsabilité en cas de dommages, directs ou indirects, causés par une mauvaise installation, par une utilisation, des interventions ou des modifi cations impropres, par un entretien insuffi sant, ainsi qu‘en cas de dommages dérivant des causes mentionnées dans les conditions de vente. -
Page 12: Mésures De Sécurité Pour La Protection Contre Incendie Selon Čsn
MÉSURES DE SÉCURITÉ POUR LA PROTECTION CONTRE INCENDIE SELON ČSN 061008 article 12-2 : • l’appareil a gaz ne peut être utilisé que par des personnes majeures • l’appareil a gaz peut être utilisé dans une espace ordinaire selon ČSN 332000-3. Dans le cas où il existe le danger d’échappement de gaz ou de vapeurs inflammables, le danger d’incendie ou d’explosion (le collage du linoleum, du PVC p.e.), il faut éteindre l’appareil à... -
Page 13: L'échange De La Buse Du Brûleur Principal : Tab. D
L’échange de la buse du brûleur principal : tab. D Enlever le gril et les pieces dessus de bruleur et bain inox (A) Déviser la buse (D) et ajuster la nouvelle buse adaptée au type du gaz souhaité selon le tableau des données téchniques. -
Page 14: Nettoyageet Entretien
Piezzo Bouton Débranché Inflammation de bruleur Consomation économique NETTOYAGEET ENTRETIEN Nettoyer après chaque usage. Soulevez gril inox, qui est possible de laver a la machine a laver. Nettoyer les parties en inox à l’aide d’un chiffon humide avec le détergent sans particulles abrasives, puis rincer à... - Page 15 Picture / Bild / Immage C : SP 30GL SP 60GL SP 90GL G– SUPPLY OF GAS G 1/2“...
- Page 16 Picture / Bild / Immage D (SP - 30 GL) Picture / Bild / Immage D (SP - 60 GL)