
Manuels Connexes pour Philips MAGNAVOX AZ1200


Sommaire des Matières pour Philips MAGNAVOX AZ1200
- Page 1 AZ1200 CD Radio AZ1201 Cassette Recorder AZ1205 Toll Free Help Line Ligne d’assistance en service libre Linea de ayuada telefónica sin cargo 800-531-0039...
- Page 2 Return your Warranty Registration card today to ensure you receive all the benefits you’re entitled to. • Once your Philips Magnavox purchase • So complete and return the Warranty is registered, you’re eligible to receive all Registration Card enclosed with your the privileges of owning a Philips purchase at once.
-
Page 3: Table Des Matières
English Safety instructions..2 & 4 CD player .......10–12 Introduction......5 Cassette recorder ..13–14 Controls ......6–7 General information.....15 Power supply ......8 Troubleshooting ....16 Basic functions ......9 Limited warranty....17 Radio........9 Français Conseils de sécurite ..18–19 Lecteur de CD ....24–26 Comandes......20–21 Platine cassette.....27–28 Alimentation ......22 Informations général ...29 Fonctions de base....23 Recherche de pannes ..30... -
Page 4: Safety Instructions
SAFETY INSTRUCTIONS – Read before operating equipment This product was designed and manufactured to 11. Grounding or Polarization – meet strict quality and safety standards. There are, Precautions should be taken so however, some installation and operation precautions that the grounding or polarization Polarized Plug which you should be particularly aware of. - Page 5 “family!” Dear Philips Magnavox product owner: Thank you for your confidence in Philips Magnavox.You’ve selected one of the best-built, best-backed products available today.And we’ll do everything in our power to keep you happy with your purchase for many years to come.
-
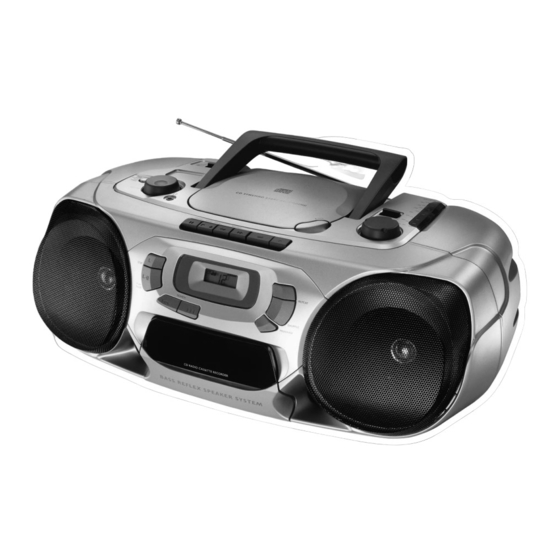
Page 6: Controls
CONTROLS AZ 1205 only... - Page 7 CONTROLS BASIC FUNCTIONS 9 CASSETTE RECORDER 1 POWER: PAUSE ; ....interrupts recording or CD, TUNER, TAPE...selects the sound source playback 2 DBB.......enhances the bass STOP·OPEN 9/ ...stops the tape and opens the cassette compartment 3 VOLUME ....adjusts the volume level SEARCH 6 ...rewinds the tape 4 p......3.5mm headphone socket SEARCH 5 ...fast forwards the tape...
-
Page 8: Power Supply
POWER SUPPLY Batteries For the set (optional) Open the battery compartment of the set and insert 6 batteries, type R20, UM-1 or D-cells (preferably alkaline). For the remote control (AZ 1205 only) Open the battery compartment of the remote control and insert 2 batteries, type R03, UM-4 or AAA-cells (preferably alkaline). -
Page 9: Basic Functions
BASIC FUNCTIONS RADIO Switching the set on and off Set the POWER control to the desired sound source: CD, TUNER, or TAPE. The set is switched off when the POWER control is set to O O F F F F /TAPE and the keys of the tape deck are released. - Page 10 CD PLAYER Playing a CD 1 Set the POWER control to CD. 2 Press / OPEN to open the CD compartment. 3 Insert an audio CD (printed side up) and close the CD compartment. ™ The CD player starts and scans the contents list of the CD. Then, the CD player stops.
- Page 11 CD PLAYER Different playing modes: SHUFFLE / REPEAT SHUFFLE – Playing in random order 1 Press SHUFFLE before or during CD play. ™ All the tracks of the CD (or program if available) will now be played in random order. 2 Press SHUFFLE again to return to normal CD play.
-
Page 12: Programming Track Numbers
CD PLAYER Programming track numbers You can select a number of tracks and store these in the memory in the desired sequence. You can store any track more than once. A maximum of 20 tracks can be stored in the memory. 1 Select the desired track with SEARCH ∞... -
Page 13: Playing A Cassette
CASSETTE RECORDER Playing a cassette 1 Set the POWER control to TAPE. 2 Press STOP·OPEN 9/ to open the cassette compartment. 3 Insert a recorded cassette with the open side upwards and close the cassette compartment. 4 Press PLAY 1 to start playback. 5 Press 6 or 5 to rewind or fast forward the tape. -
Page 14: Recording From The Radio
CASSETTE RECORDER Recording from the CD player – CD synchro start 1 Set the POWER control to CD. 2 Insert a CD and, if desired, program the track numbers. 3 Press STOP·OPEN 9/ to open the cassette compartment. 4 Insert a blank, unprotected, cassette and close the cassette compartment. -
Page 15: General Maintenance
GENERAL INFORMATION General maintenance Do not expose the set, batteries, CDs, or tapes to humidity, rain, sand, or excessive heat (caused by heating equipment or direct sunlight). The mechanical parts of the set contain self-lubricating bearings and must not be oiled or lubricated! You can clean the set with a soft, slightly dampened, lint-free cloth. -
Page 16: Troubleshooting
TROUBLESHOOTING If a fault occurs, first check the points listed WARNING below before taking the set for repair. Under no circumstances should you try If you are unable to solve a problem by to repair the set yourself as this will following these hints, consult your dealer or invalidate the warranty. -
Page 17: Limited Warranty
Adjustments of the controls discussed there may save you a trip. This warranty gives you specific legal rights.You may have other rights which vary from state/province to state/province. Philips Service Solutions Group, P.O. Box 555, Jefferson City,Tennessee 37760, (423) 475-8869 EL6095T001 / MAC5433 / 1-97... - Page 18 • Dès que l’achat de votre appareil • Remplissez et renvoyez votre carte Philips Magnavox est enregistré, vous d’enregistrement de garantie jointe à avez droit à tous les avantages dont votre appareil sans tarder.Vous...
-
Page 19: Conseils De Sécurité
CONSEILS DE SÉCURITÉ – À lire avant de faire marcher le matériel Ce produit a été conçu et fabriqué en conformité 11. Mise à terre ou polarisation avec des normes strictes de qualité et de sécurité. Il Précautions à prendre de manière Fiche y a, cependant, certains précautions d’installation et à... - Page 20 COMMANDES uniquement AZ 1205...
- Page 21 COMMANDES FONCTIONS DE BASE 9 PLATINE CASSETTE 1 POWER: PAUSE ; ....interrompt CD, TUNER, TAPE...sélection de la source audio l’enregistrement ou la lecture 2 DBB.......amélioration des basses STOP·OPEN 9/ ...arrête la bande et ouvre le 3 VOLUME ....réglage du volume compartiment cassette 4 p......prise pour écouteurs 3,5 mm SEARCH 6 ...rebobinage de la bande...
-
Page 22: Alimentation
ALIMENTATION Piles Pour l’appareil (en option) Ouvrez le compartiment à piles de l’appareil et insérez 6 piles de type R20, UM-1 ou D (alcalines de préférence). Pour la télécommande (uniquement AZ 1205) Ouvrez le compartiment à piles de la télécommande et insérez 2 piles de type R03, UM-4 ou AAA (alcalines de préférence). -
Page 23: Fonctions De Base
FONCTIONS DE BASE RADIO Mise en marche et arrêt Réglez le commutateur coulissant POWER sur la source audio voulue: CD, TUNER, or TAPE. L’appareil est arrêté lorsque le commutateur coulissant POWER est en position O O F F F F /TAPE et que les touches de la platine cassettes sont relâchées. -
Page 24: Lecteur De Cd
LECTEUR DE CD Pour lire un CD 1 Réglez le commutateur coulissant POWER sur CD. 2 Appuyez sur / OPEN pour ouvrir le compartiment CD. 3 Introduisez un CD audio (face imprimée vers le haut) et refermez le compartiment CD. ™... -
Page 25: Les Différents Modes De Lecture: Shuffle / Repeat
LECTEUR DE CD Les différents modes de lecture: SHUFFLE / REPEAT SHUFFLE – Lecture dans un ordre aléatoire 1 Appuyez sur SHUFFLE avant ou pendant la lecture CD. ™ Tous les morceaux du CD (ou du programme, le cas échéant) sont alors joués dans un ordre aléatoire. -
Page 26: Programmation De Numéros De Morceaux
LECTEUR DE CD Programmation de numéros de morceaux Vous pouvez sélectionner une série de morceaux et les enregistrer en mémoire dans l’ordre voulu. Vous pouvez programmer un morceau quelconque plus d’une fois. Vous pouvez enregistrer en mémoire 20 morceaux au maximum. 1 Sélectionnez le morceau voulu avec SEARCH ∞... -
Page 27: Lecture D'une Cassette
PLATINE CASSETTE Lecture d'une cassette 1 Amenez le commutateur coulissant POWER en position TAPE. 2 Appuyez sur STOP·OPEN 9/ pour ouvrir le compartiment cassette. 3 Introduisez une cassette enregistrée, face ouverte vers le haut, et refermez le compartiment. 4 Appuyez sur PLAY 1 pour démarrer la lecture. 5 Appuyez sur 6 ou 5 pour le rebobinage ou l’avance rapide de la bande. -
Page 28: Enregistrement Depuis Le Lecteur De Cd - Cd Synchro Start
PLATINE CASSETTE Enregistrement depuis le lecteur de CD - CD synchro start 1 Réglez le commutateur coulissant POWER sur CD. 2 Introduisez un CD et programmez éventuellement les morceaux voulus. 3 Appuyez sur la touche STOP·OPEN 9/ pour ouvrir le compartiment cassette. -
Page 29: Entretien Général
INFORMATIONS GÉNÉRALES Entretien général Evitez d’exposer l’appareil, les piles, les CD ou les cassettes à l’humidité, à la pluie ou à une chaleur excessive (chauffage ou exposition directe au soleil). Les éléments mécaniques de l’appareil sont dotés de paliers autolubrifiants qui n’ont pas besoin d’être huilés ou lubrifiés! Vous pouvez nettoyer l’appareil avec un chiffon doux légèrement humide, ne peluchant pas. -
Page 30: Recherche De Pannes
RECHERCHE DE PANNES Dans le cas d'une anomalie de fonctionnement, ATTENTION commencez par vérifier les points ci-dessous avant de donner votre appareil à réparer. N'essayez en aucun cas de réparer votre Si vous ne parvenez pas à résoudre le problème appareil vous-même, sous peine en suivant ces instructions, veuillez consulter d'invalider la garantie. -
Page 31: Garantie Limitée
Cette garantie vous donne des droits légaux spécifiques et vous pourriez avoir d’autres droits qui varient d’état en état et de province en province. Philips Service Solutions Group, P.O. Box 555, Jefferson City,Tennessee 37760 É.-U., (423) 475-8869 EL6095T001 / MAC5433 / 1-97... - Page 32 • Una vez que se registre la compra de • Sírvase llenar y devolver en seguida su aparato Philips Magnavox, Ud. tiene la Tarjeta de Registro de la Garantía derecho a todas las ventajas empacada con su aparato.
- Page 33 INSTRUCCIONES SOBRE SEGURIDAD - Léalas antes de hacer funcionar el equipo Este producto fue diseñado para cumplir con normas 11. Puesta a tierra o polarización rigurosas de calidad y seguridad. No obstante, Tome las precauciónes utilizando existen algunas medidas de precaución para la los medios de puesta a tierra o Clavija instalación y funcionamiento con las que Ud.
- Page 34 CONTROLES sólo en el AZ 1205...
- Page 35 CONTROLES FUNCIONES BÁSICAS 9 GRABADORA 1 POWER: PAUSE ; ....interrumpe la grabación o CD, TUNER, TAPE...selecciona la fuente de la reproducción sonido STOP·OPEN 9/ ...detiene la cinta y abre el 2 DBB.......realza las frecuencias compartimento del casete graves SEARCH 6 ...rebobina la cinta hacia 3 VOLUME ....ajusta el nivel de volumen atrás 4 p......toma de auriculares 3,5 mm...
-
Page 36: Fuente De Alimentación
FUENTE DE ALIMENTACIÓN Pilas Para el equipo (opcional) Abrir el compartimento de las pilas del equipo, e introducir 6 pilas tipo R20, UM-1 ó D (preferiblemente alcalinas). Para el control remoto (sólo en el AZ 1205) Abrir el compartimento de las pilas del control remoto, e introducir 2 pilas tipo RO3, UM-4 ó... -
Page 37: Funciones Básicas
FUNCIONES BÁSICAS RADIO Puesta en marcha y parada Colocar el interruptor POWER en la posición correspondiente a la fuente de sonido deseada: CD, TUNER o TAPE. El equipo se apaga cuando el mando deslizante POWER está en la posición O O F F F F /TAPE y las teclas de la platina magnetofónica están en posición neutra. -
Page 38: Reproductor Cd
REPRODUCTOR CD Reproducción del CD 1 Colocar el interruptor POWER en la posición CD. 2 Pulsar / OPEN para abrir el compartimento del CD. 3 Introducir un CD de audio (la cara impresa hacia arriba) y cierre el compartimento del CD. ™... - Page 39 REPRODUCTOR CD Diferentes modos de reproducción: SHUFFLE / REPEAT SHUFFLE – Reproducción en orden aleatorio 1 Pulsar SHUFFLE antes o durante la reproducción del CD. ™ Todas las pistas del CD (o del programa si es el caso) se reproducirán en orden aleatorio. 2 Pulsar SHUFFLE de nuevo para volver al modo de reproducción normal de CD.
- Page 40 REPRODUCTOR CD Programación de los números de pistas Se pueden seleccionar números de pistas y almacenarlos en la memoria según la secuencia deseada. Se puede almacenar cualquier pista más de una vez. Se pueden almacenar en la memoria un máximo de 20 pistas. 1 Seleccionar la pista deseada con SEARCH ∞...
-
Page 41: Grabadora
GRABADORA Reproducción de un casete 1 Colocar el interruptor POWER en la posición TAPE. 2 Pulsar STOP·OPEN 9/ para abrir el compartimento de casete. 3 Introducir un casete ya grabado, con el lado abierto hacia arriba, y cerrar el compartimento de casete. 4 Pulsar PLAY 1 para iniciar la reproducción. -
Page 42: Grabación De La Radio
GRABADORA Grabación del reproductor de CD - CD synchro start 1 Colocar el interruptor POWER en la posición CD. 2 Introducir un CD y, si se desea, realizar la programación de los números de pistas deseadas. 3 Pulsar STOP·OPEN 9/ para abrir el compartimento de casete. 4 Introducir un casete virgen desprotegido para grabación y cerrar el compartimento de casete. -
Page 43: Información General
INFORMACIÓN GENERAL Mantenimiento general No exponer el equipo, pilas, CDs o cintas a la humedad, lluvia, polvo o excesivo calor (ya sea causado por el calentamiento del propio equipo, como por la exposición directa a los rayos solares). Los componentes mecánicos del equipo contienen mecanismos auto-engrasantes y ¡no deben ser por tanto lubrificados! Se puede limpiar el equipo con un paño suave ligeramente húmedo y que no forme hilos. -
Page 44: Localización De Averías
LOCALIZACIÓN DE AVERÍAS Si se produce un fallo, comprobar en primer ADVERTENCIA lugar los puntos listados a continuación antes de llevar el equipo a reparar. Bajo ninguna circunstancia deberá intentar el usuario reparar por sí mismo Si no es usted capaz de resolver un problema el equipo, ya que esto invalidará... -
Page 45: Garantia Limitada
Esta garantía le otorga derechos legales específicos y usted podría gozar de otros derechos que varían de un estado a otro. Philips Service Solutions Group, P.O. Box 555, Jefferson City,Tennessee 37760 USA, (423) 475-8869 EL6095T001 / MAC5433 / 1-97... -
Page 48: Class 1 Laser Product
PHILIPS CONSUMER ELECTRONICS COMPANY A Division of Philips Electronics North America Corporation Knoxville, Tennessee 37914-1810, U.S.A. CLASS 1 LASER PRODUCT 3140 115 2627.1 Printed in Hong Kong IB7961T001 – VieUrs9848...