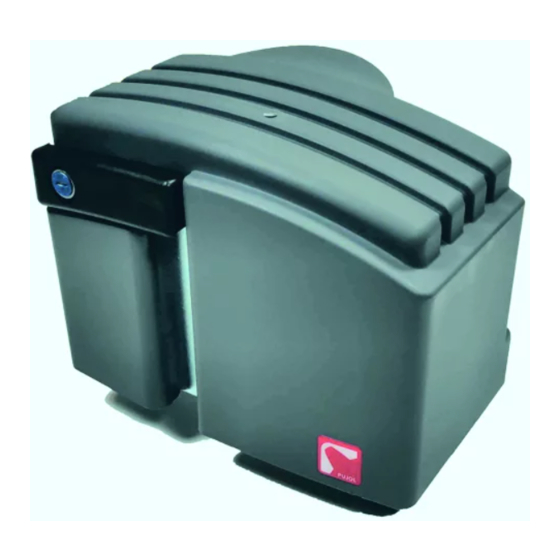
Sommaire des Matières pour Automatismos Pujol Mini Marathon
Page 1
Intructions de montage et de reglage. Istruzioni per l’installazione e la regolazione. Installation and ajustament instructions. Instruções de instalação e afinação. Einbau-und einstellanleitung. mini marathon Receptor integrado + conector tarjeta TRV + kit batería (opcional). Récepteur Intégré + connecteur carte TRV + Kit batterie (optionnel)
Page 3
TARJETA RADIO LUZ G. 220V RELE LUZ G. DESTELLO RELE DESTELLO PROG VBAT EMISORES +24V EXTERNA AMORT FUERZA INTERNA RADIO RELE CERRAR C.SEG1 TEST RELE ABRIR P.CER. P.AB SENSOR PROG RECORRIDO C.SEG P.ALT MEMORIA MICRO automatismos pujol - 3 - español...
Page 4
- Terminología, metodología de base. EN 294 Seguridad de la maquinaria - Distancias de seguridad pera evitar e impedir el acceso a zonas peligrosas. EN 60335-1 Seguridad de los aparatos eléctricos de uso doméstico y similar. La marca CE del mini marathon se refiere solamente al accionador y no al sistema en su totalidad (accionador, puerta, cuadros, etc.).
Page 5
El ángulo de inclinación máximo de trabajo es de +8º a -4º. Seguidamente fijaremos el accionador por medio del pasador ( R ), dejándolo en posición desbloqueado y sin tapa. automatismos pujol - 5 - español...
Page 7
Presionar el pulsador de programación (PROG.REC.) durante 1,5 segundos. El Led rojo indicativo se enciende en modo intermitencias, indicando que el equipo está listo para programar. En este momento podremos programar el recorrido. El proceso de programación se cierra automáticamente al finalizar un ciclo completo de la puerta. automatismos pujol - 7 - español...
Page 8
'paro' . Cuando volvamos a bloquear el motor y accionemos un pulsador la primera maniobra del motor se realiza a velocidad lenta hasta que encuentra un 'tope de final de carrera’ correcto. automatismos pujol - 8 - español...
Page 9
ESQUEMA DE CONEXIONES Borne Fotocélula Borne Cuadro 1. (12/24v) 0 10. 0v haz de luz 2. (12/24v) + 11. 24v DC 8. TEST 3. TEST 4. CONTACTO 5. Común C.S. 4. C. SEG 5. CONTACTO automatismos pujol - 9 - español...
Page 10
En caso de haber agotado la memoria disponible, haber memorizado 255 códigos distintos, al intentar memorizar nuevos códigos se emitirán una serie de destellos en el Led indicador rojo y del beep sonoro durante 10 segundos. automatismos pujol - 10 - español...
Page 11
MEDIDAS DE SEGURIDAD PARA EVITAR QUE PUEDAN PRODUCIRSE DAÑOS A PERSONAS O COSAS. APARTE DE LOS SISTEMAS DE SEGURIDAD INCORPORADOS EN EL ACCIONADOR RECOMENDAMOS INSTALAR COMPLEMENTOS EXTERIORES AL MISMO TALES COMO: CÉLULAS FOTOELÉCTRICAS, BANDAS DE SEGURIDAD, ETC., DE ACUERDO CON LA NORMATIVA VIGENTE. automatismos pujol - 11 - español...
Page 12
N ota: si después de haber com probado todas las posibles soluciones, la puerta sigue sin funcionar, se aconseja sustituir el equipo electrónico o ponerse en contacto con nuestro departam ento técnico. Servicio Técnico Post-Venta. 34-9 02 199 947 automatismos @pujol.com automatismos pujol - 12 - español...
Page 13
MINIMARATHON Descripción Accionador para puertas correderas Automatismos Pujol declara que el accionador arriba descrito esta de acuerdo con la siguiente normativa: - La directiva 98/37/CE (Texto refun dido de 89/392/CEE, 91/368/CEE y 93/44/CEE), donde se estipula que la instalación será correctamente realizada por el fabricante de la máquina.
Page 14
20. Vérifiez que l'installation à terre soit correctement réalisée et connectez les pièces métalliques de la fermeture. 21. Les dispositifs de sécurité (norme EN 12978) permettent de protéger les possibles zones de danger des Risques mécaniques de mouvement, comme l'écrasement, entraînement, coupure. automatismos pujol - 14 - français...
Page 15
Le moteur est connecté entre les bornes 26 et 27. Si il est nécessaire de changer le sens giratoire initial du moteur, changer le microswitch nº 3. CAPTEUR Entre les bornes 23 (+) 24 (signal) et 25 (-) le capteur Hall est connecté, utilisé pour arrêter les surcharges (obstacles) et un arrêt doux. automatismos pujol - 15 - français...
Page 16
Inhibition test photocellule Photocellule avec test DIP-6 Programmation voie radio permise Programmation voie radio déshabilitée DIP-7 Ouverture piétonnière Ouverture normale DIP-8 Arrêt doux variable par programmation (Ralentissement variable) Arrêt doux fixe 20 cm (Ralentissement 20 cm) automatismos pujol - 16 - français...
Page 17
être plus lente (Arrêt Doux), nous activons le bouton alternatif, et la porte commence à aller plus lentement jusqu'à arriver à la butée de fin de course. Avec ces étapes, les temps de manoeuvre et d'arrêt doux sont programmés dans la manoeuvre d'ouverture. automatismos pujol - 17 - français...
Page 18
Test De Photocellule (optionnel) Au début de chaque manoeuvre, le tableau réalise une vérification de la photocellule seulement si le sélecteur num. 5 est sur OFF. automatismos pujol - 18 - français...
Page 19
SELECTION RADIO INTERNE / EXTERNE Le tableau peut fonctionner avec la radio incorporée ou avec une carte externe si les dispositifs de radio Interne Externe ne sont pas compatibles. Selection Radio Interne / Externe automatismos pujol - 19 - français...
Page 20
2. Extraire la première pièce de forme pyramidale en évitant que la pièce rectangulaire ne sorte avec les fils. 3. Extraire la pièce rectangulaire qui contient le senseur Hall et les fils en effectuant une petite manœuvre d'inclinaison. 4. Procéder au remplacement du senseur en inversant le processus. automatismos pujol - 20 - français...
Page 21
Remarque : Si après avoir vérifié toutes les solutions possibles, la porte ne fonctionne toujours pas, il est conseillé de remplacer l’équipement électronique et de contacter notre service technique. Service a près-vente. automatismos @pujol.com 34-9 02 199 947 automatismos pujol - 21 - français...
Page 22
2 ans à partir de la date d'approvisionnement. OBLIGATIONS Automatismos Pujol s'oblige à réparer les équipements sous garantie, après une Révision de ceux-ci par notre service technique. Tous les équipements fournis, pour cause d'urgence, avant de décider si un équipement est sous garantie, seront considérés en premier lieu comme commande normale avec débit.
Page 23
20. Verificare che l'impianto di terra sia correttamente realizzato e collegare le parti metalliche della chiusura. 21. I dispositivi di sicurezza (Norma EN 12978) consentono di proteggere tutte le aree che presentino eventuali pericoli di Rischiomeccanico di movimento, quali, ad esempio schiacciamenti, trascinamenti, tagli. automatismos pujol - 23 - italiano...
Page 24
Prima di procedere all'installazione del meccanismo automatico, assicurarsi di aver scollegato l'alimentazione di corrente. Collegare la rete di 220V A.C. ai morsetti 17,18. L'uscita di 220V, i morsetti 28,29 sono quelli che si collegano al primario del trasformatore di 24V. automatismos pujol - 24 - italiano...
Page 25
Blocco test fotocellula Fotocellula con test DIP-6 Programmazione via radio consentita Programmazione via radio invalidata DIP-7 Apertura pedonale Apertura normale DIP-8 Arresto morbido variabile mediante programmazione (Rallentamento variabile) Arresto morbido fisso 20cm (Rallentamento 20cm) automatismos pujol - 25 - italiano...
Page 26
Il tempo massimo di manovra è di 2 min., trascorsi i quali, la manovra si concluderà e verrà memorizzato il citato limite massimo. La programmazione si disattiverà dopo 1 minuto se, dopo l'attivazione, non si eseguono le manovre descritte. Nel corso della fase di programmazione il motore si muove a marcia lenta. automatismos pujol - 26 - italiano...
Page 27
È fornita un'uscita da 24Vcc. e 0,15A fra i morsetti 10(-) e 11(+) per alimentare elementi ausiliari, ad esempio, una fotocellula. LUCI GARAGE Tra i morsetti 15 e 16 si trova un'uscita di 220V a. c. che opera quando si apre la porta e si interrompe trascorsi 3 minuti dall'apertura. automatismos pujol - 28 - italiano...
Page 28
Transmetore SELEZIONE RADIO INTERNA / ESTERNA Il quadro offre la possibilità di funzionamento con radio incorporata o con scheda esterna qualora i dispositivi radio non fossero compatibili. Internal External Selezione radio interna / esterna automatismos pujol - 28 - italiano...
Page 29
2º Estrarre il primo elemento in forma piramidale evitando che esca quella rettangolare con i fili. 3º Estrarre la parte rettangolare che contiene il sensore Hall dei fili realizzando una piccola manovra di inclinazione. 4º Procedere alla sostituzione del sensore invertendo il processo. automatismos pujol - 29 - italiano...
Page 30
Nota: se, pur applicando tutte le possibili soluzioni fornite, i problemi di funzionamento della porta persistono, si consiglia di sostituire il dispositivo elettronico o di rivolgersi al nostro dipartimento tecnico. Servizio post-vendita automatismos@pujol.com 34-9 02 199 947 automatismos pujol - 30 - italiano...
Page 31
SERVIZIO POST-VENDITA PERIODO DI GARANZIA Automatismos Pujol Vi offre una garanzia contro qualsiasi difetto di costruzione dei suoi attuatori per porte, apparecchi elettrici ed accessori per un periodo di 2 anni dalla data di fornitura. OBBLIGHI Automatismos Pujol si obbliga alla riparazione degli apparecchi coperti da garanzia, previa la loro Revisione effettuata dal nostro reparto tecnico.
Page 32
20. Check that the earth connection is in perfect condition and connect the metallic parts of the closing to earth. 21. The safety measures (EN 12978 standard) allow protecting any danger areas against mechanical movement risks, such as crushing, dragging, shearing. automatismos pujol - 32 - english...
Page 33
The motor is connected between terminals 26 and 27. If necessary, change the initial rotating direction of the motor by changing microswitch nº 3. SENSOR The Hall sensor, used to detect overexertion (obstacles) and smooth stopping, is connected between the terminals 23 (+) 24 (signal) and 25 (-) automatismos pujol - 33 - english...
Page 34
Photocell test enabled DIP-6 Programming via radio enabled Programming via radio disabled DIP-7 Pedestrian opening Normal opening DIP-8 Variable smooth stop programming (variable slow down) Smooth stop set at 20cm (slow down at 20cm) automatismos pujol - 34 - english...
Page 35
(Smooth Stop) we activate the alternative pushbutton, which reduces the door's speed until it gets to the end of stroke bumper. With these steps, the maneuver times and smooth stop times for the opening maneuver, will be programmed. automatismos pujol - 35 - english...
Page 36
If microswitch no. 5 is set to OFF, then at the start of each maneuver the main panel will run a check on the photocell. Safety Position 1 (nc) / 8.2 Kohm Range (microswitch No. 4) Microswitch no. 4 selects the safety input from the photocell when opening, or the resistive band when closing. automatismos pujol - 36 - english...
Page 37
The memorisation will be confirmed via a flash of the red LED and an audible tone. The system automatically exits the memorisation mode 10 seconds after having received the last code. This is indicated by the red LED turning off and two short audible tones. automatismos pujol - 37 - english...
Page 38
2º Remove the pyramidal shape piece. Avoid removing the rectangular piece with the wires. 3º Remove the rectangular piece with the Hall Sensor and the wires by moving it at an angle. 4º Replace the Sensor by reversing the described procedure. automatismos pujol - 38 - english...
Page 39
Note: If the door does not work after verifying the above described solutions, it is advisable to replace the electronic equipment or contact our technical department. After Sales Service automatismos@pujol.com 34-9 02 199 947 automatismos pujol - 39 - english...
Page 40
2 years from the date they are provided. LIABILITIES Automatismos Pujol undertakes to repair equipment subject to guarantee, prior revision by our technical department. Any equipment delivered due to urgency before it has been decided if it is under guarantee, will be considered as a standard order to be paid.
Page 41
20. Verificar se a instalação de terra foi feita correctamente e conectar as partes metálicas do fecho. 21.Os dispositivos de segurança (norma EN 12978) permitem proteger possíveis áreas de perigo de Riscos mecânicos do movimento, como por exemplo de esmagamento, de arrastamento e de corte. automatismos pujol - 41 - português...
Page 42
17 e 18 à rede de 220 V AC.A saída de 220 V, bornes 28 e 29, são os que se ligam ao primário do transformador de 24 V. MOTOR O motor está ligado entre os bornes 26 e 27.No caso de ser necessário alterar o sentido do giro inicial do motor, mudar o microswitch n.º 3. automatismos pujol - 42 - português...
Page 43
Programação via rádio permitida Programação via rádio desabilitada DIP-7 Abertura pedonal Abertura normal DIP-8 Paragem suave variável de acordo com a programação (De lentar variável) Paragem suave fixa 20 cm (Lenta em 20 cm) automatismos pujol - 43 - português...
Page 44
Através desta função poderemos fazer uma abertura pedonal (parcial) da porta. É necessário utilizar comandos programados para o 2º Canal (receptor incorporado) ou entrar através do botão de abrir os bornes 5 e 6, que se transforma em pedonal. Programação do percurso pedonal: Nesta programação só automatismos pujol - 44 - português...
Page 45
Contacto De Segurança 1 (nc) / Banda De 8,2 Kohm (microswitch N.º 4) Com o selector n.º 4, pode-se seleccionar a entrada de segurança como célula fotoeléctrica ao abrir ou como banda resistiva ao fechar. automatismos pujol - 45 - português...
Page 46
2º Extrair a primeira peça de forma piramidal evitando que saia a rectangular com os cabos. 3º Extrair a peça rectangular que contém o sensor Hall e os cabos fazendo uma pequena manobra de inclinação . 4º Realizar a substituição do sensor invertendo o processo. automatismos pujol - 46 - português...
Page 47
Nota: se após ter verificado todas as possíveis soluções, a porta continuar sem funcionar, aconselhamos a substituição do equipamento electrónico ou entre em contacto com o nosso departamento técnico. Serviço Pós-venda automatismos@pujol.com 34-9 02 199 947 automatismos pujol - 47 - português...
Page 48
Os actuadores foram ligados a equipamentos eléctricos ou complementos não homologados pela Automatismos Pujol Um actuador foi aberto, desmontado e operado de forma indevida. Os actuadores foram aplicados para usos diferentes daqueles para os quais foram projectados.
Page 49
20. Sicherstellen, dass die Anlage ordnungsgemäß geerdet ist. Die metallenen Teile der Schließung anschließen. 21. Die Sicherheitsvorrichtungen (Norm EN 12978) ermöglichen den Schutz möglicher Gefahrenbereiche vor mechanischen Bewegungsrisiken, wie zum Beispiel Quetschungen, Mitschleifen und Schnittverletzungen. automatismos pujol - 49 - deutschland...
Page 50
Das sind die, die mit der ersten Wicklung des Transformators mit 24V verbunden werden. MOTOR Der Motor wird zwischen den Klemmen 26 und 27 angeschlossen. Für den Fall, dass es nötig ist, die Anfangsdrehrichtung des Motors zu ändern, den Mikroschalter Nr. 3 ändern. automatismos pujol - 50 - deutschland...
Page 51
Durch Drehen des Kraftpotenziometers im Uhrzeigersinn übt das Tor zunächst mehr Kraft aus, wenn der Hall- Sensor die Überbelastung entdeckt, bevor es stillsteht und die Bewegung umkehrt. Durch Drehen gegen den Uhrzeigersinn wird der Sensor hinsichtlich der Wahrnehmung eines Hindernisses empfindlicher. Weniger Kraft Mehr Kraft Menos automatismos pujol - 51 - deutschland...
Page 52
Fußgängerdurchgang programmiert. Der sanfte Stopp und die Zeit bis zum Autozulauf bleiben dieselben, die zuvor schon programmiert wurden. Handelt es sich um einen miteinem Taster gespeicherten Sender, betätigt der nächste Taster desselben Senders das Öffnen für den automatismos pujol - 52 - deutschland...
Page 53
Wähler Nr. 5 in OFF-Position befindet. SICHERHEITSKONTAKT 1 (NC) / SCHUTZBAND MIT 8,2 kOhm (Mikroschalter Nr.4) Mit dem Wähler Nr. 4 kann man den Sicherheitseingang als Fotozelle beim Öffnen oder als ohmsches Schutzband beim Schließen auswählen. automatismos pujol - 53 - deutschland...
Page 54
Bestätigung des Speichervorgangs durch ein Signal der roten Anzeige-LED sowie durch einen Piepton. Die Anlage verlässt den Speichermodus automatisch 10 Sekunden nachdem sie den letzen Code empfangen hat. Dies wird durch das Erlöschen der roten Anzeige-LED und zwei kurze Pieptöne signalisiert. automatismos pujol - 54 - deutschland...
Page 55
2. Das erste, pyramidenförmige Teil herausnehmen und dabei vermeiden, dass das rechteckige Teil mit den Drähten herauskommt. 3. Das rechteckige Teil, das den Hall-Sensor und die Drähte enthält, etwas neigen und entfernen. 4. Zum Einbau des neuen Hall-Sensors die oben beschriebenen Schritte in umgekehrter Reihenfolge ausführen. automatismos pujol - 55 - deutschland...
Page 56
Spannungswahl Funk funktioniert nicht. Anmerkung: Funktioniert das Tor nach all diesen Lösungsversuchen noch immer nicht, sollte die elektronische Ausstattung ersetzt oder mit unserem technischen Dienst Kontakt aufgenommen werden. Kundendients automatismos@pujol.com 34-9 02 199 947 automatismos pujol - 56 - deutschland...
Page 57
KUNDENDIENST GARANTIEZEITRAUM Automatismos Pujol leistet für einen Zeitraum von 2 Jahren ab Lieferdatum eine Garantie für jegliche Fabrikationsfehler der hergestellten Antriebsvorrichtungen für Türen, elektrische Anlagen und Zubehör. VERPFLICHTUNGEN Automatismos Pujol verpflichtet sich zur Übernahme von Reparaturen von Anlagen mit Garantie, wobei die entsprechenden Anlagen und Geräte zuvor einer Überprüfung durch unsere technische Abteilung unterzogen...